How to format a computer in Windows 7 How to format a computer in Windows 7
After using the computer for a long time, it becomes more and more stuck. Some users will use formatting to solve it. So how to format the computer in Windows 7? You first double-click the computer icon to enter, then select the hard drive you want to format, right-click to find the format option, then enable "Quick Format", and then wait for the system to operate. It should be noted that do not format the C drive casually, as it will interfere with normal use.
How to format a computer in Windows 7:
1. First, we click "Computer" on the desktop.
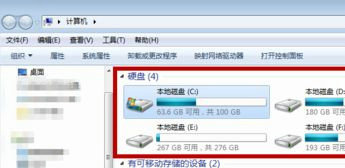
#2. Click with the mouse on a hard drive that must be formatted. The C drive generally cannot be formatted, otherwise the system software cannot run, as shown in the figure below Show.

#3. In the future, we will click the "Format" option in the menu bar of the pop-up window.
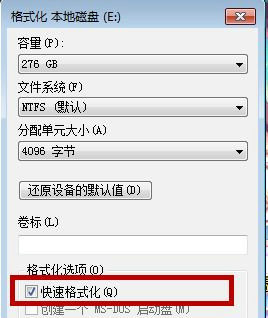
#4. In the formatting options, click to enable "Quick Format", and click "Start" below to gradually format, as shown in the figure below.

#5. A reminder will pop up, informing you that formatting will delete the content inside. Click "OK" and that's it.
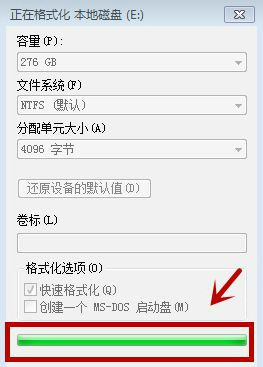
#6. You have to wait. The waiting time varies depending on how much content is on the hard drive. When the green bar is full, it is formatted.
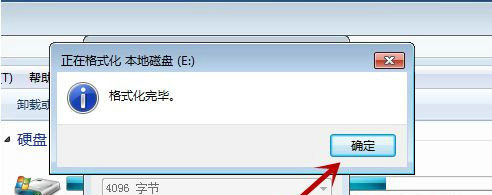
#7. There will be a reminder after the formatting is completed. Just click "OK", as shown in the figure below.
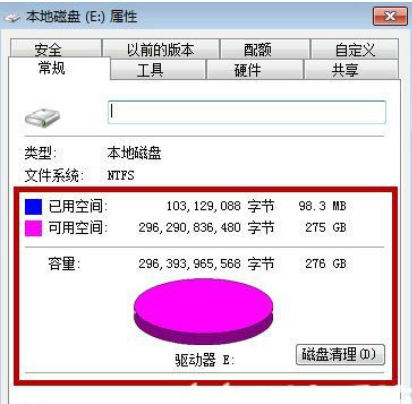
# Pay attention to check your hard drive in the future, as it is usually impossible to completely delete commonly used data information. Just restart your computer and format it to completely wipe out and delete everything. But it is almost impossible to show that 100% of the space is available, as shown in the figure below.
What I share with you above is how to format the computer in Windows 7.
The above is the detailed content of How to format a computer in Windows 7 How to format a computer in Windows 7. For more information, please follow other related articles on the PHP Chinese website!

Hot AI Tools

Undresser.AI Undress
AI-powered app for creating realistic nude photos

AI Clothes Remover
Online AI tool for removing clothes from photos.

Undress AI Tool
Undress images for free

Clothoff.io
AI clothes remover

Video Face Swap
Swap faces in any video effortlessly with our completely free AI face swap tool!

Hot Article

Hot Tools

Notepad++7.3.1
Easy-to-use and free code editor

SublimeText3 Chinese version
Chinese version, very easy to use

Zend Studio 13.0.1
Powerful PHP integrated development environment

Dreamweaver CS6
Visual web development tools

SublimeText3 Mac version
God-level code editing software (SublimeText3)

Hot Topics
 1387
1387
 52
52
 Unable to access mysql from terminal
Apr 08, 2025 pm 04:57 PM
Unable to access MySQL from the terminal may be due to: MySQL service not running; connection command error; insufficient permissions; firewall blocks connection; MySQL configuration file error.
 Can mysql run on android
Apr 08, 2025 pm 05:03 PM
MySQL cannot run directly on Android, but it can be implemented indirectly by using the following methods: using the lightweight database SQLite, which is built on the Android system, does not require a separate server, and has a small resource usage, which is very suitable for mobile device applications. Remotely connect to the MySQL server and connect to the MySQL database on the remote server through the network for data reading and writing, but there are disadvantages such as strong network dependencies, security issues and server costs.
 How to copy and paste mysql
Apr 08, 2025 pm 07:18 PM
Copy and paste in MySQL includes the following steps: select the data, copy with Ctrl C (Windows) or Cmd C (Mac); right-click at the target location, select Paste or use Ctrl V (Windows) or Cmd V (Mac); the copied data is inserted into the target location, or replace existing data (depending on whether the data already exists at the target location).
 How to recover data after SQL deletes rows
Apr 09, 2025 pm 12:21 PM
Recovering deleted rows directly from the database is usually impossible unless there is a backup or transaction rollback mechanism. Key point: Transaction rollback: Execute ROLLBACK before the transaction is committed to recover data. Backup: Regular backup of the database can be used to quickly restore data. Database snapshot: You can create a read-only copy of the database and restore the data after the data is deleted accidentally. Use DELETE statement with caution: Check the conditions carefully to avoid accidentally deleting data. Use the WHERE clause: explicitly specify the data to be deleted. Use the test environment: Test before performing a DELETE operation.
 Oracle database uninstall tutorial
Apr 11, 2025 pm 06:24 PM
To uninstall an Oracle database: stop the Oracle service, remove the Oracle instance, delete the Oracle home directory, clear the registry key (Windows only), and delete the environment variables (Windows only). Please back up the data before uninstalling.
 Where is the Redis restart service
Apr 10, 2025 pm 02:36 PM
How to restart the Redis service in different operating systems: Linux/macOS: Use the systemctl command (systemctl restart redis-server) or the service command (service redis-server restart). Windows: Use the services.msc tool (enter "services.msc" in the Run dialog box and press Enter) and right-click the "Redis" service and select "Restart".
 Who invented the mac system
Apr 12, 2025 pm 05:12 PM
The macOS operating system was invented by Apple. Its predecessor, System Software, was launched in 1984. After many iterations, it was updated to Mac OS X in 2001 and changed its name to macOS in 2012.
 Can mysql be downloaded on mac
Apr 08, 2025 pm 04:48 PM
Installing MySQL on a Mac is easy, you can use Homebrew or download the installation package from the official website. After installation, you need to start the service and set the root password. MySQL is a relational database management system that stores and organizes data. Common problems include password errors and connection failures, and debugging methods are by checking passwords, network connections, and SQL syntax. Performance optimization is key, involving index optimization, query optimization and database design. Proficiency in MySQL takes time and practice.


