
 Common Problem
How to reinstall the system on Acer computer? How to reinstall the system on Acer computer? Win10 tutorial
Common Problem
How to reinstall the system on Acer computer? How to reinstall the system on Acer computer? Win10 tutorial
How to reinstall the system on Acer computer? How to reinstall the system on Acer computer? Win10 tutorial

How to reinstall the system on Acer computer? Many friends buy and use acer computers. It is not called Zhanteng, it should be Acer (qí). So how to reinstall Win10 on these brands of computers? Today, the editor has provided a detailed tutorial for my friends. Let’s take a look at the process of reinstalling Win10 on acer computers. It is recommended that you use Master Shi’s one-click reinstallation software.
How Master Shi reinstalls the Win10 system on Acer computers
1. After entering the page, customers can follow the prompts to select the system to install. Please note: The gray button indicates that the current hardware configuration or partition format is incompatible with the system and cannot be installed.

#2. After selecting the system, click Next and wait for the download of PE data and system.

#3. After the download is in progress, the system will automatically shut down.
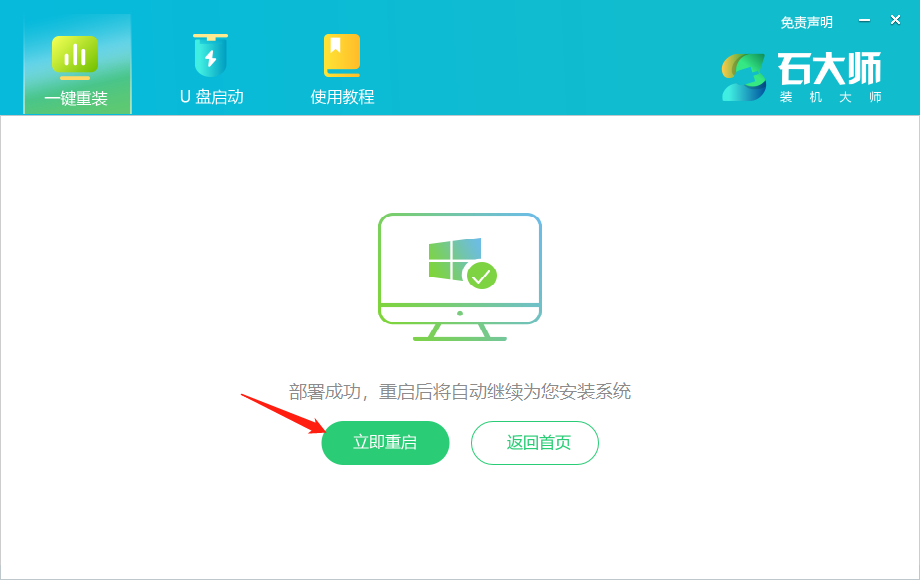
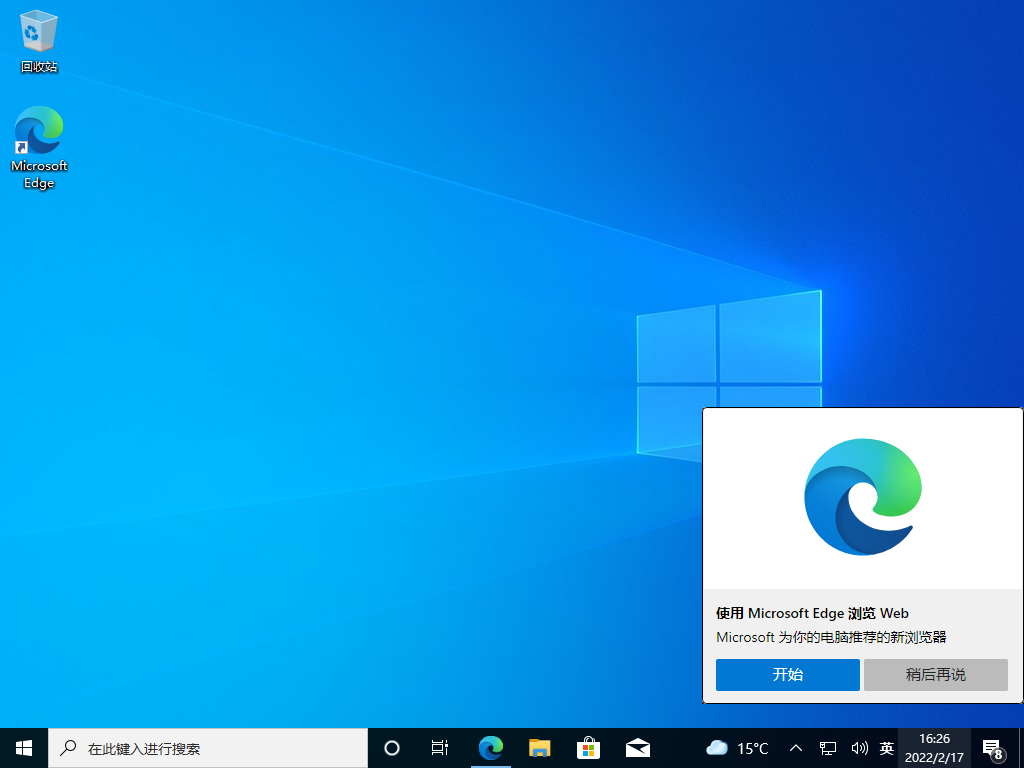
#4. After the installation is completed, go to the deployment page, wait quietly for the system to enter the desktop, and the reinstallation will be successful.
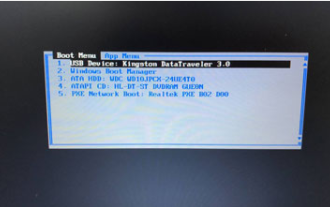
The above is the detailed tutorial process for reinstalling Win10 on Acer computers. If the computer encounters a situation where it cannot start normally and enter the desktop, it may be necessary to Choose another method.
Reinstall the system from the U disk, reading recommendation: How to use the Master Shi U disk to start the system to reinstall the system tutorial
The above is the detailed content of How to reinstall the system on Acer computer? How to reinstall the system on Acer computer? Win10 tutorial. For more information, please follow other related articles on the PHP Chinese website!

Hot AI Tools

Undresser.AI Undress
AI-powered app for creating realistic nude photos

AI Clothes Remover
Online AI tool for removing clothes from photos.

Undress AI Tool
Undress images for free

Clothoff.io
AI clothes remover

AI Hentai Generator
Generate AI Hentai for free.

Hot Article
Hot Tools

Notepad++7.3.1
Easy-to-use and free code editor

SublimeText3 Chinese version
Chinese version, very easy to use

Zend Studio 13.0.1
Powerful PHP integrated development environment

Dreamweaver CS6
Visual web development tools

SublimeText3 Mac version
God-level code editing software (SublimeText3)
Hot Topics


 Tutorial: How to allocate D drive space to C drive
Dec 25, 2023 pm 02:25 PM
Tutorial: How to allocate D drive space to C drive
Dec 25, 2023 pm 02:25 PM
Many friends want to allocate the D drive space to the C drive because there is not enough space in the C drive, but they don’t know how to operate win11. In fact, we can expand the C drive as long as we delete the D drive. How to allocate D drive space to C drive in win11: 1. First, right-click this computer and open Computer "Management" 2. Then enter "Disk Management" under storage on the left 3. Then right-click "D drive" and select "Delete Volume" 4. Click "Yes" again to delete the d drive. (Deleting the d drive will cause the files in it to be lost, so it is recommended to back it up in advance) 5. After deletion, right-click "c drive" and select "Extend Volume" 6. Enter the extend volume wizard, keep the default settings, and click "Next Page" 7. Finally, click "Finish" to allocate the D drive space to the C drive.
 Tutorial on setting up bios USB disk to boot and reinstall the system
Jul 13, 2023 pm 04:33 PM
Tutorial on setting up bios USB disk to boot and reinstall the system
Jul 13, 2023 pm 04:33 PM
How to set up USB disk boot in bios? When we redo the system through the USB flash drive, we need to set the USB flash drive boot in the BIOS for normal operation. However, many consumers don’t know how to set up the USB flash drive boot in the BIOS. It doesn’t matter. Today, the editor will The setting method brings everyone. Set the USB boot item to redo the system 1. The editor takes the Lenovo v310 computer as an example. First, we insert the prepared boot disk into the computer, press and hold F2 or F12 during startup to enter the bios page. We select "security" and change "secureboot" to the "disabled" option. 2. Then click on the "boot" option and change "bootmade" to
 How to reinstall win10 system using CD
Dec 30, 2023 pm 01:57 PM
How to reinstall win10 system using CD
Dec 30, 2023 pm 01:57 PM
Recently, some friends reported that their win10 system crashed and could not be booted into safe mode to repair the system. What should I do? In fact, we can download a new system and install it using a CD. Today, the editor has brought detailed steps to solve the problem. , let’s take a look at the details together. Steps to reinstall the win10 system with a CD: 1. Insert the win10 CD, restart the computer, press F12, F11, Esc and other shortcut keys, select the DVD option, and press Enter. 2. When this interface appears, press any key to boot from CD or DVD; 3. Boot from the CD and enter the win10 installation interface, select language, input method, and confirm. 4. In this interface, directly click "Install Now" 5. When prompted to enter the product key, select Skip. 6. Select the version of the installation system
 Tutorial on how to enter the bios and set up the hard disk to boot in win7
Jul 14, 2023 pm 01:13 PM
Tutorial on how to enter the bios and set up the hard disk to boot in win7
Jul 14, 2023 pm 01:13 PM
Currently, Bios boot modes include Legacy+MBR (traditional boot mode) and UEFI+GPT. If the hard disk boot location is set incorrectly, the system may not start. In response to this problem, the editor will tell you a tutorial on how to enter the BIOS to set up the hard disk startup in win7. Let's take a look. 1. First, press the Enter key on the computer startup screen. 2. After entering the bios interface, you will see the "main" main interface displayed. 3. Use the direction keys to move the cursor right to the "startup" option. 4. Then move the cursor to the "boot" option and press Enter to enter. 5. Select the sixth hard disk item and press the "+" key to move to the first item. 6. Then press the "F10" button. 7. Next meeting
 How to reinstall Windows 7 Ultimate operating system
Jan 03, 2024 pm 07:39 PM
How to reinstall Windows 7 Ultimate operating system
Jan 03, 2024 pm 07:39 PM
When we use the win7 operating system, if various problems occur in the system during use, we will definitely think of reinstalling the operating system if we cannot solve it. So regarding the question of how to reinstall the Windows 7 Ultimate system, the editor feels that it is not difficult. We only need to download a safe and green operating system and then use the relevant tool software to reinstall the system. Let’s take a look at the specific steps to see how the editor did it ~ How to reinstall the Windows 7 Ultimate system 1. Preparation tools for reinstalling the win7 system: 1. An 8G empty U disk 2. Xiaobai U disk boot disk creation tool >>> Xiaobai’s one-click reinstallation download address<<<3. Prepare Win7 system ultimate version&g
 Acer laptop win10 to win7 tutorial
Jul 12, 2023 pm 09:05 PM
Acer laptop win10 to win7 tutorial
Jul 12, 2023 pm 09:05 PM
How to set up the bios of Acer computer from win10 to win7? After buying an Acer desktop computer, many friends tried to change win10 to win7 system but failed. The editor below will tell you how to install win7 system on Acer laptop computer. 1. First, we open the computer browser and search the official website of Magic Pig One-Click System Reinstallation, download it and open it. 2. After downloading, we open it and click online reinstallation. 3. Next, we will wait patiently for it to be installed. 4. The installation is complete. Next we need to click to restart the computer now. 5. After restarting the computer, we still need to return to the main interface to continue completing the installation. Then our installation is completed. The above are the details of changing Acer notebook from win10 to win7.
 Dell laptop system reinstallation tutorial
Jul 21, 2023 am 08:33 AM
Dell laptop system reinstallation tutorial
Jul 21, 2023 am 08:33 AM
Dell has been selling very hotly in recent years. It has a stylish and lightweight appearance, powerful performance and high cost performance. It has been sought after by many office workers and students. Recently, I have also received inquiries from some friends on how to reinstall the system on Dell notebooks. Below, I will demonstrate to you the entire process of reinstalling the system on Dell notebooks. 1. First, you need to download an installation bar reinstallation software (you can download it from the official website of Baidu Installation Bar). After downloading, open the installation bar interface. 2. Perform local environment detection. 3. Select the system that needs to be installed and download it. 4. Select the system you want to install. Computer software 5. Start downloading 6. Deploy the installation environment 7. The environment deployment is completed, click Restart now 8. After restarting, enter the pe interface, select the second item 9. Start installation
 Tutorial on reinstalling win10 system to retain personal files and applications_Plan of reinstalling win10 system on retaining personal files and applications_
Mar 20, 2024 pm 08:50 PM
Tutorial on reinstalling win10 system to retain personal files and applications_Plan of reinstalling win10 system on retaining personal files and applications_
Mar 20, 2024 pm 08:50 PM
What is the method for reinstalling Windows 10 to preserve personal files and applications? In fact, the process of reinstalling Windows 10 but still retaining personal files and applications is very simple! Let me share with you how to preserve personal files and applications after reinstalling Windows 10. 1. First, on our computer interface, click the Start menu in the lower left corner, select Settings to open, and click Update and Security to enter. 2. Then, we continue to select the recovery option on the left, select Start, and click Keep My Files. 3. Finally, when the computer prompts that it is ready, you can initialize the computer, and then click Reset. Summary: Click the Start menu in the lower left corner, select Settings to open, and click Update and Security to enter. Select the recovery option on the left, select Start, and click Keep Mine