

How to take a screenshot on MacBook Pro

This guide will show you what you have to do to take a screenshot on your MacBook Pro. MacBooks are known for their sleek design and powerful performance, but these powerful laptops come with a number of convenient features that are often overlooked. One of the features is a built-in tool for capturing screenshots. This article will introduce in detail how to take screenshots on MacBook Pro, including full-screen screenshots and selective screenshots.
What is a screenshot?
A screenshot is a digital image taken by a computer or mobile device to record a visual item on the screen, also known as a screenshot. Screenshots are typically used to create a record of images or text that you can't easily save as a file, share a screen view with others, or create guides and tutorials, like we've done here.
How to Take a Screenshot on MacBook Pro
Thanks to the powerful MacOS screenshot tool, MacBook Pro users have a variety of screenshot options to choose from. Here are the most common methods:
1. Capture the entire screen
- Use keyboard shortcuts: Press the Command (⌘) Shift on your keyboard 3.
- The screenshot will be automatically saved to your desktop. The file name will begin with "Screenshot" and the date and time it was taken.
2. Capture a portion of the screen
- Use the keyboard shortcut: Press Command (⌘) Shift 4. The cursor will change to a crosshair pointer.
- Click and drag to select the area you want to capture, then release the mouse or trackpad button.
- If you want to adjust the selection, hold down the space bar while dragging.
- Once you are satisfied with your selection, release the mouse or trackpad button to capture the screenshot. As with full-screen capture, the image is automatically saved to the desktop.
3. Capture a window or menu
- Use keyboard shortcuts: Press Command (⌘) Shift 4. The cursor will change to a crosshair pointer.
- Press Spacebar<. The cursor will change to a camera icon.
- #Move the camera over the window to highlight it. Click your mouse or trackpad to capture the window (this will include the drop shadow).
- For the menu, first open the menu and follow steps 1-3. Note that the menu does not need to be the active window to capture it.
Get more options with the Screenshot app
If you need more functionality, MacOS Mojave (10.14) and later includes a Screenshot app that provides additional Capture options.
- Use keyboard shortcuts: Press Command (⌘) Shift 5 to open the Screenshot app.
- A control bar will appear at the bottom of the screen. From here, you can choose to capture the entire screen, window, or selected portion. You can also record your screen.
- On the right side of the control bar, click Options. Here you can choose where to save the screenshot, set a timer, and decide whether to show the mouse cursor in the screenshot.
- Click Capture or press after making your selection.
Return
Editing and Sharing Screenshots
After capturing a screenshot, a thumbnail of the screenshot will briefly appear in the corner of the screen. You can click on it to open a window where you can make simple edits like cropping the image, adding text and shapes, and more. You can share screenshots in this window using email, messaging, AirDrop, etc.
The above is the detailed content of How to take a screenshot on MacBook Pro. For more information, please follow other related articles on the PHP Chinese website!

Hot AI Tools

Undresser.AI Undress
AI-powered app for creating realistic nude photos

AI Clothes Remover
Online AI tool for removing clothes from photos.

Undress AI Tool
Undress images for free

Clothoff.io
AI clothes remover

AI Hentai Generator
Generate AI Hentai for free.

Hot Article
Hot Tools

Notepad++7.3.1
Easy-to-use and free code editor

SublimeText3 Chinese version
Chinese version, very easy to use

Zend Studio 13.0.1
Powerful PHP integrated development environment

Dreamweaver CS6
Visual web development tools

SublimeText3 Mac version
God-level code editing software (SublimeText3)
Hot Topics


 What to do if a black screen appears when taking a screenshot on a win10 computer_How to deal with a black screen when taking a screenshot on a win10 computer
Mar 27, 2024 pm 01:01 PM
What to do if a black screen appears when taking a screenshot on a win10 computer_How to deal with a black screen when taking a screenshot on a win10 computer
Mar 27, 2024 pm 01:01 PM
1. Press the win key + r key, enter regedit, and click OK. 2. In the opened registry editor window, expand: HKEY_LOCAL_MACHINESYSTEMCurrentControlSetControlGraphicsDriversDCI, select Timeout on the right and double-click. 3. Then change 7 in [Numeric Data] to 0, and confirm to exit.
 How to take screenshots on Redmi 13c?
Mar 04, 2024 pm 09:13 PM
How to take screenshots on Redmi 13c?
Mar 04, 2024 pm 09:13 PM
Recently, many consumers are considering replacing their mobile phones, and Redmi13C is a very cost-effective choice. The performance configuration of this phone is excellent. In order to facilitate daily use, let me briefly introduce how to take screenshots on Redmi 13C. Let’s find out together! How to take a screenshot on Redmi 13c 1. Shortcut key to take a screenshot: Press the power button and volume down key of the Redmi phone at the same time to take a screenshot. 2. Gesture screenshot: Enter the settings of the Redmi phone, find "More settings", find and click "Gesture and key shortcuts", then enable the "three-finger pull-down" operation and set it to take a screenshot. In this way, when you need to take a screenshot, you only need to slide down on the screen with three fingers to take a screenshot. 3. Take a screenshot of the notification bar: from the phone screen
 How to adjust the color when the screen turns black and white. Detailed introduction: How to exit black and white mode on your mobile phone.
Mar 21, 2024 pm 01:12 PM
How to adjust the color when the screen turns black and white. Detailed introduction: How to exit black and white mode on your mobile phone.
Mar 21, 2024 pm 01:12 PM
When many friends are using their mobile phones, they suddenly find that the operation interface of the mobile phone has turned into "black and white" color. They don't know what causes it or how to solve it. This article uses Android mobile phones as an example to teach you how to make it work. The color of the mobile phone's operating interface returns to normal. 1. Set up the interface of the mobile phone and find the "gear-shaped" icon in the operation interface. As shown below: Click this icon to enter the phone’s settings interface. 2. Options The operating interface of the mobile phone has changed to black and white, which is related to the "Display" setting of the mobile phone. After entering the settings interface of the mobile phone, find the "Display and Theme" option in the drop-down menu, as shown below: Then click "Display and Theme" option to enter the details page. 3. After changing the screen color and entering the "Display and Theme" option, find the "
 iPhone screenshots not working: How to fix it
May 03, 2024 pm 09:16 PM
iPhone screenshots not working: How to fix it
May 03, 2024 pm 09:16 PM
Screenshot feature not working on your iPhone? Taking a screenshot is very easy as you just need to hold down the Volume Up button and the Power button at the same time to grab your phone screen. However, there are other ways to capture frames on the device. Fix 1 – Using Assistive Touch Take a screenshot using the Assistive Touch feature. Step 1 – Go to your phone settings. Step 2 – Next, tap to open Accessibility settings. Step 3 – Open Touch settings. Step 4 – Next, open the Assistive Touch settings. Step 5 – Turn on Assistive Touch on your phone. Step 6 – Open “Customize Top Menu” to access it. Step 7 – Now you just need to link any of these functions to your screen capture. So click on the first
 How to use shortcut keys to take screenshots in Win8?
Mar 28, 2024 am 08:33 AM
How to use shortcut keys to take screenshots in Win8?
Mar 28, 2024 am 08:33 AM
How to use shortcut keys to take screenshots in Win8? In our daily use of computers, we often need to take screenshots of the content on the screen. For users of Windows 8 system, taking screenshots through shortcut keys is a convenient and efficient operation method. In this article, we will introduce several commonly used shortcut keys to take screenshots in Windows 8 system to help you take screenshots more quickly. The first method is to use the "Win key + PrintScreen key" key combination to perform full
 How to close the 'Do not cover the top of the screen' Detailed explanation: How to close the 'Do not cover the top of the screen' message that appears frequently on your phone
Mar 03, 2024 pm 01:31 PM
How to close the 'Do not cover the top of the screen' Detailed explanation: How to close the 'Do not cover the top of the screen' message that appears frequently on your phone
Mar 03, 2024 pm 01:31 PM
I believe many friends have encountered the problem that their mobile phones suddenly prompt: Do not cover the top of the screen. So why does the mobile phone suddenly appear like this? Let’s take a look together below. In fact, when this happens, something is blocking the distance sensor of the phone, so this prompt is received on the screen of the phone. So why did I suddenly receive such a prompt? In fact, it may be that you have accidentally turned on the [anti-accidental touch mode] on your phone, so this problem occurs. So how do we close it? In fact, the method is very simple. Let’s take a look at it together. Method 1: Directly follow the on-screen prompts to close using the shortcut key combination. Method 2: If the above method does not work, you can also open the phone’s [Settings]
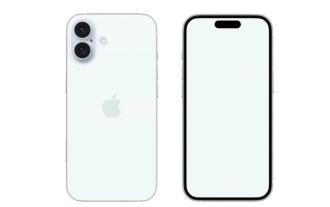 Apple reveals iPhone 16 may have a larger display
Mar 22, 2024 pm 06:41 PM
Apple reveals iPhone 16 may have a larger display
Mar 22, 2024 pm 06:41 PM
Although it will be a long time before the release of the iPhone 16 series, there have been constant revelations about the appearance and configuration. According to Korean media SisaJournal, Apple plans to introduce new ultra-narrow bezel technology in the upcoming iPhone 16 series of mobile phones. The technology involves rolling internal copper wires into a more compact structure to reduce the bezel width of the phone's bottom display, allowing for a larger display. This innovative move aims to enhance the user experience, allowing users to enjoy a wider field of view and a more immersive entertainment experience. Apple has always been committed to continuously improving its product design and technology to bring more advanced functions and performance to users. The launch of the iPhone 16 series of mobile phones will further consolidate Apple’s leadership in smart phones. According to @SnapaDigital, Apple’s new
 How to Undo Delete from Home Screen in iPhone
Apr 17, 2024 pm 07:37 PM
How to Undo Delete from Home Screen in iPhone
Apr 17, 2024 pm 07:37 PM
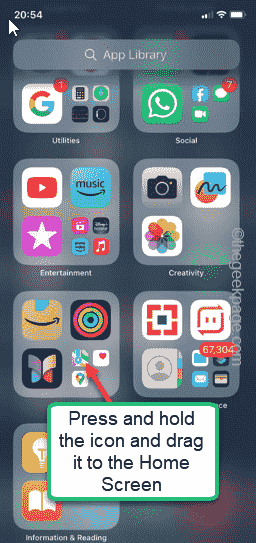
Deleted something important from your home screen and trying to get it back? You can put app icons back on the screen in a variety of ways. We have discussed all the methods you can follow and put the app icon back on the home screen. How to Undo Remove from Home Screen in iPhone As we mentioned before, there are several ways to restore this change on iPhone. Method 1 – Replace App Icon in App Library You can place an app icon on your home screen directly from the App Library. Step 1 – Swipe sideways to find all apps in the app library. Step 2 – Find the app icon you deleted earlier. Step 3 – Simply drag the app icon from the main library to the correct location on the home screen. This is the application diagram