
 Common Problem
Operation steps for reinstalling win7 system from USB flash drive on desktop computer
Common Problem
Operation steps for reinstalling win7 system from USB flash drive on desktop computer
Operation steps for reinstalling win7 system from USB flash drive on desktop computer

When the computer system cannot start, you need to reinstall the software through media. U disk is a kind of media. Taking U disk reinstallation of win7 system as an example, I will show you the steps of U disk reinstallation system. .
U disk reinstallation system win7 operating steps:
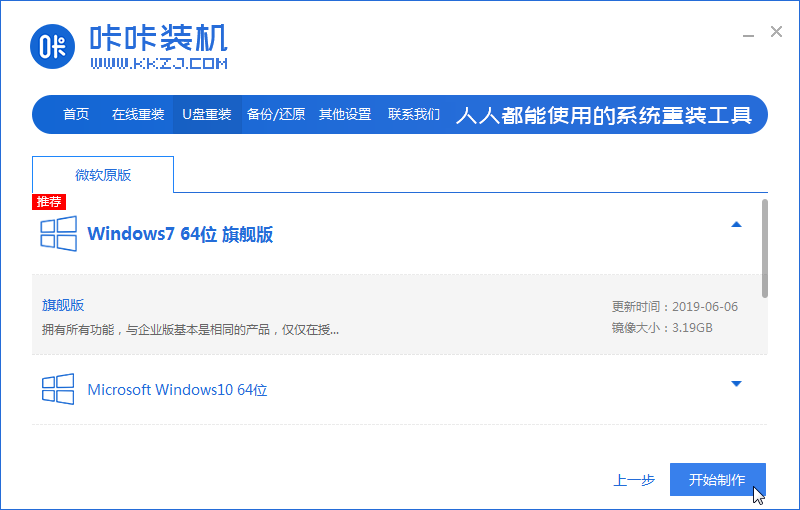
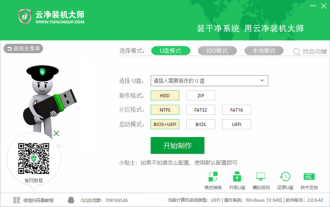
1. First download and install the Kaka installer one-click system reinstallation tool on an available computer and open it, insert a 8g or above Use a blank USB disk, select the USB disk reinstallation system mode, and click to start production.

#2. Select the computer operating system that needs to be installed and click to start production.
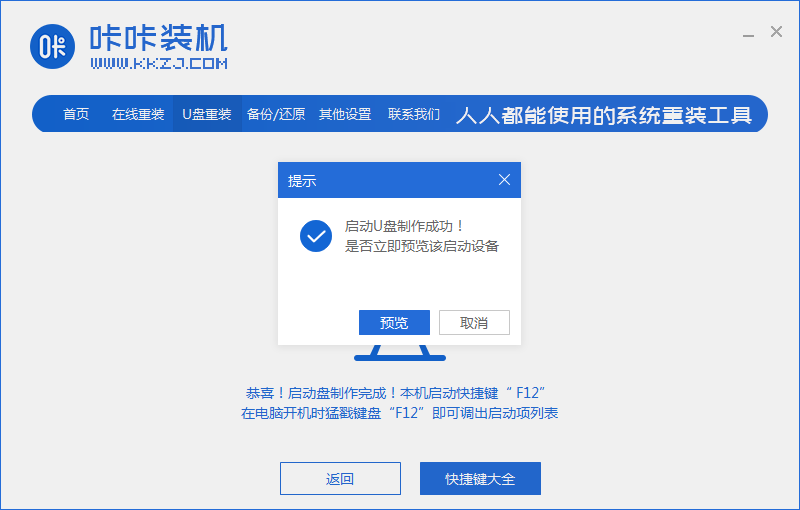
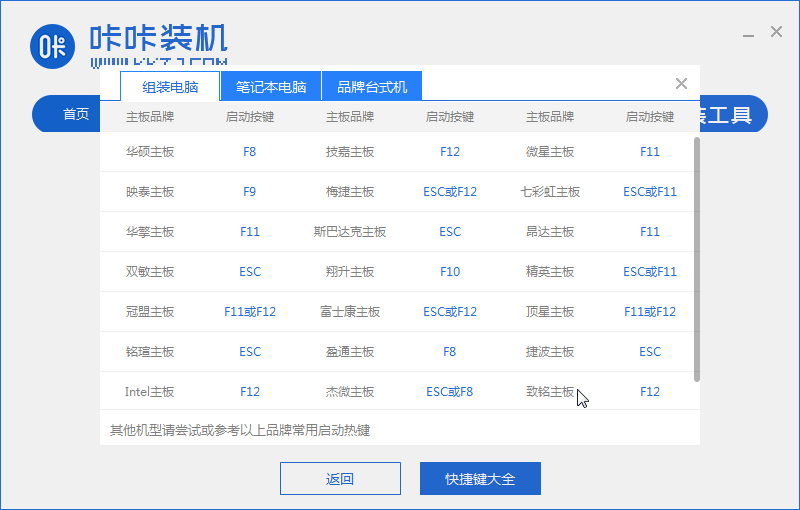
#3. After the software successfully creates a USB boot disk, you can first preview the startup hotkey of the corresponding computer motherboard, and then remove the USB disk to exit.
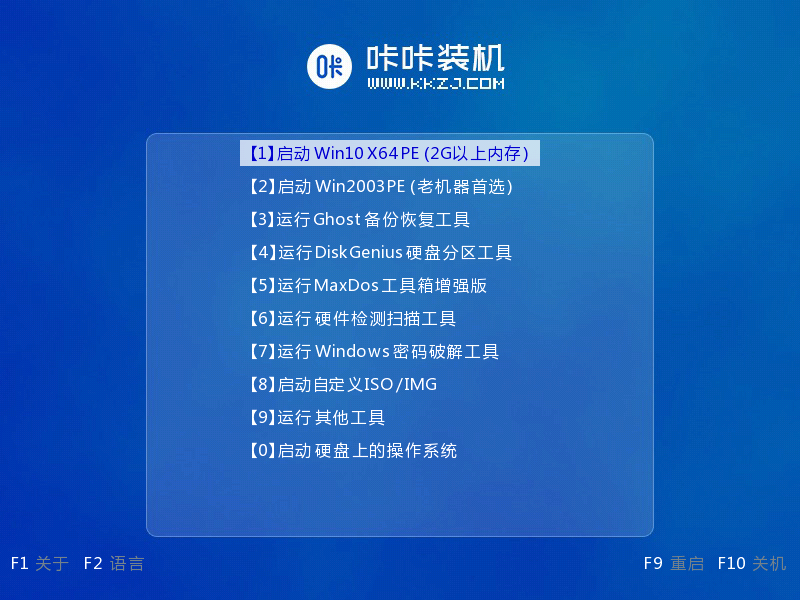
#4. Insert the startup disk into the computer, press the startup hotkey continuously to enter the startup interface, select the USB disk startup item and press Enter Confirm to enter the pe selection interface, select the first item pe system and press Enter to enter.
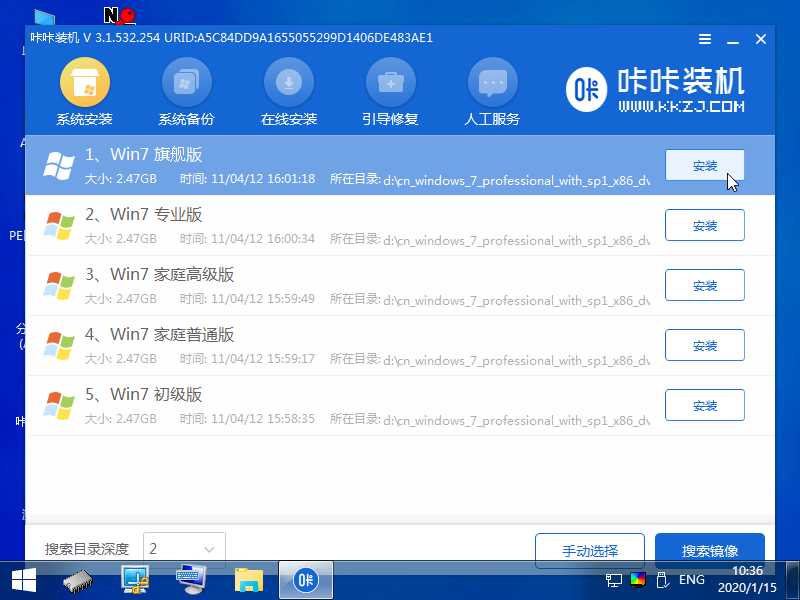
5. Open the Kaka installation tool on the pe system desktop, then select the system that needs to be installed and click Install.
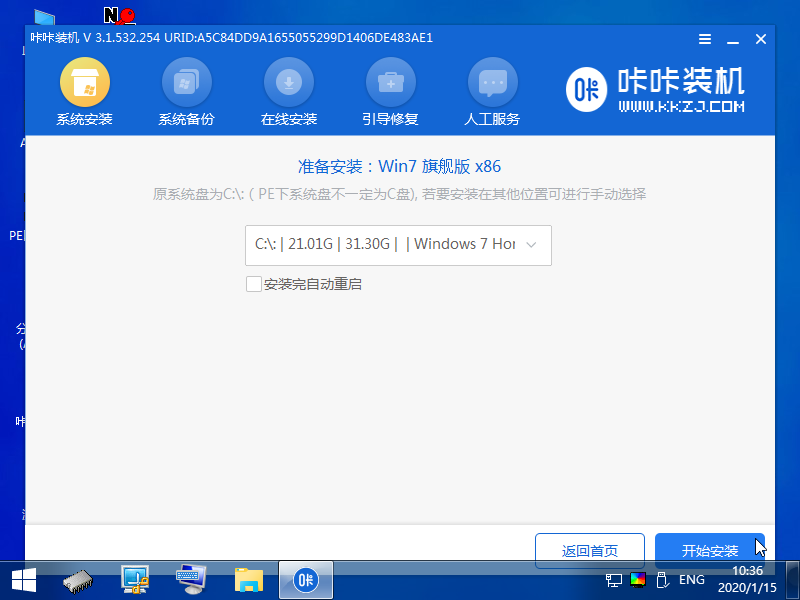
#6. Install the system to the system disk c drive and click to start the installation.
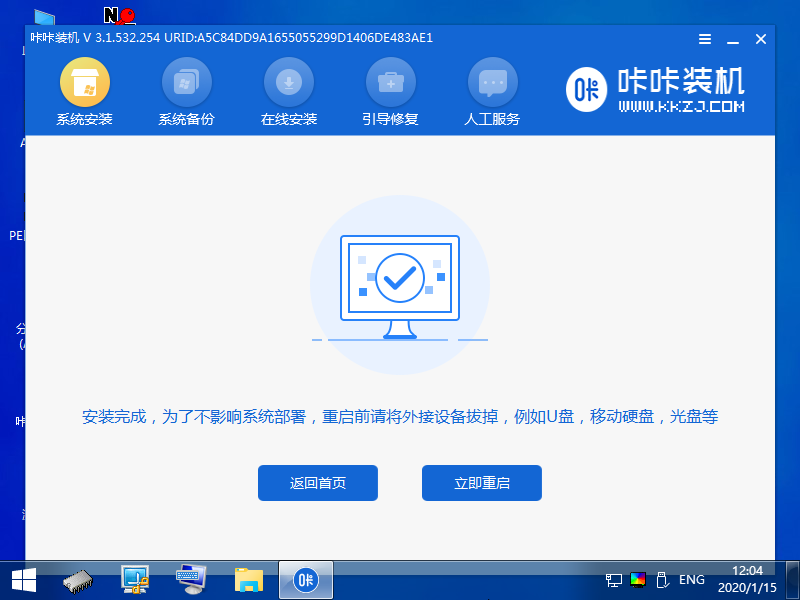
#7. After the installation is completed, choose to restart the computer immediately.
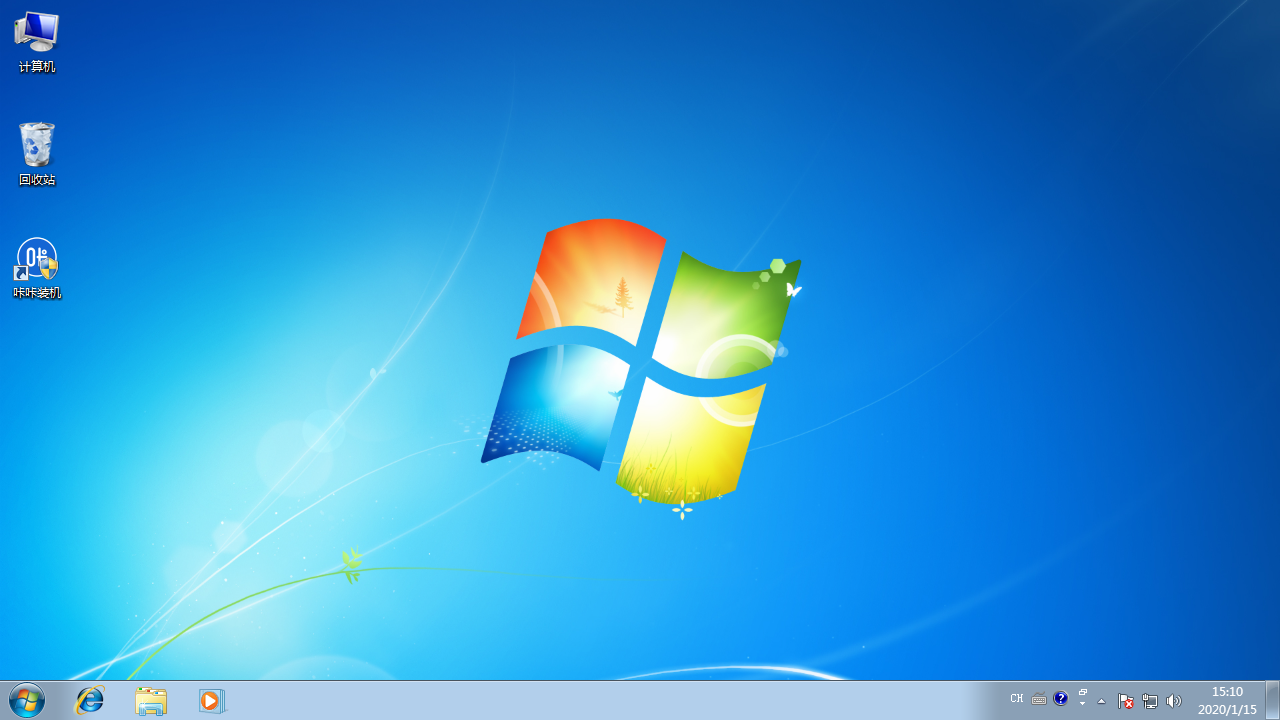
#8. During this period, you may restart multiple times until you successfully enter the system desktop, which means the installation is successful.
The above is the process of reinstalling win7 system from USB flash drive. I hope it will be helpful to you.
The above is the detailed content of Operation steps for reinstalling win7 system from USB flash drive on desktop computer. For more information, please follow other related articles on the PHP Chinese website!

Hot AI Tools

Undresser.AI Undress
AI-powered app for creating realistic nude photos

AI Clothes Remover
Online AI tool for removing clothes from photos.

Undress AI Tool
Undress images for free

Clothoff.io
AI clothes remover

AI Hentai Generator
Generate AI Hentai for free.

Hot Article
Hot Tools

Notepad++7.3.1
Easy-to-use and free code editor

SublimeText3 Chinese version
Chinese version, very easy to use

Zend Studio 13.0.1
Powerful PHP integrated development environment

Dreamweaver CS6
Visual web development tools

SublimeText3 Mac version
God-level code editing software (SublimeText3)
Hot Topics


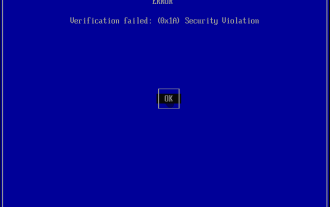 Ventoy secure boot settingsSecure Boot
Jun 18, 2024 pm 09:00 PM
Ventoy secure boot settingsSecure Boot
Jun 18, 2024 pm 09:00 PM
Ventoy is a USB boot tool that can directly boot ISO/WIM/IMG/VHD(x)/EFI and other types of files in the USB flash drive. It is very easy to use. Laptops have secure boot turned on by default. If they are not turned off or cannot be turned off, they cannot be booted from a USB device. Ventoy also supports secure boot. The principle is to inject a GRUB installation certificate into the current computer. As long as your computer After being injected once, any USB disk PE booted based on grub can pass. The official description of Ventoy is a GIF image. The playback speed is too fast and you may not be able to remember it. The editor has divided the GIF image to make it easier to understand. Ventoy secure boot has EnrollKey and Enro
 ASRock launches DESKMAX X600 ITX host: R5-7500F, single 2.5G network port, priced at 2,648 yuan
Mar 23, 2024 pm 10:26 PM
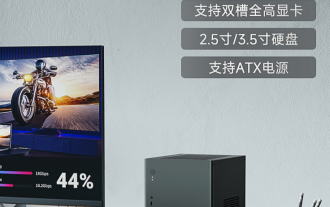
ASRock launches DESKMAX X600 ITX host: R5-7500F, single 2.5G network port, priced at 2,648 yuan
Mar 23, 2024 pm 10:26 PM
According to news from this website on March 22, ASRock recently launched a DESKMAXX600ITX host on JD.com, which uses an R5-7500F processor. The barebone system sells for 2,648 yuan, and there is also a CPU-less version, which sells for 1,598 yuan. According to reports, this ITX host has an optional 6-core 12-thread AMDR5-7500F processor, a built-in 500WATX power supply, and a standard ASRock X600ITX motherboard. It supports the installation of up to 4 DDR57200 RAM and 4 hard drives (2 M.2+2 2.5-inch SATA) and independent graphics cards within 200mm in length. In addition, this ITX host has 1 USB-C interface (unspecified version), 4 USB-A3.2 interfaces, and 4 USB-A2
 Colorful motherboard boot USB flash drive shortcut key
Mar 19, 2024 pm 12:55 PM
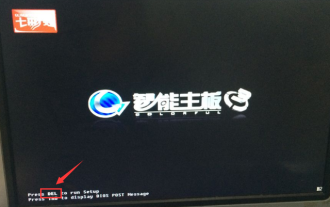
Colorful motherboard boot USB flash drive shortcut key
Mar 19, 2024 pm 12:55 PM
Hello everyone, today I will share a graphic tutorial from Xiaobai System official website (xiaobaixitong.com). Colorful motherboard is a computer motherboard brand with very good performance, and it has certain advantages in all aspects, and its price-performance ratio is also very high. So here comes the question, how to set the USB boot option for Colorful motherboard? Don’t worry, the editor will show you how to set up the USB disk boot option in Colorful. Teach you step by step how to set the U disk boot option for Colorful motherboard: First, insert the U disk into the computer, then turn on the computer and quickly and intermittently press the startup shortcut key to enter the BIOS setting interface (please note: usually it will be displayed below the computer brand logo Start hotkey hints). 2. Enter BIOS settings
 How to delete USB disk files? What should I do if the USB disk files cannot be deleted?
Mar 14, 2024 pm 08:49 PM
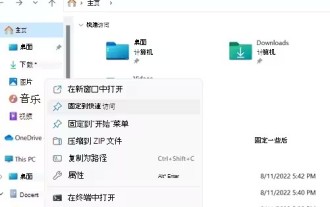
How to delete USB disk files? What should I do if the USB disk files cannot be deleted?
Mar 14, 2024 pm 08:49 PM
There are many important files stored in the USB flash drive, and there are also some useless files. Cleaning the USB flash drive regularly can better manage the USB flash drive resources. However, some users found that some files in the USB disk cannot be deleted. What is going on? This tutorial will bring you the solution, come and take a look. 1. Check whether the file is occupied 1. Open the file explorer and find the path of the U disk. 2. Right-click the file you want to delete and select "Properties". 3. In the "Properties" window, switch to the "Security" tab. 4. Click the "Advanced" button to view the file permissions. 5. Ensure that the current user has
 What should I do if the system installation is too slow when reinstalling the system from USB disk in System Home?
Mar 01, 2024 pm 11:30 PM
What should I do if the system installation is too slow when reinstalling the system from USB disk in System Home?
Mar 01, 2024 pm 11:30 PM
When reinstalling the system, many users use the USB flash drive reinstallation system of System Home. However, when they reinstall the USB flash drive, they find that the loading speed is too slow. So how should we deal with it? What should I do if the system installation is too slow when reinstalling the system via USB flash drive in System Home? Reason introduction: 1. The transmission speed of the USB flash drive itself is slow, especially when processing large files, and the operation time is very long. 2. The USB interface of the computer and the extension cord will cause The signal is attenuated, making the USB disk reinstallation system installation too slow. Solution: 1. The U disk can only be used as a PE system disk. Just put the system GHO file into the U disk. 2. When the user starts the U disk and enters the PE system, he directly copies GHO to the D disk. 3. When restoring the system, you can directly quote the GHO file of the D drive
 How to download soda music to USB disk
Feb 24, 2024 pm 12:10 PM
How to download soda music to USB disk
Feb 24, 2024 pm 12:10 PM
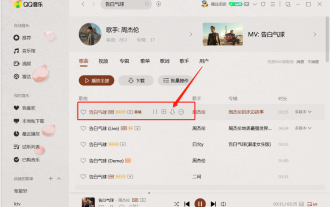
Soda Music can download music to a USB flash drive, so how do you download it to a USB flash drive? Users need to click on the music, then click on the three dots on the right side of the music, and click on download. This introduction to the method of downloading to a USB disk can tell you how to operate it. The following is a detailed introduction, so take a look! Tutorial on using soda music. How to download soda music to USB flash drive. Answer: Click the three dots on the right side of the music in the music, and click download inside. The specific method: 1. First, click the music button below. 2. After selecting a piece of music, click the three dots on the right. 3. After entering, click the download button inside.
 How to download qq music to USB flash drive? -How to download qq music to USB disk
Apr 01, 2024 am 10:11 AM
How to download qq music to USB flash drive? -How to download qq music to USB disk
Apr 01, 2024 am 10:11 AM
1. Open QQ Music software, enter the name of your favorite song in the search bar, and click the download button. 2. Open the folder where the downloaded songs are stored. 3. Copy the downloaded songs to the USB flash drive, and that’s it! Of course, you need to open the U disk first, then open the U disk in "My Computer" and paste it.
 How to connect to wifi on a desktop computer? What should I do if my desktop computer cannot connect to the Internet?
Feb 22, 2024 pm 07:43 PM
How to connect to wifi on a desktop computer? What should I do if my desktop computer cannot connect to the Internet?
Feb 22, 2024 pm 07:43 PM
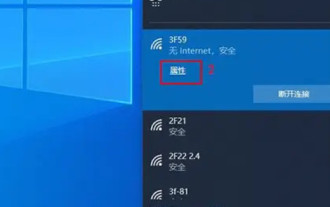
Select the WiFi you want to connect to in the notification bar and enter the password to connect. You can also enter the WLAN management interface in computer settings, select WiFi and enter the password to connect. Tutorial Applicable Model: Lenovo AIO520C System: Windows 10 Professional Edition Analysis 1 First click on the notification bar in the lower right corner of the computer. 2 Then click Network in the notification bar to enter the WiFi selection interface. 3 Then select the WiFi you want to connect to and enter the password to connect. 4 Or open the computer’s settings interface. 5 Then click Network and Internet Options to enter the computer network management interface. 6Click the WLAN option to enter the WLAN management interface. 7Finally, click to display available networks, select WiFi and enter the password to connect. Supplement: The computer is