Win7 original system installation tutorial
Nowadays computers are basically pre-installed with the win10 system, but for people who are used to the win7 system, the win10 system is definitely not that easy to use, so how to install the original win7 system on the computer? ?Next, the editor will bring you the installation tutorial of the original win7 system, let’s take a look.
1: Preparatory work:
1. Windows7 official original image, download address: http://one.198358.com:7457/iso/764_xb_21_03_18.iso
2. A 4G or above U disk (preferably a blank U disk, please back up any important data first)
3. Xiaobai reinstalls the system software with one click, official website address: http://www. xiaobaixitong.com/
2: Start the U disk creation process
1. Download and double-click to run the Xiaobai software (remember to turn off the security and anti-virus software on your computer first to prevent it from blocking the subsequent installation process )

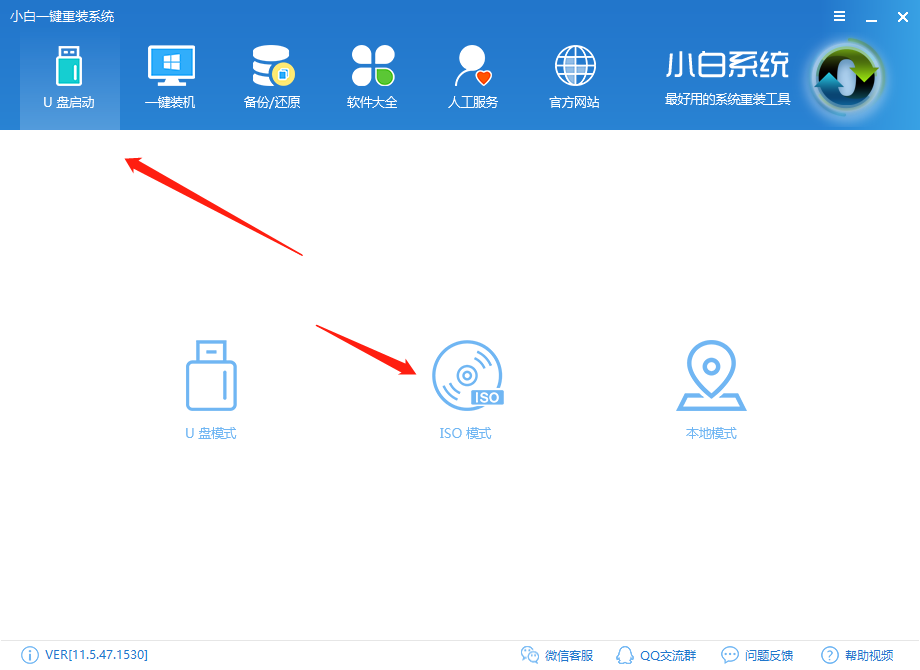
2. Select U disk boot-ISO mode as shown in the figure.
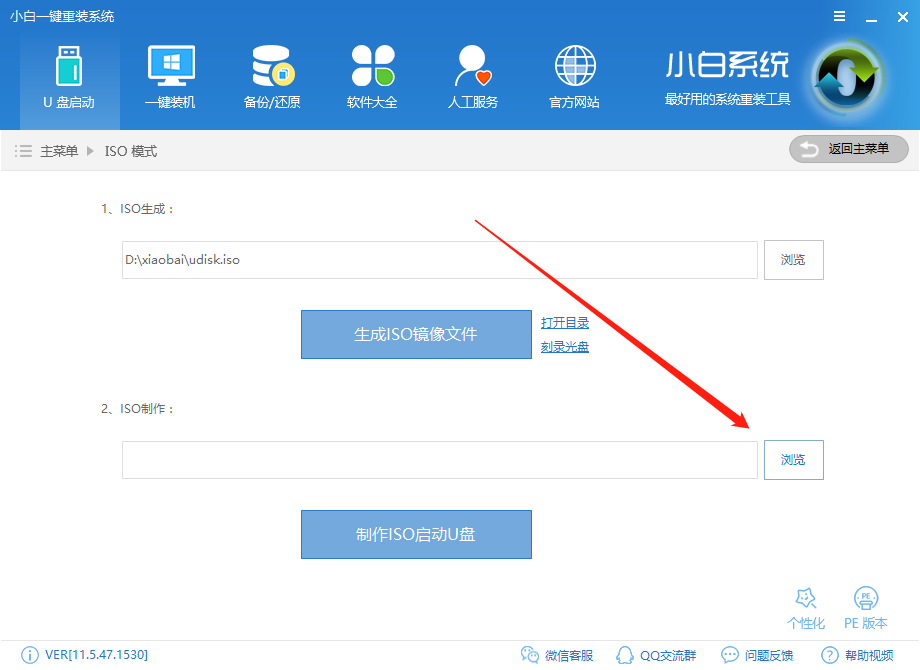
3. As shown in the picture, click Browse in the ISO production office, find the downloaded win7 original system, and load the windows7 original system
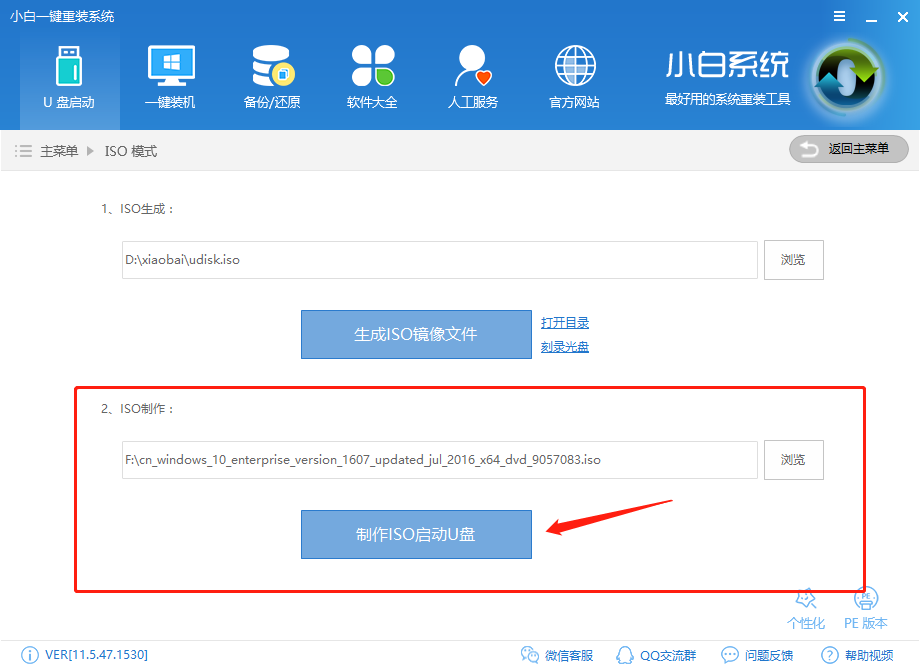
#4. After selecting the image, click Create ISO bootable USB disk.
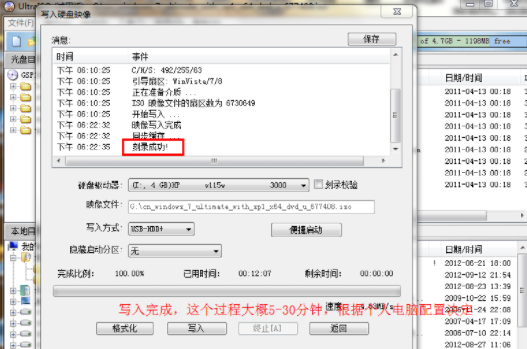
5. Write the image, generally choose the system default, and then write.
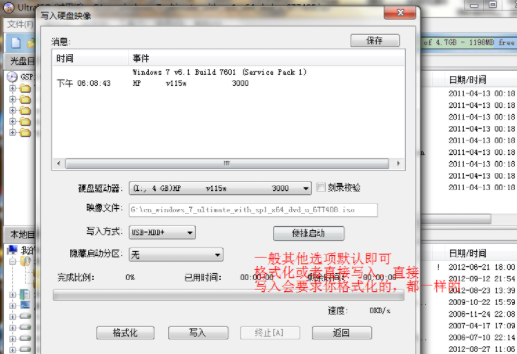
6. The system writing is completed, this process takes about 5-30 minutes. Depends on personal computer configuration.
Three: Windows 7 original system installation process
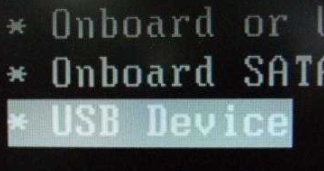
1. Restart the computer. You can choose F2, F10, or ESC according to the computer model. Enter the system bios with DEL, select the boot option as U disk boot
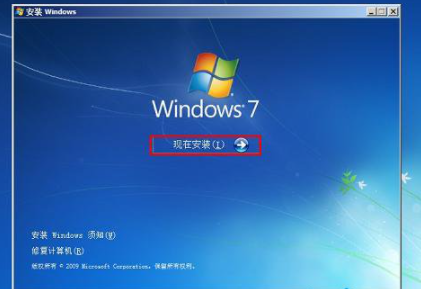
2. Restart the system and choose to start the installation.
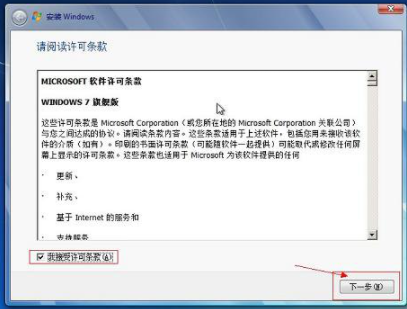
3. Check the box and go to the next step.
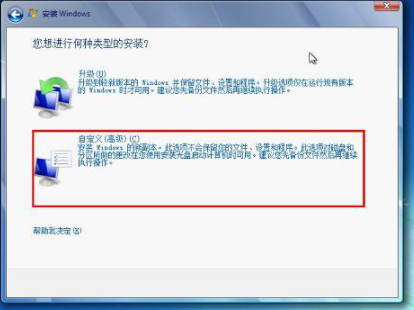
4. Remember to choose custom installation, not upgrade. (Important)
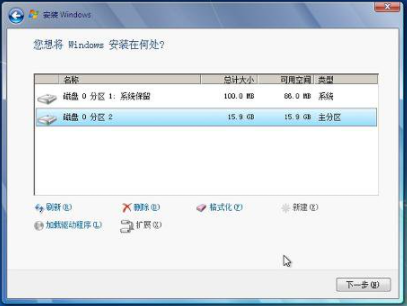
5. Select the partition where the system is installed, usually the C drive.
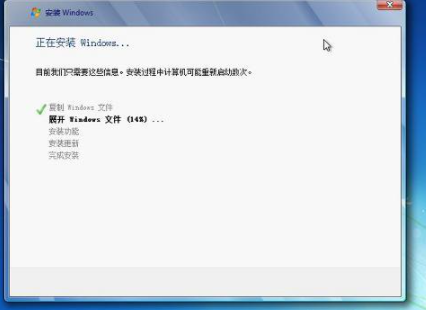
#6. Please wait patiently during the installation process.
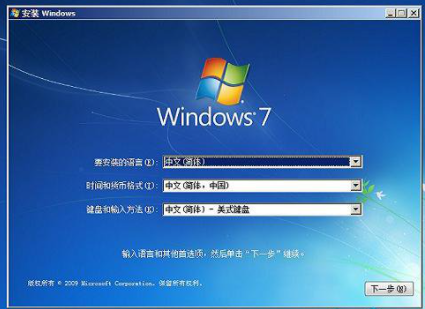
7. Select the windows version and next step.
#8. Enter username and password, next step.
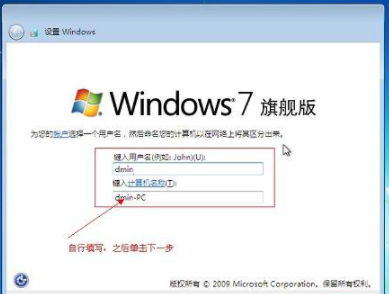
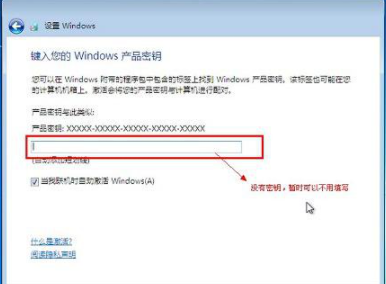
9. Enter the key. You can not enter it temporarily. After completion, you can activate it with the activation tool.
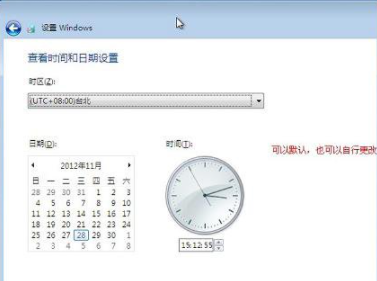
10. Set the system time. Set this yourself.
#11. Restart the configuration system and wait patiently.
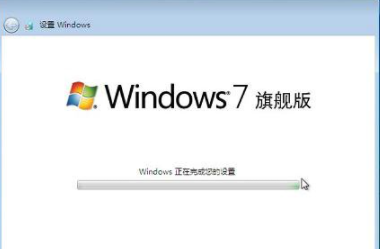
12. Finally, the computer enters the original Windows 7 system.
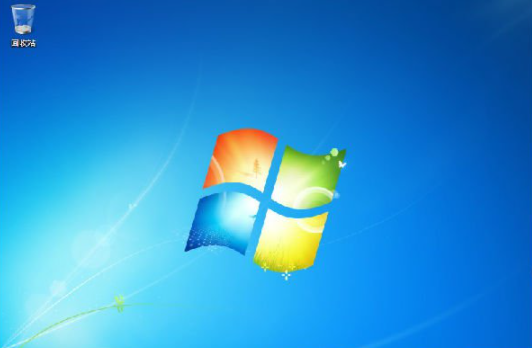
The above is the win7 original system installation tutorial compiled by the editor for everyone. I hope it can be helpful to everyone.
The above is the detailed content of Win7 original system installation tutorial. For more information, please follow other related articles on the PHP Chinese website!

Hot AI Tools

Undresser.AI Undress
AI-powered app for creating realistic nude photos

AI Clothes Remover
Online AI tool for removing clothes from photos.

Undress AI Tool
Undress images for free

Clothoff.io
AI clothes remover

Video Face Swap
Swap faces in any video effortlessly with our completely free AI face swap tool!

Hot Article

Hot Tools

Notepad++7.3.1
Easy-to-use and free code editor

SublimeText3 Chinese version
Chinese version, very easy to use

Zend Studio 13.0.1
Powerful PHP integrated development environment

Dreamweaver CS6
Visual web development tools

SublimeText3 Mac version
God-level code editing software (SublimeText3)

Hot Topics
 1386
1386
 52
52
 U disk installation system tutorial: easily learn how to use a U disk to install the operating system for your computer
Apr 04, 2024 pm 12:49 PM
In today's technological development, operating system installation has become an essential skill in computer use. Using a USB flash drive to install the operating system has become a popular way. This article aims to introduce to technology enthusiasts and novice computer and mobile phone users how to use a USB flash drive to install an operating system on a computer, helping them master this skill more easily. Tool materials: System version: Windows 10 Brand model: HP Z66 Software version: Rufus3.11 1. Preparation 1. First, prepare a computer running the Windows 10 operating system, a USB flash drive (recommended capacity is not less than 8GB), and the latest version of the operating system image file. 2. Download and install Rufus software for making a USB boot disk. two
 Teach you how to install windows7 system
Jul 19, 2023 pm 03:37 PM
The Windows 7 system is a very compatible system so far. There are still many users using the Windows 7 system for office work. So how to install the Windows 7 system? Next, the editor will bring you the Windows 7 installation tutorial. Installing Windows 7: 1. First, we open the downloaded Xiaobai one-click reinstall system software. After opening the software, we select the system that needs to be installed and click the "Install this system" button below. 2. Then start downloading the system image file and driver device, and wait patiently for the download to complete. 3. After the download is completed, you need to restart the computer. At this time, click the "Restart Now" option. 4. When we restart and enter the startup item page
 YuLinMuFeng U disk installation tutorial for Win10 operating system
Dec 28, 2023 pm 08:47 PM
YuLinMuFeng's win10 system is still very good. It is very easy to use and can help the majority of users to use it conveniently. However, many users find that they do not know when using a USB flash drive to install the win10 system. How to operate, come and take a look at the detailed tutorial ~ Yulin Mufeng U disk system installation tutorial win10: 1. Make a U disk boot disk. Here we take the U boot tool as an example. 2. Download the win10 system you need, and then place the Yunlin Mufeng system into the USB flash drive. 3. Insert the prepared U-boot installed version boot disk into the USB interface of the computer (if it is a desktop computer, it is recommended to insert it into the rear interface of the main chassis). 4. Then turn on the computer, wait until the startup screen appears on the screen, and then press the U disk startup shortcut key to enter.
 Detailed step-by-step guide to installing system from USB disk
Apr 05, 2024 pm 12:34 PM
In the field of technology, there are many ways to install the system, among which using a USB flash drive to install the system is the most common way. This article will provide a detailed guide for technology enthusiasts and novice computer and mobile phone users to help them better understand and master this technique. Tool materials: Computer brand and model: Dell , to avoid data loss. 2. Download the system image: According to your own needs, download the required system image file from the official website, such as Wind
 How to install the latest version of win10 system
Dec 29, 2023 pm 04:13 PM
When we use computers, if we want to install an operating system or reinstall the system on our computers, many friends don't know what to do. So for the question of how to install the latest version of win10 system, the editor thinks that first we can download the required operating system from this site, and then install it through related third-party software. Let’s take a look at the specific steps of how to do it ~ How to install the latest version of win10 system 1. Set the computer’s hard disk mode to ahciahci hard disk mode How to set up >>> 2. Make a USB boot disk, here it is Take cabbage as an example. 3. Download the win10 system you need. >>>win10200
 Graphical demonstration on how to install win7 system
Jul 11, 2023 pm 10:33 PM
When win7 system has blue screen, black screen, system crash, etc., many people often don’t know how to solve it. In fact, when it cannot be repaired, we can usually choose to reinstall the win7 system with a USB flash drive to solve the problem. So how to install win7 system specifically? The editor below will show you the tutorial on installing win7 system from USB disk. The specific steps are as follows: 1. First download, install and install the one-click system reinstallation tool on an available computer and open it. Insert a blank USB disk of more than 8g, select the USB disk reinstallation system mode, and click to start production. (Be careful to back up important data on the USB flash drive) 2. Select the win7 system that needs to be installed, click Start Making, and wait for the USB boot disk to be made. 3. After prompting that the USB boot disk is successfully created, you can preview the required
 Teach you how to reinstall win10 system win7 system
Jul 08, 2023 pm 03:45 PM
The operation method of win10 system has been greatly changed compared to win7 system. Many users are not used to it, so they want to reinstall win10 system into win7 system. The editor will tell you how to simply reinstall win10 system into win7 system. . 1. First download the Xiaoyu system and reinstall the system software on your desktop computer. 2. Select the win7 system and click "Install this system". 3. Then start downloading the image of the win7 system. 4. After downloading, deploy the environment, and then click Restart Now after completion. 5. After restarting the computer, the Windows Manager page will appear. We choose the second one. 6. Return to the computer pe interface to continue the installation. 7. After completion, restart the computer. 8. Finally come to the desktop,
 Win7 original system installation tutorial
Jul 20, 2023 pm 06:53 PM
Today's computers are basically pre-installed with the win10 system, but for people who are used to the win7 system, the win10 system is definitely not that easy to use. So how to install the original win7 system on the computer? Next, the editor will I bring you the original win7 system installation tutorial, let’s take a look. 1: Preparatory work: 1. Windows 7 official original image, download address: http://one.198358.com:7457/iso/764_xb_21_03_18.iso2. A 4G or above U disk (preferably a blank U disk, such as Please back up important data first) 3. Xiaobai reinstalls the system software with one click, official website address: http://www


