

Detailed explanation of how to enter Lenovo bios and boot from USB disk

If we want to use a USB flash drive to reinstall the system of a Lenovo computer, in addition to making the USB flash drive a boot disk, we also need to enter Lenovo bios and set the USB boot disk as the first startup item to enter pe. Install. So how to enter Lenovo bios into the USB disk to boot? How to set up the USB disk to boot in bios? The editor below will teach you how to set up USB disk startup in Lenovo bios.
1. Enable the quick boot menu mode
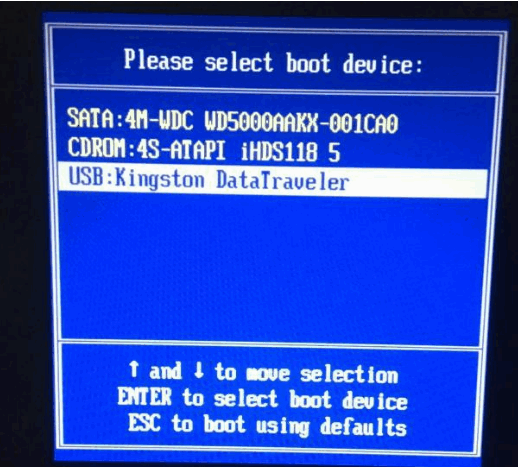
1. You can directly insert the boot disk into the Lenovo computer, and then when the "LENOVO" logo self-test screen is displayed after booting, press F12 quickly and repeatedly. key (some models may be the "Fn F12" key combination) to enter the startup shortcut interface.

#2. In the quick startup interface, use the up and down keys to select the U disk startup item and press Enter to enter the U disk boot pe and reinstall the system. (Generally, the U disk boot item displays the U disk brand name or USB characters)
2. Boot the U disk from the BIOS in traditional mode
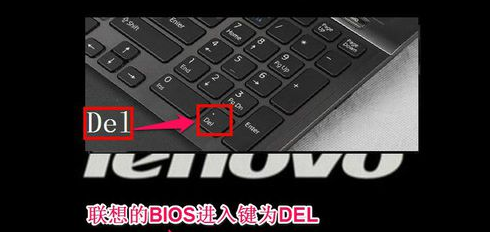
1. After inserting the boot disk, press the Del key immediately when the Lenovo logo appears when the computer is turned on to enter the BIOS setting main interface. Some Lenovo computers may use the F2 key to enter the BIOS.
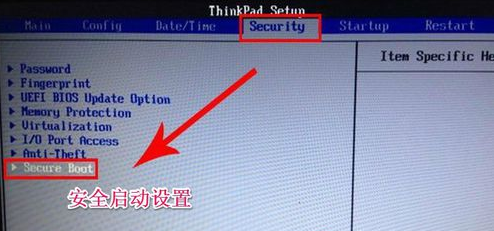
#2. After entering the BIOS main interface, move the cursor to Security (security) and use the up and down arrow keys to move the cursor to "Security Boot", which in Chinese means " Secure Boot Settings". If you want to use the traditional method to boot the USB flash drive, this item must be turned off.
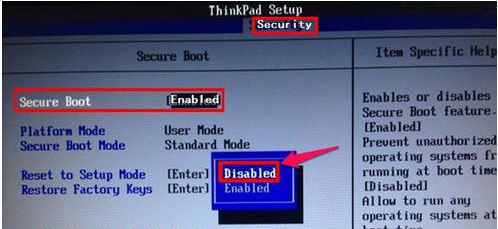
3. Select Security Boot and press Enter. Select the disabled item and press Enter to confirm and turn off Secure Boot.
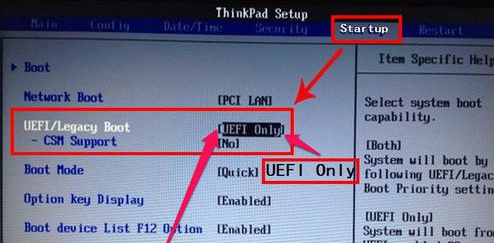
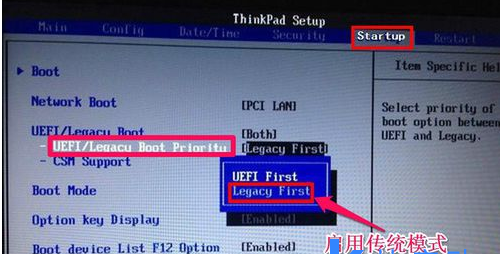
4. Then select the Startup item, first select the UEFI/Legacy Boot item, which in Chinese means "new UEFI and traditional "Startup method", now it shows "UEFI Only (single UEFI mode)", we need to select the compatibility mode, which is to be compatible with the traditional BIOS mode, so press Enter to enter, select the Both item, and press Enter to confirm.
5. Select Legacy First in the small window that opens, which means that the traditional startup mode is listed first. Press Enter to confirm.
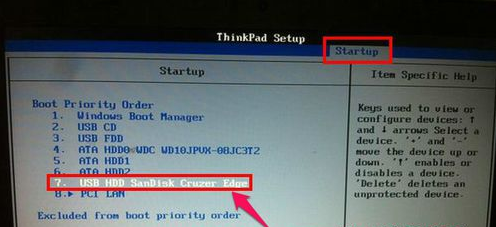
#6. After setting up, under Startup, select the Boot item and press Enter to enter. Select the U disk startup item and move to the first startup by using the up and down keys. Enter the item position.
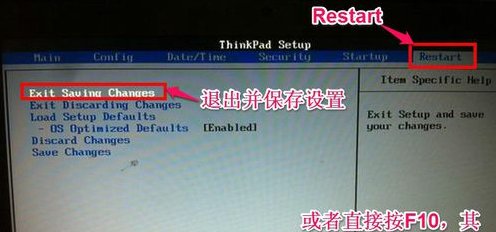
#7. In this way, the traditional BIOS settings are completed. Just press the f10 shortcut key to save and restart the computer. Then you can enter the U disk to install the system.
#8. When it comes to installing the system, if you don’t know how to reinstall the system with a USB flash drive, you can refer to the following tutorial: Xiaobai USB flash drive Tutorial on reinstalling windows system from boot disk.
#The above is the method for setting up USB disk startup in Lenovo bios. Friends who need to reinstall the system on Lenovo computer USB disk can refer to the tutorial.
The above is the detailed content of Detailed explanation of how to enter Lenovo bios and boot from USB disk. For more information, please follow other related articles on the PHP Chinese website!

Hot AI Tools

Undresser.AI Undress
AI-powered app for creating realistic nude photos

AI Clothes Remover
Online AI tool for removing clothes from photos.

Undress AI Tool
Undress images for free

Clothoff.io
AI clothes remover

Video Face Swap
Swap faces in any video effortlessly with our completely free AI face swap tool!

Hot Article
Hot Tools

Notepad++7.3.1
Easy-to-use and free code editor

SublimeText3 Chinese version
Chinese version, very easy to use

Zend Studio 13.0.1
Powerful PHP integrated development environment

Dreamweaver CS6
Visual web development tools

SublimeText3 Mac version
God-level code editing software (SublimeText3)
Hot Topics
 1386
1386
 52
52