
 Backend Development
PHP Tutorial
PHP calls the camera to record time-lapse video: simple tutorial sharing
Backend Development
PHP Tutorial
PHP calls the camera to record time-lapse video: simple tutorial sharing
PHP calls the camera to record time-lapse video: simple tutorial sharing

PHP calls the camera to record time-lapse video: simple tutorial sharing
The application of the camera has become more and more widespread. In addition to live broadcast and taking photos, it can also be used to record time-lapse video. Time-lapse video displays a time-accelerated effect by playing a series of consecutive pictures at a lower frame rate. In this article, we will share a simple tutorial on how to use PHP to call the camera and record time-lapse video.
- Configuring the camera
First, we need to make sure that the camera has been configured correctly. In Linux systems, you can use command line tools to check and configure the camera. Run the following command to view the available camera devices in the system:
ls -l /dev/video*
If the output contains a device similar to /dev/video0, it means that there are available cameras in the system. If the device is not found, check that the camera is plugged in correctly and that the correct driver is installed.
- Install necessary software packages
Before using PHP to call the camera, we also need to install some necessary software packages. Run the following command to install the corresponding package:
sudo apt-get install ffmpeg fswebcam
- PHP Calling the Camera
Next, we start writing PHP code to call the camera and record the time-lapse video. First, we need to use the shell_exec function to perform command line operations.
The following is a simple sample code that demonstrates how to use PHP to call the camera and record a time-lapse video:
<?php

// 设置时间间隔和记录总帧数
$interval = 1; // 每隔1秒拍摄一张照片
$total_frames = 60; // 总共拍摄60张照片

// 定义保存照片的目录
$photos_dir = '/path/to/photos'; // 这里的路径需要替换成你的实际路径

// 创建保存照片的目录
if (!is_dir($photos_dir)) {
    mkdir($photos_dir, 0755, true);
}

// 循环拍摄照片
for ($i = 1; $i <= $total_frames; $i++) {
    $photo_file = $photos_dir . '/photo' . $i . '.jpg'; // 图片文件名
    $command = 'fswebcam -r 640x480 --no-banner ' . $photo_file; // 调用摄像头拍照的命令
    shell_exec($command);
    sleep($interval); // 等待指定时间间隔
}

// 将照片合成为时间-lapse视频
$video_file = '/path/to/video.mp4'; // 这里的路径需要替换成你的实际路径
$command = 'ffmpeg -framerate 24 -pattern_type glob -i "' . $photos_dir . '/*.jpg" -c:v libx264 -pix_fmt yuv420p ' . $video_file;
shell_exec($command);

// 删除拍摄的照片
array_map('unlink', glob($photos_dir . '/*.jpg'));
rmdir($photos_dir);

?>In the above code, we first set the time interval and the total number of recorded frames. Then, a directory is created to save the photos, and a loop is used to call the camera to take photos through the fswebcam command. After each shot, the program waits for the specified time interval. After completing the shooting, we use the ffmpeg command to synthesize the photos into a time-lapse video and save it to the specified file. Finally, we also deleted the photos we took.
- Run the code
Save the above code as a PHP file and replace the path with the actual path. Then, run the PHP file through a browser or command line to start shooting time-lapse video.
Summary
By using PHP to call the camera and record time-lapse video, we can implement a simple and effective method on the server side. Using the acceleration effect of time-lapse video, we can record and display a series of slowly changing but interesting scenes, such as sunset, cloud movement, flower blooming, etc. I hope this article will be helpful to use PHP to call the camera to record time-lapse video.
The above is the detailed content of PHP calls the camera to record time-lapse video: simple tutorial sharing. For more information, please follow other related articles on the PHP Chinese website!

Hot AI Tools

Undresser.AI Undress
AI-powered app for creating realistic nude photos

AI Clothes Remover
Online AI tool for removing clothes from photos.

Undress AI Tool
Undress images for free

Clothoff.io
AI clothes remover

AI Hentai Generator
Generate AI Hentai for free.

Hot Article
Hot Tools

Notepad++7.3.1
Easy-to-use and free code editor

SublimeText3 Chinese version
Chinese version, very easy to use

Zend Studio 13.0.1
Powerful PHP integrated development environment

Dreamweaver CS6
Visual web development tools

SublimeText3 Mac version
God-level code editing software (SublimeText3)
Hot Topics
 1382
1382
 52
52

 Using PHP to control the camera: analysis of the entire process from connection to shooting
Jul 30, 2023 pm 03:21 PM
Using PHP to control the camera: analysis of the entire process from connection to shooting
Jul 30, 2023 pm 03:21 PM
Use PHP to control the camera: Analyze the entire process from connection to shooting. Camera applications are becoming more and more widespread, such as video calls, surveillance systems, etc. In web applications, we often need to control and operate cameras through PHP. This article will introduce how to use PHP to realize the entire process from camera connection to shooting. Confirm the connection status of the camera. Before starting to operate the camera, we first need to confirm the connection status of the camera. PHP provides an extension library video to operate the camera. We can pass the following code
 How to fix Windows Hello unsupported camera issue
Jan 05, 2024 pm 05:38 PM
How to fix Windows Hello unsupported camera issue
Jan 05, 2024 pm 05:38 PM
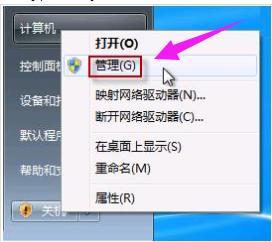
When using Windows Shello, a supported camera cannot be found. The common reasons are that the camera used does not support face recognition and the camera driver is not installed correctly. So let's take a look at how to set it up. Windowshello cannot find a supported camera tutorial: Reason 1: The camera driver is not installed correctly 1. Generally speaking, the Win10 system can automatically install drivers for most cameras, as follows, there will be a notification after plugging in the camera; 2. At this time, we open the device Check the manager to see if the camera driver is installed. If not, you need to do it manually. WIN+X, then select Device Manager; 3. In the Device Manager window, expand the camera option, and the camera driver model will be displayed.
 What does it mean if the camera is offline?
Dec 07, 2023 pm 04:05 PM
What does it mean if the camera is offline?
Dec 07, 2023 pm 04:05 PM
The camera is offline means that the camera can no longer perform normal video transmission, that is, it cannot be monitored in real time. This is usually due to the connection between the camera and the host being lost, or the camera itself is malfunctioning. Reasons that may cause the camera to go offline: 1. Network problems; 2. Power problems; 3. Signal line problems; 4. Camera failure; 5. Software problems. If the camera is offline, you need to check the network connection, power supply, signal line, software, etc. to find the cause and solve it. At the same time, you need to pay attention to the protection of personal privacy and data security.
 Win11 Camera Problem Solutions: Four Ways to Fix Win11 Camera Not Working
Jan 29, 2024 pm 12:03 PM
Win11 Camera Problem Solutions: Four Ways to Fix Win11 Camera Not Working
Jan 29, 2024 pm 12:03 PM
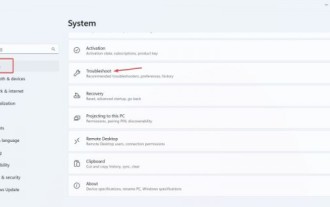
The camera is a tool that can help us conduct video chats when using computers, but many users find that their cameras cannot be used when using the win11 system. So what is going on? Users can go into the troubleshooter to set up or check the camera permissions to operate. Let this site carefully introduce to users four solutions to the problem that the Win11 camera cannot be used. Four solutions to the Win11 camera not working Solution 1. Use the built-in troubleshooter 1. Press + to open settings, and then click Troubleshooting in the system tab. Windows I4, follow the on-screen instructions to complete the troubleshooting process and make the recommended changes. 5. Use
 How to use PHP to call the camera for QR code scanning
Jul 30, 2023 pm 12:53 PM
How to use PHP to call the camera for QR code scanning
Jul 30, 2023 pm 12:53 PM
How to use PHP to call the camera to scan QR codes. Camera scanning QR codes is becoming more and more common in modern applications, and can provide convenient and fast information transmission and interaction methods. In the web application, we can use PHP to call the camera to scan the QR code, and use the scanned information for subsequent processing and display. This article will introduce how to use PHP to call the camera for QR code scanning, and provide corresponding code examples. Before starting the preparation work, we need to configure the corresponding extension libraries and functions for the PHP environment. First, make sure
 How to open the camera. Teach you how to open the Win7 camera.
Jan 11, 2024 pm 07:48 PM
How to open the camera. Teach you how to open the Win7 camera.
Jan 11, 2024 pm 07:48 PM
I believe some users have encountered such a problem. The Win7 system cannot find the camera shortcut. They can only call up the camera function from the program. People who don’t know the inside story think that the camera driver is not installed, so I will give it to those who need it. Win7 users have caused a lot of trouble when using the camera. Next, the editor will bring you a tutorial on how to open the Win7 camera. Users who use laptops all know that laptops have built-in camera functions. Unlike desktop computers that need to connect the camera, you can directly open the camera in the laptop win7 system and use it, which is very convenient. However, some users usually do not try to explore it, and try many methods but still fail. Now, the editor will tell you how to open the Win7 camera.
 How to open photos from surveillance camera in Windows 10
Jul 10, 2023 pm 09:41 PM
How to open photos from surveillance camera in Windows 10
Jul 10, 2023 pm 09:41 PM
If we don’t have a mobile phone at hand, only a computer, but we have to take pictures, we can use the computer’s built-in surveillance camera to take pictures, so how to turn on the win10 surveillance camera, in fact, we only need to download a camera application. The specific method to open the win10 surveillance camera. How to open photos from win10 surveillance camera: 1. First, use the disk shortcut key Win+i to open settings. 2. After opening, enter the personal privacy settings. 3. Then turn on access restrictions under camera phone permissions. 4. Once opened, you just need to open the camera application software. (If not, you can go to the Microsoft store to download one) 5. After opening, if the computer has a built-in surveillance camera or an external surveillance camera is assembled, you can take pictures. (Because people don’t have cameras installed
 How to open the camera and take pictures in win10
Jan 16, 2024 pm 10:06 PM
How to open the camera and take pictures in win10
Jan 16, 2024 pm 10:06 PM
If we don’t have a mobile phone at hand and only have a computer, but we need to take pictures, we can use the camera that comes with the computer to take pictures. So how do we open the Win10 camera to take pictures? In fact, we only need to download a camera app. How to open the Win10 camera to take pictures: 1. First, we use the shortcut key "Win+i" to open the settings. 2. After opening it, enter the "Privacy" settings. 3. Then turn on the access permission under the "Camera" application permissions. 4. After opening, we only need to open the "Camera" application. (If not, you can go to the Microsoft store to download one.) 5. After opening it, you can take pictures if the computer has a built-in camera or an external camera is installed. (We can't demonstrate because we don't have a camera installed)
