
 Common Problem
Detailed explanation of how to browse and edit registry files using Windows PowerToys
Common Problem
Detailed explanation of how to browse and edit registry files using Windows PowerToys
Detailed explanation of how to browse and edit registry files using Windows PowerToys

Since its initial release in 2021, Windows 11 has been a great operating system for new users. However, since its release, power users have found it quite difficult to perform tasks that were easier in previous iterations of Windows. This is why many such users choose to install third-party applications that help overcome this warning.
Microsoft also does its best to provide an application that helps with these tasks: PowerToys, a set of advanced tools that help you perform complex tasks with a few simple clicks. Over the past year, PowerToys has seen a lot of improvements by adding a host of new tools designed to help improve workflow. These new features include a registry preview tool.
This tool can help you manage registry files and edit them dynamically. If you are an IT administrator or someone who must edit registry values on a regular basis, you may want to check out the Registry Preview tool in PowerToys. Here's everything you need to know.
What is Registry Preview in PowerToys and what can you do with it?
Registry Preview is an enhanced way to visualize your PC registry and edit it if needed. This tool allows you to visualize and analyze registry files and even edit them if needed. If desired, you can also view and edit your computer's registry values.
The Registry Editor has always been the default tool of choice if you wish to make changes to your PC's registry, however, depending on the values you want to edit, it can be quite confusing. This is where registry preview comes in, as it allows you to better visualize registry values, making it easier for you to find the value you want to edit and other registry values that may depend on it.
How to use Registry Preview in PowerToys
Now that you are familiar with Registry Preview, here’s how to use it on your computer. Please follow the steps below to help you through the process.
Step 1: Install PowerToys and Enable Registry Preview
We first need to install PowerToys and enable Registry Preview before we can use it on your PC. let's start.
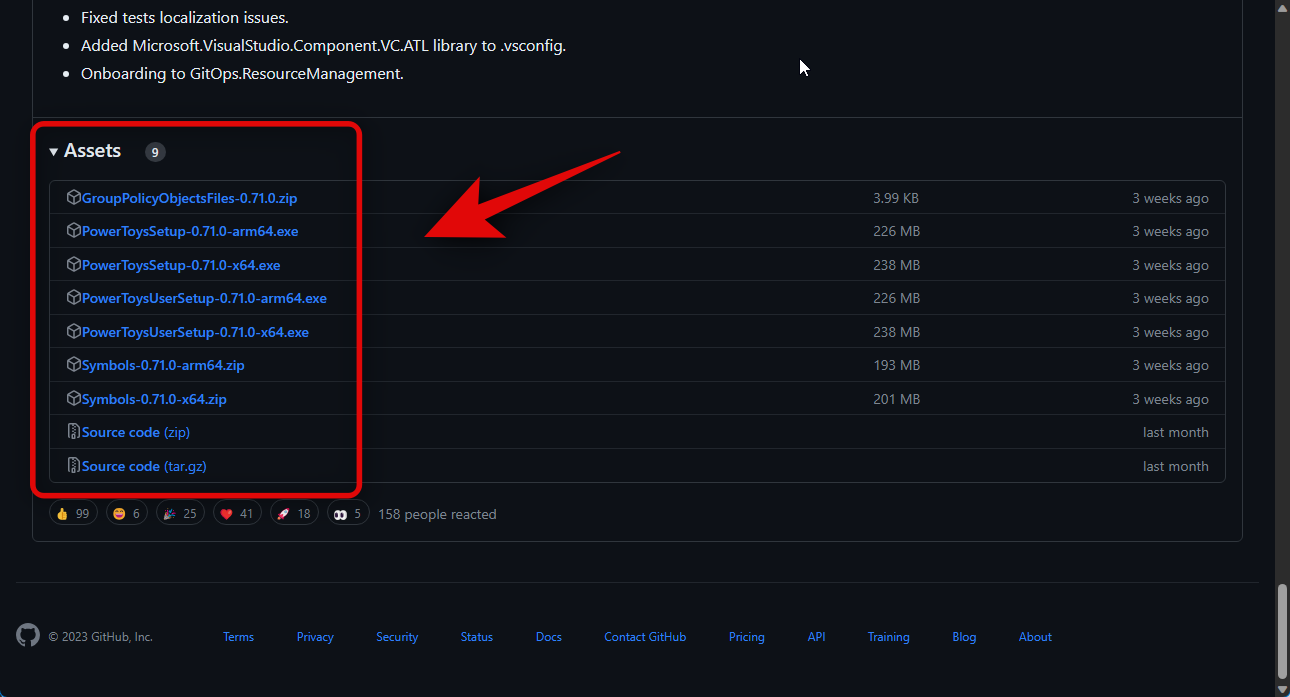
Visit this link and click and download the PowerToys settings related to your PC.
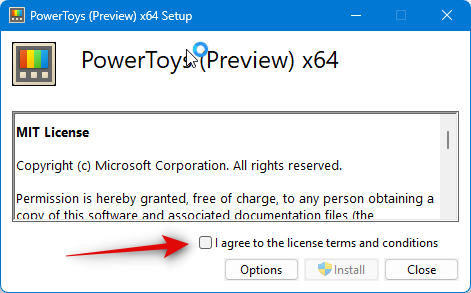
After downloading, double-click and launch the installation file.

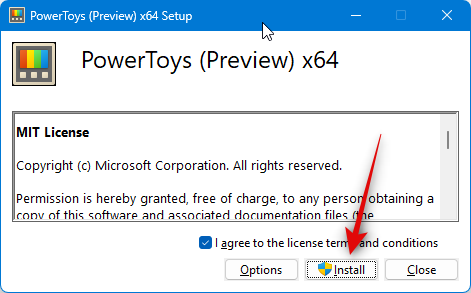
Next, select the I agree to the license terms and agreement checkbox.
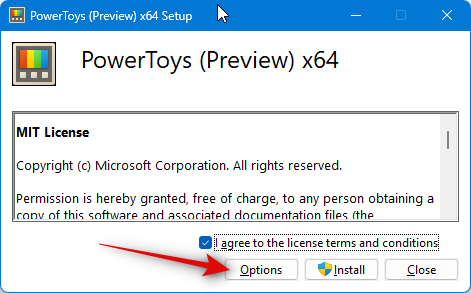
Now click on options.
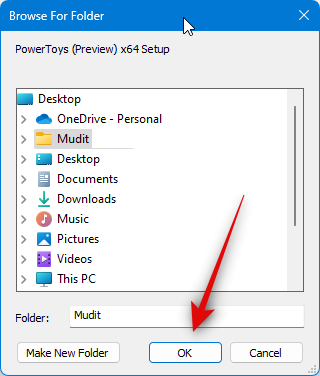
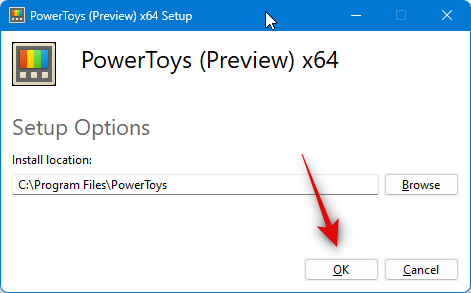
Click "Browse" to select the location where PowerToys will be installed on your PC.
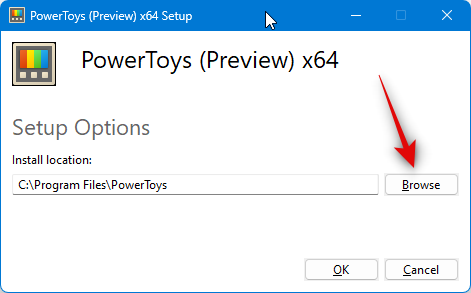
Select your preferred location and click OK.
Click "OK" again.
Now click Install.
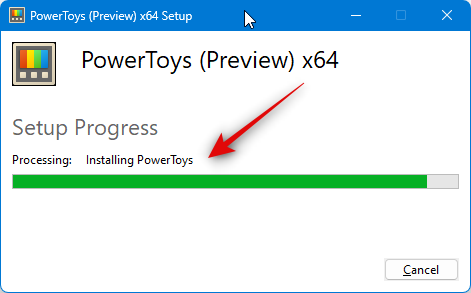
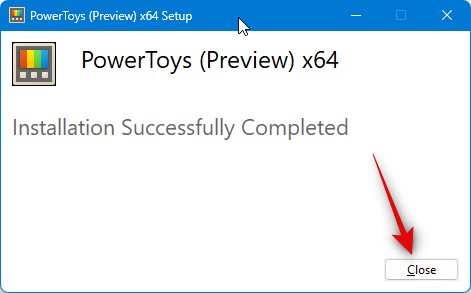
PowerToys will now be installed on your PC.
Click Close and install it on your PC.
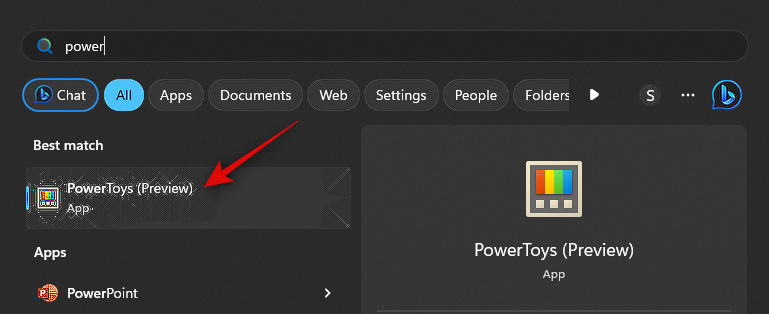
Now launch the Start Menu and search for PowerToys. Click on the app after it appears in the search results.
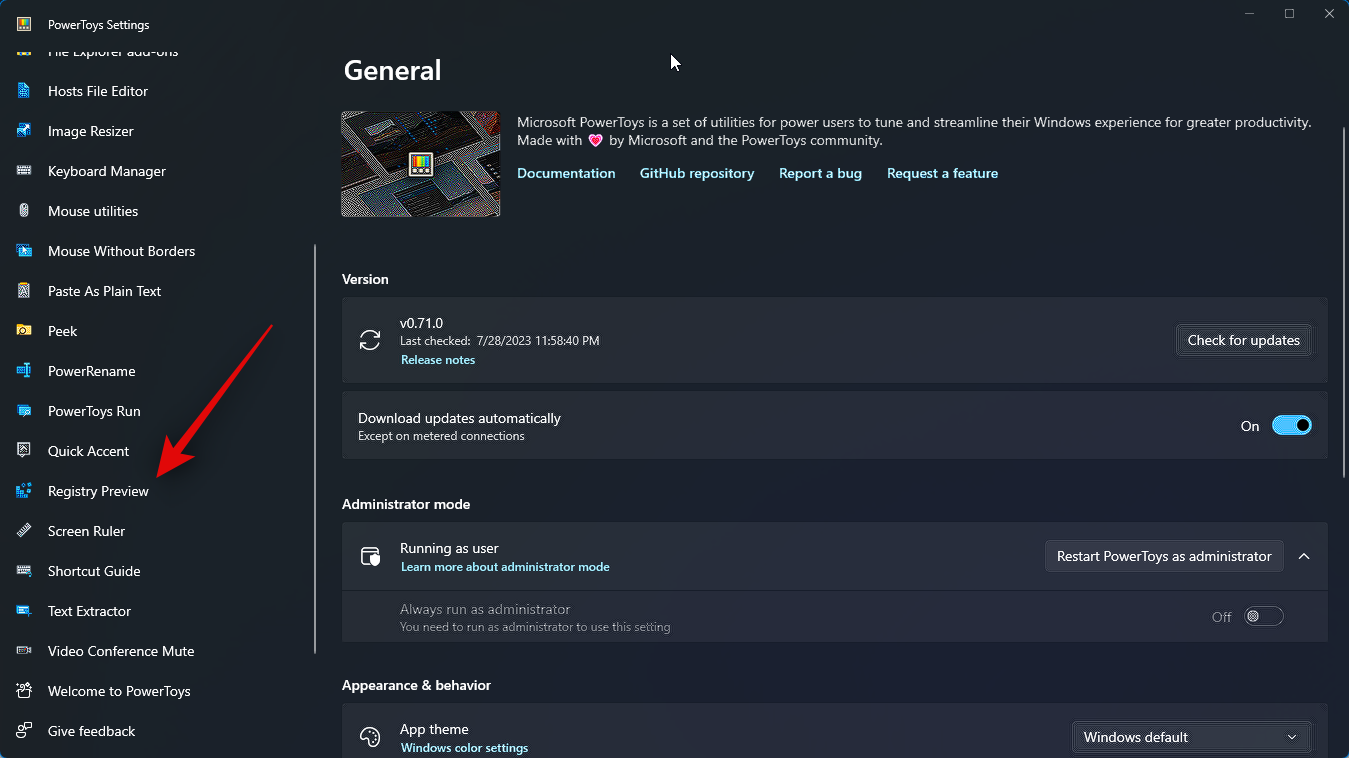
After launching the application, click Registry Preview in the left sidebar.
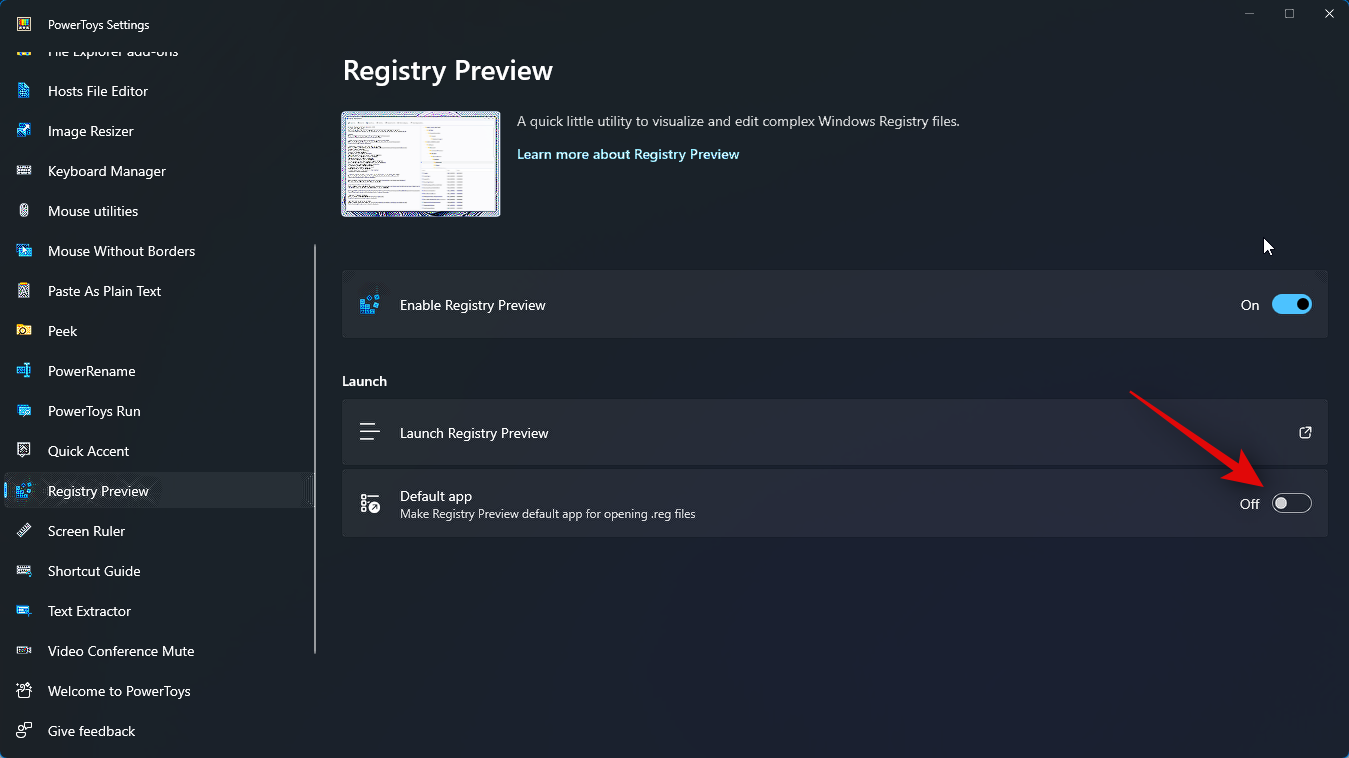
Click and enable the Enable registry preview switch at the top.
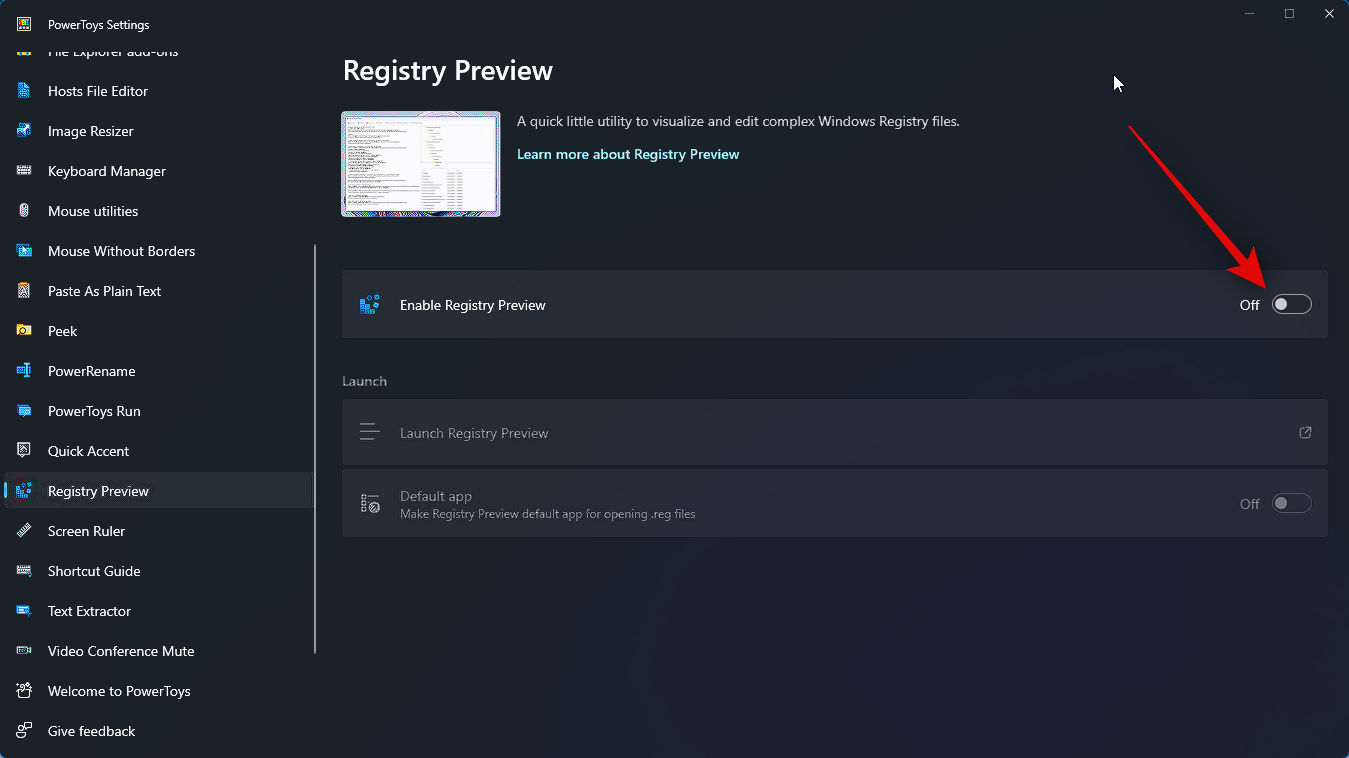
Now click and enable the switch for default applications if you wish to make the registry preview the one you wish to use to open the registry on your PC The default application for files.
That's it! Registry preview is now enabled on your PC. We can now use it to visualize and edit registry files on our PC.
Step 2: Use Registry Preview to view and edit registry files
Here's how to use Registry Preview to visualize and edit registry files on your computer. There are two ways to use Registry Preview. You can launch it and open the required registry file, or you can right-click and open the registry file in the registry preview. We'll look at both methods. Please follow the steps below to help you through the process.
Let’s first take a look at how to launch the registry preview and then edit the required registry files as needed. First launch the Start Menu and search for PowerToys. Click and launch the app after it appears in search results.
Now click on Registry Preview in the left sidebar.
Next, click Launch Registry Preview.
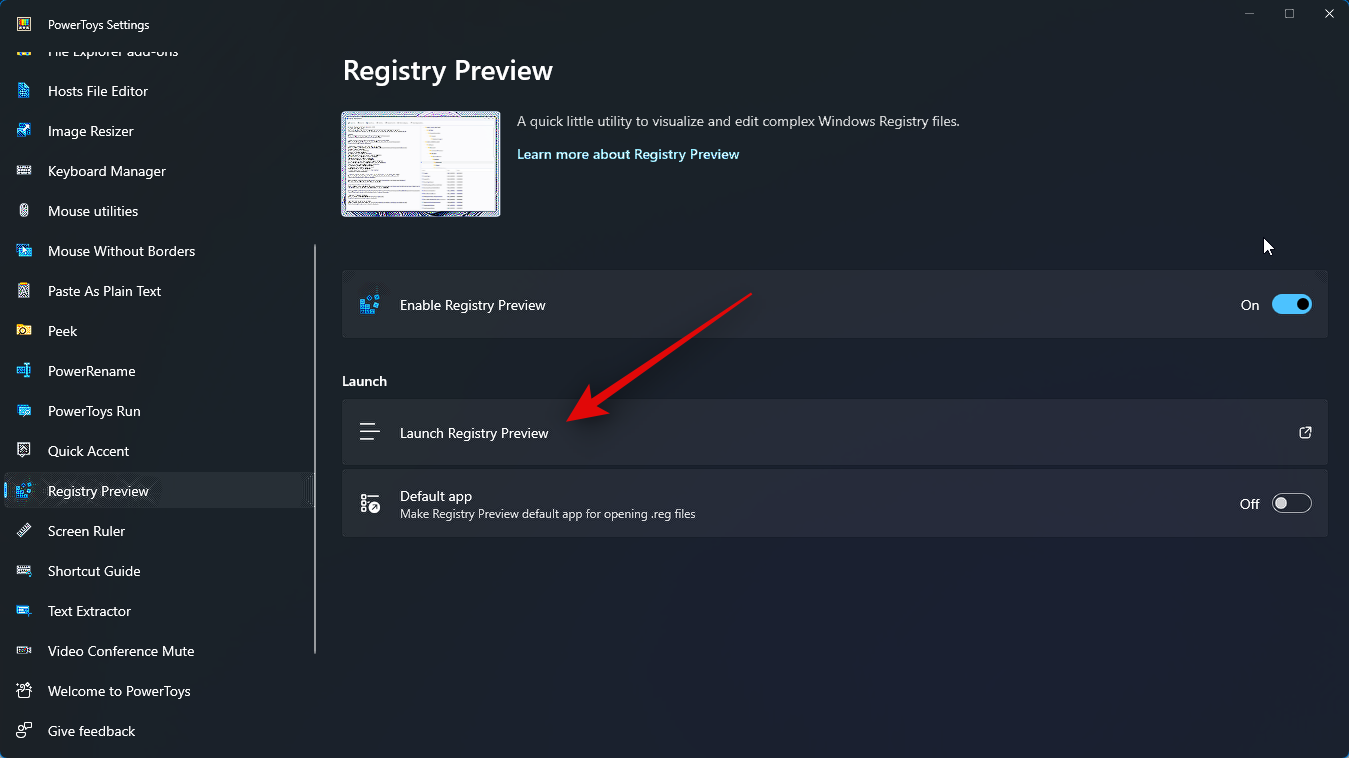
# You can also enable the switch for the default application if you would like to use the registry preview every time you open a registry file.
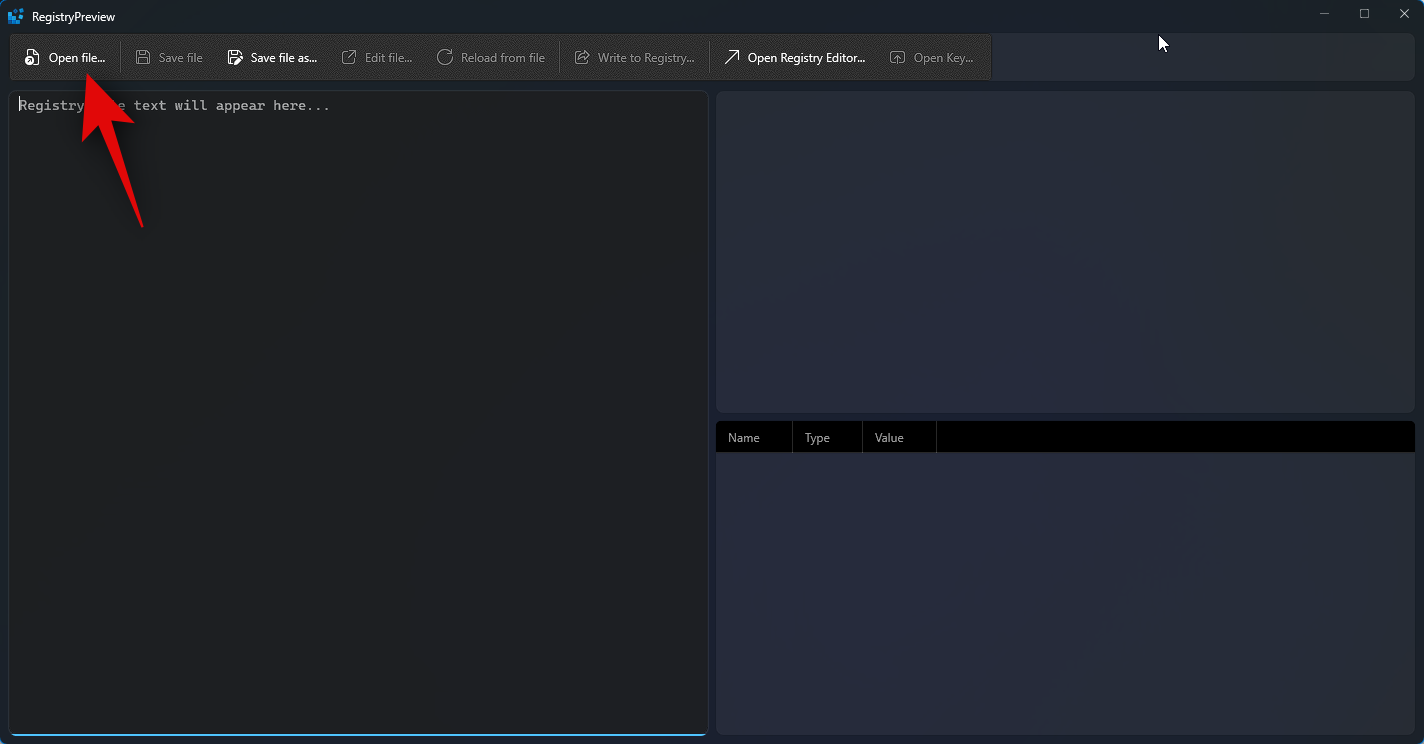
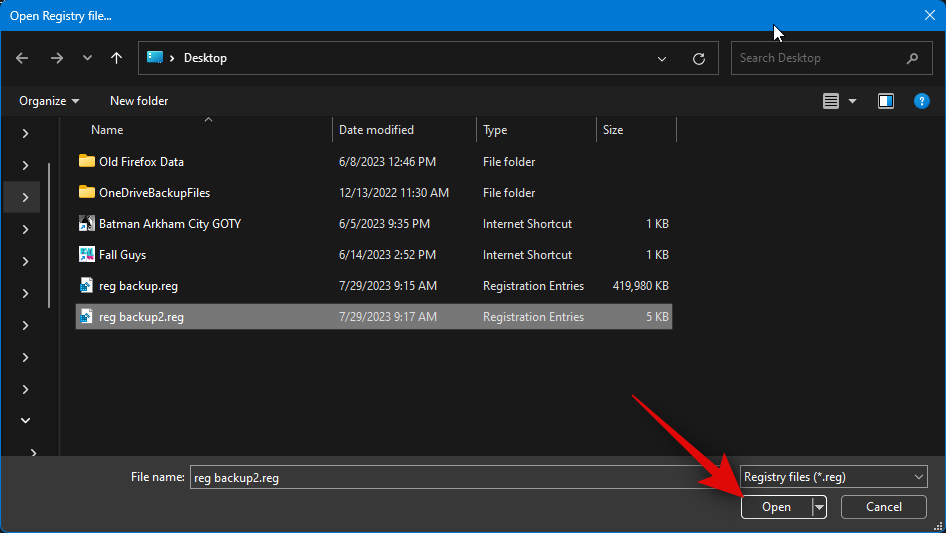
in the upper left corner to open file…. You can also press Ctrl O on your keyboard to open the required registry file.
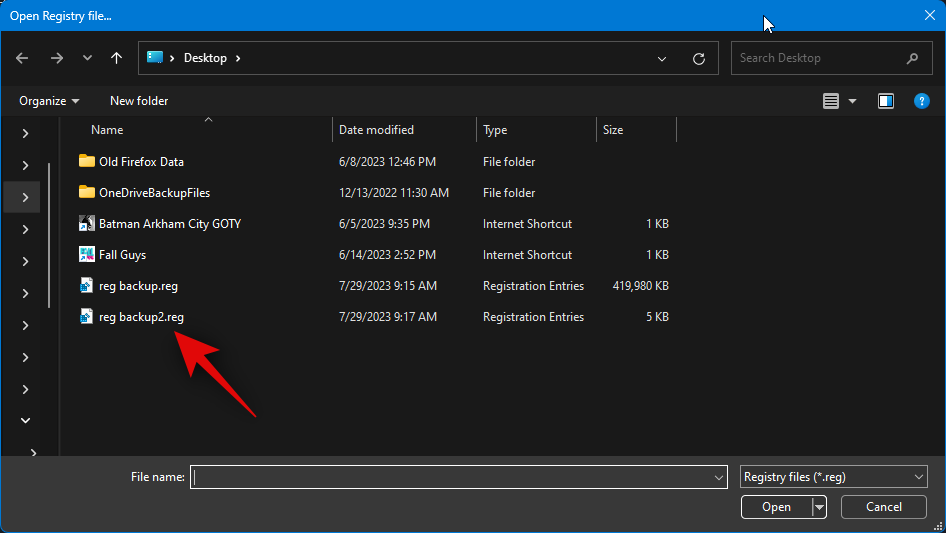
Open" after selecting the file.
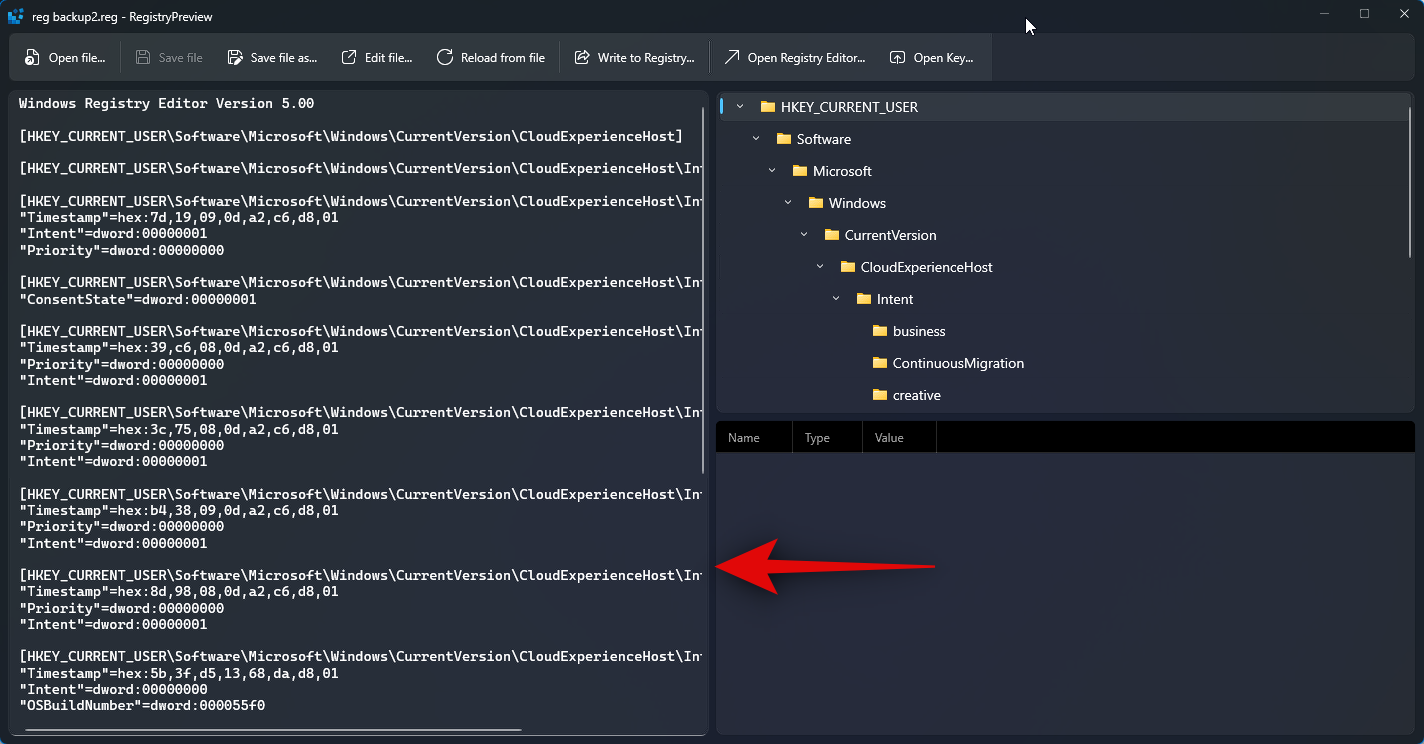
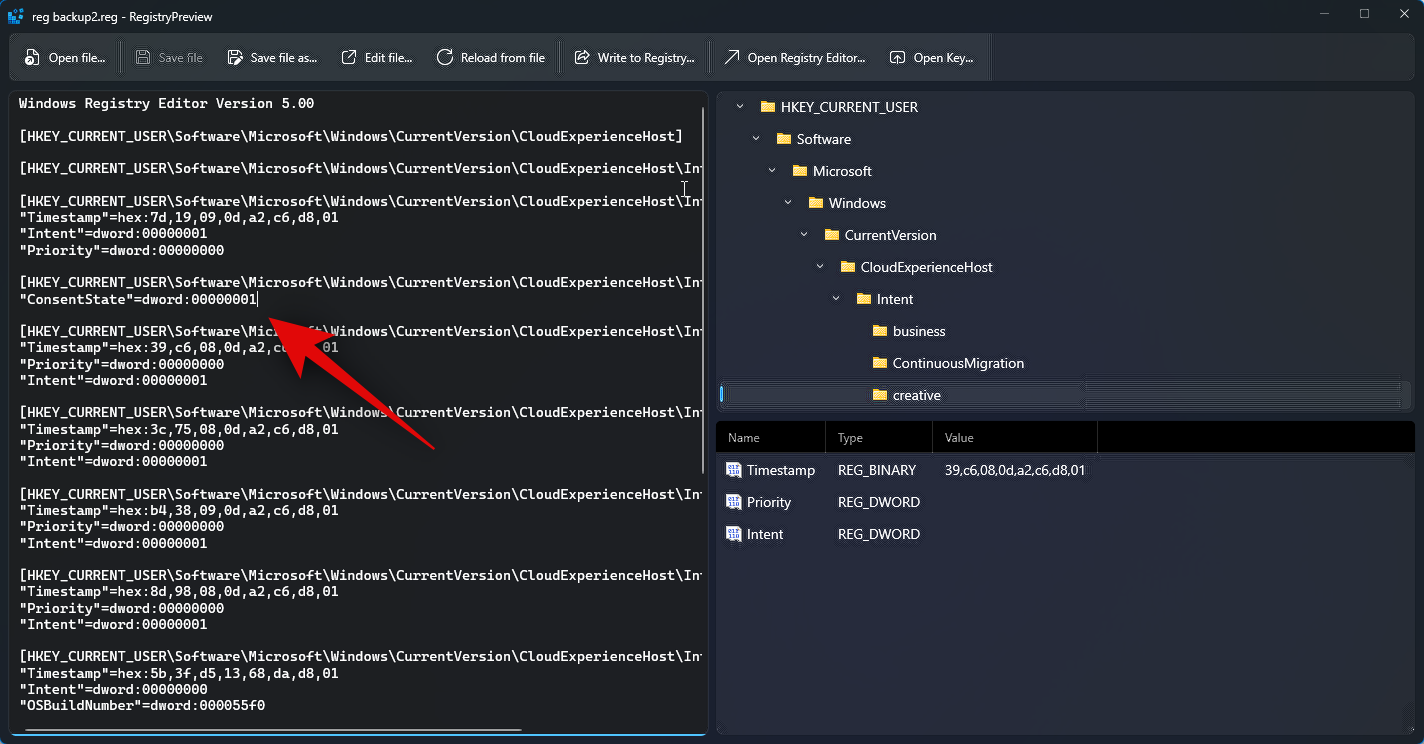
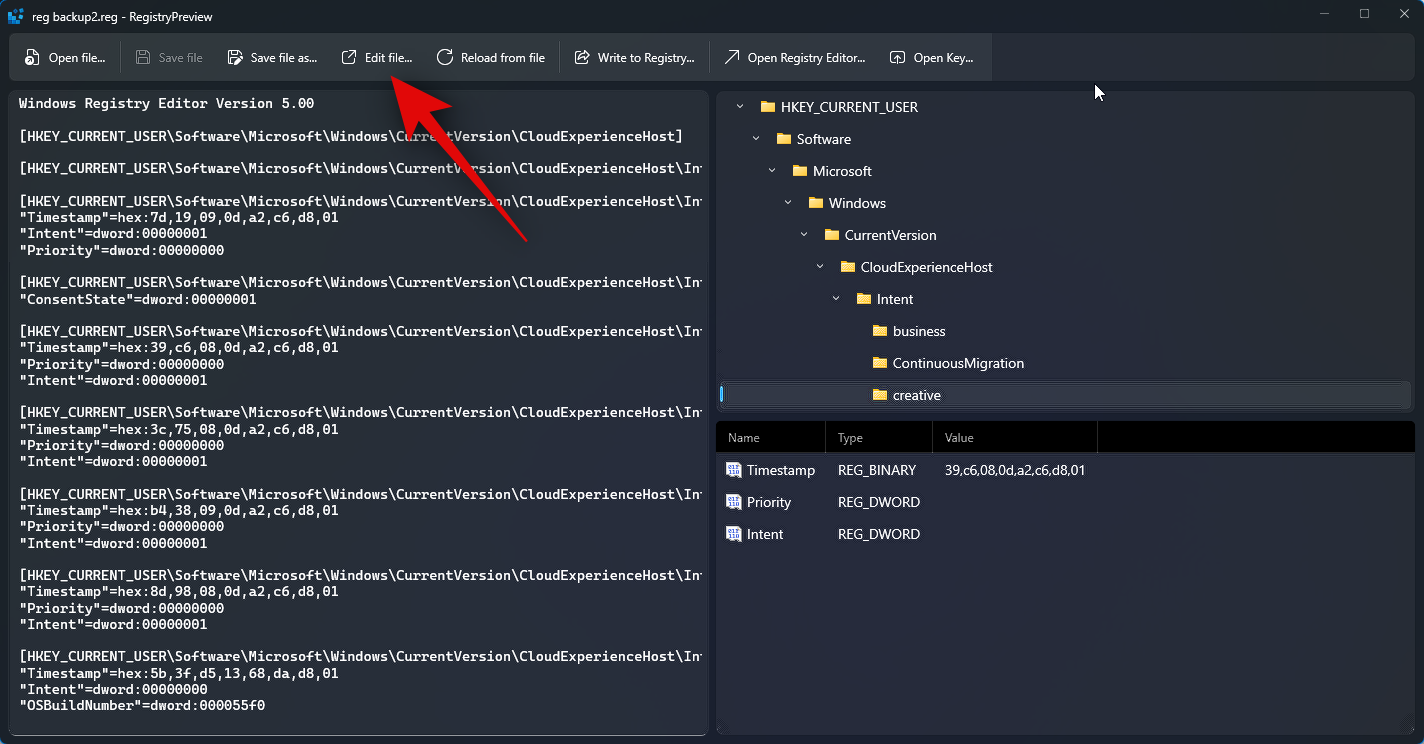
… at the top. You can also use the Ctrl E keyboard shortcut to edit files.
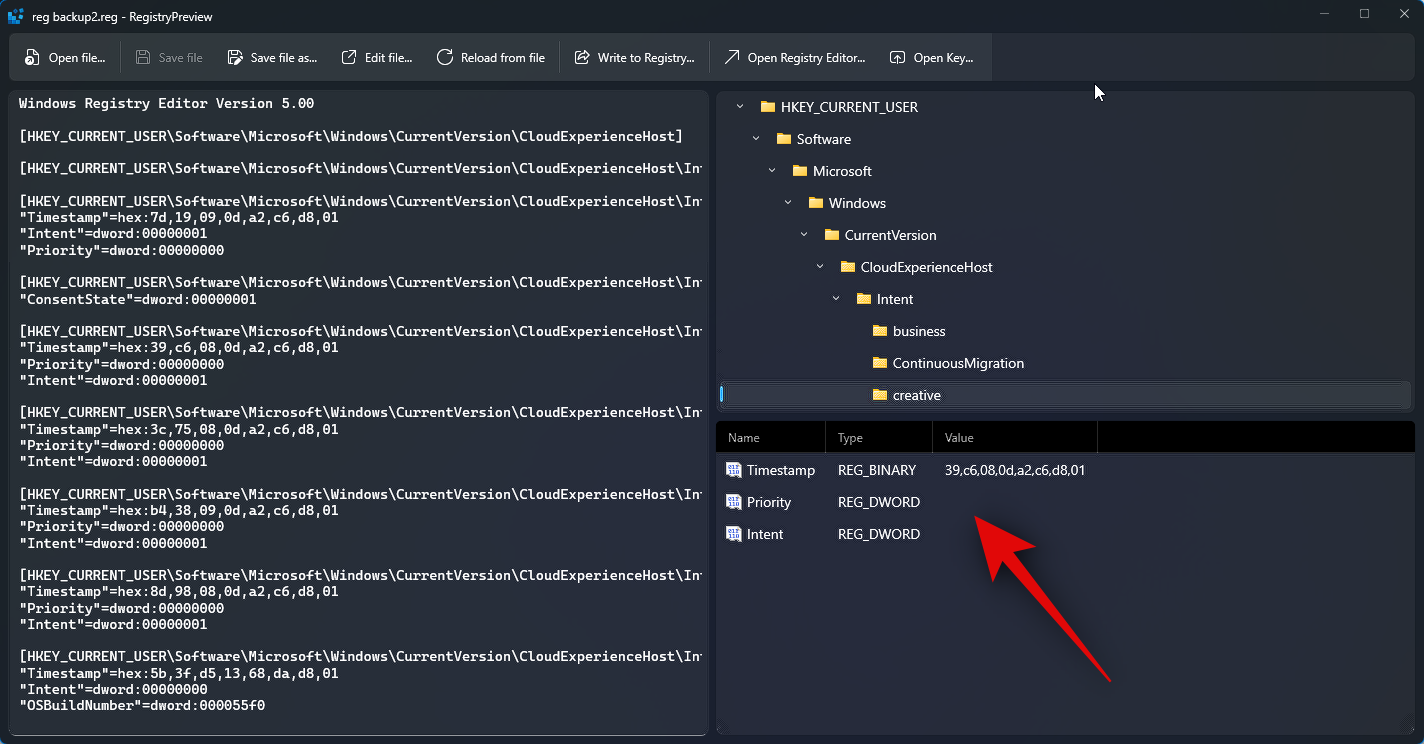
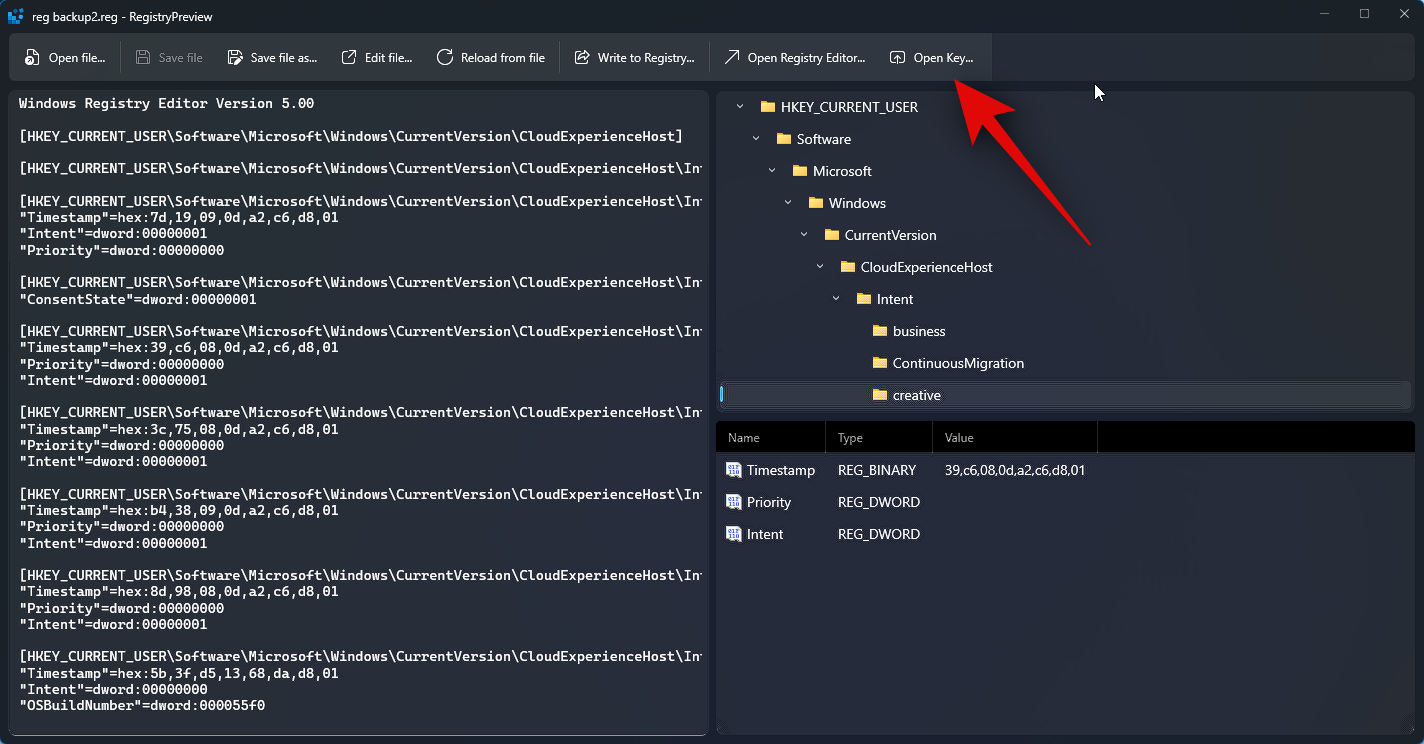
If a registry value exists in the PC's registry, you can click "Open Key... to view it in the Registry Editor. You can also use the Ctrl Shift R keyboard shortcut to Do the same.
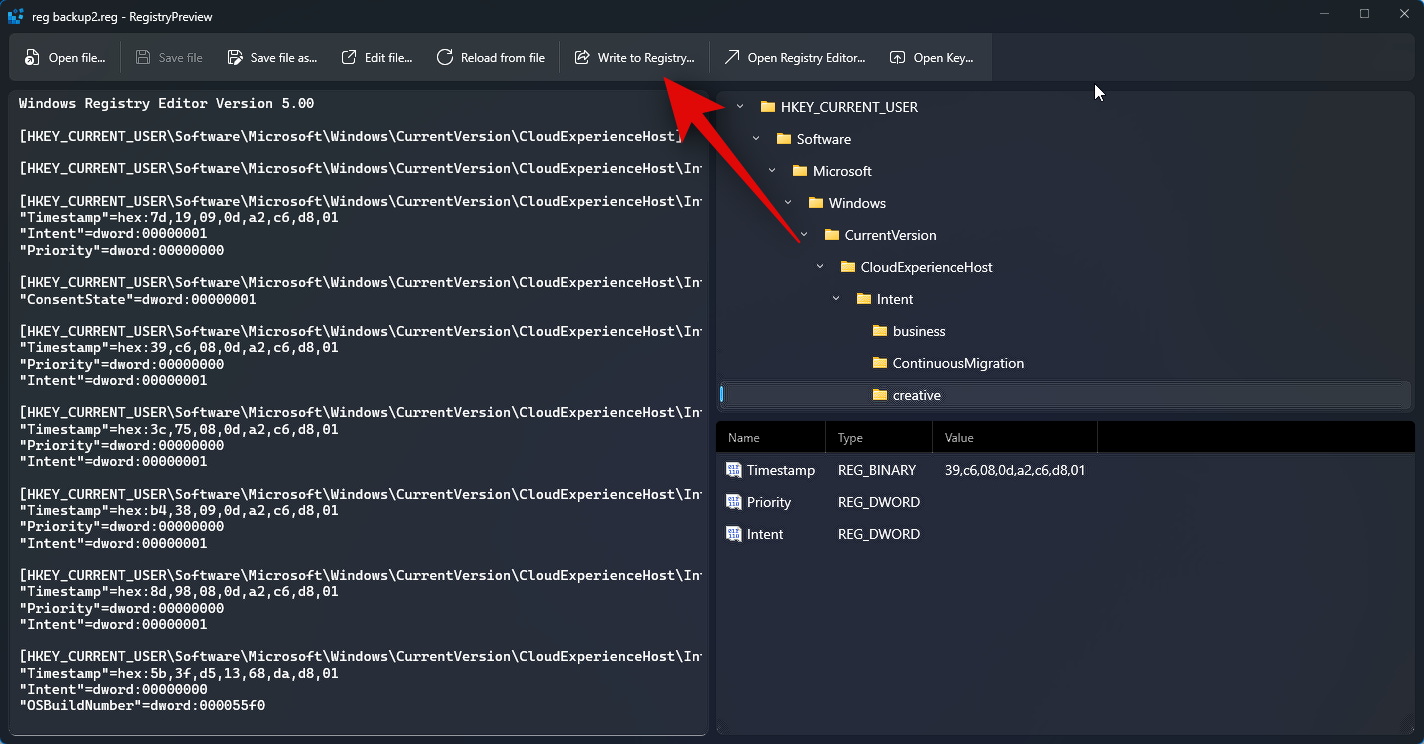
Also, after editing the file as needed, you can click "Write to Registry..." to add the value to your computer in the registry. You can also use the Ctrl W keyboard shortcut to perform the same action.
Also, you can click Save File… to Save changes you make to a registry file. There is also a keyboard shortcut Ctrl S that you can use to save changes you make to a file.
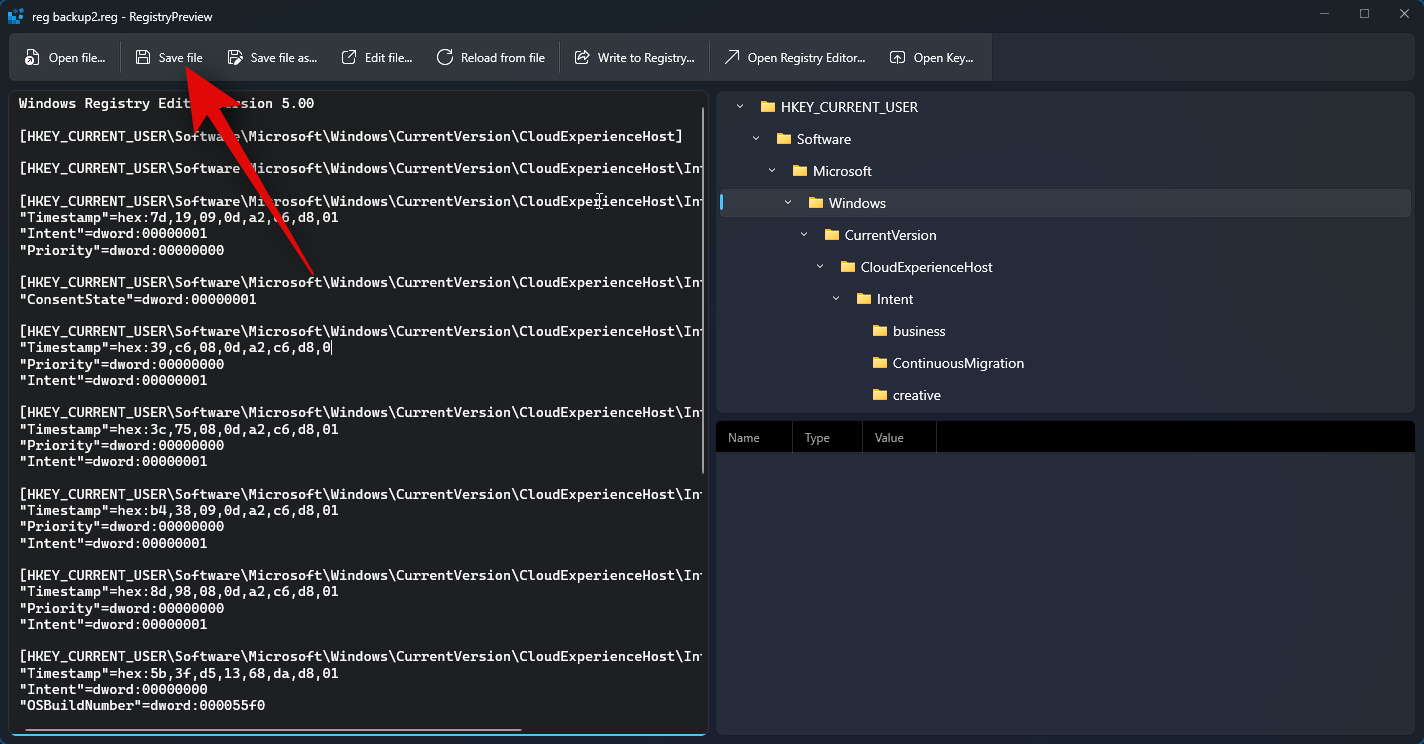
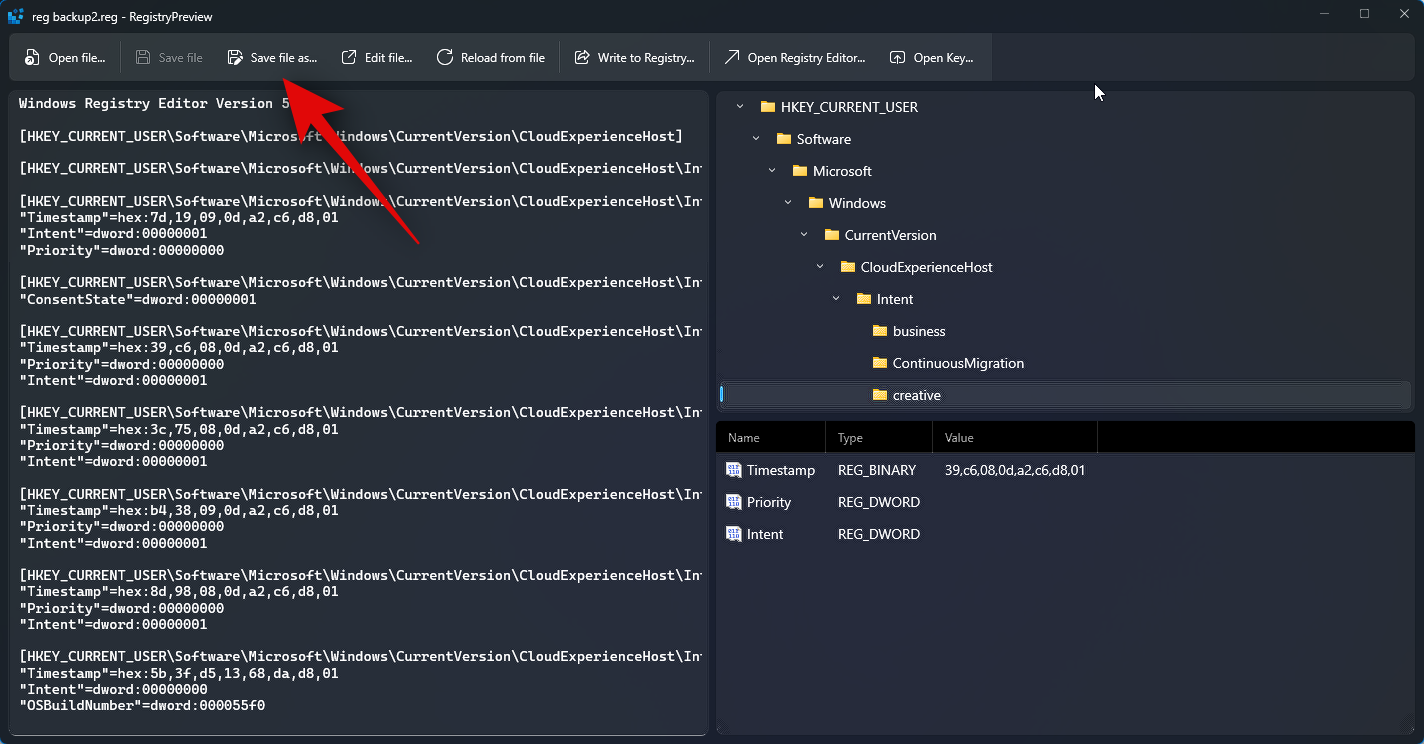
You can also use the "Save file as... option to save the registry file as a new file containing the changes you have made. You can also use the Ctrl Shift S keyboard shortcut to perform the same action.
This is how you can view and edit registry files on your PC using Registry Preview.
The above is the detailed content of Detailed explanation of how to browse and edit registry files using Windows PowerToys. For more information, please follow other related articles on the PHP Chinese website!

Hot AI Tools

Undresser.AI Undress
AI-powered app for creating realistic nude photos

AI Clothes Remover
Online AI tool for removing clothes from photos.

Undress AI Tool
Undress images for free

Clothoff.io
AI clothes remover

AI Hentai Generator
Generate AI Hentai for free.

Hot Article
Hot Tools

Notepad++7.3.1
Easy-to-use and free code editor

SublimeText3 Chinese version
Chinese version, very easy to use

Zend Studio 13.0.1
Powerful PHP integrated development environment

Dreamweaver CS6
Visual web development tools

SublimeText3 Mac version
God-level code editing software (SublimeText3)
Hot Topics


 How to recover expired WeChat files? Can expired WeChat files be recovered?
Feb 22, 2024 pm 02:46 PM
How to recover expired WeChat files? Can expired WeChat files be recovered?
Feb 22, 2024 pm 02:46 PM
Open WeChat, select Settings in Me, select General and then select Storage Space, select Management in Storage Space, select the conversation in which you want to restore files and select the exclamation mark icon. Tutorial Applicable Model: iPhone13 System: iOS15.3 Version: WeChat 8.0.24 Analysis 1 First open WeChat and click the Settings option on the My page. 2 Then find and click General Options on the settings page. 3Then click Storage Space on the general page. 4 Next, click Manage on the storage space page. 5Finally, select the conversation in which you want to recover files and click the exclamation mark icon on the right. Supplement: WeChat files generally expire in a few days. If the file received by WeChat has not been clicked, the WeChat system will clear it after 72 hours. If the WeChat file has been viewed,
 Photos cannot open this file because the format is not supported or the file is corrupted
Feb 22, 2024 am 09:49 AM
Photos cannot open this file because the format is not supported or the file is corrupted
Feb 22, 2024 am 09:49 AM
In Windows, the Photos app is a convenient way to view and manage photos and videos. Through this application, users can easily access their multimedia files without installing additional software. However, sometimes users may encounter some problems, such as encountering a "This file cannot be opened because the format is not supported" error message when using the Photos app, or file corruption when trying to open photos or videos. This situation can be confusing and inconvenient for users, requiring some investigation and fixes to resolve the issues. Users see the following error when they try to open photos or videos on the Photos app. Sorry, Photos cannot open this file because the format is not currently supported, or the file
 Can Tmp format files be deleted?
Feb 24, 2024 pm 04:33 PM
Can Tmp format files be deleted?
Feb 24, 2024 pm 04:33 PM
Tmp format files are a temporary file format usually generated by a computer system or program during execution. The purpose of these files is to store temporary data to help the program run properly or improve performance. Once the program execution is completed or the computer is restarted, these tmp files are often no longer necessary. Therefore, for Tmp format files, they are essentially deletable. Moreover, deleting these tmp files can free up hard disk space and ensure the normal operation of the computer. However, before deleting Tmp format files, we need to
 How to improve computer startup speed by modifying Windows 10 registry
Apr 19, 2024 am 08:01 AM
How to improve computer startup speed by modifying Windows 10 registry
Apr 19, 2024 am 08:01 AM
In the process of using the Windows 10 operating system, many users find that it takes a long time to start up their computers, which affects the user experience. In order to optimize the boot speed, some people have suggested that the purpose can be achieved by modifying the system registry. In response to this demand, this article will provide an in-depth analysis of how to effectively improve computer startup speed by properly adjusting Windows 10 registry settings. Let’s take a look below. Operation method 1. Use the "win+R" shortcut key to start running, enter "regedit", and click "OK" to open. 2. After entering the Registry Editor, click "HKEY_CURRENT_USERSoftwareMicrosoftWindowsCurren" in the left column
 How to transfer files from Quark Cloud Disk to Baidu Cloud Disk?
Mar 14, 2024 pm 02:07 PM
How to transfer files from Quark Cloud Disk to Baidu Cloud Disk?
Mar 14, 2024 pm 02:07 PM
Quark Netdisk and Baidu Netdisk are currently the most commonly used Netdisk software for storing files. If you want to save the files in Quark Netdisk to Baidu Netdisk, how do you do it? In this issue, the editor has compiled the tutorial steps for transferring files from Quark Network Disk computer to Baidu Network Disk. Let’s take a look at how to operate it. How to save Quark network disk files to Baidu network disk? To transfer files from Quark Network Disk to Baidu Network Disk, you first need to download the required files from Quark Network Disk, then select the target folder in the Baidu Network Disk client and open it. Then, drag and drop the files downloaded from Quark Cloud Disk into the folder opened by the Baidu Cloud Disk client, or use the upload function to add the files to Baidu Cloud Disk. Make sure to check whether the file was successfully transferred in Baidu Cloud Disk after the upload is completed. That's it
 What to do if the 0x80004005 error code appears. The editor will teach you how to solve the 0x80004005 error code.
Mar 21, 2024 pm 09:17 PM
What to do if the 0x80004005 error code appears. The editor will teach you how to solve the 0x80004005 error code.
Mar 21, 2024 pm 09:17 PM
When deleting or decompressing a folder on your computer, sometimes a prompt dialog box "Error 0x80004005: Unspecified Error" will pop up. How should you solve this situation? There are actually many reasons why the error code 0x80004005 is prompted, but most of them are caused by viruses. We can re-register the dll to solve the problem. Below, the editor will explain to you the experience of handling the 0x80004005 error code. Some users are prompted with error code 0X80004005 when using their computers. The 0x80004005 error is mainly caused by the computer not correctly registering certain dynamic link library files, or by a firewall that does not allow HTTPS connections between the computer and the Internet. So how about
 What is hiberfil.sys file? Can hiberfil.sys be deleted?
Mar 15, 2024 am 09:49 AM
What is hiberfil.sys file? Can hiberfil.sys be deleted?
Mar 15, 2024 am 09:49 AM
Recently, many netizens have asked the editor, what is the file hiberfil.sys? Can hiberfil.sys take up a lot of C drive space and be deleted? The editor can tell you that the hiberfil.sys file can be deleted. Let’s take a look at the details below. hiberfil.sys is a hidden file in the Windows system and also a system hibernation file. It is usually stored in the root directory of the C drive, and its size is equivalent to the size of the system's installed memory. This file is used when the computer is hibernated and contains the memory data of the current system so that it can be quickly restored to the previous state during recovery. Since its size is equal to the memory capacity, it may take up a larger amount of hard drive space. hiber
 How to install GHO files
Feb 19, 2024 pm 10:06 PM
How to install GHO files
Feb 19, 2024 pm 10:06 PM
The gho file is a GhostImage image file, which is usually used to back up the entire hard disk or partition data into a file. In some specific cases, we need to reinstall this gho file back to the hard drive to restore the hard drive or partition to its previous state. The following will introduce how to install the gho file. First, before installation, we need to prepare the following tools and materials: Entity gho file: Make sure you have a complete gho file, which usually has a .gho suffix and contains a backup