#There is a rumor that has been circulating since ancient times... During the Go language interview, someone will ask about the implementation principle of the interface. Why is this? Why are you so obsessed with interfaces?
In fact, the interface design of the Go language plays a very important role in the whole. Without it, many programs would probably not run happily.
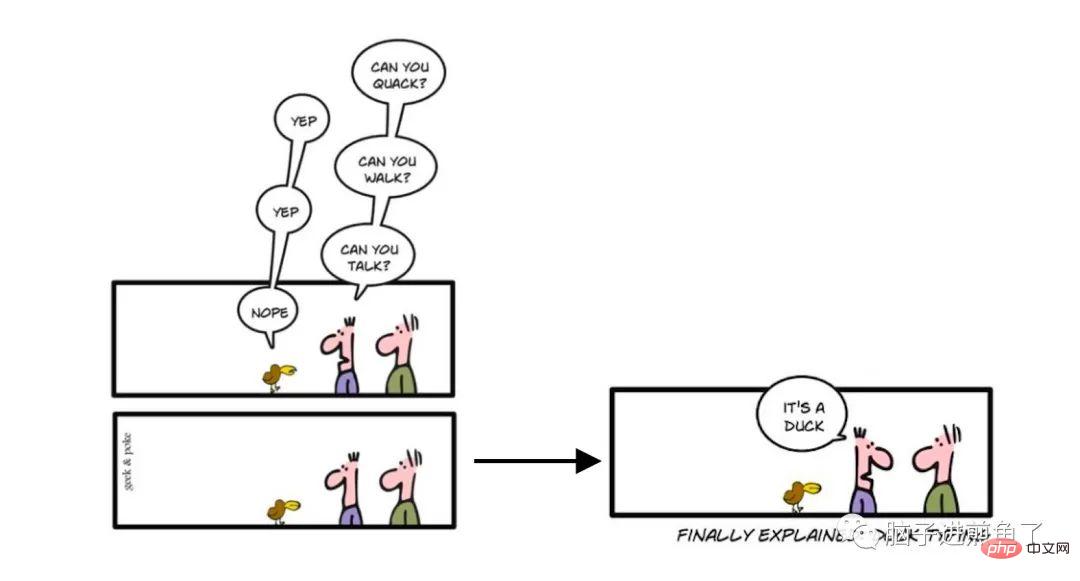
In the semantics of the Go language, as long as a certain type implements a defined set of methods, it is considered to be the same type and the same thing. People often call it duck typing because it is relatively consistent with the definition of duck typing.

In Wikipedia, the proverb of duck type is defined as "If it looks like a duck, swims like a duck , and quacks like a duck, then it probably is a duck.", which translates to "If it looks like a duck, swims like a duck, and quacks like a duck, then it can be considered a duck."
Returning to the Go language, under the interface, what kind of underlying structure does the interface contain, and what are its design principles and thinking? We can't just look at the surface. In this chapter, we will analyze and explain one by one. Let’s see what “thing” is deep inside.
Interface declaration in Go language:
type Human interface {
 Say(s string) error
}The main body of the keyword is type xxx interface, which can be followed by square brackets Write a method set to declare and define the set of methods contained in the interface.
Further code demonstration:
type Human interface {
 Say(s string) error
}

type TestA string

func (t TestA) Say(s string) error {
 fmt.Printf("煎鱼:%s\n", s)
 return nil
}

func main() {
 var h Human
 var t TestA
 _ = t.Say("炸鸡翅")
 h = t
 _ = h.Say("烤羊排")
}Output result:
煎鱼:炸鸡翅
煎鱼:烤羊排
我们在上述代码中,声明了一个名为 Human 的 interface,其包含一个 Say 方法。同时我们声明了一个 TestA 类型,也有自己的一个 Say 方法。他们两者的方法入参和出参类型均为一样。
而与此同时,我们在主函数 main 中通过声明和赋值,成功将类型为 TestA 的变量 t 赋给了类型为 Human 的变量 h,也就是说两者只因有了个 Say 方法,在 Go 语言的编译器中就认为他们是 “一样” 的了,这也就是业界中常说的鸭子类型。
通过上面的功能代码一看,似乎 Go 语言非常优秀。一个接口,不同的类型,2 个包含相同的方法,也能够对标到一起。
接口到底是怎么实现的呢?底层数据结构又是什么?带着问题,我们开始深挖细节之路。
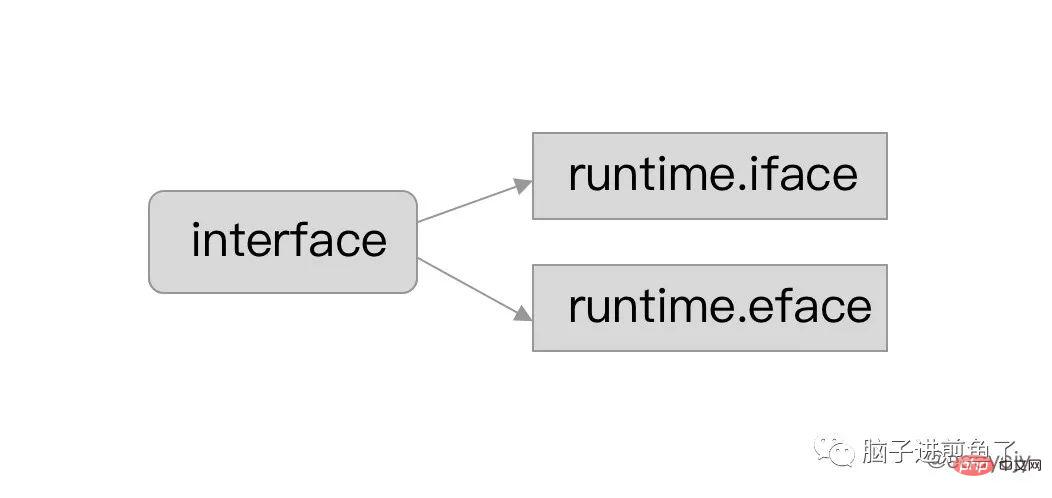
在 Go 语言中,接口的底层数据结构在运行时一共分为两类结构体(struct),分别是:

runtime.eface 结构体:表示不包含任何方法的空接口,也称为 empty interface。runtime.iface 结构体:表示包含方法的接口。首先我们来介绍 eface,看看 “他” 到底是何许人也。源码如下:
type eface struct {
 _type *_type
 data  unsafe.Pointer
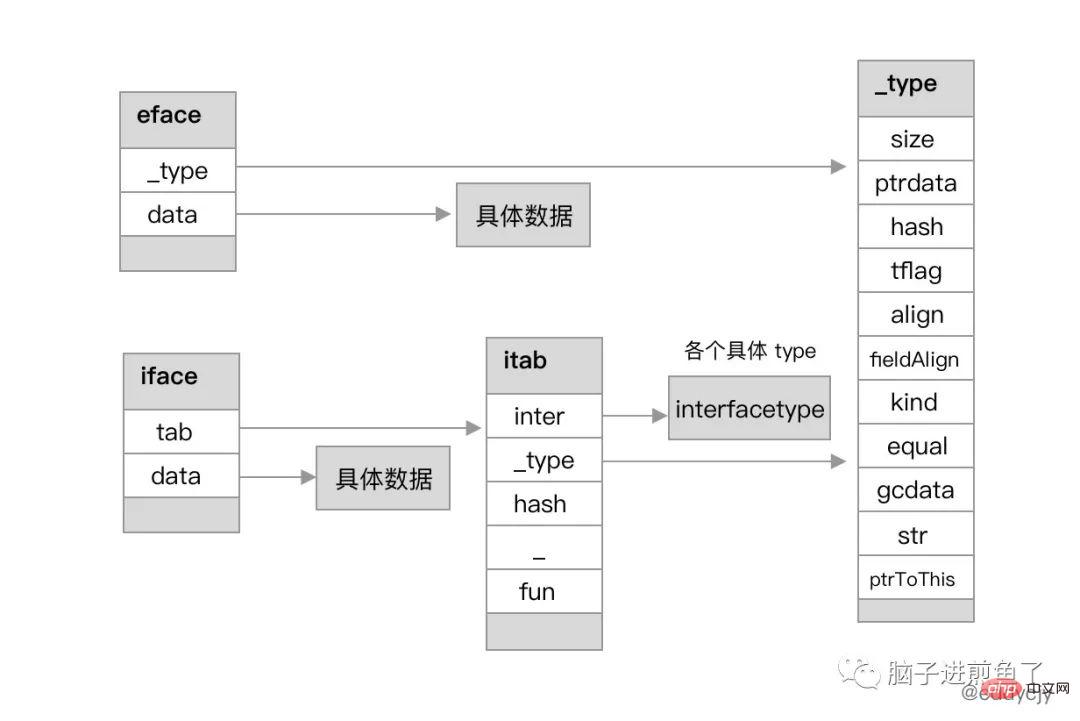
}其表示不包含任何方法的空接口。在结构上来讲 eface 非常简单,就两个属性,分别是 _type 和 data 属性,分别代表底层的指向的类型信息和指向的值信息指针。
再进一步到 type 属性里看看,其包含的类型信息更多:
type _type struct {
 size       uintptr
 ptrdata    uintptr
 hash       uint32
 tflag      tflag
 align      uint8
 fieldAlign uint8
 kind       uint8
 equal func(unsafe.Pointer, unsafe.Pointer) bool
 gcdata    *byte
 str       nameOff
 ptrToThis typeOff
}kindBool、kindInt、kindInt8、kindInt16 等。总结一句,就是类型信息所需的信息都会存储在这里面,其中包含字节大小、类型标志、内存对齐、GC 等相关属性。而在 eface 来讲,其由于没有方法集的包袱,因此只需要存储类型和值信息的指针即可,非常简单。
其次就是我们日常在应用程序中应用的较多的 iface,源码如下:
type iface struct {
 tab  *itab
 data unsafe.Pointer
}与 eface 结构体类型一样,主要也是分为类型和值信息,分别对应 tab 和 data 属性。但是我们再加思考一下,为什么 iface 能藏住那么多的方法集呢,难道施了黑魔法?
为了解密,我们进一步深入看看 itab 结构体。源码如下:
type itab struct {
 inter *interfacetype
 _type *_type
 hash  uint32
 _     [4]byte
 fun   [1]uintptr
}inter:接口的类型信息。_type:具体类型信息hash:_type.hash 的副本,用于目标类型和接口变量的类型对比判断。fun:底层数组,存储接口的方法集的具体实现的地址,其包含一组函数指针,实现了接口方法的动态分派,且每次在接口发生变更时都会更新。对应 func 属性会在后面的章节进一步展开讲解,便于大家对于接口中的函数指针管理的使用和理解,在此可以先行思考长度为 1 的 uintptr 数组是如何做到存储多方法的?
接下来我们进一步展开 interfacetype 结构体。源码如下:
type nameOff int32
type typeOff int32

type imethod struct {
 name nameOff
 ityp typeOff
}

type interfacetype struct {
 typ     _type
 pkgpath name
 mhdr    []imethod
}_type:接口的具体类型信息。pkgpath:接口的包(package)名信息。mhdr:接口所定义的函数列表。而相对应 interfacetype,还有各种类型的 type。例如:maptype、arraytype、chantype、slicetype 等,都是针对具体的类型做的具体类型定义:
type arraytype struct {
 typ   _type
 elem  *_type
 slice *_type
 len   uintptr
}

type chantype struct {
 typ  _type
 elem *_type
 dir  uintptr
}
...若有兴趣自行翻看 runtime 里相应源码即可,都是一些基本数据结构信息的存储和配套方法,就不在此一一展开讲解了。

总结来讲,接口的数据结构基本表示形式比较简单,就是类型和值描述。再根据其具体的区别,例如是否包含方法集,具体的接口类型等进行组合使用。
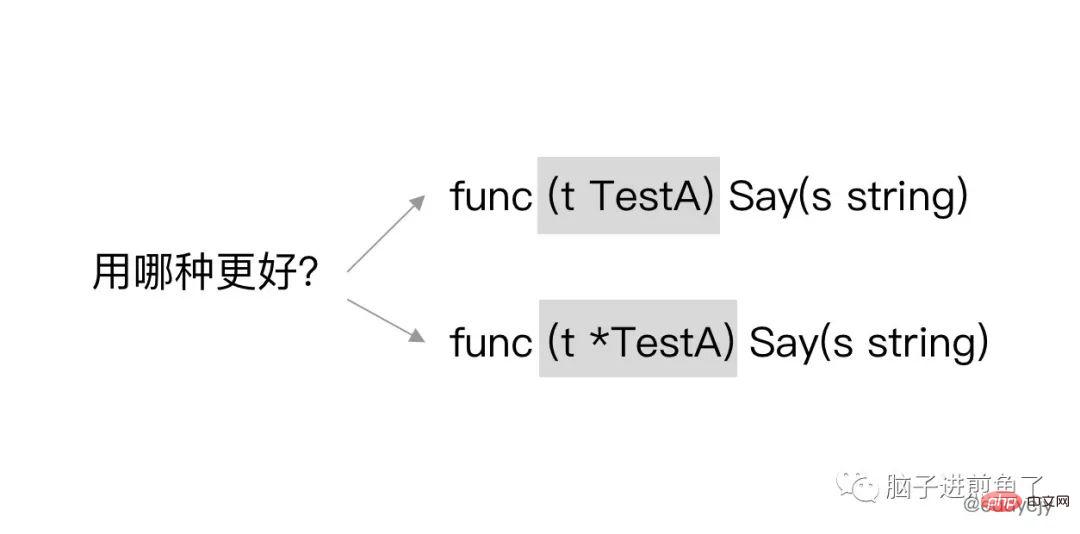
在接口的具体应用使用场景中,有一个是大家常常会碰到,甚至会对其产生较大纠结心里的东西。那就是到底用值接收者,又或是用指针接收者来声明。

演示代码如下:
type Human interface {
 Say(s string) error
 Eat(s string) error
}

type TestA struct{}

func (t TestA) Say(s string) error {
 fmt.Printf("说煎鱼:%s\n", s)
 return nil
}

func (t *TestA) Eat(s string) error {
 fmt.Printf("吃煎鱼:%s\n", s)
 return nil
}

func main() {
 var h Human = &TestA{}
 _ = h.Say("催更")
 _ = h.Eat("真香")
}在 Human 接口中,其包含 Say 和 Eat 方法,并且在 TestA 结构体中我们进行了针对性的实现。
具体的区别就是:
Say 方法中是值接收对象,如:(t TestA)。Eat 方法中是指针接收对象,如:(t *TestA)。最终的输出结果:
说煎鱼:催更
吃煎鱼:真香
如果我们将演示代码的主函数 main 改成下述这样:
func main() {
 var h Human = TestA{}
 _ = h.Say("催更")
 _ = h.Eat("真香")
}你觉得这段代码还能正常运行吗?在编译时会出现如下报错信息:
# command-line-arguments
./main.go:23:6: cannot use TestA literal (type TestA) as type Human in assignment:
 TestA does not implement Human (Eat method has pointer receiver)
显然是不能的。因为接口校验不对,编译器过不了。其根本原因在于 Eat 是指针接收者。而当声明改为 TestA{} 后,其就会变成值对象,所以不匹配。
这时候又会出现新的问题,为什么在上面代码声明为 &TestA{} 时,那肯定是指针引用了,那为什么 Say 方法又能正常运行,不会报错呢?
其实 TestA{} 实现了 Say 方法,那么 &TestA{} 也能自动拥有该方法。显然,这是 Go 语言自身在背后做了一些事情。
因此如果我们实现了一个值对象的接收者时,也会相应拥有了一个指针接收者。两者并不会互相影响,因为值对象会产生值拷贝,对象会独立开来。
而指针对象的接收者不行,因为指针引用的对象,在应用上是期望能够直接对源接收者的值进行修改,若又支持值接收者,显然是不符合其语义的。
既然支持值接收,又支持指针接收。那平时在工程应用开发中,到底用谁?还是说随便用?
其实问题的答案,在前面就有提到。本质上还是要看你业务逻辑所期望修改的是什么?还是说程序很严谨,每次都重新 new 一个,是值又或是指针引用对于程序逻辑的结果都没有任何的影响。
总结一下,如果你想使用指针接收者,可以想想是否有以下诉求:
但若应用场景没什么区别,只是个人习惯问题就不用过于纠结了,适度统一也是很重要的一环。
在 Go 语言中使用接口,必搭配一个 “技能”。那就是进行类型断言(type assertion):
var i interface{} = "吃煎鱼"

// 进行变量断言,若不判断容易出现 panic
s := i.(string)

// 进行安全断言
s, ok := i.(string)在 switch case 中,还有另外一种写法:
var i interface{} = "炸煎鱼"

// 进行 switch 断言
switch i.(type) {
case string:
    // do something...
case int:
    // do something...
case float64:
    // do something...
}采取的是 (变量).(type) 的调用方式,再给予 case 不同的类型进行判断识别。在 Go 语言的背后,类型断言其实是在编译器翻译后,根据 iface 和 eface 分别对应了下述方法:
func assertI2I2(inter *interfacetype, i iface) (r iface, b bool) {
 tab := i.tab
 if tab == nil {
  return
 }
 if tab.inter != inter {
  tab = getitab(inter, tab._type, true)
  if tab == nil {
   return
  }
 }
 r.tab = tab
 r.data = i.data
 b = true
 return
}
func assertI2I(inter *interfacetype, i iface) (r iface)

func assertE2I2(inter *interfacetype, e eface) (r iface, b bool)
func assertE2I(inter *interfacetype, e eface) (r iface)主要是根据接口的类型信息进行一轮判断和识别,基本就完成了。主要核心在于 getitab 方法,会在后面进行统一介绍和说明。
演示代码如下:
func main() {
 x := "煎鱼"
 var v interface{} = x
 fmt.Println(v)
}查看汇编代码:
 0x0021 00033 (main.go:9) LEAQ go.string."煎鱼"(SB), AX
 0x0028 00040 (main.go:9) MOVQ AX, (SP)
 0x002c 00044 (main.go:9) MOVQ $6, 8(SP)
 0x0035 00053 (main.go:9) PCDATA $1, $0
 0x0035 00053 (main.go:9) CALL runtime.convTstring(SB)
 0x003a 00058 (main.go:9) MOVQ 16(SP), AX
 0x003f 00063 (main.go:10) XORPS X0, X0
主要对应了 runtime.convTstring 方法。同时很显然其是根据类型来区分来方法:
func convTstring(val string) (x unsafe.Pointer) {
 if val == "" {
  x = unsafe.Pointer(&zeroVal[0])
 } else {
  x = mallocgc(unsafe.Sizeof(val), stringType, true)
  *(*string)(x) = val
 }
 return
}

func convT16(val uint16) (x unsafe.Pointer)
func convT32(val uint32) (x unsafe.Pointer)
func convT64(val uint64) (x unsafe.Pointer)
func convTstring(val string) (x unsafe.Pointer)
func convTslice(val []byte) (x unsafe.Pointer)
func convT2Enoptr(t *_type, elem unsafe.Pointer) (e eface)
func convT2I(tab *itab, elem unsafe.Pointer) (i iface)
...前面有提到接口中的 fun [1]uintptr 属性会可以存储接口的方法集,但不知道为什么。
接下来我们将进行具体的分析,演示代码:
type Human interface {
 Say(s string) error
 Eat(s string) error
 Walk(s string) error
}

type TestA string

func (t TestA) Say(s string) error {
 fmt.Printf("煎鱼:%s\n", s)
 return nil
}
func (t TestA) Eat(s string) error {
 fmt.Printf("煎鱼:%s\n", s)
 return nil
}

func (t TestA) Walk(s string) error {
 fmt.Printf("煎鱼:%s\n", s)
 return nil
}

func main() {
 var h Human
 var t TestA
 h = t
 _ = h.Eat("烤羊排")
 _ = h.Say("炸鸡翅")
 _ = h.Walk("去炸鸡翅")
}执行 go build -gcflags '-l' -o awesomeProject . 编译后,再次执行 go tool objdump -s "main" awesomeProject。
查看具体的汇编代码:
  LEAQ go.itab.main.TestA,main.Human(SB), AX
  TESTB AL, 0(AX)
  MOVQ 0x10(SP), AX
  MOVQ AX, 0x28(SP)
  MOVQ go.itab.main.TestA,main.Human+32(SB), CX
  MOVQ AX, 0(SP)
  LEAQ go.string.*+3048(SB), DX
  MOVQ DX, 0x8(SP)
  MOVQ $0x9, 0x10(SP)
  CALL CX
  MOVQ go.itab.main.TestA,main.Human+24(SB), AX
  MOVQ 0x28(SP), CX
  MOVQ CX, 0(SP)
  LEAQ go.string.*+3057(SB), DX
  MOVQ DX, 0x8(SP)
  MOVQ $0x9, 0x10(SP)
  CALL AX
  MOVQ go.itab.main.TestA,main.Human+40(SB), AX
  MOVQ 0x28(SP), CX
  MOVQ CX, 0(SP)
  LEAQ go.string.*+4973(SB), CX
  MOVQ CX, 0x8(SP)
  MOVQ $0xc, 0x10(SP)
  CALL AX
结合来看,虽然 fun 属性的类型是 [1]uintptr,只有一个元素,但其实就是存放了接口方法集的首个方法的地址信息,接着根据顺序往后计算并获取就好了。也就是说其是存在一定规律的。在存入方法时就决定了,所以获取也能明确。
我们进一步展开,看看 itab hash table 是如何获取和新增的。
getitab 方法的主要作用是获取 itab 元素,若不存在则新增。源码如下:
func getitab(inter *interfacetype, typ *_type, canfail bool) *itab {
 // 省略一些边界、异常处理
 var m *itab

 t := (*itabTableType)(atomic.Loadp(unsafe.Pointer(&itabTable)))
 if m = t.find(inter, typ); m != nil {
  goto finish
 }

 lock(&itabLock)
 if m = itabTable.find(inter, typ); m != nil {
  unlock(&itabLock)
  goto finish
 }

 m = (*itab)(persistentalloc(unsafe.Sizeof(itab{})+uintptr(len(inter.mhdr)-1)*sys.PtrSize, 0, &memstats.other_sys))
 m.inter = inter
 m._type = typ
 m.hash = 0
 m.init()
 itabAdd(m)
 unlock(&itabLock)
finish:
 if m.fun[0] != 0 {
  return m
 }

 panic(&TypeAssertionError{concrete: typ, asserted: &inter.typ, missingMethod: m.init()})
}atomic.Loadp 方法加载并查找现有的 itab hash table,看看是否是否可以找到所需的 itab 元素。lock 方法对 itabLock 上锁,并进行重试(再一次查找)。finish 标识的收尾步骤。itabAdd 方法新增到全局的 hash table 中。fun 属性的首位地址,继续后续业务逻辑。itabAdd 方法的主要作用是将所生成好的 itab 元素新增到 itab hash table 中。源码如下:
func itabAdd(m *itab) {
 // 省略一些边界、异常处理
 t := itabTable
 if t.count >= 3*(t.size/4) { // 75% load factor
  t2 := (*itabTableType)(mallocgc((2+2*t.size)*sys.PtrSize, nil, true))
  t2.size = t.size * 2
  iterate_itabs(t2.add)
  if t2.count != t.count {
   throw("mismatched count during itab table copy")
  }

  atomicstorep(unsafe.Pointer(&itabTable), unsafe.Pointer(t2))
  t = itabTable
 }
 t.add(m)
}mallocgc 方法申请内存,按既有 size 大小扩容双倍容量。itab 元素到 hash table 中。在本文中,我们先介绍了 Go 语言接口的 runtime.eface 和 runtime.iface 两个基本数据结构,其代表了一切的开端。
随后针对值接受者和指针接收者进行了详细的说明,同时日常用的较多的类型断言和转换也一一进行了描述。
最后对接口的多方法这个神秘的地方进行了基本分析和了解,相信这一番轮流吸收下来,能够打开大家对接口的一个新的理解。
The above is the detailed content of A thorough understanding of Go language decryption interface interface. For more information, please follow other related articles on the PHP Chinese website!
 Usage of Type keyword in Go
 How to implement linked list in go
 What are the Go language programming software?
 How to learn go language from 0 basics
 What are the methods to implement operator overloading in Go language?
 What are the operators in Go language?
 Why is my phone not turned off but when someone calls me it prompts me to turn it off?
 What is mobile phone HD?
 How to run code html in vscode


