
face recognition algorithm. Face recognition is a relatively common technology in computer vision. In life, the face recognition scenario we are most exposed to is face attendance. I have also written a special article about face recognition before. Interested friends can take a look at the attendance project.
The core task of the face recognition algorithm is to identify the position of the face from a picture. There are many different recognition algorithms, and I will introduce them one by one below.

This algorithm uses HoG to extract facial features in the picture, and uses the SVM algorithm for classification.
HoG (Histogram of Oriented Gradient, Histogram of Oriented Gradient) feature is a feature descriptor used for object detection in computer vision and image processing, through calculation and statistical image The gradient direction histogram of the local area is used to form the feature.
dlib There is an implementation of this algorithm in the library. Let’s take a look at the core code
import dlib
# 加载预训练的 HoG 人脸检测器
hog_face_detector = dlib.get_frontal_face_detector()

# 对图片进行人脸检测
results = hog_face_detector(imgRGB, 0)

for bbox in results:
  x1 = bbox.left()  # 人脸左上角x坐标
  y1 = bbox.top()  # 人脸左上角y坐标
  x2 = bbox.right()  # 人脸右下角x坐标
  y2 = bbox.bottom()  # 人脸右下角y坐标
results Stores multiple faces detected in a picture , traversing results can get the rectangular frame of each face.
Detection examples are as follows:
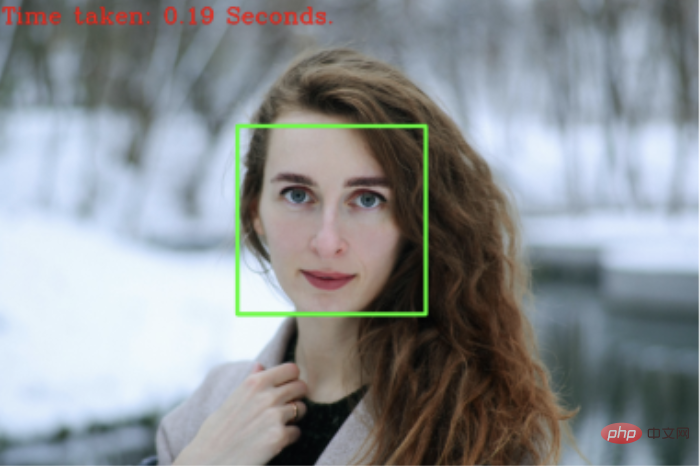
The green box outlines the face detected by the algorithm.
HoG 人脸检测由于采用传统机器学习算法,所以性能比较高,在CPU上运行也可以比较快。但它无法检测小于 80*80 的人脸,对旋转人脸、非正面人脸,识别效果也不太好。
虽然传统机器学习算法检测更快,但准确度却有待提升。基于深度学习的人脸检测算法往往会更加准确。
这里介绍的是使用残差网络ResNet-10通过网络(模型)在图像的单通道( Single Shot Detector,SSD)中检测多个人脸。简称SSD算法。
首先,需要将原始图片进行blob预处理,然后直接送入模型,进行检测
cv2库提供了该算法的实现,核心代码如下:
import cv2

# 加载预训练的 SSD 模型
opencv_dnn_model = cv2.dnn.readNetFromCaffe(
      prototxt="models/deploy.prototxt"
      , caffeModel="models/res10_300x300_ssd_iter_140000_fp16.caffemodel")

# 原始图片 blob 处理
preprocessed_image = cv2.dnn.blobFromImage(image, scalefactor=1.0, size=(300, 300), mean=(104.0, 117.0, 123.0), swapRB=False, crop=False)

# blob 图片送入模型
opencv_dnn_model.setInput(preprocessed_image)

# 模型推理,进行人脸检测
results = opencv_dnn_model.forward()

# 遍历人脸
for face in results[0][0]:
  # 置信度
  face_confidence = face[2]

  # 人脸边框的左上角和右下角坐标点
  x1 = int(bbox[0] * image_width)
  y1 = int(bbox[1] * image_height)
  x2 = int(bbox[2] * image_width)
y2 = int(bbox[3] * image_height)results[0][0]存放了检测出来的多张人脸,每张人脸用数组表达,数组的第3位存放置信度,可以通过阈值过滤不置信的人脸。数组的第4~7位存放检测出来的人脸矩形框左上角和右下角的坐标。
相比于 HoG 人脸检测,SSD 算法对遮挡、非正面人脸也能检测出来。
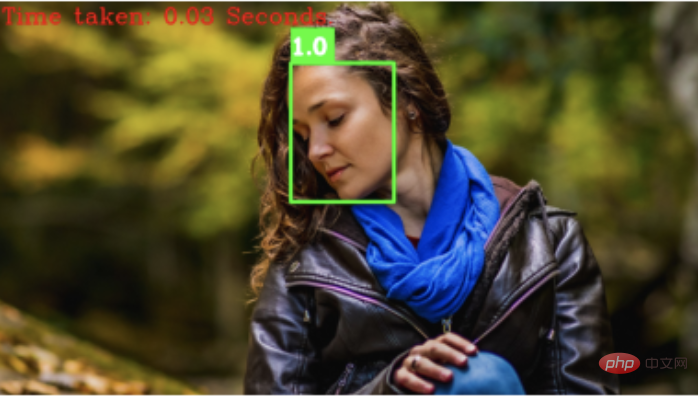
卷积就不多说了,了解计算机视觉的都知道。
dlib库提供了卷积神经网络人脸检测算法的实现,用法跟之前类似
import dlib

# 记载预训练模型
cnn_face_detector = dlib.cnn_face_detection_model_v1("models/mmod_human_face_detector.dat")

# 人脸检测
results = cnn_face_detector(imgRGB, 0)

# 遍历每张人脸
for face in results:
  # 人脸边框
  bbox = face.rect

  # 人脸边框的左上角和右下角坐标点
  x1 = int(bbox.left() * (width/new_width))
  y1 = int(bbox.top() * (height/new_height))
  x2 = int(bbox.right() * (width/new_width))
y2 = int(bbox.bottom() * (height/new_height))results的解析跟上面类似,这里就不在赘述了。
采用卷积神经网络的人脸检测算法优势很明显,比前两个更准确和健壮,并且还能够检测遮挡下的人脸。
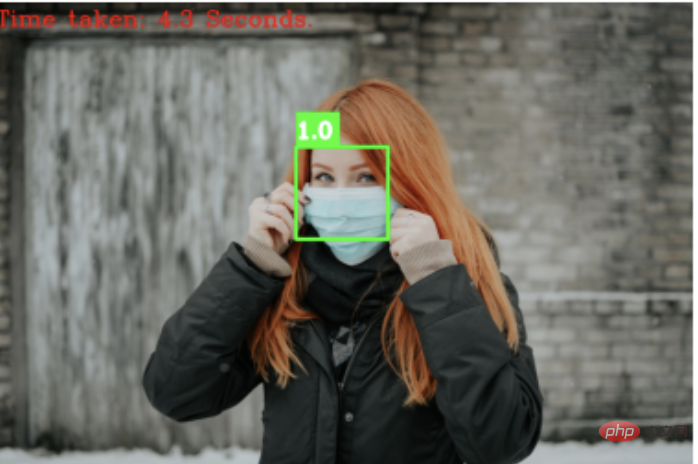
即便非正面、且光线暗的图片,也能很好检测出来
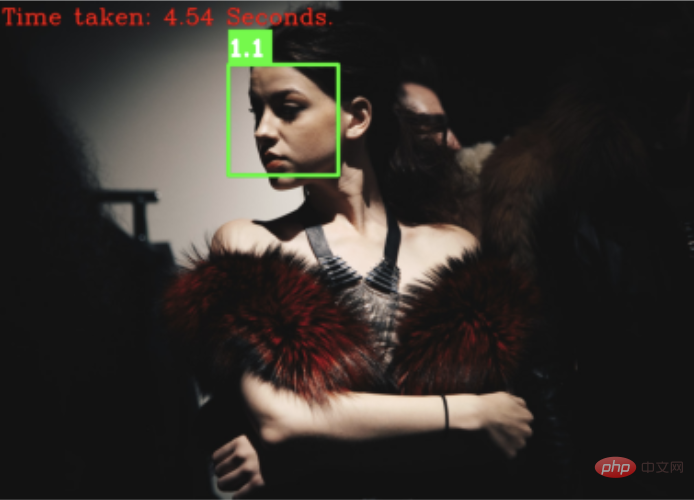
但该算法相应的缺点也很明显,检测过程所花费的时间非常长,无法在 CPU 上实时运行。
上面的算法要么精度高、速度慢,要么速度快,精度低。那有没有一种检测算法,既有高准确率,又有高性能呢?
答案是肯定的,BlazeFace是一种非常轻量级且高度准确的人脸检测器,号称亚毫秒级的人脸检测器。其灵感来自 Single Shot MultiBox Detector (SSD) 和 MobileNetv2。
Mediapipe库提供了该算法的实现,核心代码如下:
import mediapipe as mp

# 画图工具
mp_drawing = mp.solutions.drawing_utils

# 初始化人脸检测模型
mp_face_detection = mp.solutions.face_detection
mp_face_detector = mp_face_detection.FaceDetection(min_detection_confidence=0.4)

results = mp_face_detector.process(imgRGB)

if results.detections:

  # 变脸检测出的人脸
  for face_no, face in enumerate(results.detections):

      # 画人脸关键点
      mp_drawing.draw_detection(image=output_image, detection=face, keypoint_drawing_spec=mp_drawing.DrawingSpec(color=(0,255,0),thickness=-1, circle_radius=image_width//115), bbox_drawing_spec=mp_drawing.DrawingSpec(color=(0,255,0),thickness=image_width//180))

      # 画人脸框
      face_bbox = face.location_data.relative_bounding_box
      x1 = int(face_bbox.xmin*image_width)
      y1 = int(face_bbox.ymin*image_height)

cv2.rectangle(output_image, pt1=(x1, y1-image_width//20), pt2=(x1+image_width//16, y1), color=(0, 255, 0), thickness=-1)效果如下:
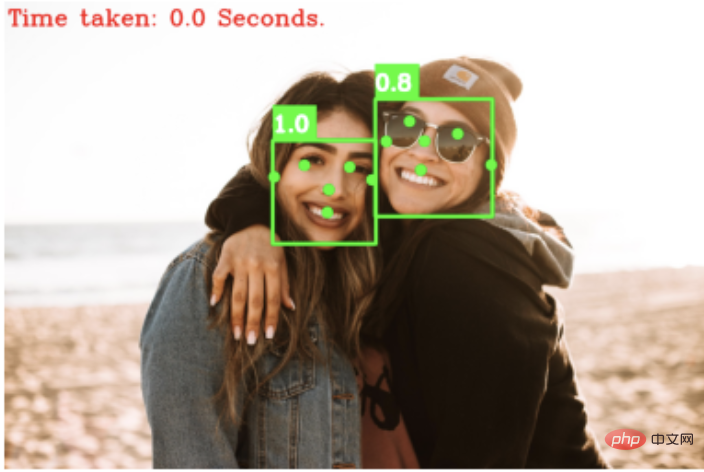
As you can see, the BlazeFace algorithm can not only detect faces, but also identify 6 key points of faces (eyes, nose, ears, mouth).
The above are the 4 face recognition algorithms shared today.
After recognizing the face, it is very simple for us to do face attendance. Just convert the face Embedding into a vector and calculate the distance between the vectors.
The above is the detailed content of Tips | Summarize several simple and easy-to-use Python face recognition algorithms. For more information, please follow other related articles on the PHP Chinese website!


