Home > Common Problem > A practical guide to screen recording on Windows 11 for free

A practical guide to screen recording on Windows 11 for free

WBOY
Release: 2023-08-13 18:17:22
forward
1549 people have browsed it

How to Screen Record on Windows 11

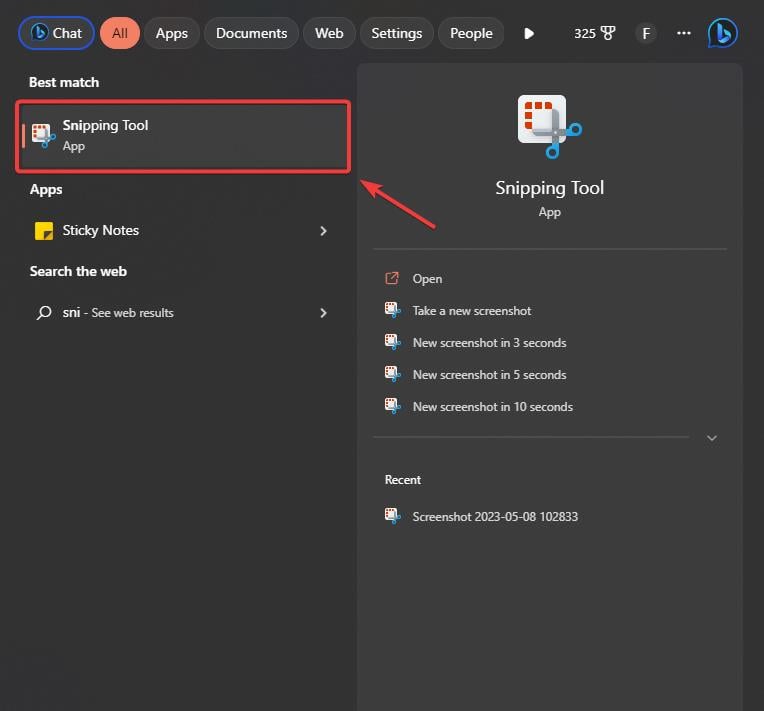
  1. Go to the Settings bar of Windows 11 and enter Snipping Tool.
  2. Open the screenshot tool. 免费在 Windows 11 上进行屏幕录制的实用指南
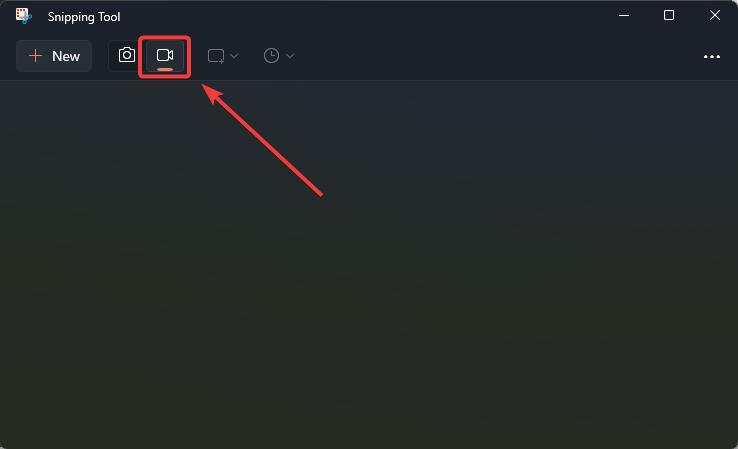
  3. After opening the snipping tool, go to the top bar and click on the camera icon to select the screen recording feature. 免费在 Windows 11 上进行屏幕录制的实用指南
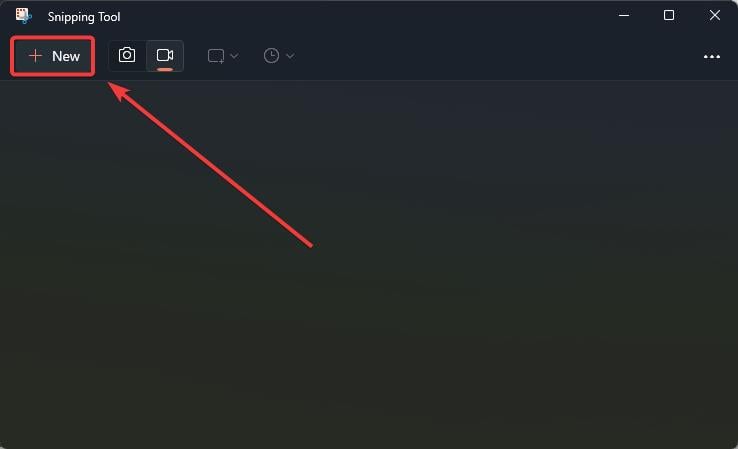
  4. Next, click the "New" button and select the area you want to record. 免费在 Windows 11 上进行屏幕录制的实用指南
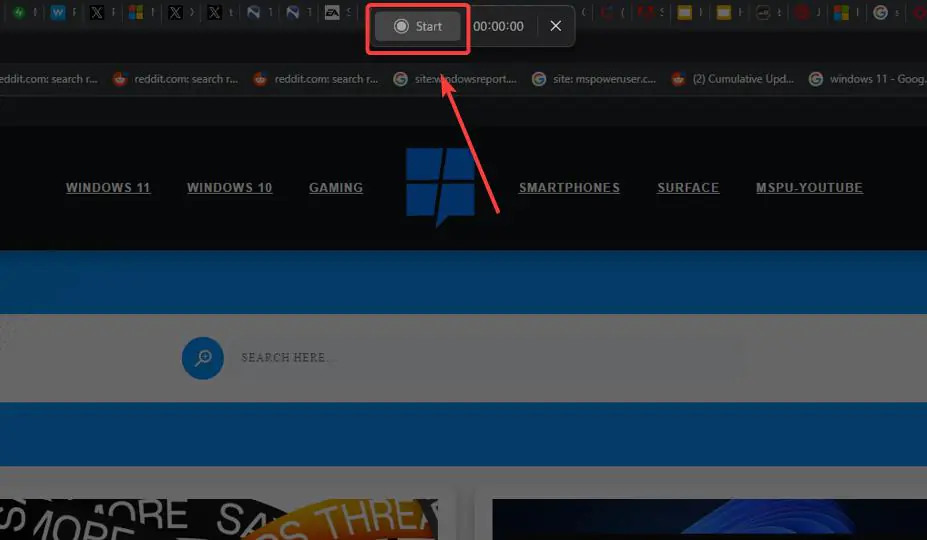
  5. After selection, click the "Start" button to start recording. 免费在 Windows 11 上进行屏幕录制的实用指南
  6. To stop recording, click the red button.

That's it. You just recorded your screen on Windows 11 for free.

To save the video, you just click Ctrl S and the Save window will open. You will be able to save the screen recording in your preferred folder.

However, you should know that Snipping Tool only saves files in MP4 format and does not have any other format available.

The above is the detailed content of A practical guide to screen recording on Windows 11 for free. For more information, please follow other related articles on the PHP Chinese website!

Related labels:
source:yundongfang.com
Statement of this Website
The content of this article is voluntarily contributed by netizens, and the copyright belongs to the original author. This site does not assume corresponding legal responsibility. If you find any content suspected of plagiarism or infringement, please contact admin@php.cn
Popular Tutorials
More>
Latest Downloads
More>
Web Effects
Website Source Code
Website Materials
Front End Template