Fix: Snipping tool not working in Windows 11
Why the Snipping Tool doesn’t work on Windows 11
Understanding the root cause of the problem can help find the right solution. Here are the top reasons why the Snipping Tool may not be working properly:
- Focus Assistant is On: This prevents the Snipping Tool from opening.
- ApplicationCorrupted: If the Snipping Tool crashes on launch, it may be corrupted.
- Outdated Graphics Drivers: Incompatible drivers may interfere with the Snipping Tool.
- Interference from other applications: Other running applications may conflict with the Snipping Tool.
- Certificate Expired: An error during the upgrade may cause this issu
Simple Solutions
These will suit most users , does not require any special technical knowledge.
1. Update Windows and Microsoft Store Apps
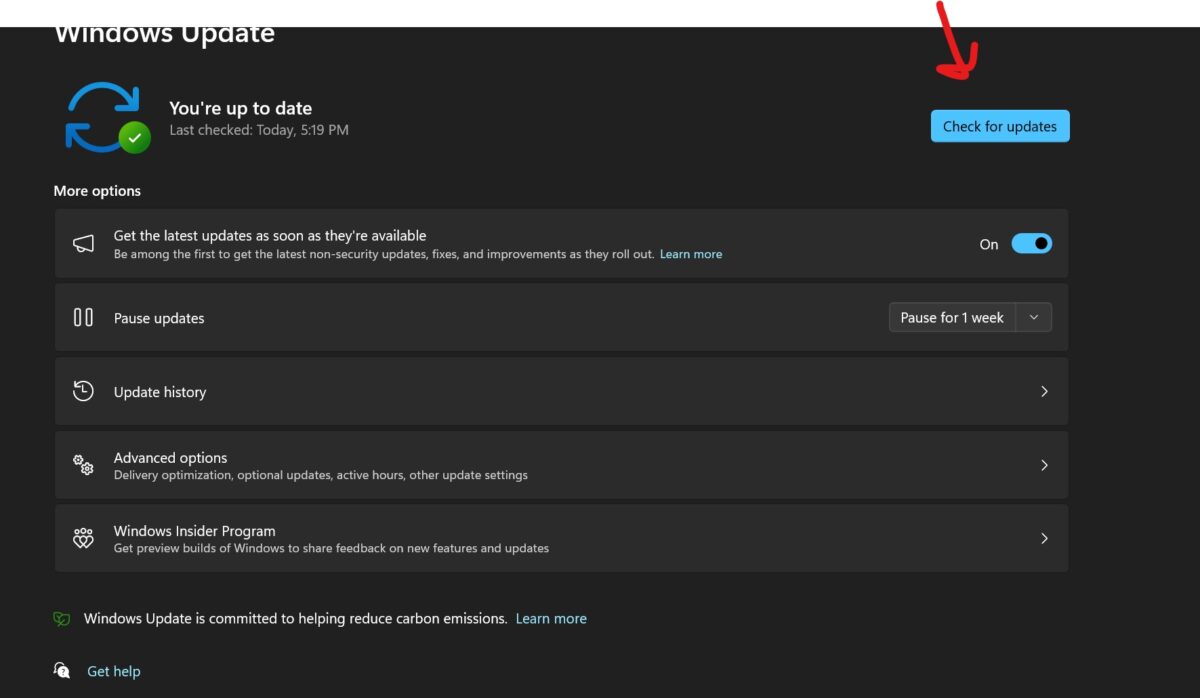
- ## Check for Windows updates:
- Open Settings by clicking the Start button and selecting the gear icon.
- Click "Update & Security".
- Click "Check for Updates" and install if available.
- If prompted, please restart your computer.
- Update Snip & Sketch from the Microsoft Store:

- Open the Microsoft Store from the Start menu .
- Search for "Snip & Sketch" or "Snipping Tool"
- Click "Update" if available.
- Wait for the update to complete.
- Start the Snipping Tool from the "Start" menu:
- Click the "Start" button.
- Enter "Snipping Tool" in the search bar.
- Click on the Snipping Tool app to open it.
- Try taking a screenshot to see if the problem is resolved.
- Open the Snipping Tool options and select the default settings:
- Open the Snipping Tool from the Start menu.
- Click "Options" in the Snipping Tool window.
- Click "Restore Defaults".
- Click "OK".
- Close and reopen the Snipping Tool to see if the problem is resolved.
- Run the Windows Store App Troubleshooter:
- Open "Settings" > "Update & Security" > "Troubleshoot".
- Click "Additional Troubleshooters".
- Click "Windows Store Apps".
- Click "Run the troubleshooter".
- Follow the on-screen instructions and apply any recommended fixes.
- Use the command prompt to run "sfc /scannow":
- Right-click "Start" > "Windows Terminal (Administrator)".
- Type "sfc /scannow" and press Enter.
- Wait for the scan to complete.
- Follow any on-screen instructions to repair the file.
- Restart the computer.
- Disable focus assist in settings:
- Turn on " Settings>System>Focus Assist.
- Select "Close".
- Restart your computer and check if the snipping tool is working properly.
- Delete and re-create Snipping Tool shortcut:
- Right-click the Snipping Tool shortcut on the desktop > "Delete".
- Go to Start > Search for "Snipping Tool".
- Right-click the Snipping Tool app > "Pin to Start Screen" or "Pin to Taskbar".
- Try to launch the Snipping Tool from the new shortcut.
- Verify screenshot save location and settings:
- Open Snipping Tool>"Options".
- Check the "Save As" location and adjust if necessary.
- Click OK and try saving a screenshot to see if the issue is resolved.
- Turn off automatic copy to clipboard in the snipping tool settings:
- Open Snipping Tool>"Options".
- Uncheck "Automatically copy screenshots to clipboard".
- Click OK and try taking a screenshot to see if the issue is resolved.
10. Use the "Classic" Snipping Tool in the "Windows.old" folder
-
Find and use the Snipping Tool from the Windows.old folder:
- Open File Explorer > C: Drive > "Windows.old" folder > "System32".
- Search for "Snipping Tool.exe".
- Double-click to run.
- If it works, consider creating a shortcut on your desktop for easier access.
11. Disable automatic time on your computer
-
Manually set date and time to 30th January 2021<> Day before:
- Right-click the time on the taskbar>"Adjust Date/Time".
- Turn off "Automatically set time".
- Click "Change">Set Date>"Change".
- Restart your computer and check if the snipping tool is working properly.
12. Enable the Print Screen keyboard shortcut
-
Enable the Print Screen button for taking screenshots:
- Open "Settings" > "Ease of Access" > "Keyboard".
- Turn on "Open screenshot using PrtScn button".
- Press the Print Screen key to see if it opens the Snipping Tool.
13. Use the Print Screen key as an alternative
-
Enable the Print Screen button in accessibility settings:
- Open "Settings" > "Accessibility" > "Keyboard".
- Open the "Print Screen Shortcut".
- Press the "Print Screen" key to see if you need a screenshot.
14. Repair or reset the Snipping Tool application
-
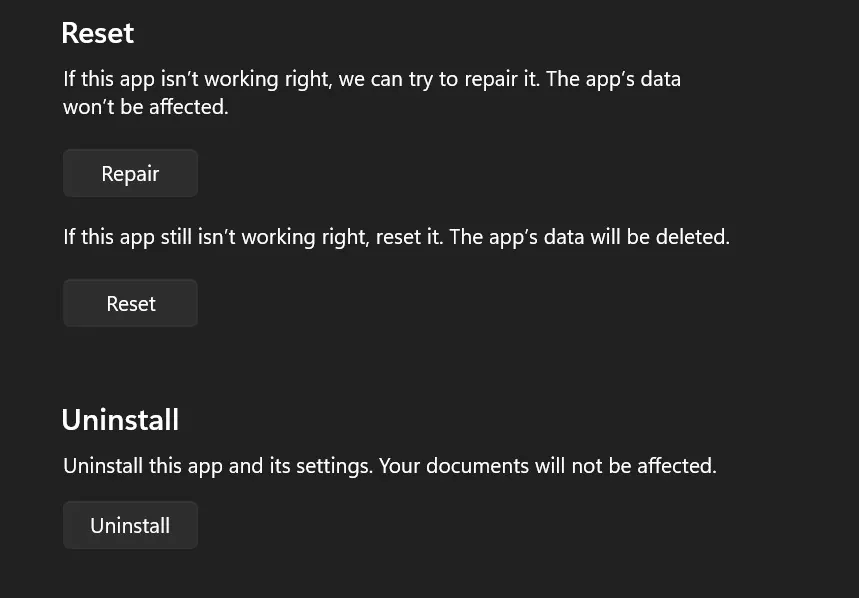
Fix or reset the Snipping Tool in the app settings:
- Open Settings > Apps > Apps & Features.
- Find Snipping Tool>"Advanced Options".
- Click Repair or Reset as needed.
- Restart your computer and check if the snipping tool is working properly.
15. Upgrade to Snip & Sketch tools
-
Install Snip & Sketch from the Microsoft Store:
- Open Microsoft Store>Search for "Snip & Sketch".
- Click "Get" to install.
- Open Snip & Sketch and try to take a screenshot.
16. Perform a clean boot
-
Disable non-essential processes and perform a clean boot:
- Press Win R >Type "msconfig" >Enter.
- "Services" tab > Check "Hide all Microsoft services" > "Disable all".
- "Startup" tab>"Open Task Manager">Disable unnecessary startup items.
- Restart the computer.
- Check whether the screenshot tool is working properly.
- If resolved, enable services one by one to identify conflicting services.
17. Use the registry editor to enable the snipping tool
-
Modify the registry file to enable the snipping tool:
- Press Win R >Type "Registry Editor" >Enter.
- Navigate to "HKEY_LOCAL_MACHINE\Software\Policies\Microsoft\Tablets".
- Right-click "Disable Snipping Tool" > "Modify" > Set the value data to 0 > "OK".
- Restart your computer and check if the snipping tool is working properly.
- WARNING: Incorrectly editing the registry may cause serious system problems.
18. Check for Windows 11 Out-of-Band (OOB) Updates
-
Check for the latest Windows updates, even if they are newer:
- Open "Settings" > "Update & Security".
- Click "Check for Updates" and install if available.
- Restart your computer and check if the snipping tool is working properly.
19. Temporarily disable the automatic time and reset its manual value
-
Manually set the date to 30th January 2021< > Day, then restore:
- Right-click the time on the taskbar > "Adjust Date/Time".
- Turn off "Automatically set time".
- Click "Change" >Date is set to 30th January 2021 <> Day> "Change".
- Restart your computer and check if the snipping tool is working properly.
- If necessary, re-enable "Automatically set time".
20. Run Windows 11 Snipping Tool directly from the “Windows.old” folder
-
From the Windows.old folder Find and run the snipping tool:
- Open File Explorer > C: Drive > "Windows.old" folder > "System32".
- Search for "Snipping Tool.exe".
- Double-click to run.
- If it works, consider creating a shortcut on your desktop for easier access.
21. Keep "Automatically copy changes" enabled in Snipping Tool settings

-
Make sure "Automatically copy changes" is turned on:
- Open Snipping Tool > "Options".
- Check "Automatically copy changes to clipboard".
- Click "OK" and try to intercept.
22. Turn on background application permissions to take pictures
-
Enable background application permissions for pictures:
- Open "Settings" > "Privacy" > "Background Apps".
- Turn on the Snipping Tool or Snip and Sketch permissions.
- Restart your computer and check if the snipping tool is working properly.
Advanced Solutions
WARNING: These solutions are intended for experienced users and should be used with caution.
23. Set the keyboard print screen key to launch the Snipping Tool
-
Enable the Print Screen key for the Snipping Tool:
- Open "Settings">" Easy Access>Keyboard.
- Turn on "Open screenshot using PrtScn button".
- Press the Print Screen key to see if it opens the Snipping Tool.
24. Uninstall and reinstall the Snipping Tool
-
Uninstall and reinstall the Snipping Tool from the StoreMicrosoft:
- Open "Settings" > "Apps" > "Apps & Features".
- Find the Snipping Tool>"Uninstall".
- Restart the computer.
- Open Microsoft Store>Search for "Snipping Tool">"Get" to reinstall.
25. Enable the Snipping Tool using the Local Group Policy Editor in Windows 11
-
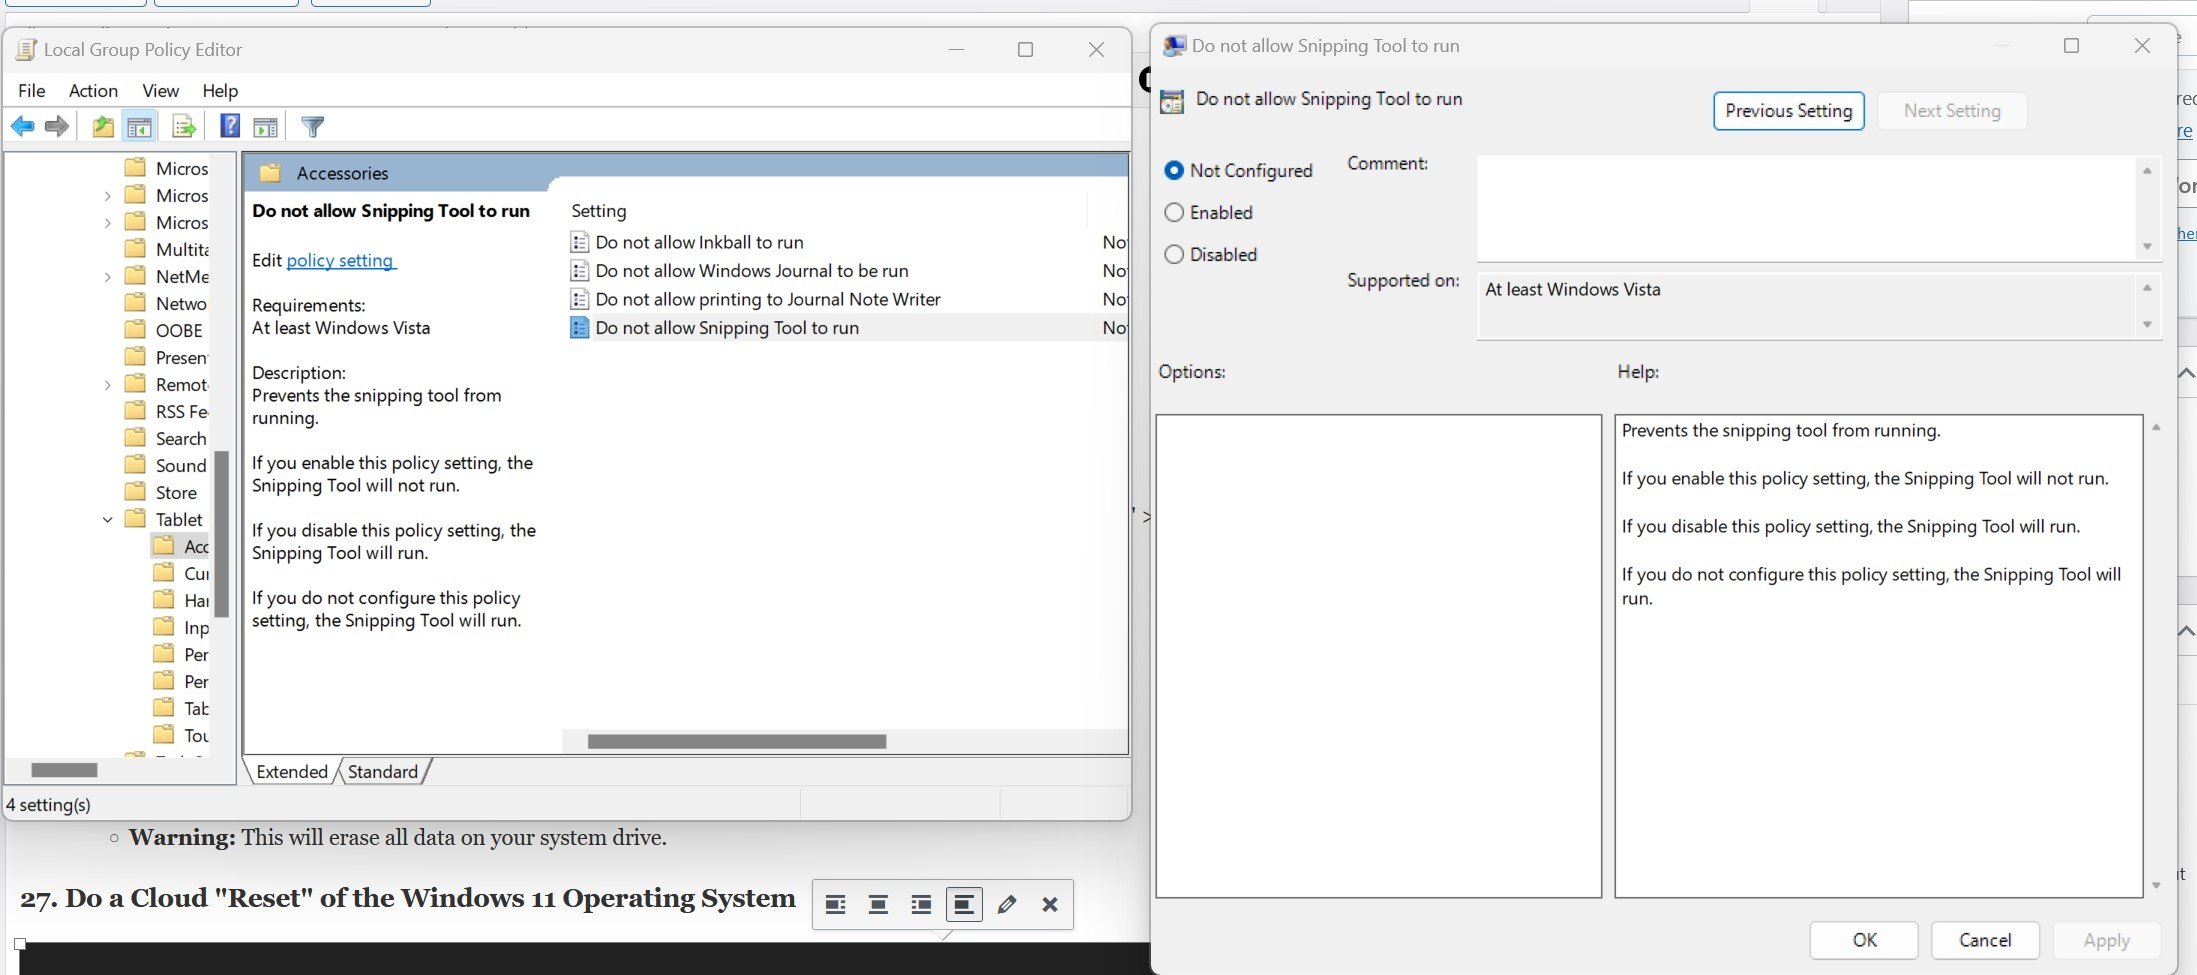
Modify the local group policy to enable the Snipping Tool:
- Press Win R > Type "gpedit.msc" > Enter.
- Navigate to User Configuration >Administrative Templates >Windows Components >Tablets >Accessories.
- Double-click "Do not use Snipping Tool" > Select "Disable" > "OK".
- Restart your computer and check if the snipping tool is working properly.
26. Perform a clean installation of Windows 11
-
Perform a clean installation of Windows 11:
- Back up all important data to external drive or cloud storage.
- Download the Windows 11 installation media from the Microsoft official website.
- Follow the on-screen instructions to perform a clean installation.
- WARNING: This will clear all data on the system drive.
27. Perform a cloud "reset" on the Windows 11 operating system
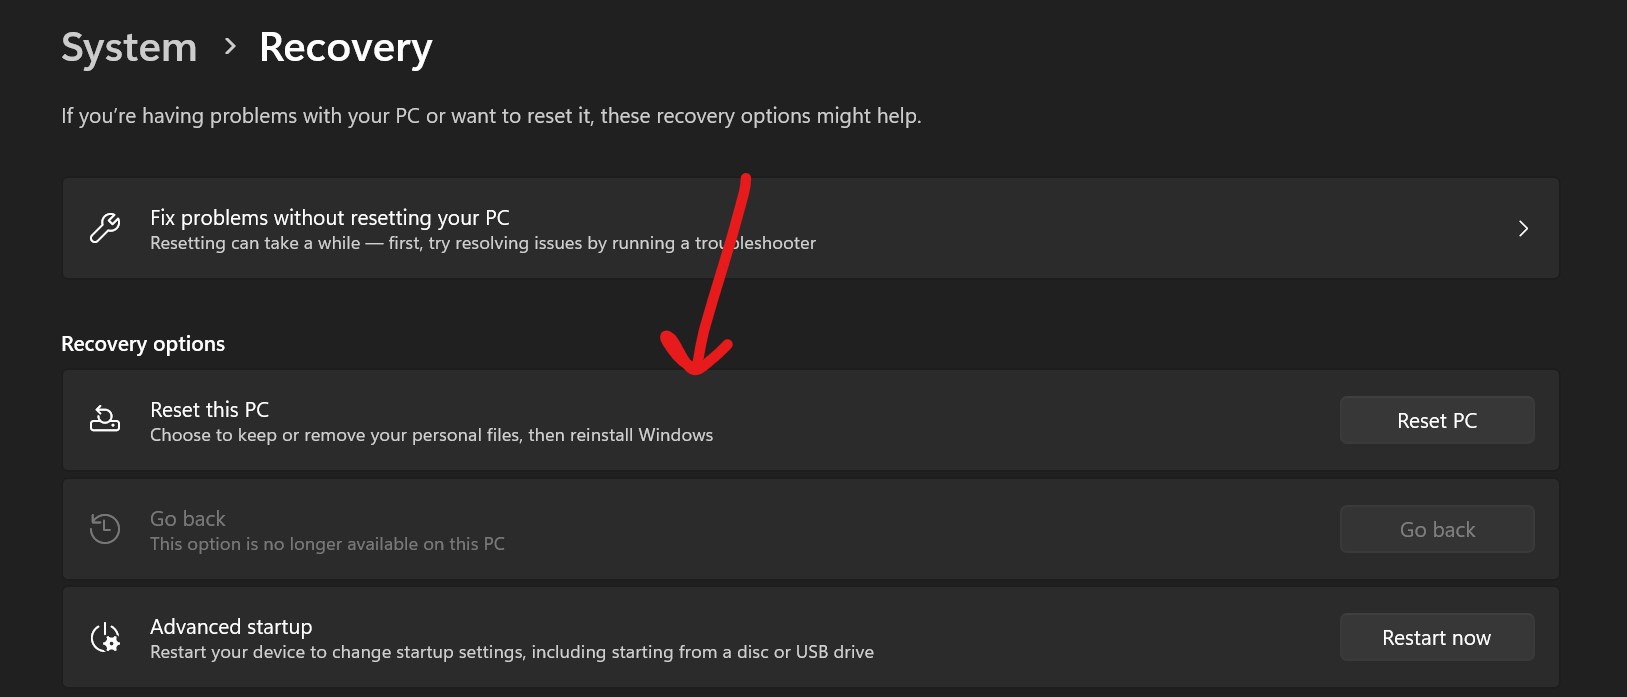
-
Execute Cloud reset for Windows 11:
- Open Settings > Update & Security > Recovery.
- Under "Reset this PC," click "Get Started."
- Select "Cloud Download" and follow the on-screen instructions.
- WARNING: Back up your data first as this will reinstall Windows and delete personal files and applications.
The above is the detailed content of Fix: Snipping tool not working in Windows 11. For more information, please follow other related articles on the PHP Chinese website!

Hot AI Tools

Undresser.AI Undress
AI-powered app for creating realistic nude photos

AI Clothes Remover
Online AI tool for removing clothes from photos.

Undress AI Tool
Undress images for free

Clothoff.io
AI clothes remover

Video Face Swap
Swap faces in any video effortlessly with our completely free AI face swap tool!

Hot Article

Hot Tools

Notepad++7.3.1
Easy-to-use and free code editor

SublimeText3 Chinese version
Chinese version, very easy to use

Zend Studio 13.0.1
Powerful PHP integrated development environment

Dreamweaver CS6
Visual web development tools

SublimeText3 Mac version
God-level code editing software (SublimeText3)

Hot Topics
 What are the digital currency trading apps suitable for beginners? Learn about the coin circle in one article
Apr 22, 2025 am 08:45 AM
When choosing a digital currency trading platform suitable for beginners, you need to consider security, ease of use, educational resources and cost transparency: 1. Priority is given to platforms that provide cold storage, two-factor verification and asset insurance; 2. Apps with a simple interface and clear operation are more suitable for beginners; 3. The platform should provide learning tools such as tutorials and market analysis; 4. Pay attention to hidden costs such as transaction fees and cash withdrawal fees.
 Reliable and easy-to-use virtual currency exchange app recommendations The latest ranking of the top ten exchanges in the currency circle
Apr 22, 2025 pm 01:21 PM
The reliable and easy-to-use virtual currency exchange apps are: 1. Binance, 2. OKX, 3. Gate.io, 4. Coinbase, 5. Kraken, 6. Huobi Global, 7. Bitfinex, 8. KuCoin, 9. Bittrex, 10. Poloniex. These platforms were selected as the best for their transaction volume, user experience and security, and all offer registration, verification, deposit, withdrawal and transaction operations.
 What are the digital currency trading platforms in 2025? The latest rankings of the top ten digital currency apps
Apr 22, 2025 pm 03:09 PM
Recommended apps for the top ten virtual currency viewing platforms: 1. OKX, 2. Binance, 3. Gate.io, 4. Huobi, 5. Coinbase, 6. Kraken, 7. Bitfinex, 8. KuCoin, 9. Bybit, 10. Bitstamp, these platforms provide real-time market trends, technical analysis tools and user-friendly interfaces to help investors make effective market analysis and trading decisions.
 The top ten free platform recommendations for real-time data on currency circle markets are released
Apr 22, 2025 am 08:12 AM
Cryptocurrency data platforms suitable for beginners include CoinMarketCap and non-small trumpet. 1. CoinMarketCap provides global real-time price, market value, and trading volume rankings for novice and basic analysis needs. 2. The non-small quotation provides a Chinese-friendly interface, suitable for Chinese users to quickly screen low-risk potential projects.
 What are the free market viewing software websites? Ranking of the top ten free market viewing software in the currency circle
Apr 22, 2025 am 10:57 AM
The top three top ten free market viewing software in the currency circle are OKX, Binance and gate.io. 1. OKX provides a simple interface and real-time data, supporting a variety of charts and market analysis. 2. Binance has powerful functions, accurate data, and is suitable for all kinds of traders. 3. gate.io is known for its stability and comprehensiveness, and is suitable for long-term and short-term investors.
 Meme Coin Exchange Ranking Meme Coin Main Exchange Top 10 Spots
Apr 22, 2025 am 09:57 AM
The most suitable platforms for trading Meme coins include: 1. Binance, the world's largest, with high liquidity and low handling fees; 2. OkX, an efficient trading engine, supporting a variety of Meme coins; 3. XBIT, decentralized, supporting cross-chain trading; 4. Redim (Solana DEX), low cost, combined with Serum order book; 5. PancakeSwap (BSC DEX), low transaction fees and fast speed; 6. Orca (Solana DEX), user experience optimization; 7. Coinbase, high security, suitable for beginners; 8. Huobi, well-known in Asia, rich trading pairs; 9. DEXRabbit, intelligent
 Tips and recommendations for the top ten market websites in the currency circle 2025
Apr 22, 2025 am 08:03 AM
Domestic user adaptation solutions include compliance channels and localization tools. 1. Compliance channels: Franchise currency exchange through OTC platforms such as Circle Trade, domestically, they need to go through Hong Kong or overseas platforms. 2. Localization tools: Use the currency circle network to obtain Chinese information, and Huobi Global Station provides a meta-universe trading terminal.
 A list of special services for major virtual currency trading platforms
Apr 22, 2025 am 08:09 AM
Institutional investors should choose compliant platforms such as Coinbase Pro and Genesis Trading, focusing on cold storage ratios and audit transparency; retail investors should choose large platforms such as Binance and Huobi, focusing on user experience and security; users in compliance-sensitive areas can conduct fiat currency trading through Circle Trade and Huobi Global, and mainland Chinese users need to go through compliant over-the-counter channels.


