The SafeViewArea component is designed to display your content within the safe boundaries of the device. It's responsible for adding padding and ensuring that navigation bars, toolbars, tab bars, etc. don't cover your content. This component is only available for iOS devices, here is a working example of the same.
Let us understand the advantages of using SafeAreaView with the help of an example.
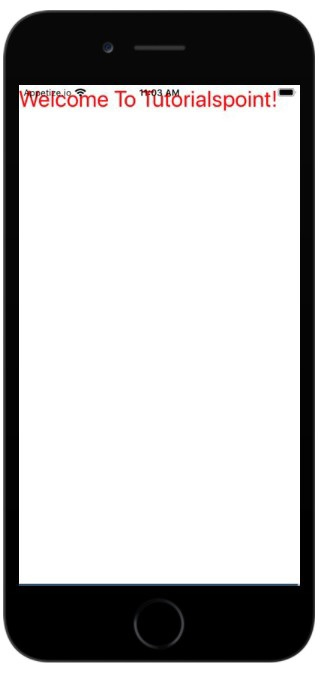
Consider the following using a view component to display the text "Welcome to Tutorialspoint!" .
Display text "Welcome to Tutorialspoint!" Inside View component
Using style flex on View component: 1. The Text component is contained within the View component and displays the text "Welcome To Tutorialspoint!". If you see output by default, the text is rendered on the status bar.
import React from 'react';
import { StyleSheet, Text, View } from 'react-native';
const App = () => {
return (
<View style={styles.container}>
<Text style={{ color:'red', fontSize:'30'}}>Welcome To Tutorialspoint!</Text>
</View>
);
}
const styles = StyleSheet.create({
container: {
flex: 1
},
});
export default App;
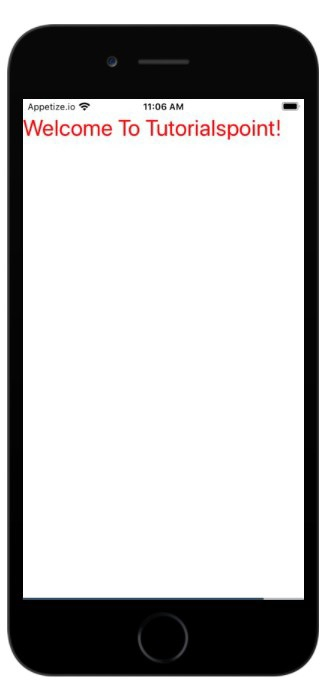
Now let’s see the same example with the help of SafeAreaView in iOS.
In the example below, we have replaced the View component with SafeAreaView.
To use SafeViewArea you have to import it as follows -
import { SafeAreaView } from 'react-native';Now if you see the output you will see that the padding is added to the text component and now it will not work with Status bars overlap.
import React from 'react';
import { StyleSheet, Text, SafeAreaView } from 'react-native';
const App = () => {
return (
<SafeAreaView style={styles.container}>
<Text style={{ color:'red', fontSize:'30'}}>Welcome To Tutorialspoint!</Text>
</SafeAreaView>
);
}
const styles = StyleSheet.create({
container: {
flex: 1
},
});
export default App;
The above is the detailed content of Explain the importance of SafeViewArea in React Native?. For more information, please follow other related articles on the PHP Chinese website!
 Which mobile phone models does Hongmeng OS 3.0 support?
 A memory that can exchange information directly with the CPU is a
 Dual graphics card notebook
 The role of index.html
 webstorm adjust font size
 webservice calling method
 Introduction to carriage return and line feed characters in java
 Learn C# from scratch
 How to apply for registration of email address


