How to adjust MTU size on Windows 11
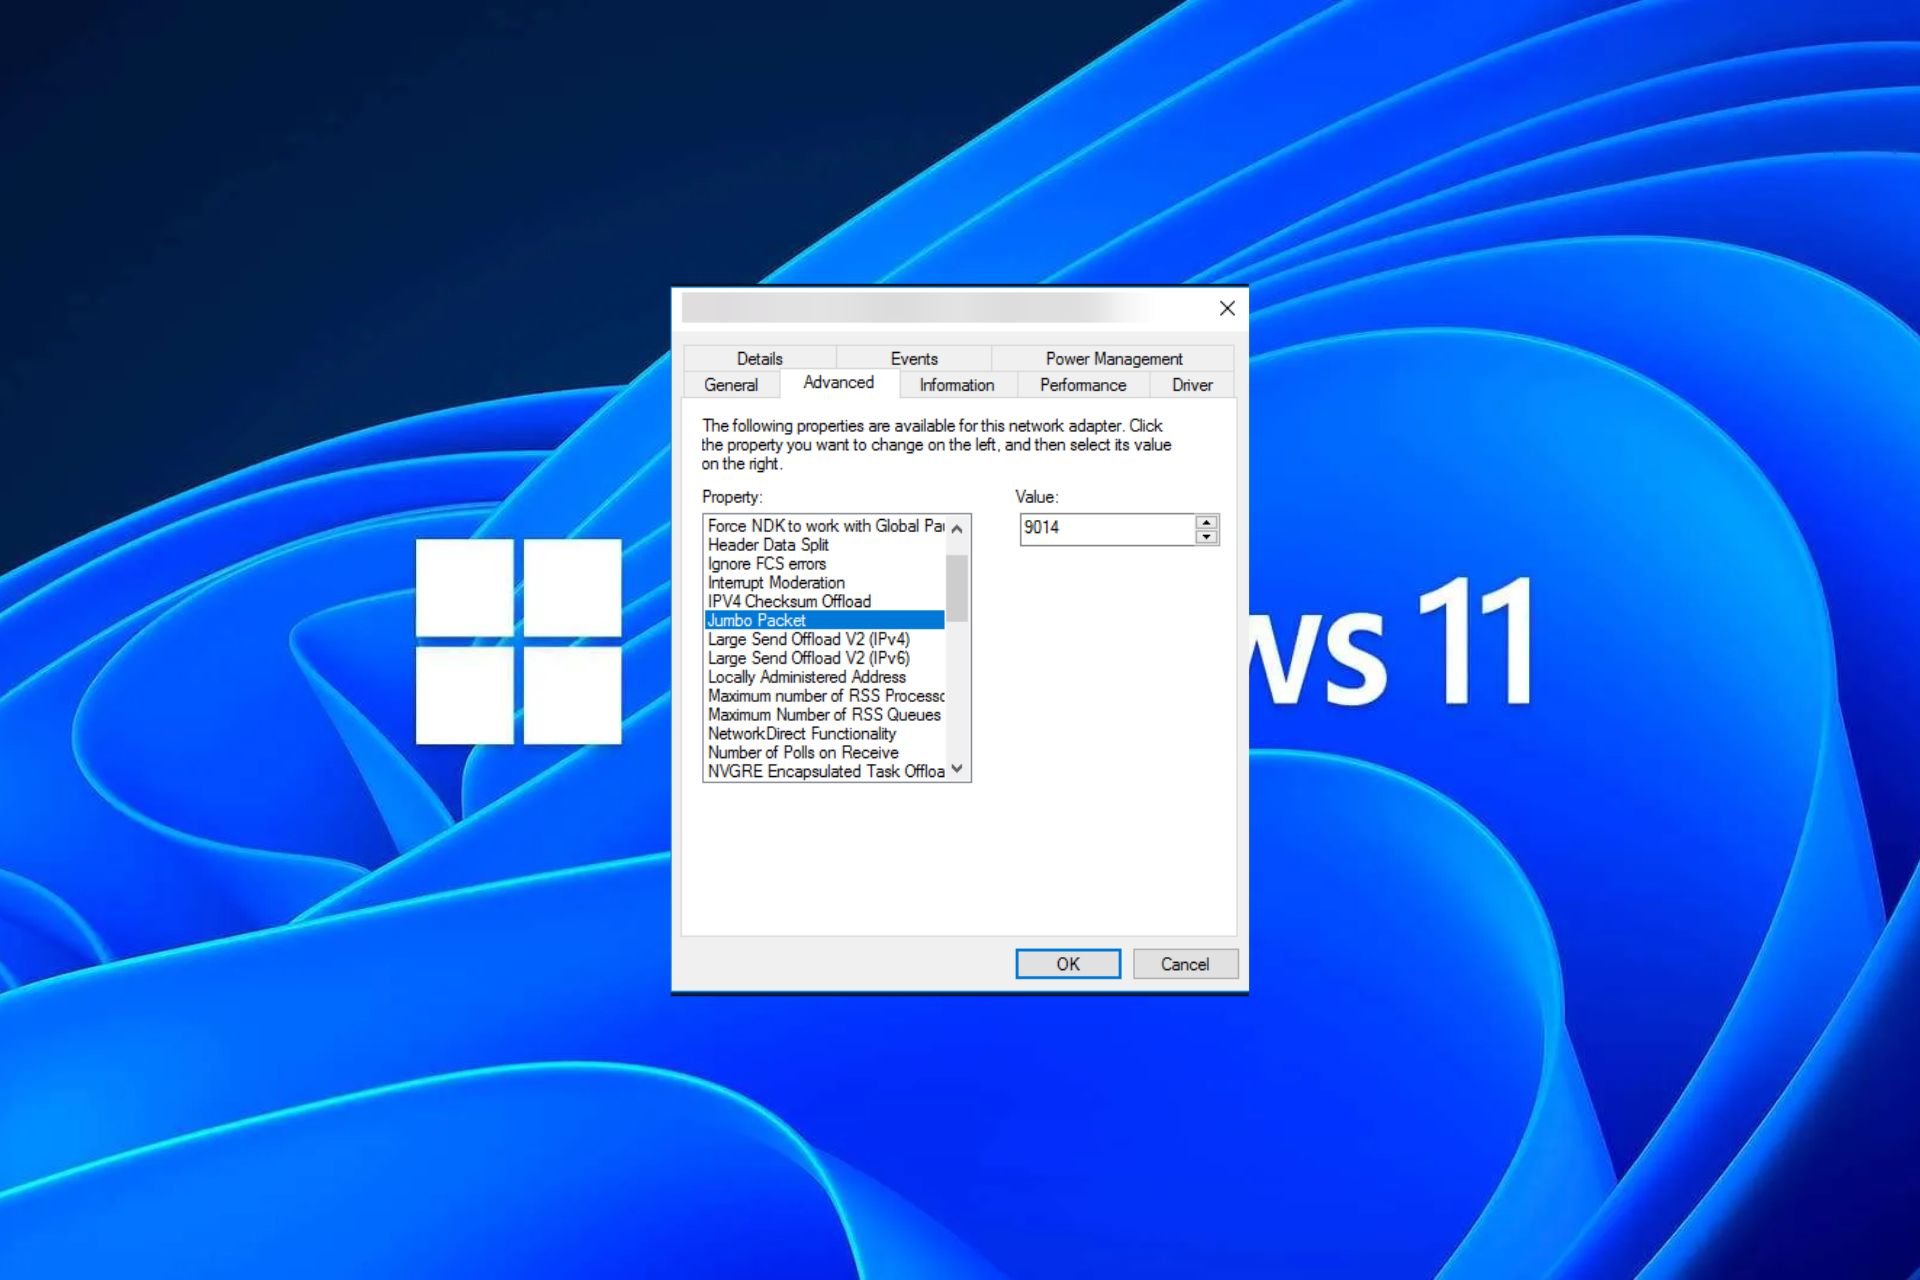
If you're suddenly experiencing a slow internet connection on Windows 11 and you've tried every trick in the book, it probably has nothing to do with your network and everything to do with your Maximum Transmission Unit (MTU) Don't care.
Problems may occur if your system sends or receives data with the wrong MTU size. In this article, we will learn how to change MTU size on Windows 11 for smooth and uninterrupted internet connection.
What is the default MTU size in Windows 11?
The default MTU size in Windows 11 is 1500, which is the maximum value allowed. MTU stands for Maximum Transmission Unit. This is the maximum packet size that can be sent or received on the network.
Every network-enabled device has a maximum acceptable MTU size. If these limits are exceeded, there will be consequences.
For example, if your MTU size is set too high, you may encounter errors such as the Xbox 360 MTU error. In this case, there are only two options. You can drop the packet or break it into several smaller packets.
Fragmentation is the most popular option because routers cannot handle packets larger than their maximum transmission unit. This will increase network overhead and reduce performance.
The ripple effect will manifest itself in various ways, such as emails not fully arriving, problems connecting to certain websites, or buffering in streaming services like Netflix.
While a larger MTU means more data can be transmitted in each packet, the disadvantage is that packets take more time to transmit.
Therefore, you need to understand the needs of your device, as increasing or decreasing the MTU size may improve or decrease network performance.
If you are transferring a large amount of data over a network connection, reducing the MTU size may help increase transfer speeds because fewer packets need to be sent.
However, if the amount of data being transferred over the network connection is small, increasing the MTU size may help you send more packets in less time.
Now that you understand the factors that affect MTU size, here's how to adjust some of these settings for optimal internet performance.
How to modify MTU settings on Windows 11
Before performing the following steps, please note the following:
- Check the maximum MTU size of your computer and make sure it is not exceed these limits. Open a command line as an administrator and enter the following command to find the current MTU:
<strong>netsh interface ipv4 show subinterfaces</strong> - Make sure your computer has all the latest Windows updates installed , because older versions may not support larger MTU values.
- Make sure your computer is connected to the Internet via an Ethernet cable or wireless connection and that your network adapter driver is updated.
Changing the MTU may cause problems with applications and services. Some applications may not be able to communicate with other devices on the network if they are configured to use a different MTU setting.
Here’s how to adjust your MTU settings:
1. Use the Control Panel
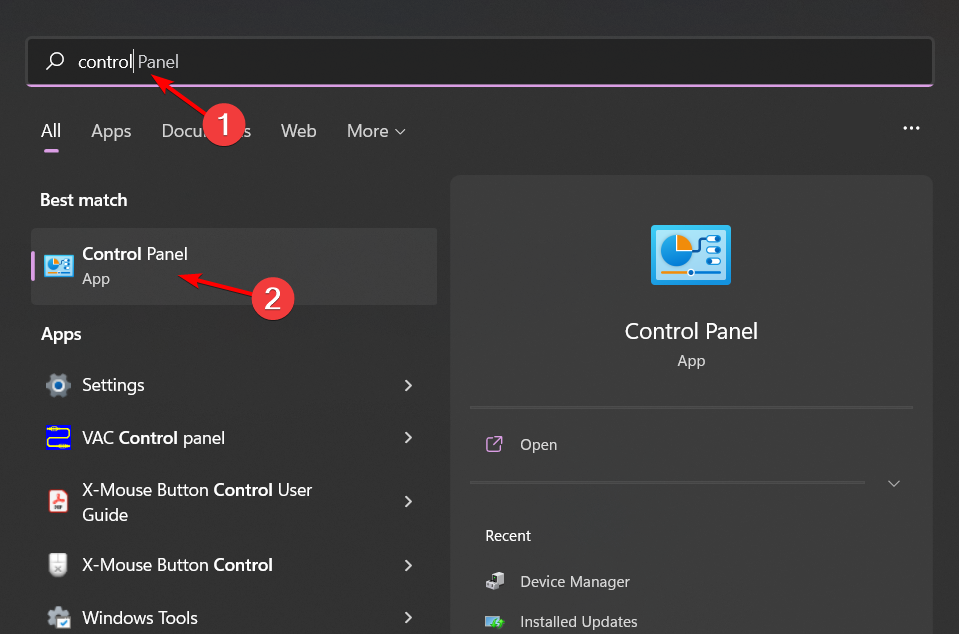
- button, type Control Panel in the search bar, and then click Open. Windows

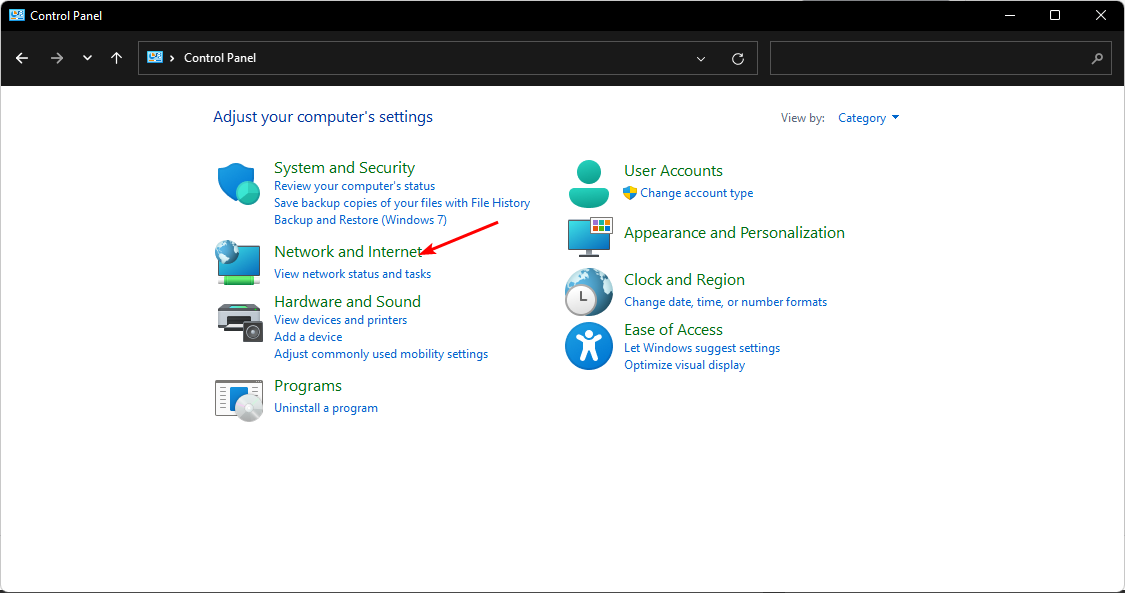
- Navigate to "Network and Internet".

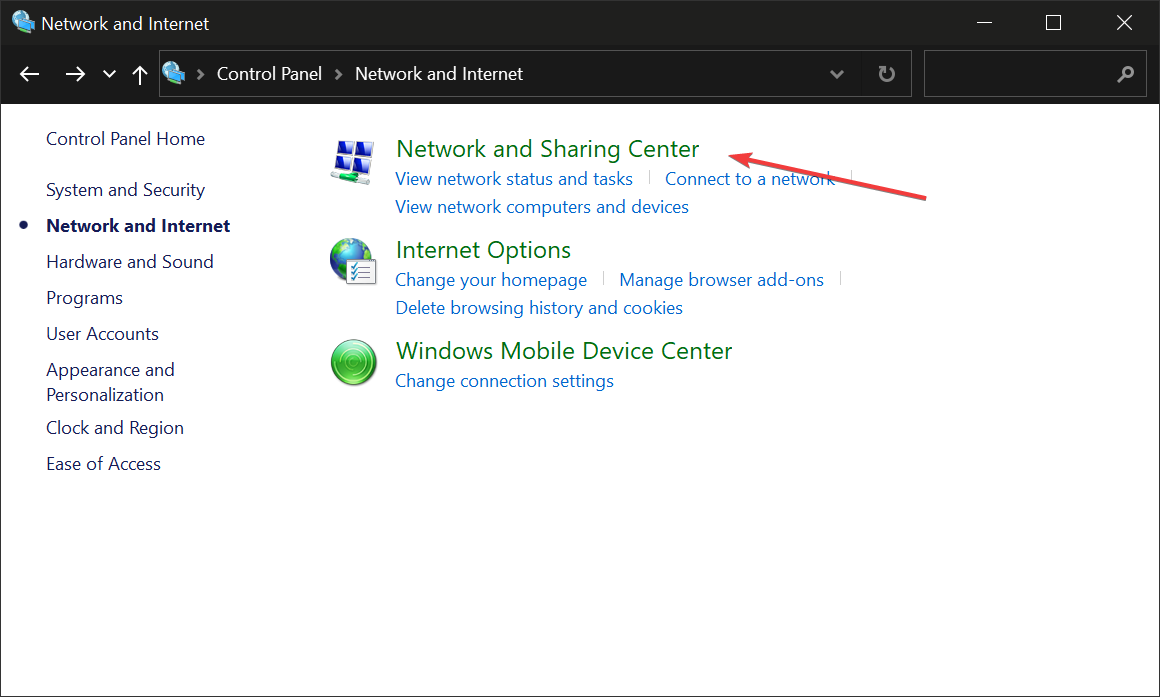
- Click on Network and Sharing Center.

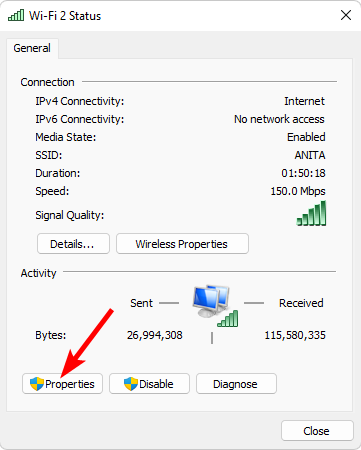
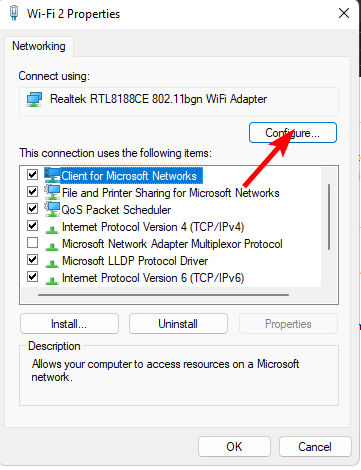
- Next, click on your Wi-Fi adapter and select Properties.

- Hit the Configuration button.

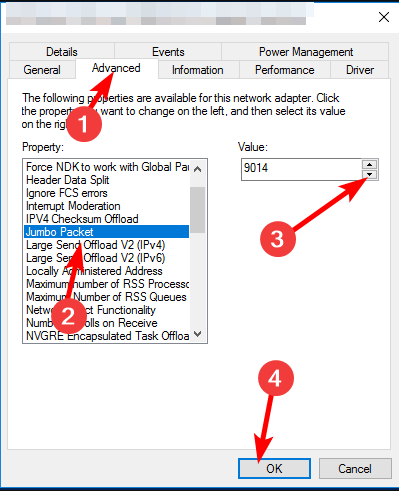
- Navigate to the "Advanced" tab, under "Properties" find the Jumbo packet, and then under "Value" Under Options, select an option from the drop-down menu and click OK.

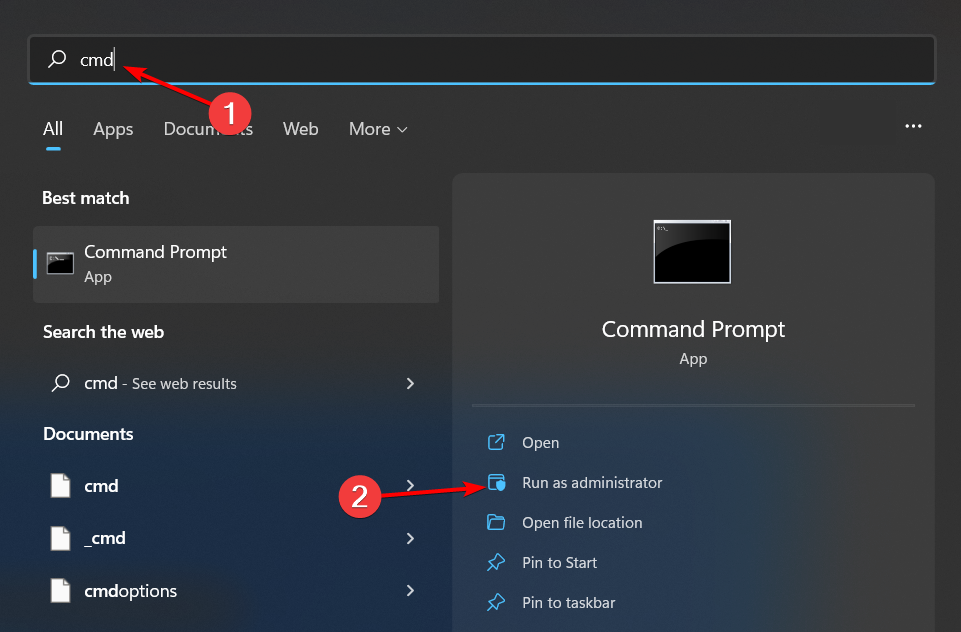
- key, type cmd in the search bar, and then click
- Open. Windows
 Type the following command and click:
 - Enter
netsh interface ipv4 show subinterfaces<strong></strong> Make a note of the interface you want to change, and then enter the next command. Remember to replace the subinterface name with the subinterface name you noted down, and
 - 9000 with the new MTU value within the accepted limits:
netsh interface ipv4 set subinterface < subinterface name> mtu=9000 store=persistent<strong></strong>
- Check that your internet connection is working properly by performing a speed test. You can try downloading some files from the web or playing online games.
- Run some hardware diagnostic tests on your computer. This will help you identify hardware or software issues that may arise after changing the MTU size.
- Check if your firewall or antivirus software is blocking any connections.
The above is the detailed content of How to adjust MTU size on Windows 11. For more information, please follow other related articles on the PHP Chinese website!

Hot AI Tools

Undresser.AI Undress
AI-powered app for creating realistic nude photos

AI Clothes Remover
Online AI tool for removing clothes from photos.

Undress AI Tool
Undress images for free

Clothoff.io
AI clothes remover

AI Hentai Generator
Generate AI Hentai for free.

Hot Article

Hot Tools

Notepad++7.3.1
Easy-to-use and free code editor

SublimeText3 Chinese version
Chinese version, very easy to use

Zend Studio 13.0.1
Powerful PHP integrated development environment

Dreamweaver CS6
Visual web development tools

SublimeText3 Mac version
God-level code editing software (SublimeText3)

Hot Topics
 1376
1376
 52
52
 How to adjust MTU size on Windows 11
Aug 25, 2023 am 11:21 AM
If you're suddenly experiencing a slow internet connection on Windows 11 and you've tried every trick in the book, it might have nothing to do with your network and everything to do with your maximum transmission unit (MTU). Problems may occur if your system sends or receives data with the wrong MTU size. In this post, we will learn how to change MTU size on Windows 11 for smooth and uninterrupted internet connection. What is the default MTU size in Windows 11? The default MTU size in Windows 11 is 1500, which is the maximum allowed. MTU stands for maximum transmission unit. This is the maximum packet size that can be sent or received on the network. every support network
![WLAN expansion module has stopped [fix]](https://img.php.cn/upload/article/000/465/014/170832352052603.gif?x-oss-process=image/resize,m_fill,h_207,w_330) WLAN expansion module has stopped [fix]
Feb 19, 2024 pm 02:18 PM
WLAN expansion module has stopped [fix]
Feb 19, 2024 pm 02:18 PM
If there is a problem with the WLAN expansion module on your Windows computer, it may cause you to be disconnected from the Internet. This situation is often frustrating, but fortunately, this article provides some simple suggestions that can help you solve this problem and get your wireless connection working properly again. Fix WLAN Extensibility Module Has Stopped If the WLAN Extensibility Module has stopped working on your Windows computer, follow these suggestions to fix it: Run the Network and Internet Troubleshooter to disable and re-enable wireless network connections Restart the WLAN Autoconfiguration Service Modify Power Options Modify Advanced Power Settings Reinstall Network Adapter Driver Run Some Network Commands Now, let’s look at it in detail
 How to solve win11 DNS server error
Jan 10, 2024 pm 09:02 PM
We need to use the correct DNS when connecting to the Internet to access the Internet. In the same way, if we use the wrong dns settings, it will prompt a dns server error. At this time, we can try to solve the problem by selecting to automatically obtain dns in the network settings. Let’s take a look at the specific solutions. How to solve win11 network dns server error. Method 1: Reset DNS 1. First, click Start in the taskbar to enter, find and click the "Settings" icon button. 2. Then click the "Network & Internet" option command in the left column. 3. Then find the "Ethernet" option on the right and click to enter. 4. After that, click "Edit" in the DNS server assignment, and finally set DNS to "Automatic (D
 Fix 'Failed Network Error' downloads on Chrome, Google Drive and Photos!
Oct 27, 2023 pm 11:13 PM
What is the "Network error download failed" issue? Before we delve into the solutions, let’s first understand what the “Network Error Download Failed” issue means. This error usually occurs when the network connection is interrupted during downloading. It can happen due to various reasons such as weak internet connection, network congestion or server issues. When this error occurs, the download will stop and an error message will be displayed. How to fix failed download with network error? Facing “Network Error Download Failed” can become a hindrance while accessing or downloading necessary files. Whether you are using browsers like Chrome or platforms like Google Drive and Google Photos, this error will pop up causing inconvenience. Below are points to help you navigate and resolve this issue
 Fix: WD My Cloud doesn't show up on the network in Windows 11
Oct 02, 2023 pm 11:21 PM
If WDMyCloud is not showing up on the network in Windows 11, this can be a big problem, especially if you store backups or other important files in it. This can be a big problem for users who frequently need to access network storage, so in today's guide, we'll show you how to fix this problem permanently. Why doesn't WDMyCloud show up on Windows 11 network? Your MyCloud device, network adapter, or internet connection is not configured correctly. The SMB function is not installed on the computer. A temporary glitch in Winsock can sometimes cause this problem. What should I do if my cloud doesn't show up on the network? Before we start fixing the problem, you can perform some preliminary checks:
 What should I do if the earth is displayed in the lower right corner of Windows 10 when I cannot access the Internet? Various solutions to the problem that the Earth cannot access the Internet in Win10
Feb 29, 2024 am 09:52 AM
This article will introduce the solution to the problem that the globe symbol is displayed on the Win10 system network but cannot access the Internet. The article will provide detailed steps to help readers solve the problem of Win10 network showing that the earth cannot access the Internet. Method 1: Restart directly. First check whether the network cable is not plugged in properly and whether the broadband is in arrears. The router or optical modem may be stuck. In this case, you need to restart the router or optical modem. If there are no important things being done on the computer, you can restart the computer directly. Most minor problems can be quickly solved by restarting the computer. If it is determined that the broadband is not in arrears and the network is normal, that is another matter. Method 2: 1. Press the [Win] key, or click [Start Menu] in the lower left corner. In the menu item that opens, click the gear icon above the power button. This is [Settings].
 How to enable/disable Wake on LAN in Windows 11
Sep 06, 2023 pm 02:49 PM
Wake on LAN is a network feature on Windows 11 that allows you to remotely wake your computer from hibernation or sleep mode. While casual users don't use it often, this feature is useful for network administrators and power users using wired networks, and today we'll show you how to set it up. How do I know if my computer supports Wake on LAN? To use this feature, your computer needs the following: The PC needs to be connected to an ATX power supply so that you can wake it from sleep mode remotely. Access control lists need to be created and added to all routers in the network. The network card needs to support the wake-up-on-LAN function. For this feature to work, both computers need to be on the same network. Although most Ethernet adapters use
 How to check network connection details and status on Windows 11
Sep 11, 2023 pm 02:17 PM
In order to make sure your network connection is working properly or to fix the problem, sometimes you need to check the network connection details on Windows 11. By doing this, you can view a variety of information including your IP address, MAC address, link speed, driver version, and more, and in this guide, we'll show you how to do that. How to find network connection details on Windows 11? 1. Use the "Settings" app and press the + key to open Windows Settings. WindowsI Next, navigate to Network & Internet in the left pane and select your network type. In our case, this is Ethernet. If you are using a wireless network, select a Wi-Fi network instead. At the bottom of the screen you should see


