

In this three-part tutorial, we'll take a deep dive into how to create a to-do list management application using Node.js and Geddy. In this second part of the series, we will create a simple to-do list management application.
As a quick recap, last time we installed Node and Geddy, generated a new application, and learned how to start a server. In this tutorial we will build on what we did last time, so make sure you complete that tutorial before continuing.
Geddy has a built-in resource generator; this will allow us to automatically generate models, controllers, views and routes for specific resources. Our to-do list application has only one resource: todo. To generate it, just put cd into your application's directory (cd path/to/your/todo_app) and run:
geddy resource todo
You should now have these files added to your app:
Your config/router.js should also have the following appended:
router.resource('todos');
If you are new to MVC, all this may be a little daunting for you. But don't worry, it's pretty simple once you figure it out.
models/todo.js: This file is where we define the todo model. We'll define a number of properties that all todo have. We'll also write some data validation here.
controllers/todos.js: This file is the final location for all /todos/ routes. Each action in this controller has a corresponding route:
GET      /todos/            => index
POST     /todos/            => create
GET      /todos/:id         => show
PUT      /todos/:id         => update
DELETE   /todos/:id         => remove
GET      /todos/:id/add     => add
GET      /todos/:id/edit    => edit
views/todos/: Each file here corresponds to one of the GET routes we showed you above. These are the templates we use to generate the front end of our application. Geddy uses EJS (Embedded JavaScript) as its templating language. If you've ever used PHP or ERB, this should look familiar. Basically, you can use any JavaScript you want in your template.
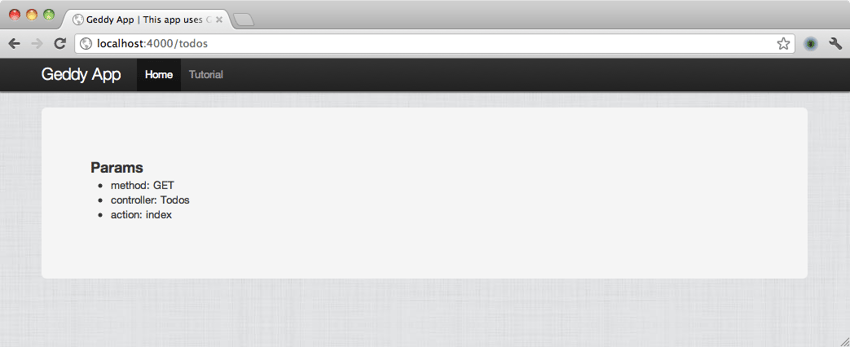
Now that we have generated a bunch of code, let's verify that we've got all the routes we need. Launch the application (geddy) again and point your browser to http://localhost:4000/todos. You should see something like this

Continue to try other GET routes:
everything fine? Okay, let's continue.
In Geddy (and most other MVC frameworks) you use models to define the data types that your application will use. We just generated a model for todos, so let's see what it gives us:
var Todo = function () {
  // Some commented out code
};

// Some more commented out code

Todo = geddy.model.register('Todo', Todo);
The models in Geddy are very simple. We just create a new constructor for todos and register it as a model in geddy. Let's define some properties for todos. Remove all commented out code and add it to the constructor:
var Todo = function () {
  this.defineProperties({
    title: {type: 'string', required: true}
  , id: {type: 'string', required: true}
  , status: {type: 'string', required: true}
  });
};
Our todos will have a title, an id and a status, all three are required. Now let's set up some validation for the todos.
var Todo = function () {

  this.defineProperties({
    title: {type: 'string', required: true}
  , id: {type: 'string', required: true}
  , status: {type: 'string', required: true}
  });

  this.validatesPresent('title');
  this.validatesLength('title', {min: 5});

  this.validatesWithFunction('status', function (status) {
    return status == 'open' || status == 'done';
  });

};
We are verifying that the header exists, the minimum length of the header is 5 characters, and we are using a function to verify that the status is open or done. There are many built-in validation functions, go ahead and check out the project at http://github.com/mde/geddy to learn more about them.
Now that we have the to-do model set up, we can create a place to store our model. For the purpose of this tutorial, we are just keeping the data in memory. We will hang a todos array on the global geddy object to hold the data. In the next part of this series, we will start saving this data in a database.
Open the config/init.js file. There should now be a global uncaught exception handler:
// Add uncaught-exception handler in prod-like environments
if (geddy.config.environment != 'development') {
  process.addListener('uncaughtException', function (err) {
    geddy.log.error(JSON.stringify(err));
  });
}
在该代码块之后,让我们将数组挂在 geddy 全局上:
geddy.todos = [];
现在我们有了一个地方来存储 todos。请记住,它位于您的应用程序内存中,因此当您重新启动服务器时它将消失。
模型适配器提供模型所需的基本 save、remove、load 和 all 方法。我们的数据源非常简单(只是一个数组!),因此编写模型适配器也应该非常简单。
在 lib 中创建一个名为 model_adapters 的目录,并在 lib/model_adapters 中创建一个名为 todo.js 的文件。让我们打开该文件并添加一些样板代码:
var Todo = new (function () {
})();
exports.Todo = Todo;
我们在这里所做的就是设置一个新的空白对象,将其导出到最终需要此文件的任何地方。如果您想更多地了解 Node 的 require 方法是如何工作的,这篇文章有一个很好的概述。在这种情况下,我们的 init.js 文件将满足要求。
因此我们设置了一个新的 Todo 模型适配器对象。现在还很贫瘠,但我们很快就会做到这一点。现在,我们必须返回 init.js 并添加一些代码,以便在启动时将其加载到我们的应用程序中。在 config/init.js 中的 geddy.todos = []; 之后添加这两行:
geddy.model.adapter = {};
geddy.model.adapter.Todo = require(process.cwd() + '/lib/model_adapters/todo').Todo;
我们创建了一个空白的模型适配器对象,并向其添加了 Todo 模型适配器。
现在我们已经有了模型和模型适配器,我们可以开始应用程序逻辑了。让我们首先将待办事项添加到我们的待办事项列表中。
处理数据时,首先应该去的地方是模型适配器。我们需要能够将 Todo 模型的实例保存到 geddy.todos 数组中。因此,打开 lib/model_adapters/todo.js 并添加保存方法:
var Todo = new (function () {
  this.save = function (todo, opts, callback) {

    if (typeof callback != 'function') {
      callback = function(){};
    }

    todo.saved = true;
    geddy.todos.push(todo);
    return callback(null, todo);

  }
})();
我们所要做的就是将实例的保存属性设置为 true 并将项目推送到 geddy.todos 数组中。在 Node 中,最好以非阻塞方式执行所有 I/O,因此养成使用回调传递数据的习惯是个好主意。对于本教程来说,这并不重要,但稍后当我们开始持久化事物时,它会派上用场。您会注意到我们确保回调是一个函数。如果我们不这样做并在没有回调的情况下使用 save,我们会收到错误。现在让我们继续控制器创建操作。
继续看一下 app/controllers/todos.js 中的 create 操作:
this.create = function (req, resp, params) {
  // Save the resource, then display index page
  this.redirect({controller: this.name});
};
很简单,对吧?盖迪已经帮你把它记下来了。那么我们来稍微修改一下:
this.create = function (req, resp, params) {
  var self = this
    , todo = geddy.model.Todo.create({
        title: params.title
      , id: geddy.string.uuid(10)
      , status: 'open'
      });
  todo.save(function (err, data) {
    if (err) {
      params.errors = err;
      self.transfer('add');
    }
    else {
      self.redirect({controller: self.name});
    }
  });
};
首先,我们使用 geddy.model.Todo.create 创建一个 Todo 模型的新实例,传入表单将发布给我们的标题,并设置 id 和状态的默认值。< /p>
然后我们调用在模型适配器上创建的 save 方法并将用户重定向回 /todos 路由。如果它没有通过验证,或者我们收到错误,我们使用控制器的 transfer 方法将请求传输回 add 操作。
现在是我们设置添加模板的时候了。看一下 app/views/todos/add.html.ejs,它应该看起来像这样:
<div class="hero-unit">
  <h3>Params</h3>
  <ul>
  <% for (var p in params) { %>
    <li><%= p + ': ' + params[p]; %></li>
  <% } %>
  </ul>
</div>
我们不需要
<ul></ul> 对于我们的用例来说,所以让我们暂时摆脱它。让你的 add.html.ejs 看起来像这样:
<div class="hero-unit">
  <%= partial('_form', {params: params}); %>
</div>
Partials 为您提供了一种在模板之间共享代码的简单方法。
您会注意到我们在此模板中使用了部分内容。部分为您提供了一种在模板之间共享代码的简单方法。我们的添加和编辑模板都将使用相同的表单,所以现在让我们创建这个表单部分。在 views/todos/ 目录中创建一个名为 _form.html.ejs 的新文件。我们使用下划线来轻松判断该模板是否是部分模板。打开它并添加以下代码:
<%
  var isUpdate = params.action == 'edit'
    , formTitle = isUpdate ? 'Update this To Do Item' : 'Create a new To Do Item'
    , action = isUpdate ? '/todos/' + todo.id + '?_method=PUT' : '/todos'
    , deleteAction = isUpdate ? '/todos/' + todo.id + '?_method=DELETE' : ''
    , btnText = isUpdate ? 'Update' : 'Add'
    , doneStatus = isUpdate ? 'checked' : ''
    , titleValue = isUpdate ? todo.title : ''
    , errors = params.errors;
%>
<form id="todo-form" class="form-horizontal" action="<%= action %>" method="POST">
  <fieldset>
    <legend><%= formTitle %></legend>
    <div class="control-group">
      <label for="title" class="control-label">Title</label>
      <div class="controls">
        <input type="text" class="span6" placeholder="enter title" name="title" value='<%= titleValue %>'/>
        <%  if (errors) { %>
          <p>
          <% for (var p in errors) { %>
            <div><%=  errors[p];  %></div>
          <% } %>
          </p>
        <% } %>
      </div>
    </div>
    <% if (isUpdate) { %>
      <div class="control-group">
        <label for="status">Status</label>
        <div class="controls">
          <select name="status">
            <option>open</option>
            <option>done</option>
          </select>
        </div>
      </div>
    <% } %>
    <div class="form-actions">
      <input type="submit" class="btn btn-primary" value="<%= btnText %>"/>
      <% if (isUpdate) { %>
        <button type="submit" formaction="<%= deleteAction %>" formmethod="POST" class="btn btn-danger">Remove</button>
      <% } %>
    </div>
  </fieldset>
</form>
哇,那里有很多代码!让我们看看是否可以通过它。由于两个不同的模板将使用此部分,因此我们必须确保表单在两个模板中看起来都正确。大部分代码实际上是来自 Twitter Bootstrap 的样板。这就是让这个应用程序立即看起来如此出色的原因(在移动设备上也是如此!)。
为了使此应用程序看起来更好,您可以使用演示应用程序下载中提供的 CSS 文件。
我们做的第一件事是设置一些变量供我们使用。在 add 操作中,我们将 params 对象传递给 respond 方法调用中的模板。这给了我们一些信息——它告诉我们这个请求被路由到哪个控制器和操作,并给我们提供了在 url 中传递的任何查询参数。我们设置 isUpdate 变量来查看当前是否正在进行更新操作,然后我们设置更多变量来帮助清理视图代码。
从那里,我们所做的就是制作一个表格。如果我们执行添加操作,我们只需按原样渲染表单即可。如果我们正在进行编辑操作,我们会填写表单以让用户更新字段。
请注意,该表单将使用 _method=PUT 参数向 /todos/ 发送 POST 请求。 Geddy 使用标准方法覆盖参数,允许您从浏览器发送 PUT 和 DELETE 请求,而无需使用 JavaScript。 (至少在前端!)
我们需要看的最后一个小细节是“删除”按钮。我们使用 html5 的 formaction 属性来更改此表单的操作。您会注意到此按钮的 formaction 将 POST 请求发送到 /todos/:id 路由,并带有 _method=DELETE 参数。这将在控制器上执行 remove 操作,我们稍后会介绍。
重新启动服务器 (geddy) 并访问 http://localhost:4000/todos/add 以查看正在运行的模板。创建一个待办事项。
现在我们已经将用户输入的待办事项添加到了 geddy.todos 数组中,我们可能应该将它们列出在某个地方。让我们从模型适配器中的 all 方法开始。
让我们再次打开 lib/model_adapters/todo.js 并在 save` 方法上方添加一个 all 方法:</p>
<div class="code" style="position:relative; padding:0px; margin:0px;"><pre class='brush:php;toolbar:false;'>this.all = function (callback) {
callback(null, geddy.todos);
}
</pre><div class="contentsignin">Copy after login</div></div>
<p>这可能是我们今天要创建的最简单的模型适配器方法,它所做的就是接受回调并调用它并返回错误(目前始终为 null,我们将在下一个版本中升级此方法)教程)和 <code>geddy.todos。
再次打开 /app/controllers/todos.js 并查看 index 操作。它应该看起来像这样:
this.index = function (req, resp, params) {
  this.respond({params: params});
};
这部分非常简单,我们只需使用我们刚刚在模型适配器上定义的 all 方法来获取所有 todo 并渲染它们:
this.index = function (req, resp, params) {
  var self = this;
  geddy.model.adapter.Todo.all(function(err, todos){
    self.respond({params: params, todos: todos});
  });
};
这就是控制器的内容,现在进入视图。
看一下 /app/views/todos/index.html.ejs,它应该如下所示:
<div class="hero-unit">
  <h3>Params</h3>
  <ul>
  <% for (var p in params) { %>
    <li><%= p + ': ' + params[p]; %></li>
  <% } %>
  </ul>
</div>
看起来很像 add.html.ejs 模板,不是吗?同样,我们在这里不需要 params 样板,因此将其取出,并使您的 index.html.ejs 模板如下所示:
<div class="hero-unit">
<h2>To Do List</h2>
<a href="/todos/add" class="btn pull-right">Create a new To Do</a></p>
</div>
<% if (todos && todos.length) { %>
<% for (var i in todos) { %>
<div class="row todo-item">
<div class="span8"><h3><a href="/todos/<%= todos[i].id; %>/edit"><%= todos[i].title; %></a></h3></div>
<div class="span4"><h3><i class="icon-list-alt"></i><%= todos[i].status; %></h3></div>
</div>
<% } %>
<% } %>
这个也非常简单,但是这次我们的模板中有一个循环。在标题中,我们添加了一个按钮来添加新的待办事项。在循环内,我们为每个 todo 生成一行,显示其标题(作为指向 edit 页面的链接)及其状态。
要查看它,请访问 http://localhost:4000/todos。
现在我们有了 edit 页面的链接,我们应该可以让它工作了!
再次打开模型适配器 (/lib/model_adapters/todo.js)。我们将添加 load 方法,以便我们可以加载特定的 todo 并在我们的编辑页面中使用它。添加到哪里并不重要,但现在让我们将其放在 all 方法和 save 方法之间:
this.load = function (id, callback) {
  for (var i in geddy.todos) {
    if (geddy.todos[i].id == id) {
      return callback(null, geddy.todos[i]);
    }
  }
  callback({message: "To Do not found"}, null);
};
此加载方法需要一个 id 和一个回调。它循环遍历 geddy.todos 中的项目,并检查当前项目的 id 是否与传入的 id 匹配。如果是,则调用回调,并将 todo 项传回。如果找不到匹配项,则会调用回调并返回错误。现在我们需要在 todos 控制器的 show 操作中使用此方法。
再次打开 todos 控制器并查看它的 edit 操作。它应该看起来像这样:
this.edit = function (req, resp, params) {
  this.respond({params: params});
};
让我们使用刚刚创建的加载方法:
this.edit = function (req, resp, params) {
  var self = this;
  geddy.model.Todo.load(params.id, function(err, todo){
    self.respond({params: params, todo: todo});
  });
};
我们在这里所做的就是加载待办事项并将其发送到要渲染的模板。那么让我们看一下模板。
打开/app/views/todos/edit.html.ejs。我们再次不需要 params 样板,所以让我们删除它。让你的 edit.html.ejs 看起来像这样:
<div class="hero-unit">
  <%= partial('_form', {params: params, todo: todo}); %>
</div>
这应该与我们刚刚编辑的 add.html.ejs 文件非常相似。您会注意到,这次我们将 todo 对象发送到部分以及参数。很酷的是,由于我们已经编写了部分内容,因此这就是我们所要做的以使编辑页面正确显示。
重新启动服务器,创建一个新的 todo 并单击链接以查看其工作原理。现在让我们让更新按钮起作用!
再次打开模型适配器并找到 save 方法。我们将添加一些内容,以便我们可以保存现有的 todos。让它看起来像这样:
this.save = function (todo, opts, callback) {
  if (typeof callback != 'function') {
    callback = function(){};
  }
  var todoErrors = null;
  for (var i in geddy.todos) {
    // if it's already there, save it
    if (geddy.todos[i].id == todo.id) {
      geddy.todos[i] = todo;
      todoErrors = geddy.model.Todo.create(todo).errors;
      return callback(todoErrors, todo);
    }
  }
  todo.saved = true;
  geddy.todos.push(todo);
  return callback(null, todo);
}
这会循环 geddy.todos 中的所有待办事项,如果 id 已经存在,它将用新的 todo 实例替换 todo 。我们在这里做了一些事情,以确保我们的验证在更新和创建时都有效 - 为了做到这一点,我们必须从新模型实例中提取 errors 属性,并将其传递回回调中。如果它通过了验证,它只是未定义的,我们的代码将忽略它。如果没有通过,todoErrors 将是一个验证错误数组。
现在我们已经完成了,让我们来处理控制器的 update 操作。
继续再次打开控制器并找到“更新”操作,它应该如下所示:
this.update = function (req, resp, params) {
  // Save the resource, then display the item page
  this.redirect({controller: this.name, id: params.id});
};
您需要对其进行编辑,使其看起来像这样:
this.update = function (req, resp, params) {
  var self = this;
  geddy.model.adapter.Todo.load(params.id, function (err, todo) {
    todo.status = params.status;
    todo.title = params.title;
    todo.save(function (err, data) {
      if (err) {
        params.errors = err;
        self.transfer('edit');
      }
      else {
        self.redirect({controller: self.name});
      }
    });
  });
};
我们在这里所做的是加载请求的 todo,编辑它的一些属性,然后再次保存 todo。我们刚刚在模型适配器中编写的代码应该处理其余的事情。如果我们收到错误,则意味着新属性未通过验证,因此我们会将请求传输回 edit 操作。如果我们没有收到错误,我们将把请求重定向回 index 操作。
来吧,尝试一下。重新启动服务器,创建一个新的todo,点击它的编辑链接,将状态更改为done,并在index中看到它已更新。如果您想验证验证是否有效,请尝试将 title 更改为少于 5 个字符的内容。
现在让“删除”按钮发挥作用。
现在我们已经有了一个待办事项列表应用程序,但是如果您开始使用它一段时间,那么在该索引页面上找到您要查找的 todo 项目将会变得很困难。让我们让“删除”按钮起作用,这样我们就可以保持列表简洁明了。
让我们再次打开模型适配器,这次我们要在其中添加 remove 方法。在 save 方法之后添加此内容:
this.remove = function(id, callback) {
  if (typeof callback != 'function') {
    callback = function(){};
  }
  for (var i in geddy.todos) {
    if (geddy.todos[i].id == id) {
      geddy.todos.splice(i, 1);
      return callback(null);
    }
  }
  return callback({message: "To Do not found"});
}
这个非常简单,它应该看起来很像 load 方法。它循环遍历 geddy.todos 中的所有 todo 以找到我们要查找的 id。然后,它将该项目从数组中拼接出来并调用回调。如果在数组中找不到它,则会调用回调并返回错误。
现在让我们在控制器中使用它。
再次打开控制器并执行 remove 操作。它应该看起来像这样:
this.remove = function (req, resp, params) {
  this.respond({params: params});
};
编辑它,使其看起来像这样:
this.remove = function (req, resp, params) {
  var self = this;
  geddy.model.adapter.Todo.remove(params.id, function(err){
    if (err) {
      params.errors = err;
      self.transfer('edit');
    }
    else {
      self.redirect({controller: self.name});
    }
  });
}
我们将从表单 post 中的参数中获取的 id 传递到我们刚刚创建的 remove 方法中。如果返回错误,我们将重定向回 edit 操作(我们假设表单发布了错误的信息)。如果我们没有收到错误,只需将请求发送到 index 操作。
就是这样!我们完成了。
您可以通过重新启动服务器,创建一个新的 todo 项目,单击它的链接,然后单击“删除”按钮来测试删除功能。如果您做得正确,您应该会返回索引页并删除该项目。
在下一个教程中,我们将使用 http://i.tv 很棒的 mongodb-wrapper 模块将 todo 持久保存到 MongoDB 中。有了 Geddy,这一切就会很容易;我们需要改变的只是模型适配器。
If you have any questions, please comment here or raise an issue on github.
The above is the detailed content of Build a task manager application using Node.js and Geddy. For more information, please follow other related articles on the PHP Chinese website!


![[Web front-end] Node.js quick start](https://img.php.cn/upload/course/000/000/067/662b5d34ba7c0227.png)


