

Use the WordPress media uploader to save images

In this series, we will look at how to implement the WordPress media uploader in an actual plugin. The idea behind this series and its associated code is to give us a clear understanding of how it works, how we can use it in the future, and how we can incorporate it into our work.
So far we have covered:
- Getting Started with WordPress Media Uploader
- Add and remove images using the WordPress media uploader
In these articles, we step through the process of building a plugin that uses the WordPress Media Uploader to bring featured images into the footer of our blog posts (and pages).
But there's a problem: the image isn't saved, nor does it appear in the content of its associated blog post (or page).
In this article, we will continue where we left off and complete the implementation of the rest of the plugin. Please note that I assume you have read the first two articles and understand the source code we have covered so far.
With that said, let’s move on.
Save Featured Image
The key to ensuring that images can be displayed on the WordPress front-end is to save the image information provided by WordPress.
In the previous article, we used some of this information to display the image in the meta box we created, but did not actually save the information. Therefore, the image cannot be displayed on the dashboard or website front-end because WordPress doesn’t actually remember it.
We will solve this problem. Specifically, we will save the following fields:
- Image URL so we can set the
srcattribute of the image - Title of the image so we can set it to the image's
altattribute andtitleattribute
Introduction to metadata
The first thing we need to do is add another container with three input fields in the plugin's admin.php view. Each of these fields will correspond to the value above.
Take a look at the code below and then I will elaborate:
<p id="featured-footer-image-meta">
    <input type="text" id="footer-thumbnail-src" name="footer-thumbnail-src" value="" />
	<input type="text" id="footer-thumbnail-title" name="footer-thumbnail-title" value="" />
	<input type="text" id="footer-thumbnail-alt" name="footer-thumbnail-alt" value="" />
</p><!-- #featured-footer-image-meta -->
It should be easy enough to understand from the beginning:
- We introduced a container identified by
featured-footer-image-meta - Contains three input text elements, each corresponding to the image element attribute we will save
At this point we need to jump back into the JavaScript file so that we can get the information returned to us via the media uploader and populate the input fields with this information.
Open admin.js and add the following three lines to the bottom of the handler function inserted into event (for file_frame):
// Store the image's information into the meta data fields
$( '#footer-thumbnail-src' ).val( json.url );
$( '#footer-thumbnail-title' ).val( json.title );
$( '#footer-thumbnail-alt' ).val( json.title );
Navigate to your WordPress dashboard from here, add a new post or edit an existing post, you should see something like the image below:
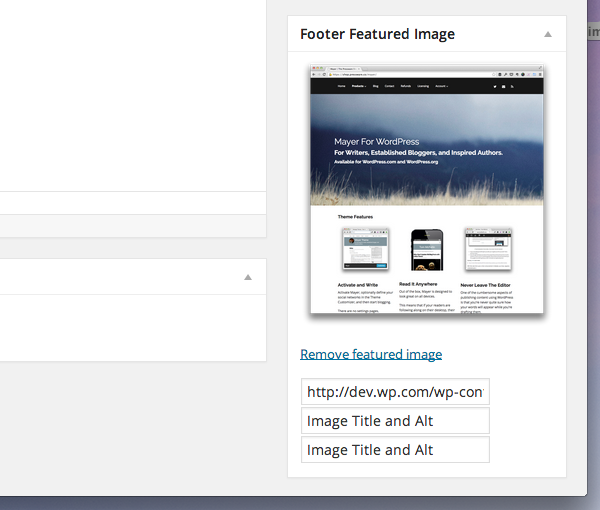
Assuming you've written all your JavaScript directly, you should see something similar based on the data you provided in the Media Uploader when selecting an image.
But please note that when you click "Remove Featured Image" the text will remain. Before we actually save this information, let's finalize the JavaScript so that it clears the input field whenever the user deletes the image.
While there are multiple ways to do this, I chose to use the following code:
// Finally, we reset the meta data input fields
$( '#featured-footer-image-info' )
    .children()
    .val( '' );
Remember, this needs to be in the event handler of the "Remove Featured Image" anchor. In the previous article, we named this function resetUploadForm.
At this point, you should be able to click "Remove Featured Image" and see that the image and input fields have been reset. If you run into issues, check out the source code in the GitHub repository associated with this article (it will be in the master branch and will also be tagged 1.0.0).
Save metadata
Now we need to introduce some code into the plugin that will clean the values of the input fields, associate them with posts, and save them to the database so that we can display the information at the footer of each post . < /p>
In the run function of Acme_Footer_Image, add the following lines of code:
add_action( 'save_post', array( $this, 'save_post' ) );
Then we need to define a function that is responsible for actually saving the value of the input field to the database. There are two things to know about the following code:
- We will clean the data before saving it
- We associate the field with the key used to display the image on the frontend.
/**
 * Sanitized and saves the post featured footer image meta data specific with this post.
 *
 * @param    int    $post_id    The ID of the post with which we're currently working.
 * @since 0.2.0
 */
public function save_post( $post_id ) {

    if ( isset( $_REQUEST['footer-thumbnail-src'] ) ) {
		update_post_meta( $post_id, 'footer-thumbnail-src', sanitize_text_field( $_REQUEST['footer-thumbnail-src'] ) );
	}

	if ( isset( $_REQUEST['footer-thumbnail-title'] ) ) {
		update_post_meta( $post_id, 'footer-thumbnail-title', sanitize_text_field( $_REQUEST['footer-thumbnail-title'] ) );
	}

	if ( isset( $_REQUEST['footer-thumbnail-alt'] ) ) {
		update_post_meta( $post_id, 'footer-thumbnail-alt', sanitize_text_field( $_REQUEST['footer-thumbnail-alt'] ) );
	}

}
Before we are ready to test, we need to make two more changes to the dashboard view before the images are displayed on the front end.
First, we need to make sure the metadata is echoed to the input field. Jump to admin.php and update it again to include the following:
<p id="featured-footer-image-info">
    <input type="text" id="footer-thumbnail-src" name="footer-thumbnail-src" value="<?php echo get_post_meta( $post->ID, 'footer-thumbnail-src', true ); ?>" />
	<input type="text" id="footer-thumbnail-title" name="footer-thumbnail-title" value="<?php echo get_post_meta( $post->ID, 'footer-thumbnail-title', true ); ?>" />
	<input type="text" id="footer-thumbnail-alt" name="footer-thumbnail-alt" value="<?php echo get_post_meta( $post->ID, 'footer-thumbnail-alt', true ); ?>" />
</p><!-- #featured-footer-image-meta -->
Here we call the get_post_meta function to retrieve the value saved using the function we declared above.
接下来,我们需要确保使用相同的值填充本系列前面创建的图像元素:
<div id="featured-footer-image-container" class="hidden">
    <img src="<?php echo get_post_meta( $post->ID, 'footer-thumbnail-src', true ); ?>" alt="<?php echo get_post_meta( $post->ID, 'footer-thumbnail-alt', true ); ?>" title="<?php echo get_post_meta( $post->ID, 'footer-thumbnail-title', true ); ?>" />
</div><!-- #featured-footer-image-container -->
当然,如果元数据为空,则不会填充任何内容,并且图像将不会显示。
假设一切顺利,您应该在保存帖子时看到图像及其关联数据显示在输入字段中。同样,当您删除特色图像时,字段应该清除并且不再显示。
清理
在我们继续在前端显示图像之前,我们需要做一些小事情来清理元框的显示。
首先,我们需要确保之前类型为 text 的所有输入字段均为 hidden 类型。
<p id="featured-footer-image-info">
    <input type="hidden" id="footer-thumbnail-src" name="footer-thumbnail-src" value="<?php echo get_post_meta( $post->ID, 'footer-thumbnail-src', true ); ?>" />
	<input type="hidden" id="footer-thumbnail-title" name="footer-thumbnail-title" value="<?php echo get_post_meta( $post->ID, 'footer-thumbnail-title', true ); ?>" />
	<input type="hidden" id="footer-thumbnail-alt" name="footer-thumbnail-alt" value="<?php echo get_post_meta( $post->ID, 'footer-thumbnail-alt', true ); ?>" />
</p><!-- #featured-footer-image-meta -->
接下来,我们需要编写一个小的 JavaScript 函数,该函数将显示图像(假设图像已保存)。该函数将检查图像 URL 的输入字段是否不是空字符串。
如果不是,那么它将显示图像。因此,我们将此函数添加到 JavaScript 文件中:
/**
 * Checks to see if the input field for the thumbnail source has a value.
 * If so, then the image and the 'Remove featured image' anchor are displayed.
 *
 * Otherwise, the standard anchor is rendered.
 *
 * @param    object    $    A reference to the jQuery object
 * @since    1.0.0
 */
function renderFeaturedImage( $ ) {

    /* If a thumbnail URL has been associated with this image
     * Then we need to display the image and the reset link.
     */
	if ( '' !== $.trim ( $( '#footer-thumbnail-src' ).val() ) ) {

		$( '#featured-footer-image-container' ).removeClass( 'hidden' );

		$( '#set-footer-thumbnail' )
			.parent()
			.hide();

		$( '#remove-footer-thumbnail' )
			.parent()
			.removeClass( 'hidden' );

	}

}
然后,在 DOM 就绪函数的上下文中调用 JavaScript 函数:
renderFeaturedImage( $ );
简而言之,当页面加载时,它会检查输入字段中是否存在 URL。如果是这样,它会渲染图像并为我们提供删除它的选项。否则,它只显示空的特色图像框。
再次强调,如果您在执行此代码时遇到问题,请务必使用本页侧边栏中的链接查看关联的 GitHub 存储库。
显示特色图像
至此,我们已经在仪表板中完成了需要做的所有事情,现在是时候在博客的前端显示图像了。为此,我们需要设置一个连接到 the_content 操作的挂钩,检查图像是否存在,如果存在,则将其附加到帖子内容中。
为此,首先将以下行添加到 Acme_Footer_Image 类的 run 方法中:
add_action( 'the_content', array( $this, 'the_content' ) );
接下来,我们需要编写一个与此操作挂钩的函数。该函数将负责检查我们是否只是一个页面(因为如果用户有 more 标签,我们不想将图像附加到帖子的页脚其内容的一部分)。
我们使用以下代码来完成此操作:
/**
 * If the current post is a single post, check to see if there is a featured image.
 * If so, append is to the post content prior to rendering the post.
 *
 * @param   string    $content    The content of the post.
 * @since   1.0.0
 */
public function the_content( $content ) {

    // We only care about appending the image to single pages
	if ( is_single() ) {

		// In order to append an image, there has to be at least a source attribute
		if ( '' !== ( $src = get_post_meta( get_the_ID(), 'footer-thumbnail-src', true ) ) ) {

			// read the remaining attributes even if they are empty strings
			$alt = get_post_meta( get_the_ID(), 'footer-thumbnail-alt', true );
			$title = get_post_meta( get_the_ID(), 'footer-thumbnail-title', true );

			// create the image element within its own container
			$img_html = '<p id="footer-thumbnail">';
				$img_html .= "<img src='$src' alt='$alt' title='$title' />";
			$img_html .= '</p><!-- #footer-thumbnail -->';

			// append it to the content
			$content .= $img_html;

		}

	}

	return $content;

}
这样,我们就应该有一个功能齐全的插件,将特色页脚图像附加到在单个帖子页面上呈现的帖子中。
结论
在本系列中,我们介绍了很多材料,其中最少涉及使用媒体上传器。尽管这篇文章花了更多时间向我们展示如何将数据从元框连接到前端,但它仍然演示了如何在插件上下文中应用媒体上传器的实际应用。
话虽如此,关于媒体上传器还有很多东西需要了解,我们可以在以后的主题中介绍这些内容。如果您有兴趣,请在下面的评论中告诉我。此外,如果您对所读内容或本系列有任何疑问,也请随时留下。
不要忘记查看该项目的 GitHub 存储库 - 我希望它能在您将来使用媒体上传器时为您提供良好的服务!
The above is the detailed content of Use the WordPress media uploader to save images. For more information, please follow other related articles on the PHP Chinese website!

Hot AI Tools

Undresser.AI Undress
AI-powered app for creating realistic nude photos

AI Clothes Remover
Online AI tool for removing clothes from photos.

Undress AI Tool
Undress images for free

Clothoff.io
AI clothes remover

AI Hentai Generator
Generate AI Hentai for free.

Hot Article
Hot Tools

Notepad++7.3.1
Easy-to-use and free code editor

SublimeText3 Chinese version
Chinese version, very easy to use

Zend Studio 13.0.1
Powerful PHP integrated development environment

Dreamweaver CS6
Visual web development tools

SublimeText3 Mac version
God-level code editing software (SublimeText3)
Hot Topics


 Difficulty in updating caching of official account web pages: How to avoid the old cache affecting the user experience after version update?
Mar 04, 2025 pm 12:32 PM
Difficulty in updating caching of official account web pages: How to avoid the old cache affecting the user experience after version update?
Mar 04, 2025 pm 12:32 PM
The official account web page update cache, this thing is simple and simple, and it is complicated enough to drink a pot of it. You worked hard to update the official account article, but the user still opened the old version. Who can bear the taste? In this article, let’s take a look at the twists and turns behind this and how to solve this problem gracefully. After reading it, you can easily deal with various caching problems, allowing your users to always experience the freshest content. Let’s talk about the basics first. To put it bluntly, in order to improve access speed, the browser or server stores some static resources (such as pictures, CSS, JS) or page content. Next time you access it, you can directly retrieve it from the cache without having to download it again, and it is naturally fast. But this thing is also a double-edged sword. The new version is online,
 How do I use HTML5 form validation attributes to validate user input?
Mar 17, 2025 pm 12:27 PM
How do I use HTML5 form validation attributes to validate user input?
Mar 17, 2025 pm 12:27 PM
The article discusses using HTML5 form validation attributes like required, pattern, min, max, and length limits to validate user input directly in the browser.
 What are the best practices for cross-browser compatibility in HTML5?
Mar 17, 2025 pm 12:20 PM
What are the best practices for cross-browser compatibility in HTML5?
Mar 17, 2025 pm 12:20 PM
Article discusses best practices for ensuring HTML5 cross-browser compatibility, focusing on feature detection, progressive enhancement, and testing methods.
 How to efficiently add stroke effects to PNG images on web pages?
Mar 04, 2025 pm 02:39 PM
How to efficiently add stroke effects to PNG images on web pages?
Mar 04, 2025 pm 02:39 PM
This article demonstrates efficient PNG border addition to webpages using CSS. It argues that CSS offers superior performance compared to JavaScript or libraries, detailing how to adjust border width, style, and color for subtle or prominent effect
 What is the purpose of the <datalist> element?
Mar 21, 2025 pm 12:33 PM
What is the purpose of the <datalist> element?
Mar 21, 2025 pm 12:33 PM
The article discusses the HTML <datalist> element, which enhances forms by providing autocomplete suggestions, improving user experience and reducing errors.Character count: 159
 What is the purpose of the <meter> element?
Mar 21, 2025 pm 12:35 PM
What is the purpose of the <meter> element?
Mar 21, 2025 pm 12:35 PM
The article discusses the HTML <meter> element, used for displaying scalar or fractional values within a range, and its common applications in web development. It differentiates <meter> from <progress> and ex
 How do I use the HTML5 <time> element to represent dates and times semantically?
Mar 12, 2025 pm 04:05 PM
How do I use the HTML5 <time> element to represent dates and times semantically?
Mar 12, 2025 pm 04:05 PM
This article explains the HTML5 <time> element for semantic date/time representation. It emphasizes the importance of the datetime attribute for machine readability (ISO 8601 format) alongside human-readable text, boosting accessibilit
 What is the purpose of the <progress> element?
Mar 21, 2025 pm 12:34 PM
What is the purpose of the <progress> element?
Mar 21, 2025 pm 12:34 PM
The article discusses the HTML <progress> element, its purpose, styling, and differences from the <meter> element. The main focus is on using <progress> for task completion and <meter> for stati
