

No matter how simple we try to make a web application, it's often helpful to walk new users through their first experience. A visual tour is probably the easiest way.
If you’ve followed my Envato Tuts Create Your Startup with PHP series, then you’ll be familiar with meeting planners. After watching users schedule their first meetings, I decided it would be best to build some kind of guide.
At first, I considered building it myself, but then I found an open source option, Shepherd.
In today’s tutorial, I’ll show you how to build a visual user journey using Shepherd. Using Shepherd is relatively simple, and I'm going to review some code that I myself use to simplify the creative process.
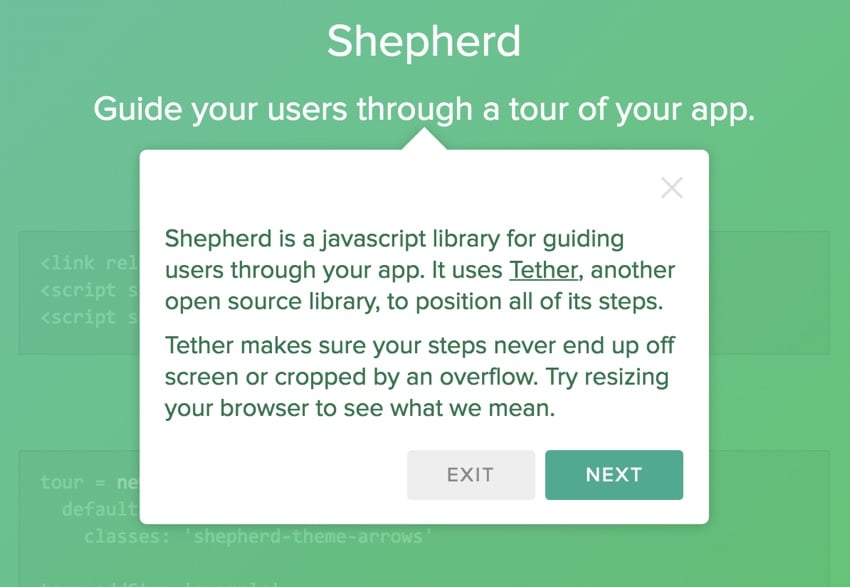
Shepherd is an open source product from HubSpot, an inbound marketing service. Kudos to them for providing a robust library and good documentation.
Let’s look at a simple scene from Shepherd.
Integrating basic browsing into your application is easy with Shepherd. First, you select a theme file and integrate its JavaScript like this:
<link rel="stylesheet" href="shepherd-theme-arrows.css" />
<script src="tether.min.js"></script>
<script src="shepherd.min.js"></script>
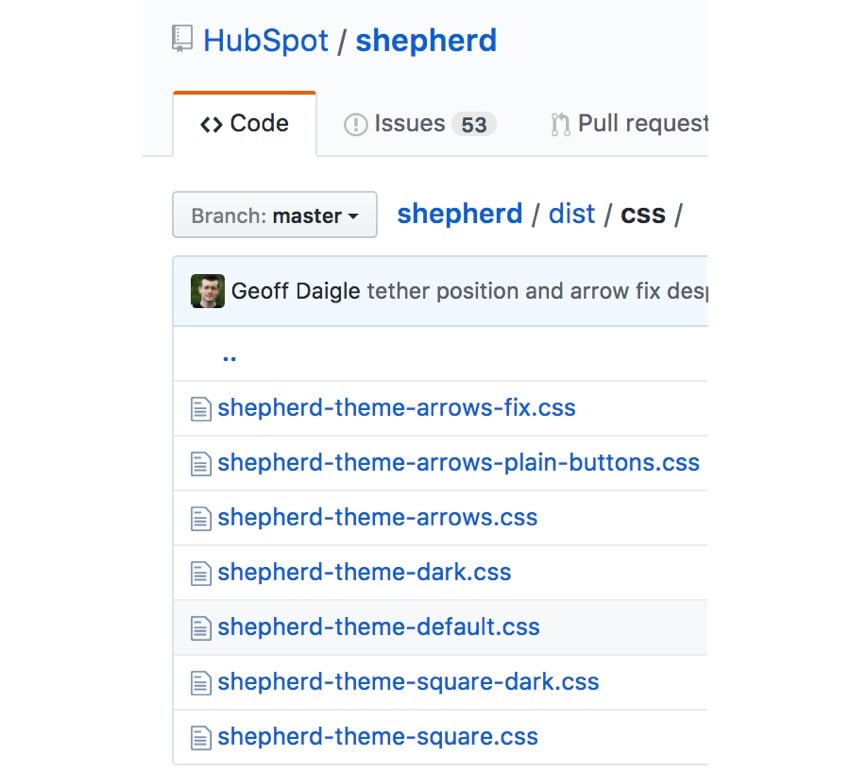
You can download the file from the Shepherd GitHub page. I used shepherd-theme-arrows.css above, but you can choose from any of the defaults below and customize them:
Next, you create a tour object:
const tour = new Shepherd.Tour({
  defaultStepOptions: {
    classes: 'shepherd-theme-arrows',
    scrollTo: true
  }
});
When creating a tour using the defaultStepOptions key, you can define default values for all steps. classes refers to the theme definition you are using, for example shepherd-theme-arrows and scrollTo help in the scrollIntoView() method Make sure all steps appear in the visible viewport with the help of .
You can then add individual steps to the tour:
tour.addStep('example-step', {
  text: 'This step is attached to the bottom of the <code>.
example-css-selector</code> element.',
  attachTo: { element: '.example-css-selector', on: 'bottom'},
  classes: 'example-step-extra-class',
  buttons: [
    {
      text: 'Next',
      action: tour.next
    }
  ]
});
text is the content that appears in the text of the visual tour. The text can be a regular HTML string or a HTMLElement object. You can also provide a callback function here that will be executed when the step is built. However, it must return an HTML string or a HTMLElement object.
attachTo Key points to the CSS selector of the item to which this step is to be attached. It expects an object as its value.
buttons Keys allow you to define one or more buttons and their actions, eg. Next. This key accepts an array of button objects as its value. The button object will have key-value pairs that control the button's behavior and appearance.
Finally, you start your tour:
tour.start();
Shepherd is built on Tether (another HubSpot open source product), which helps position elements to other elements on the page. Tether ensures your steps don't overflow the screen or get clipped.
When I started experimenting with Shepherd, I quickly discovered that writing a guide with many steps could be quite lengthy. This is a problem I solved in my own implementation.
I don't want to write a tour with a lot of JavaScript code that requires long-term maintenance. Instead, I chose to create an array and programmatically customize the buttons based on whether the user is at the beginning or end of the tour.
For example, I create a steps[] array and define the tour by populating the array:
const tour = new Shepherd.Tour({
defaultStepOptions: {
classes: 'shepherd-theme-arrows',
scrollTo: true
}
});
const steps = [];
steps.push({
attachTo: {
element: '.nav-tabs',
on: 'top'
},
title: 'Welcome',
text: `Allow me to show you how to plan a ${title}. <p>If you prefer, you can <a href="javascript::return false;" onclick="turnOffGuide();">turn off this guide</a>.<br /><br />`
});
steps.push({
attachTo: {
element: '#headingWho',
on: 'top'
},
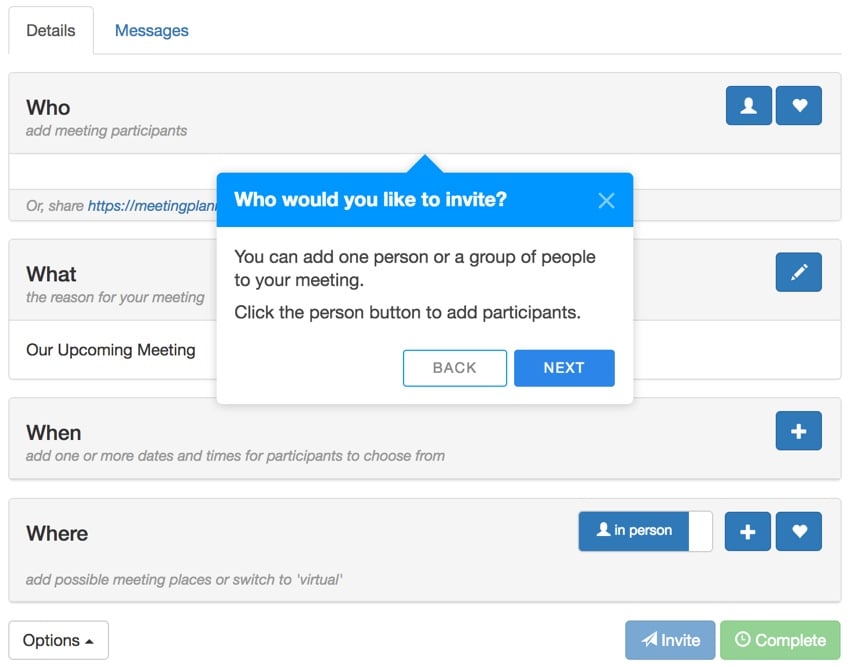
title: 'Who would you like to invite?',
text: `You can add one person or a group of people to your ${title}. <p>Click the person button to add participants.</p>`
});
steps.push({
attachTo: {
element: '#invitation-url',
on: 'bottom'
},
title: 'Inviting by email',
text: 'Alternately, you can email the meeting link to your participant(s)'
});
steps.push({
attachTo: {
element: '#headingWhat',
on: 'bottom'
},
title: 'What is your meeting about?',
text: `You can customize the subject of your ${title}. We'll use it for the invitation and reminder emails.<p>Click the pencil button to edit the subject.</p>`
});
if ($('#headingActivity').length > 0) {
steps.push({
attachTo: {
element: '#headingActivity',
on: 'top'
},
title: 'What do you want to do?',
text: 'You can suggest one or more activity ideas. With multiple ideas, your participants can help you select their favorite. <p>Click the plus button to suggest activities.</p>'
});
}
steps.push({
attachTo: {
element: '#headingWhen',
on: 'top'
},
title: 'When do you want to meet?',
text: `Suggest one or more dates and times for your ${title}. With more than one, your participants can help you choose. <p>Click the + button to add them.</p>`
});
steps.push({
attachTo: {
element: '#headingWhere',
on: 'top'
},
title: 'Where do you want to meet?',
text: `Suggest one or more places for your ${title}. With multiple places, your participants can help you choose. <p>We use Google Places to simplify adding them. Click the + button to begin.</p>`
});
steps.push({
attachTo: {
element: '.virtualThing',
on: 'top'
},
title: 'Is this a virtual meeting?',
text: `Switch between <em>in person</em> and <em>virtual</em> ${title}s such as phone calls or online conferences.`
});
steps.push({
attachTo: {
element: '#actionSend',
on: 'top'
},
title: 'Sending invitations',
text: `Scheduling is collaborative. After you add times and places, you can <strong>Invite</strong> participants to select their favorites. <em>A place isn't necessary for virtual ${title}s.</em>`
});
steps.push({
attachTo: {
element: '#actionFinalize',
on: 'right'
},
title: 'Finalizing the plan',
text: `Once you choose a time and place, you can <strong>Complete</strong> the plan. We'll email the invitations and setup reminders.`
});
steps.push({
attachTo: {
element: '#tourDiscussion',
on: 'left'
},
title: 'Share messages with participants',
text: 'You can write back and forth with participants on the <strong>Messages</strong> tab. <p>Messages are delivered via email.</p>'
});
steps.push({
attachTo: {
element: '.container',
on: 'top'
},
title: 'Ask a question',
text: `Need help? <a href="${$('#url_prefix').val()}/ticket/create">Ask a question</a> and we'll respond as quickly as we can. <p>If you prefer, you can <a href="${$('#url_prefix').val()}/user-setting?tab=guide">turn off the guide</a> in settings.</p>`
});
Each object element I add to the array contains three key pieces of information:
{element: '.nav-tabs', on:'top'}
title The text of the title in the key, for example 'When would you like to meet? '
text keyFor me, maintaining this array is much simpler than defining buttons for each step of the tutorial. However, this means I need to programmatically define the buttons when loading the steps into the tour.
I wrote this code to properly add and respond to the tour button. At each step, it creates an array of buttons which I would otherwise have to define manually:
for (let i = 0; i < steps.length; i++) {

    let buttons=[];

    // no back button at the start
    if (i>0) {
        buttons.push({
          text: 'Back',
          classes: 'shepherd-button-secondary',
          action: function() {
            return tour.back();
          }
        });
    }

    // no next button on last step
    if (i!=(steps.length-1)) {
        buttons.push({
          text: 'Next',
          classes: 'shepherd-button-primary',
          action: function() {
            return tour.next();
          }
        });
    } else {
        buttons.push({
          text: 'Close',
          classes: 'shepherd-button-primary',
          action: function() {
            return tour.hide();
          }
        });
    }
For example, the first step does not have a Back button, and the last step does not have a Next button. But the last step does have a Close button.
Then every step in my array and every button array is added to the tour.
    tour.addStep(`step_${i}`, {
        text: steps[i].text,
        title: steps[i].title,
        attachTo: steps[i].attachTo,
        classes: 'shepherd shepherd-open shepherd-theme-arrows shepherd-transparent-text',
        buttons: buttons,
    });
}
使用这种方法,我不必为教程的每个步骤重复重新定义相同的按钮。它还提供了一些编程能力,可以为未来动态定制游览。
使用我选择的 PHP 编程框架 Yii,我将必要的包含文件添加到我的资源文件中。这会加载到需要游览的特定页面上。就我而言,会议安排页面:
<?php
namespace frontend\assets;
use yii\web\AssetBundle;
class MeetingAsset extends AssetBundle
{
    public $basePath = '@webroot';
    public $baseUrl = '@web';
    public $css = [
      ...
      'css/shepherd-theme-arrows.css',
    ];
    public $js = [
      'js/meeting.js',
      ...
      'js/tether.min.js',
      'js/shepherd.min.js',
      'js/meeting_tour.js',
    ];
    ...
您将在上面看到 Shepherd 主题的 CSS 和 Tether、Shepherd 的 JavaScript,以及我的游览定义文件 meeting_tour.js。
我还添加了 CSS 来将游览弹出窗口的整体宽度控制为视口的 40%:
.shepherd-element.shepherd-theme-arrows {
  max-width: 40%;
}
您可以观看上面或 Vimeo 上的示例游览视频。如果您想亲自尝试,请在 Meeting Planner 上注册,然后您将立即进入安排导览。
我创建了一个用户设置,供人们快速关闭游览。我没有在每个步骤中添加一个分散注意力的关闭按钮,而是在导览的第一个和最后一个步骤中添加了一个关闭指南的链接:
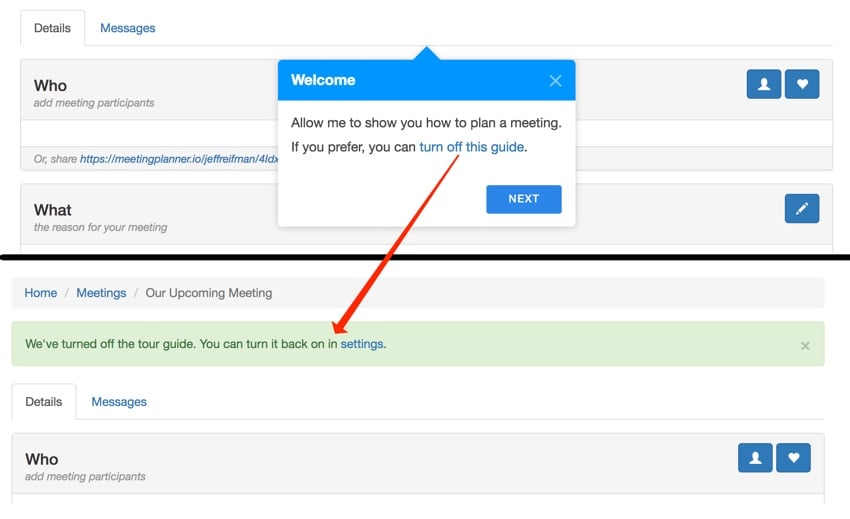
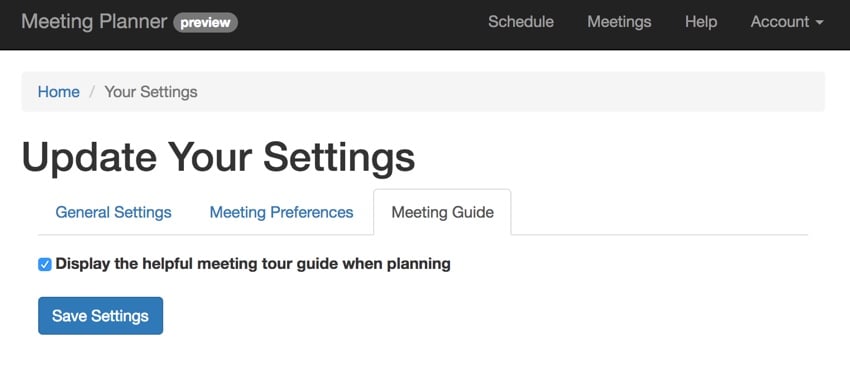
通过 AJAX 以交互方式将其关闭,并显示指向下面设置页面的有用链接。这可以帮助新用户轻松找到如何重新打开游览:
我刚刚向您展示了 Shepherd 的基础知识以及如何将其快速集成到您的 Web 应用程序中。到目前为止,除了偶尔出现箭头问题之外,它对我来说效果很好。然而,Shepherd 提供的功能比我所评论的要多得多,特别是在事件处理和管理方面。这允许您以更加定制的方式调整您的游览以适应您的应用程序和用户的当前状态。他们也有非常好的文档。
例如,如果用户跳转到网页的某个区域,您可以让事件自动触发跳转到游览的另一个步骤。我可能会在以后的教程中深入探讨这一点。
我希望您喜欢了解 Shepherd。它无疑是一个视觉效果优美、开发人员友好的视觉之旅,您可以快速集成到任何应用程序中。
本文已根据 Monty Shokeen 的贡献进行了更新。 Monty 是一位全栈开发人员,他也喜欢编写教程和学习新的 JavaScript 库。
The above is the detailed content of How to use Shepherd to build user navigation in JavaScript. For more information, please follow other related articles on the PHP Chinese website!


![[Web front-end] Node.js quick start](https://img.php.cn/upload/course/000/000/067/662b5d34ba7c0227.png)


