iPhone Tips for 2023: Easily Customize Your Widgets
Widgets have been a game-changer for iOS users since they were first introduced in iOS 14. This feature has evolved over the years to include new apps and provide support for third-party widgets. If you are new to the operating system or have recently upgraded your iPhone to a newer model and want to change the default widgets on your device, the following post should help you do so on your iPhone.
You can change widgets on your iPhone in three different places – the Lock screen, Home screen, or Today view. You can also change and customize third-party app widgets based on the apps you use.
How to Change Widgets on the iPhone Lock Screen
If your iPhone already has widgets on the lock screen, you can edit those widgets to display a different set of information, or replace them entirely Widgets to display widgets from other apps available on your iPhone.
Method 1: Edit existing widgets
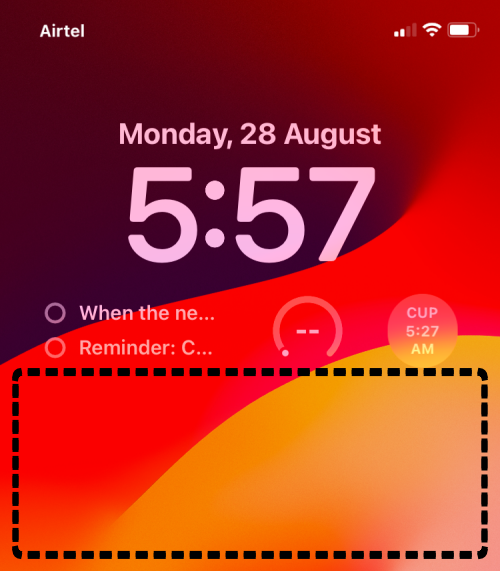
Some apps have widgets that provide different information that you can modify from the lock screen, so you don’t need to delete the widget completely You can make it display different content. You simply edit these widgets and select different information types from the edit screen on your lock screen. To do this, unlock your device and press and hold an empty space on the lock screen. When the lock screen enters edit mode, swipe left or right to select the lock screen you want to add the new widget to.
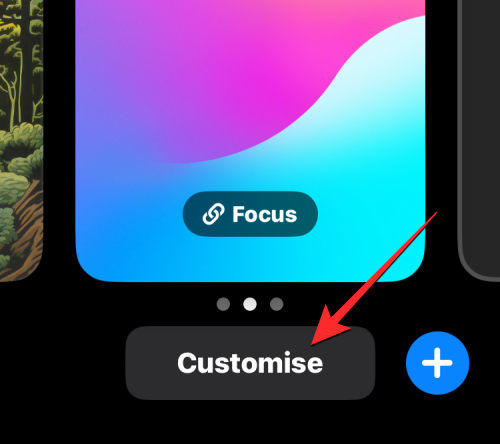
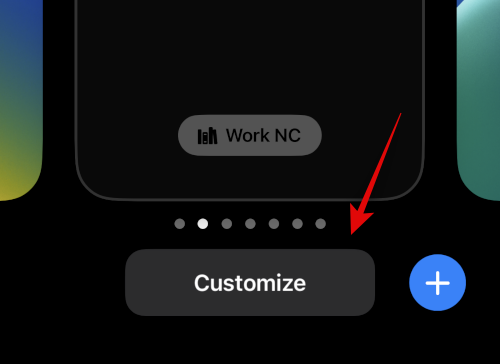
Now, click Customize at the bottom.
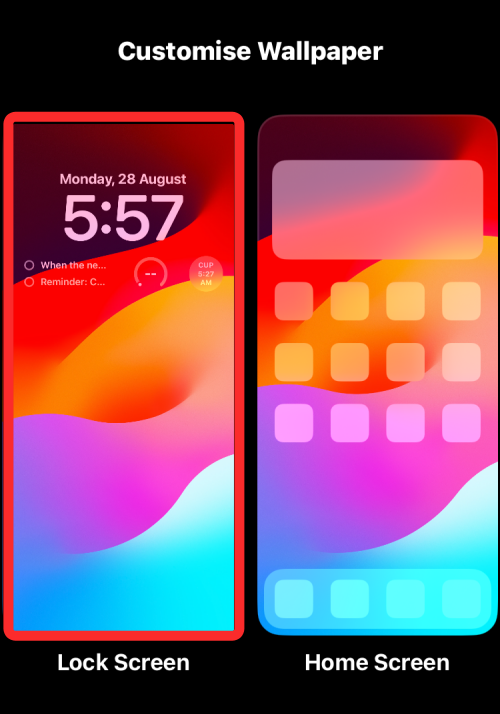
When the "Customize Wallpaper" screen appears, select the "Lock Screen" preview on the left.
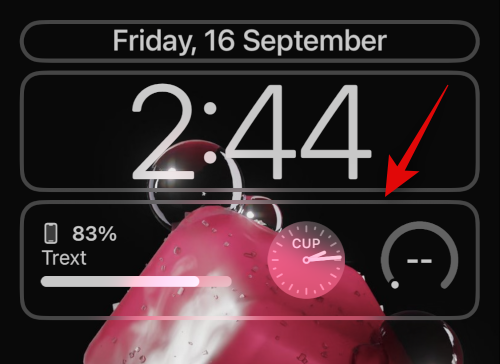
Now you will enter the edit mode of your lock screen. Here, click on the widget box below the clock and select the widget you want to edit.
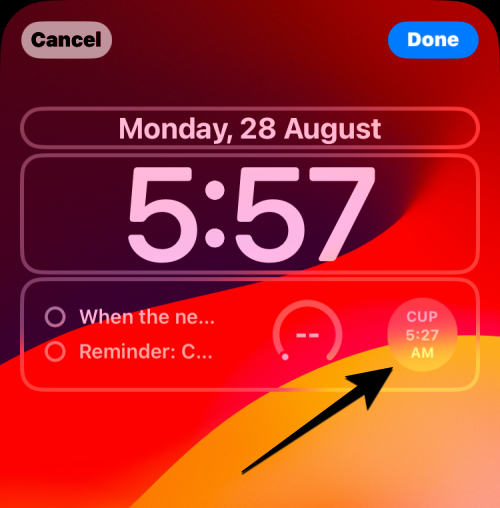
Note: Not all widgets on the lock screen can be edited to display different information. If clicking on the window on the screen above does not display the menu, then you can be sure that you cannot change the information displayed by the widget without replacing the widget itself.
From the widget's menu, you can select the section you want to edit, then tap the option you want to show on the lock screen. Some widgets may have multiple sections for you to edit, while other widgets will directly show you a menu of options to choose from.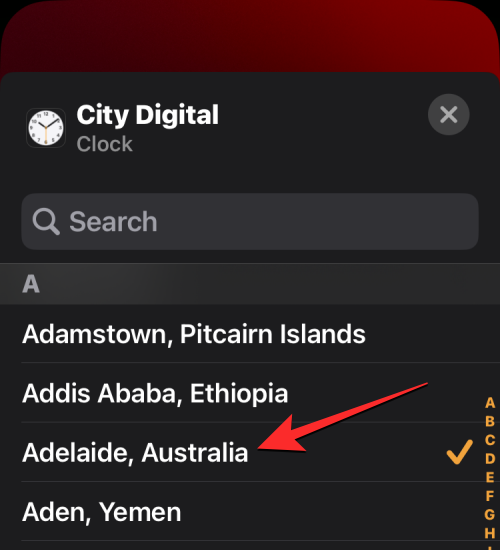
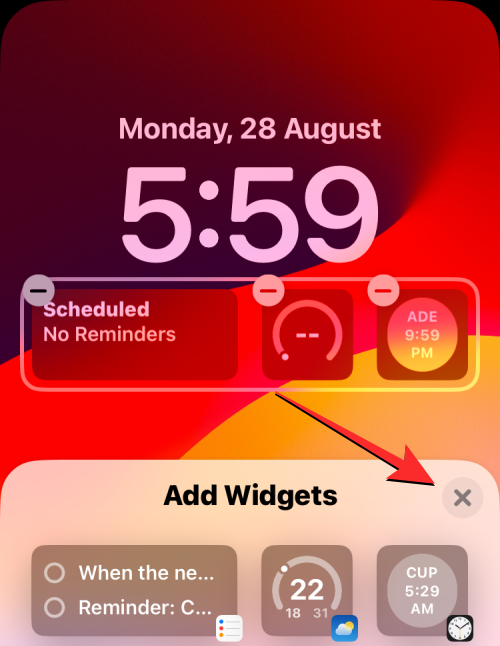
X icon on the Add Widget menu.
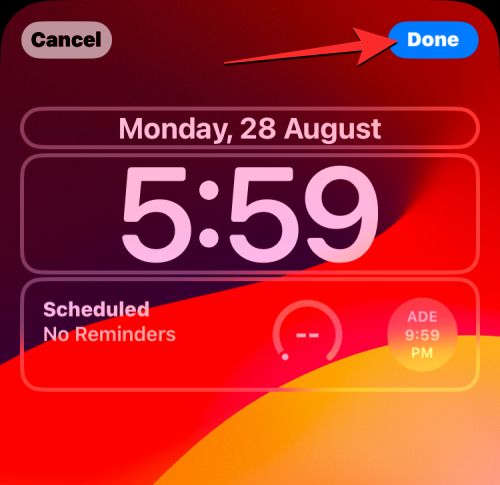
Done in the upper right corner.
Customize under the current lock screen.
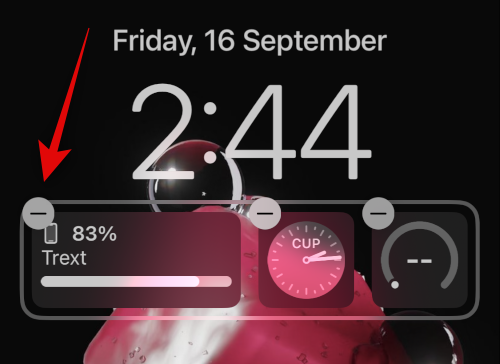
– icon to delete existing widgets and make room for new widgets.
Now scroll through the list at the bottom and tap on the app you want to add a widget to your lock screen.
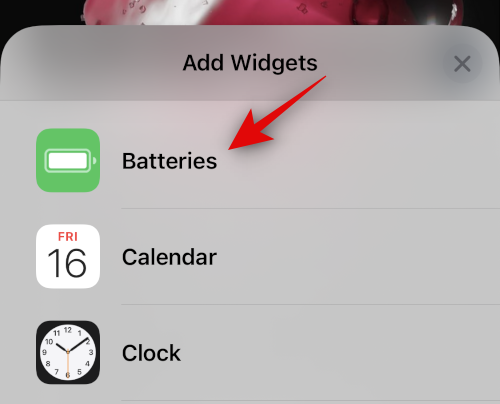
You can also click and select a widget from the suggestions at the top.
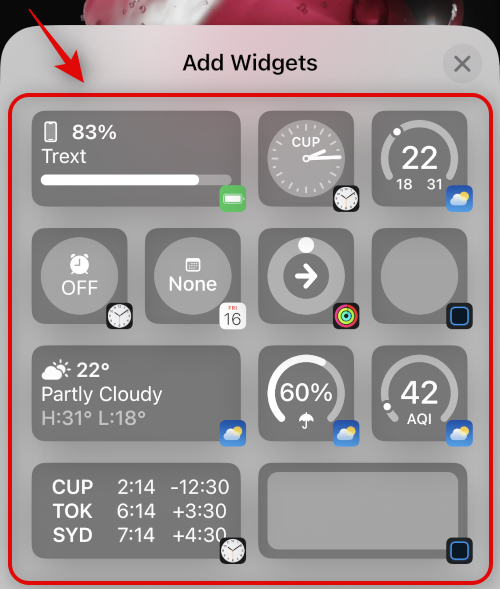
#After selecting the app, tap and select the widget you want to add to the lock screen.
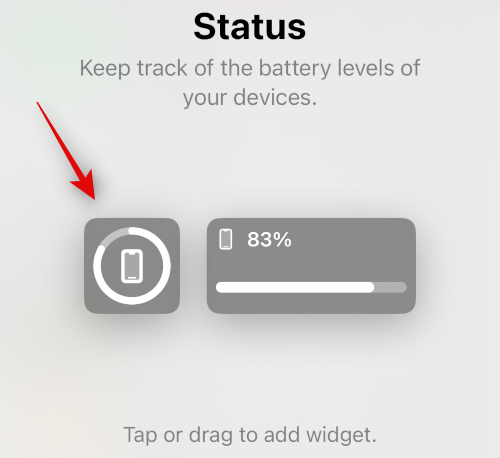
Repeat the above steps to change any other widgets currently on the lock screen. Click Finish after completing widget changes.
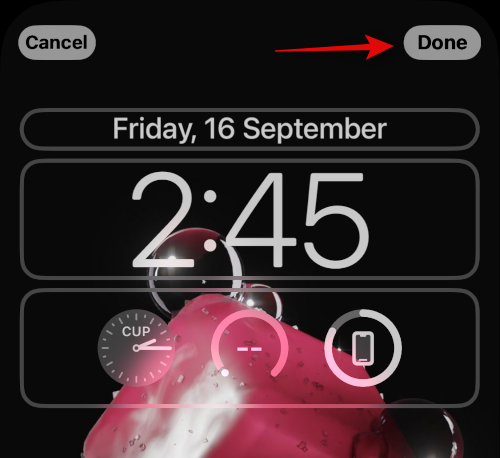
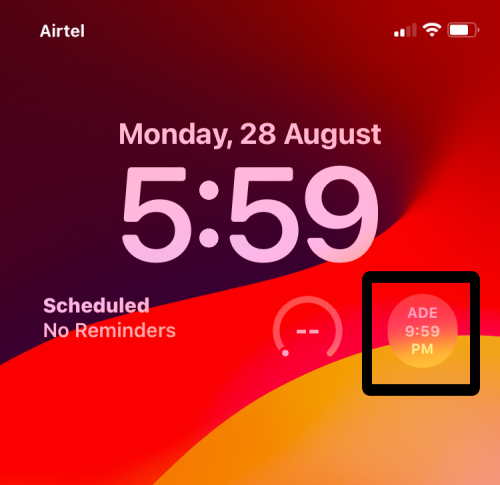
Tap the lock screen to exit edit mode. This is how you change widgets on the lock screen.
How to Change Widgets on iPhone Home Screen
You can add an unlimited number of widgets to your home screen. If you already have widgets on your iPhone home screen, you can edit them to display a different set of information, or replace them entirely to display widgets from other apps available on your iPhone.
Method 1: Edit an existing widget
To change the content displayed on an existing widget, long press the widget you want to edit.
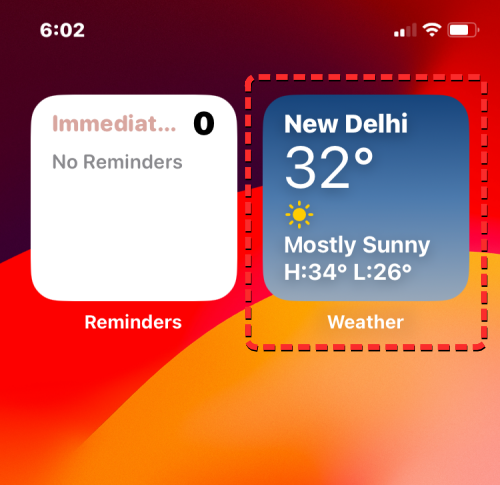
From the overflow menu that appears, click Edit Widget.
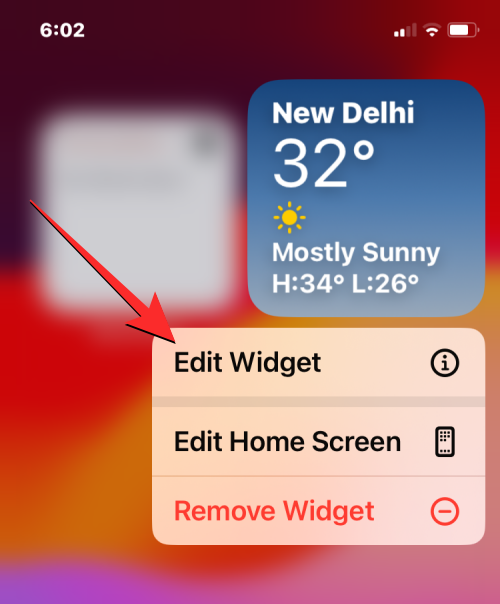
#Alternatively, you can access the same menu by long-pressing an empty area on the home screen until you enter edit mode. When the apps and widgets on the screen start to shake, tap the widget you want to edit.
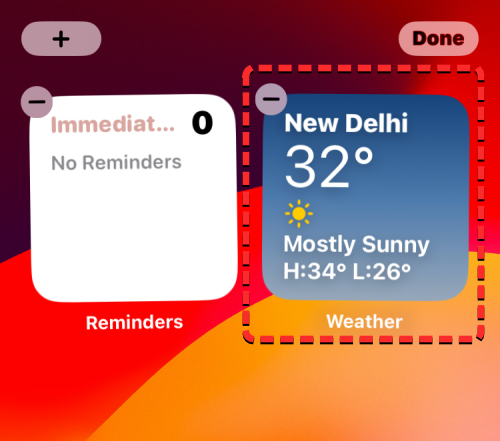
#In the menu that appears, click on the section you want to edit. Some widgets may have multiple sections for you to edit, while other widgets will directly show you a menu of options to choose from. In this case, what we want to change is the "Location" part.
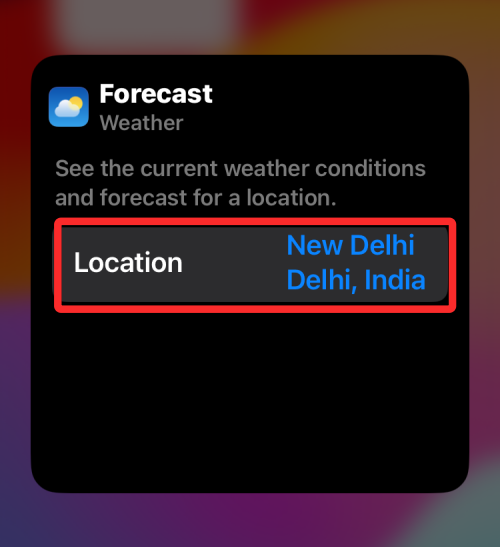
When you do this, you will see a list of options to choose from. Select the options to display in place of the existing information on the widget.
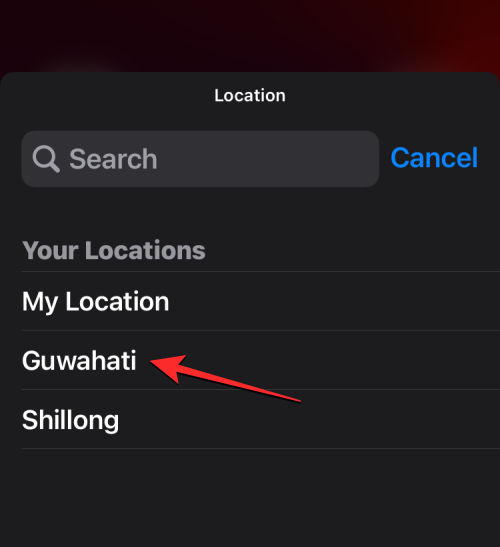
#The widget will now display the selected information on the home screen by replacing the previous existing content.
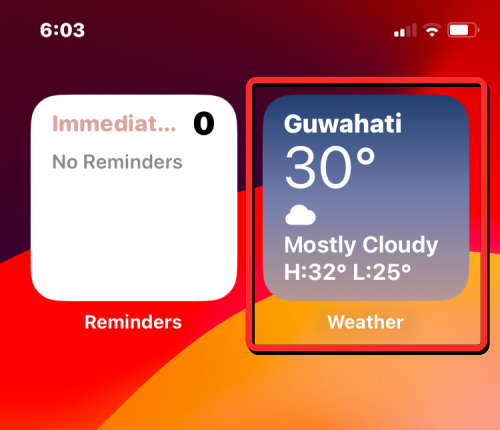
Method 2: Replace existing widget
If you wish to completely replace one widget with another, you must first delete the existing widget Widgets and add a new widget from the widget menu. To replace an existing widget, long-press on the widget you want to remove and select ResetMove Widget from the overflow menu.
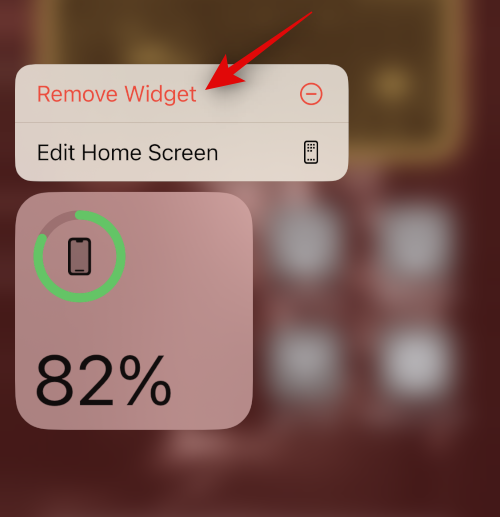
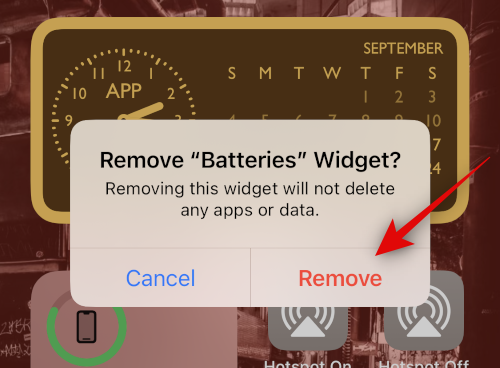
Tap Remove again to confirm your choice.
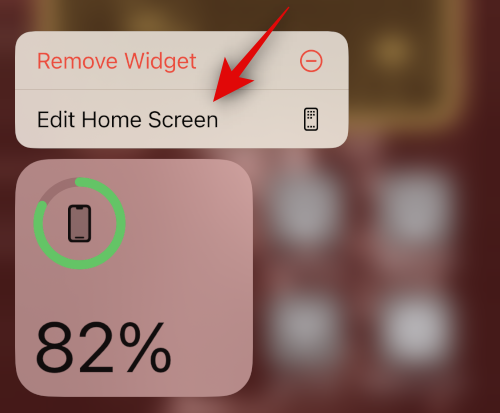
Repeat the above steps to remove any other widgets from your home screen. Now tap and hold on any item on the home screen and select Edit Home Screen from the context menu.
Click the icon in the upper left corner.
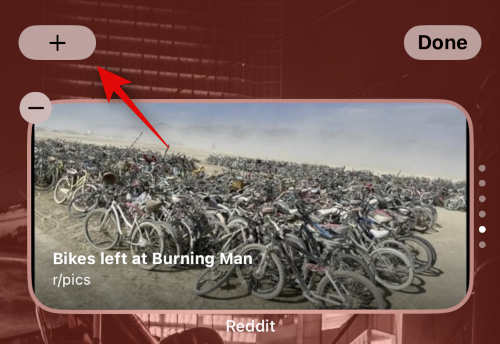
#Now, select the desired app whose widget you want to add to your home screen.
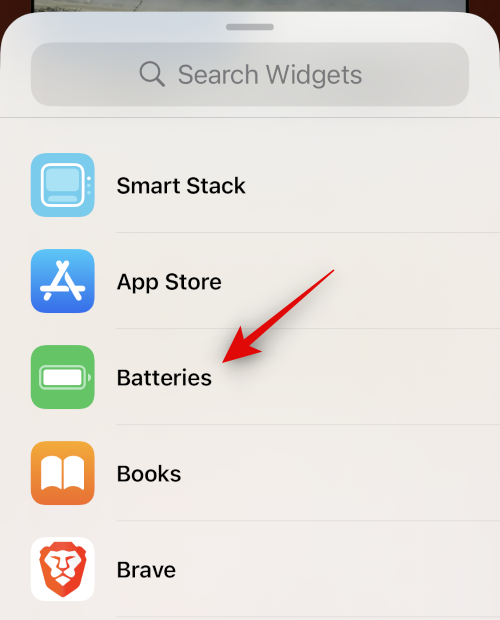
You can also select and add widgets from the suggestions at the top of the app list.
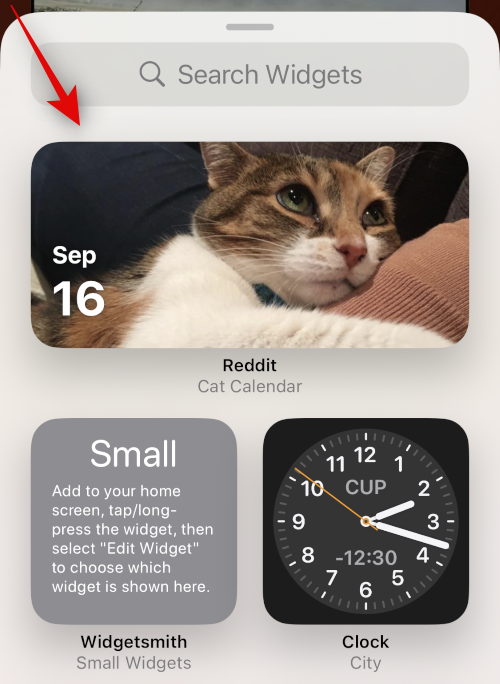
Now select the widgets you want to add to the selected app by swiping on the screen.
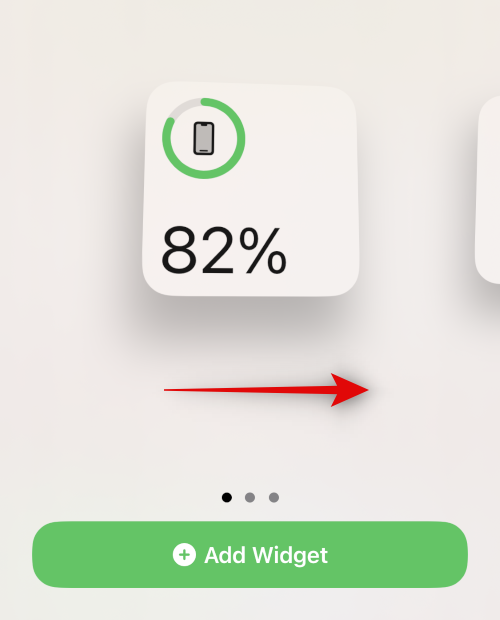
After selection, click Add Widget at the bottom.
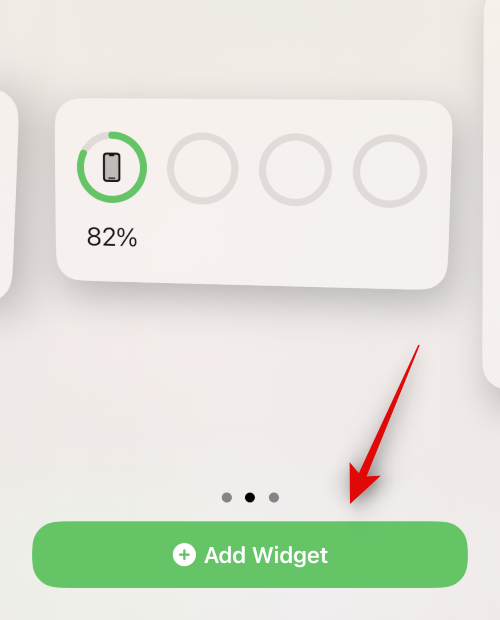
The selected widget will now be added to your home screen. Click and drag the widget to reposition it on the home screen. Repeat the above steps to add any other widgets you like to your home screen. Click Finish to exit edit mode.
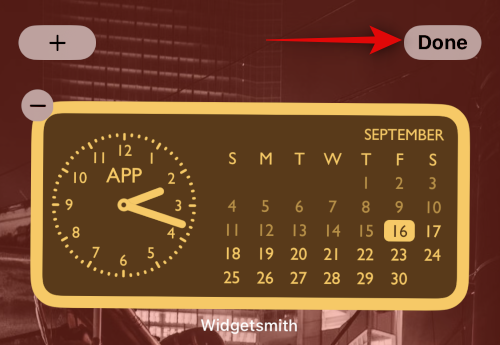
This is how you can replace widgets on your home screen.
How to Change Widgets on iPhone Today View
Today View enables you to add widgets and view information at a glance. If you already have widgets on your iPhone's Today View screen, you can edit them to display a different set of information, or replace them entirely to display widgets from other apps available on your iPhone.
Method 1: Edit an existing widget
To modify the information displayed by an existing widget in Today View, long pressan empty area on the home screen , until it enters edit mode. When apps and widgets on the Home screen start shaking, swipe right to open Today View.
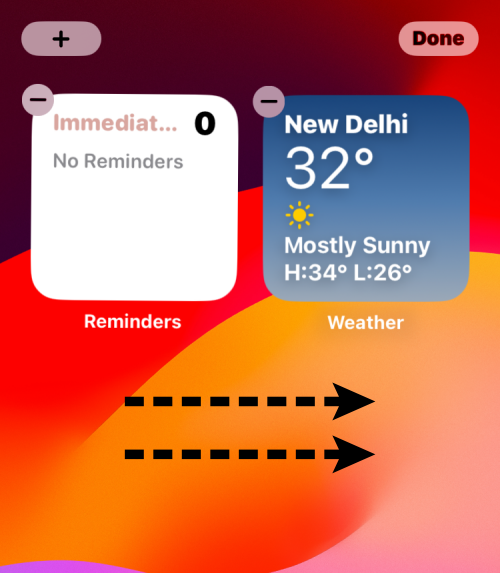
In Today View, tap the widget you want to edit.
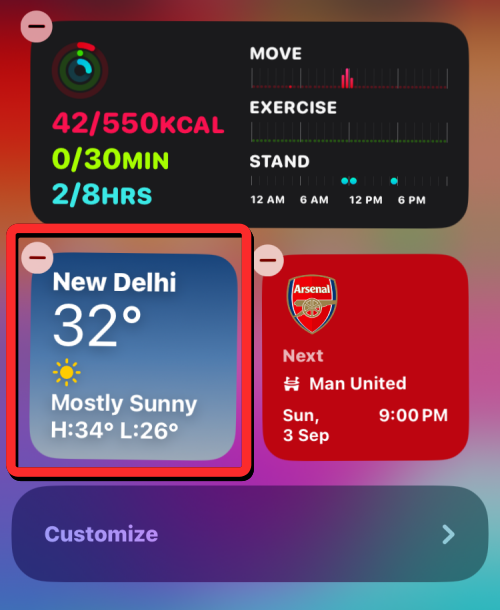
You can also do this by swiping right on the home screen without entering edit mode, and then long-pressing the widget you want to edit from the Today View screen to access this setting. When you press and hold, you'll see an overflow menu appear above or below the selected widget. From here, click Edit Widget.
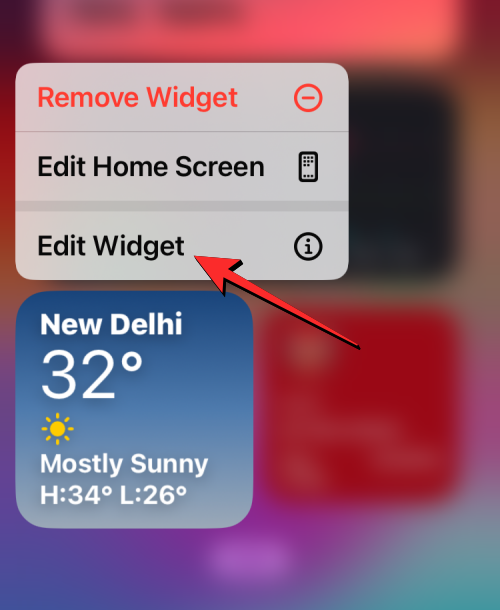
#In the menu that appears, click on the section you want to edit. Some widgets may have multiple sections for you to edit, while other widgets will directly show you a menu of options to choose from. In this case, what we want to change is the "Location" part.
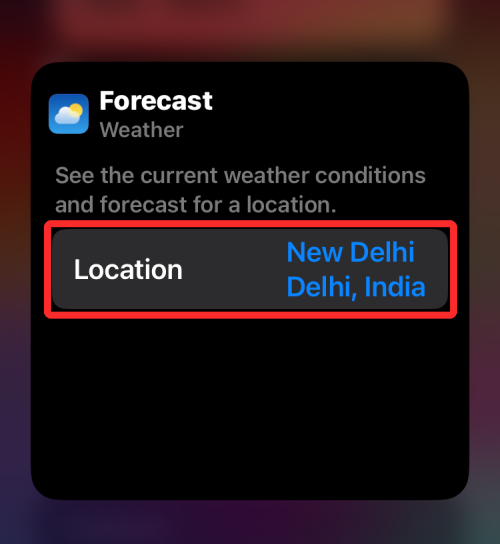
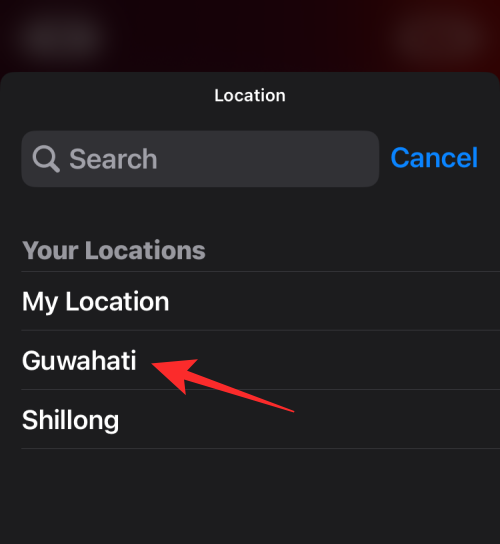
When you do this, you will see a list of options to choose from. Select the options to display in place of the existing information on the widget.
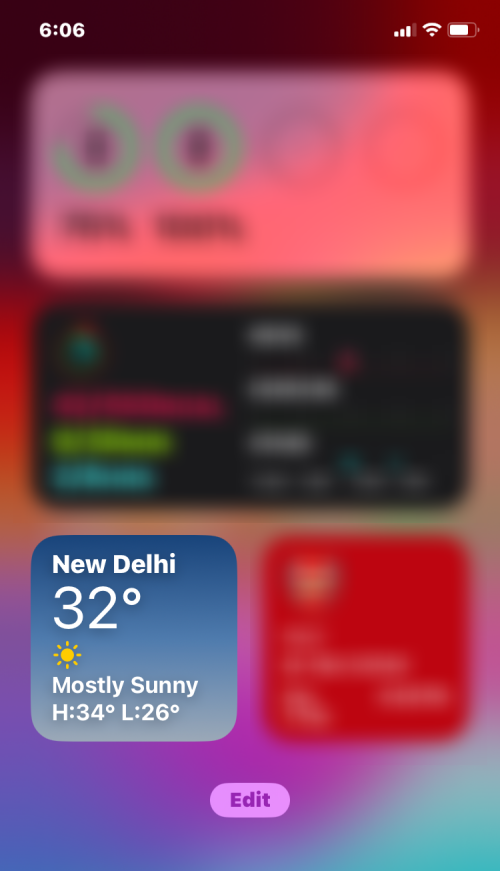
The widget will now display the selected information within the Today View by replacing the previous existing content.
Method 2: Replace existing widget
Unlock your device and swipe right on the home screen to see your Today view . Now click Edit.
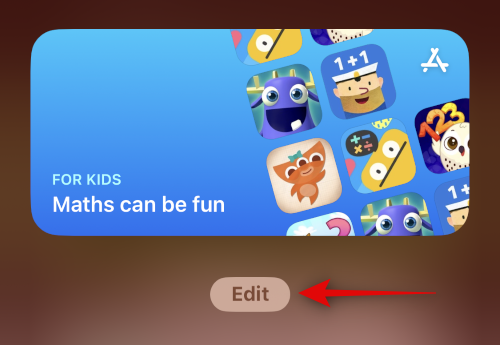
Click the – icon in the upper left corner of the widget you want to delete.
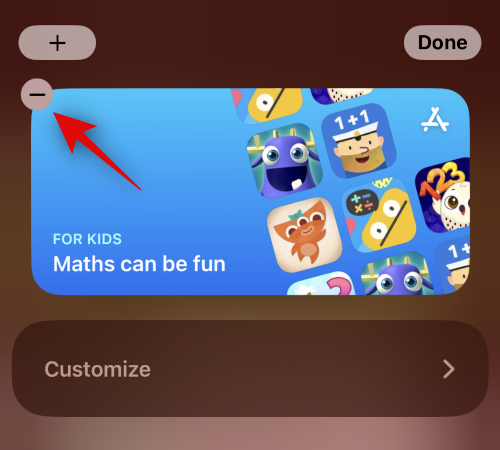
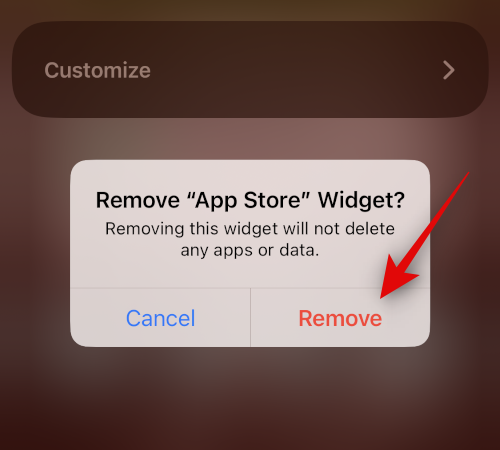
Tap Remove to confirm your choice.
Repeat the above steps to remove any other widgets you want to change in Today View. When finished, click the icon.
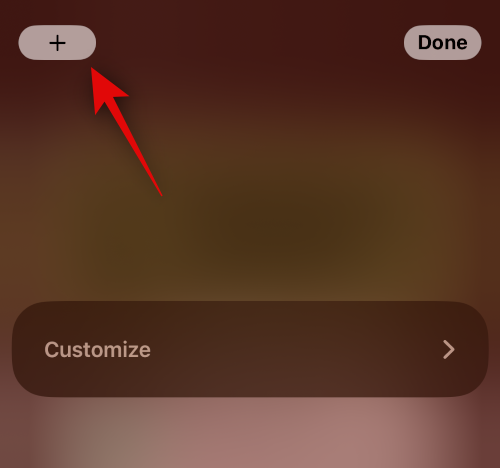
Now click and select the widgets you want to add to Today View. You can select an app or select a widget from the suggestions at the top.
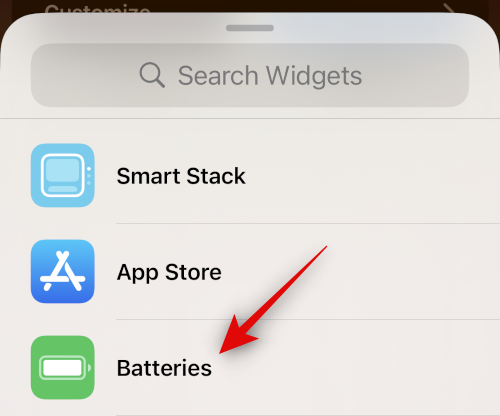
If you selected an app, swipe right and select the desired widget size.
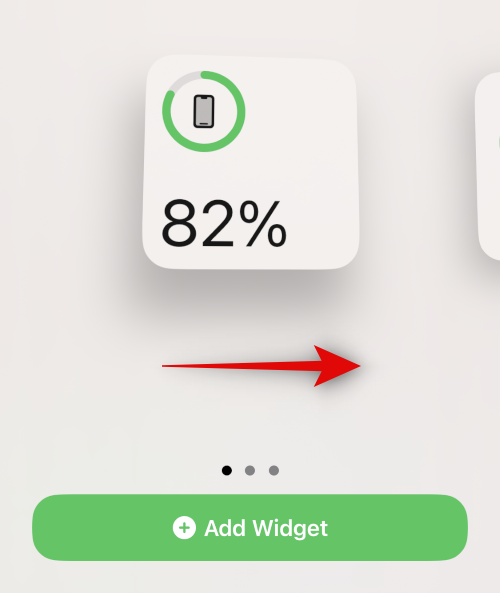
Click Add widget After completion.
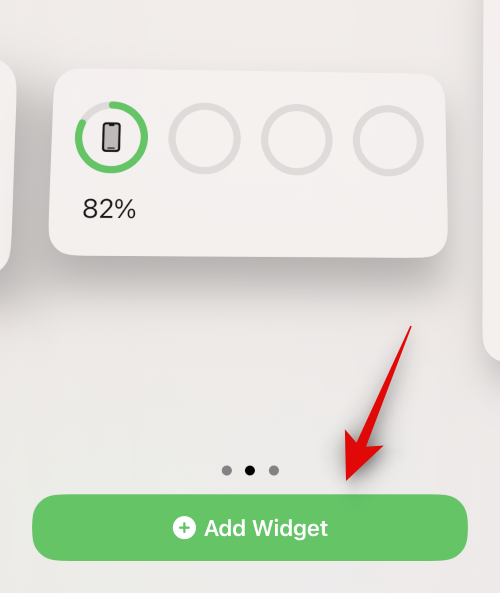
Repeat the above steps to add more widgets to Today View.
To add a widget that is not available in the "Add Widget" menu, you can click "Customize" at the bottom.
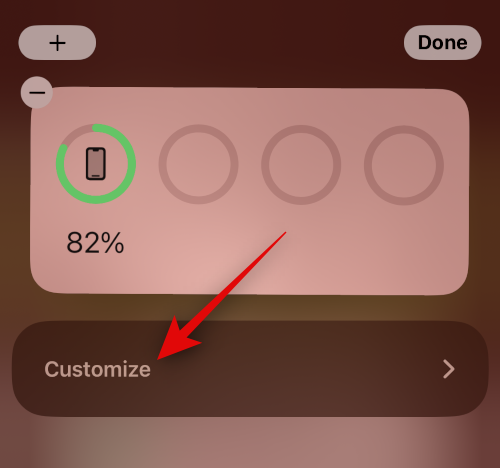
You will now see supported third-party apps that can display shortcuts using this stack. Click the plus button to the left of your preferred app to add it to your Today View.
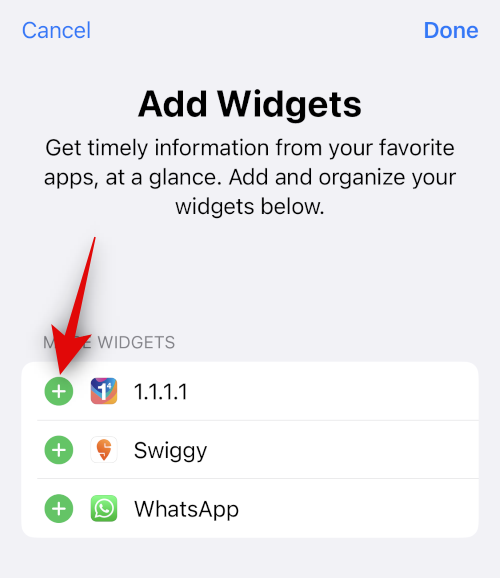
Click to complete.
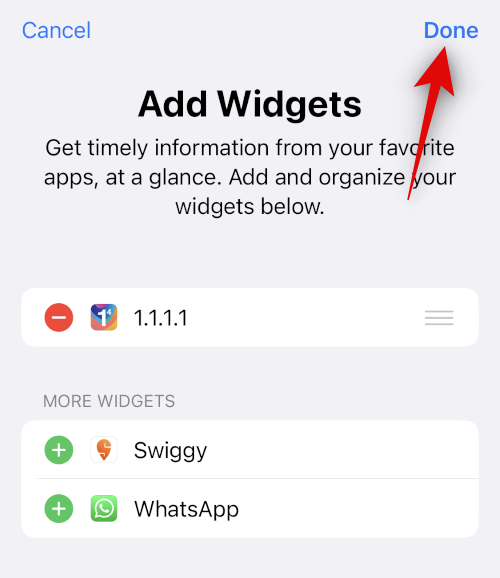
Tap again to complete.
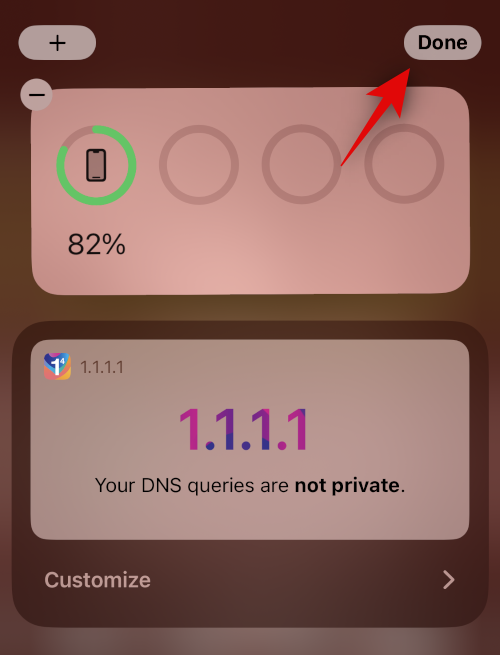
Now you will change the widget in Today View.
How to Edit Stack Widgets on iPhone
Apple allows you to view multiple widgets within stacked widgets on the Home screen and Today view. Stacked widgets can host a bunch of widgets from different apps in the same box, and you can swipe up and down on this box to see your favorite widgets at once.
If you have a stacked widget that you want to modify, long press the widget from the Home screen or Today View and select Edit Stack from the overflow menu.
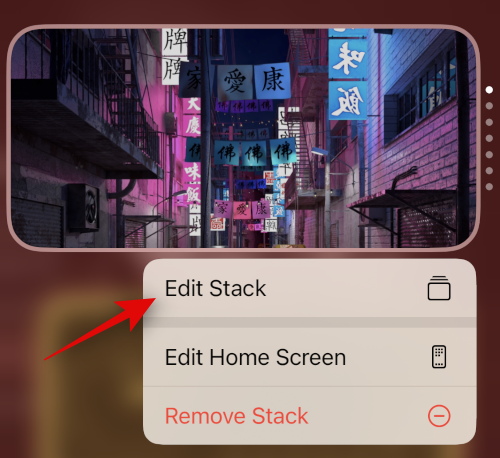
Option 1: Remove the widget from the stack
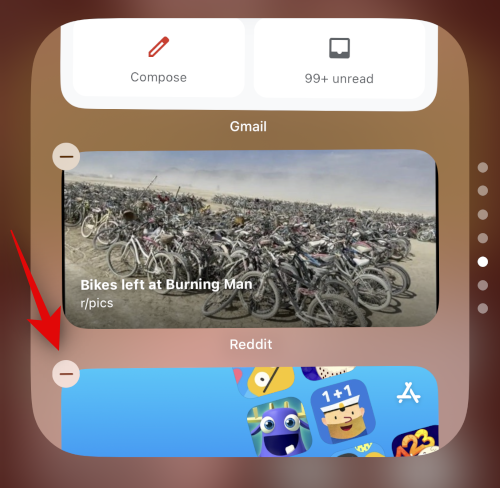
When the stack widget enters edit mode, click the minus sign in the upper left corner of the widget – Buttonremoves it from the stack.
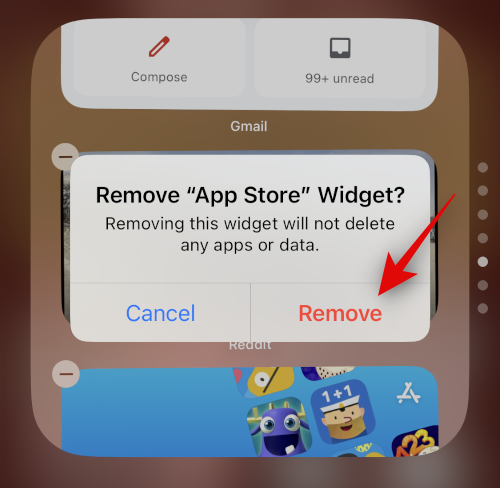
To confirm your action, click Remove from the prompt that appears.
Option 2: Add the widget to the stack
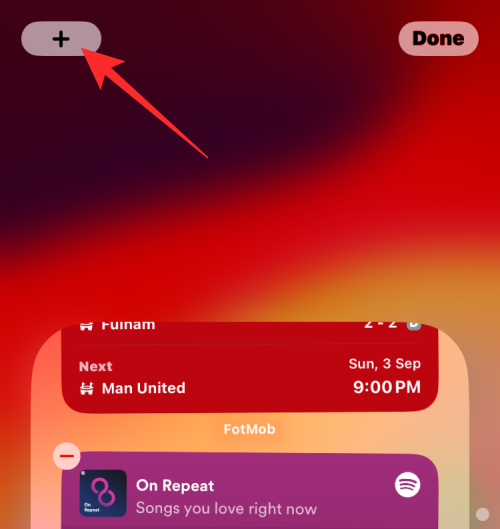
You can also add widgets to the stack by clicking on the in the upper left corner while the stack widget is in edit mode. Plus buttonAdds more widgets to the stack.
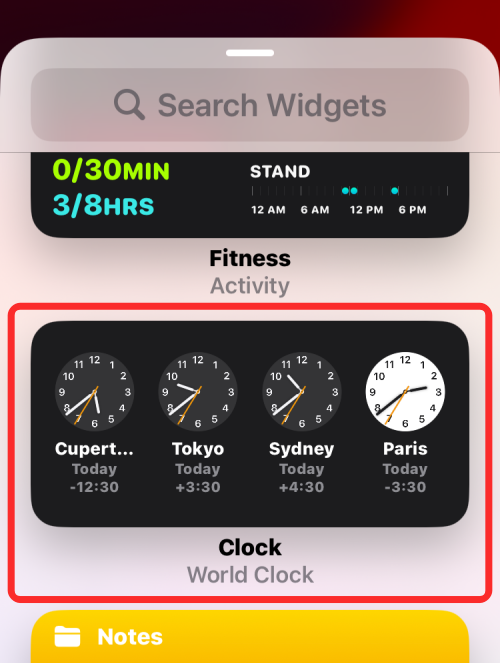
You will now see a Widgets menu showing all the widgets that are similar in size to the stack widget box itself. From here, select the widgets you want to add to the stack.
On the next screen, tap Add Widget at the bottom.
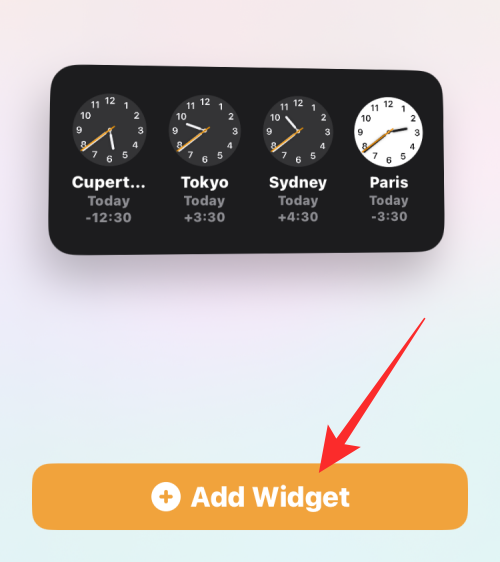
The new widget should now appear at the bottom of the stack, from where you can reposition to your preferred location.
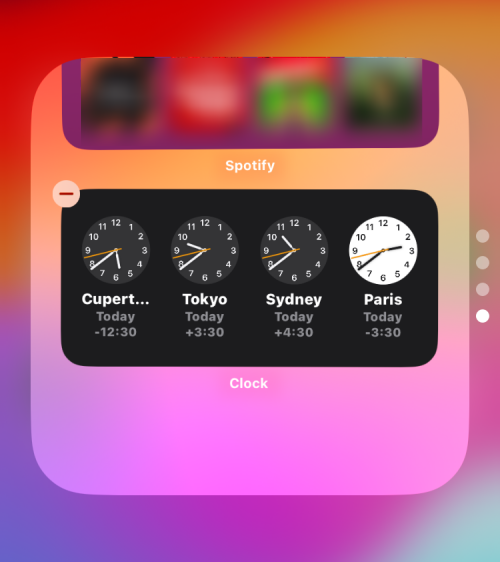
Option 3: Toggle Smart Rotation and Widget Suggestions
To control how widgets appear in the stack, you can enable or disable Smart Rotation and Widget Suggestions . These options will be accessed at the bottom of the screen as shown below.
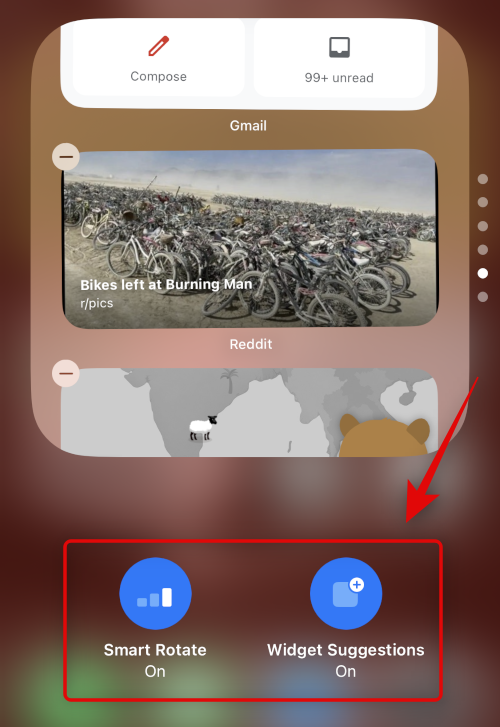
- Smart Rotation: This feature allows iOS and Siri to intelligently rotate your widgets based on your usage.
- Widget Suggestions: This feature allows stack widgets to make suggestions based on how you interact with widgets and devices.
When you have finished making changes to the widget, click Finish.
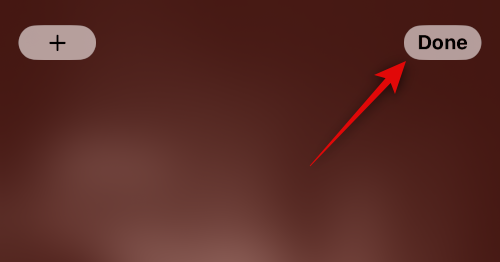
#This is how you can change the existing stack widgets on your iPhone home screen.
How to Use Third-Party Apps to Change Widgets on iPhone
Third-party apps also allow you to add widgets to the Home Screen and Today View. This gives you greater control over the content and appearance of the widget. There are many apps that allow you to modify the appearance of their iPhone widgets from within their apps. While it's not possible to share instructions for all the apps, we will show you how to change widgets using the Widgetsmith app on iOS. These steps may vary for other apps, so you'll have to go through the in-app options or search online for instructions to change the widget on the app you want to use.
For Widgetsmith, you can change and edit widgets from the Widgets tab at the bottom.
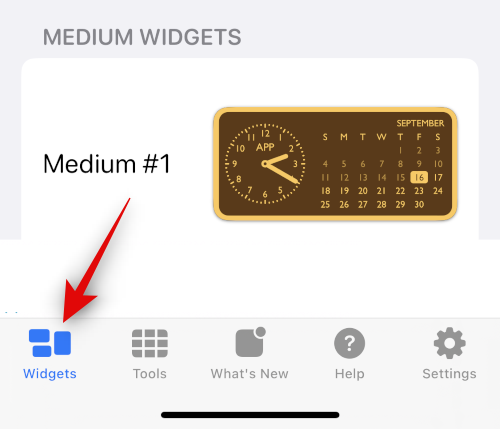
From there, you can select the widget you want to edit from the available options. You can choose to edit the current widget, or tap the Add [Size] widget at the bottom to create a new widget.
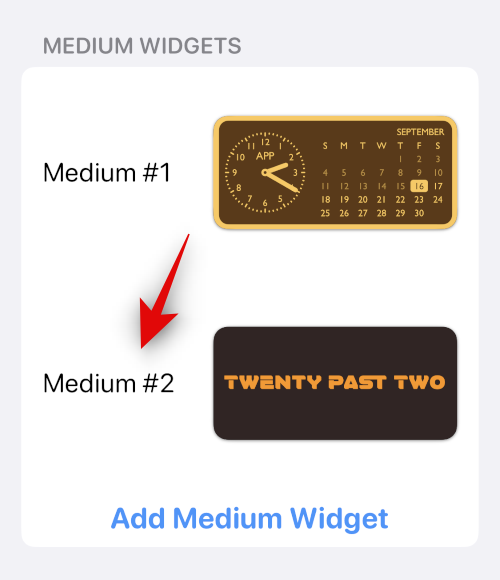
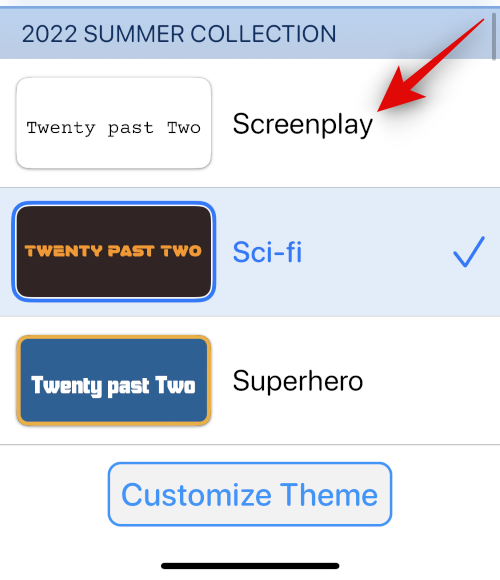
Customize and change the selected widget to your liking. We will change the color of the clock for this guide.
Click Save after completing the widget changes.
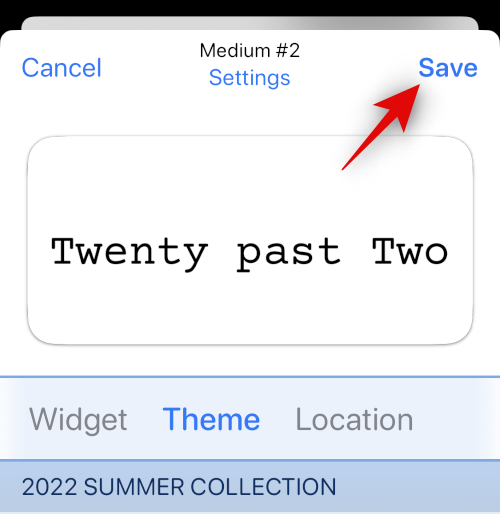
#If you edited an existing widget, the changes should already be visible on the Home screen or Today View.
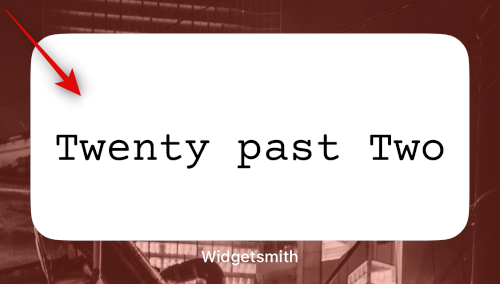
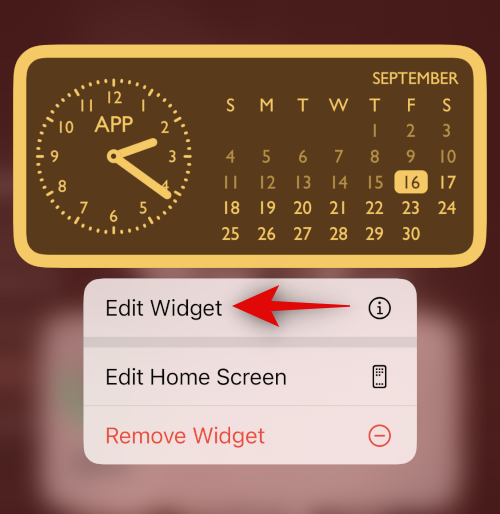
However, if you created a new widget, go to the Home screen or Today View and tap and hold on your widget. Select Edit Widget from the context menu.
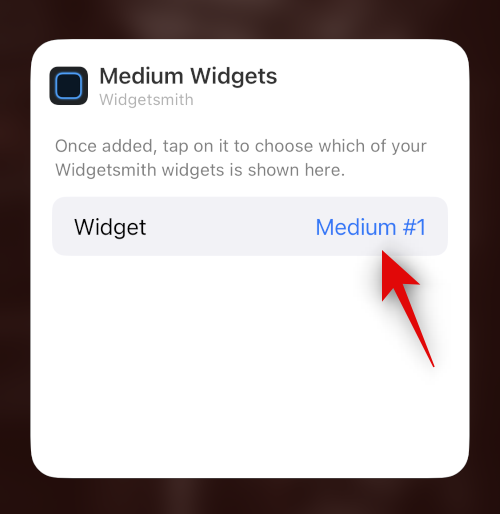
Click on the widget.
Now select your recently created widget.
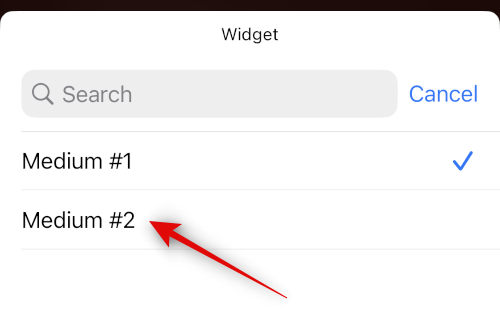
This is how you change widgets when using Widgetsmith on your device.
FAQ
Here are some frequently asked questions about changing widgets on iPhone that should help you get familiar with the latest changes.
Can you change the widget icon?
Unfortunately, there is no way to change the widget icon for native applications or third-party applications. Icons can only be changed when using a custom app like Widgetsmith, which provides dedicated widgets for the lock screen and home screen.
Can you add multiple widgets to the lock screen?
Yes, you can add up to 5 smaller widgets to your lock screen - 1 above the clock and up to 4 below the clock. The widget box below the lock screen clock has limited space; therefore, to add 4 widgets here, they all need to be sized as a 1×1 grid.
The above is the detailed content of iPhone Tips for 2023: Easily Customize Your Widgets. For more information, please follow other related articles on the PHP Chinese website!

Hot AI Tools

Undresser.AI Undress
AI-powered app for creating realistic nude photos

AI Clothes Remover
Online AI tool for removing clothes from photos.

Undress AI Tool
Undress images for free

Clothoff.io
AI clothes remover

AI Hentai Generator
Generate AI Hentai for free.

Hot Article

Hot Tools

Notepad++7.3.1
Easy-to-use and free code editor

SublimeText3 Chinese version
Chinese version, very easy to use

Zend Studio 13.0.1
Powerful PHP integrated development environment

Dreamweaver CS6
Visual web development tools

SublimeText3 Mac version
God-level code editing software (SublimeText3)

Hot Topics
 Unable to save changes to Photos app error in Windows 11
Mar 04, 2024 am 09:34 AM
If you encounter the Unable to save changes error while using the Photos app for image editing in Windows 11, this article will provide you with solutions. Unable to save changes. An error occurred while saving. Please try again later. This problem usually occurs due to incorrect permission settings, file corruption, or system failure. So, we’ve done some deep research and compiled some of the most effective troubleshooting steps to help you resolve this issue and ensure you can continue to use the Microsoft Photos app seamlessly on your Windows 11 device. Fix Unable to Save Changes to Photos App Error in Windows 11 Many users have been talking about Microsoft Photos app error on different forums
 How to view clipboard history on Mac
Sep 14, 2023 pm 12:09 PM
View macOS Clipboard History from Finder When you copy anything on your Mac (text, images, files, URLs, etc.), it goes to the Clipboard. Here's how to see what was last copied on your Mac. Go to Finder and click "Edit" in the menu bar. Click "Show Clipboard". This will open a window showing the contents of the macOS clipboard. Get Clipboard History Containing Multiple Items in Mac Of course, native Mac Clipboard History isn't the most versatile tool you can have. It only shows the last thing you copied, so if you want to copy multiple things at once and then paste them all together, you simply can't do that. However, if you are looking for
 Learn how to use the Boundless Notes app on iPhone and iPad
Nov 18, 2023 pm 01:45 PM
What is Boundless Notes on iPhone? Like the iOS17 Diary app, Boundless Notes is a productivity app with tons of creative potential. It’s a great place to turn ideas into reality. You can schedule projects, brainstorm ideas, or create mood boards so you never run out of space to express your ideas. The app allows you to add photos, videos, audios, documents, PDFs, web links, stickers, and more anywhere on an unlimited canvas. Many of the tools in Boundless Notes (like brushes, shapes, and more) will be familiar to anyone who uses iWork apps like Keynote or Notes. Real-time collaboration with colleagues, teammates, and group project members is also easy because Freeform allows
 Photos cannot open this file because the format is not supported or the file is corrupted
Feb 22, 2024 am 09:49 AM
In Windows, the Photos app is a convenient way to view and manage photos and videos. Through this application, users can easily access their multimedia files without installing additional software. However, sometimes users may encounter some problems, such as encountering a "This file cannot be opened because the format is not supported" error message when using the Photos app, or file corruption when trying to open photos or videos. This situation can be confusing and inconvenient for users, requiring some investigation and fixes to resolve the issues. Users see the following error when they try to open photos or videos on the Photos app. Sorry, Photos cannot open this file because the format is not currently supported, or the file
 MS Paint not working properly in Windows 11
Mar 09, 2024 am 09:52 AM
Microsoft Paint not working in Windows 11/10? Well, this seems to be a common problem and we have some great solutions to fix it. Users have been complaining that when trying to use MSPaint, it doesn't work or open. Scrollbars in the app don't work, paste icons don't show up, crashes, etc. Luckily, we've collected some of the most effective troubleshooting methods to help you resolve issues with Microsoft Paint app. Why doesn't Microsoft Paint work? Some possible reasons why MSPaint is not working on Windows 11/10 PC are as follows: The security identifier is corrupted. hung system
 How to solve application startup error 0xc000012d problem
Jan 02, 2024 pm 12:53 PM
When a friend's computer is missing certain files, the application cannot start normally with error code 0xc000012d. In fact, it can be solved by re-downloading the files and installing them. The application cannot start normally 0xc000012d: 1. First, the user needs to download ".netframework". 2. Then find the download address and download it to your computer. 3. Then double-click on the desktop to start running. 4. After the installation is completed, return to the wrong program location and open the program again.
 How to connect Apple Vision Pro to PC
Apr 08, 2024 pm 09:01 PM
The Apple Vision Pro headset is not natively compatible with computers, so you must configure it to connect to a Windows computer. Since its launch, Apple Vision Pro has been a hit, and with its cutting-edge features and extensive operability, it's easy to see why. Although you can make some adjustments to it to suit your PC, and its functionality depends heavily on AppleOS, so its functionality will be limited. How do I connect AppleVisionPro to my computer? 1. Verify system requirements You need the latest version of Windows 11 (Custom PCs and Surface devices are not supported) Support 64-bit 2GHZ or faster fast processor High-performance GPU, most
 Fix caa90019 Microsoft Teams error
Feb 19, 2024 pm 02:30 PM
Many users have been complaining about encountering error code caa90019 every time they try to log in using Microsoft Teams. Even though this is a convenient communication app, this mistake is very common. Fix Microsoft Teams Error: caa90019 In this case, the error message displayed by the system is: "Sorry, we are currently experiencing a problem." We have prepared a list of ultimate solutions that will help you resolve Microsoft Teams error caa90019. Preliminary steps Run as administrator Clear Microsoft Teams application cache Delete settings.json file Clear Microsoft from Credential Manager


