

Building a PHP5 framework: Part 3

Now that we have a basic framework (see Part 1 and Part 2 of this series), we can start thinking about integrating the design with a PHP framework. Now, we'll focus on the front-end design, including how to easily "skin" our new framework.
How it all fits together
So far we have the core files in a logical structure and the core set of objects accessed by the registry. One of these objects is our template handler, which allows us to easily build and generate HTML output. The output is built from a series of files, including images, CSS, and templates that make up the "skin."
Step 1: What is needed for our framework front-end design
A generic front-end design for a template can be difficult to get right. It's useful if you design a basic HTML template that contains all the content for any website you might create using the framework. The minimum I'm considering is:
Main content area, we call it
#content
- .
-
One or two columns of content are not as important as#content
Copy after loginCopy after login. -
Some tabular data. - Unordered and ordered lists (the same goes for definition lists, if you're likely to use that).
- image. I find it useful to add a separate style for photos, which I identify as the "photo" class in HTML; for example .
-
 Form for data capture.
 Form for data capture.
 We'll start by creating the basic XHTML structure for the page. Let’s start with this section first:
<!DOCTYPE html PUBLIC "-//W3C//DTD XHTML 1.0 Strict//EN" "https://www.w3.org/TR/xhtml1/DTD/xhtml1-strict.dtd">
<html xmlns="http://www.w3.org/1999/xhtml" xml:lang="en" lang="en">
<head>
<title>{pagetitle}</title>
<meta name="description" content="{metadesc}" />
<meta name="keywords" content="{metakey}" />
<style type="text/css" title="Default page style" media="screen"><!--@import "skins/fmwk/style.css";--></style>
<link rel="icon" href="favicon.ico" type="image/x-icon" />
<link rel="shortcut icon" href="favicon.ico" type="image/x-icon" />
</head>
<body>
You can change the document type to match, you can even define it in the settings of every website created using the framework, and being able to change the document type is also useful
lang
. It can be useful to define the stylesheet as a setting as well, which we will cover in a future tutorial.
Additionally, meta description and meta key attributes can be hard-coded into the skin of every website you create, but it is wise to
provide a different set of descriptions and keywords for each pageto prevent Broken pages appear in Google's supplemental index. The {pagetitle} placeholder will be used to insert the title of the current page into the template.
Now, we can move on to the body of the template XHTML file to create a generic front-end design for our framework. We'll keep the layout simple for now, assuming that most of the websites we'll create using this framework will use a traditional header, content, columns, and footer scheme.
<div id="wrapper">
<div id="header">

</div>
<div id="content">

</div><!--/content-->
<div id="column">

</div><!--/column-->

<div id="footer">

</div><!--/footer-->

</div><!--/wrapper-->
</body>
</html>
Step 2: Basic Content
As promised, we're going to fill in some basic stuff so that we can style it so that we have at least most of the tags that are likely to appear in a page that's ready to be styled:
<!DOCTYPE html PUBLIC "-//W3C//DTD XHTML 1.0 Strict//EN" "http://www.w3.org/TR/xhtml1/DTD/xhtml1-strict.dtd">
<html xmlns="http://www.w3.org/1999/xhtml" xml:lang="en" lang="en">
<head>
<title>{pagetitle}</title>
<meta name="description" content="{metadesc}" />
<meta name="keywords" content="{metakey}" />
<style type="text/css" title="Default page style" media="screen"><!--@import "skins/fmwk/style.css";--></style>
<link rel="icon" href="favicon.ico" type="image/x-icon" />
<link rel="shortcut icon" href="favicon.ico" type="image/x-icon" />
</head>
<body>
<div id="wrapper">
<div id="header">
<h2 id="a-href-title-Website-name-Website-name-a"><a href="#" title="Website name">Website name</a></h2>
</div>
<div id="content">
<h1 id="pagetitle">{pagetitle}</h1>
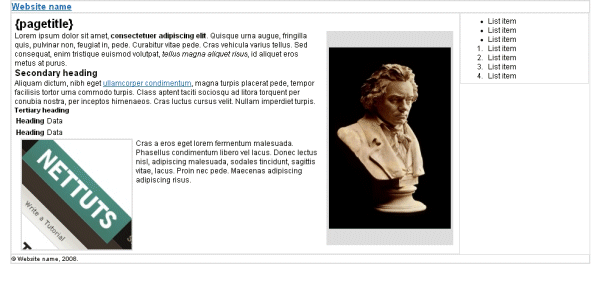
<img class="photo lazy" src="/static/imghw/default1.png" data-src="photo.jpg" alt="Photo test" />
<p>
Lorem ipsum dolor sit amet, <strong>consectetuer adipiscing elit</strong>. Quisque urna augue, fringilla quis, pulvinar non, feugiat in, pede. Curabitur vitae pede. Cras vehicula varius tellus. Sed consequat, enim tristique euismod volutpat, <em>tellus magna aliquet risus</em>, id aliquet eros metus at purus.
</p>
<h2 id="Secondary-heading">Secondary heading</h2>
<p>
Aliquam dictum, nibh eget <a href="#" title="Test link">ullamcorper condimentum</a>, magna turpis placerat pede, tempor facilisis tortor urna commodo turpis. Class aptent taciti sociosqu ad litora torquent per conubia nostra, per inceptos himenaeos. Cras luctus cursus velit. Nullam imperdiet turpis.
</p>
<h3 id="Tertiary-heading">Tertiary heading</h3>
<table>
<tr>
<th>Heading</th>
<td>Data</td>
</tr>
<tr>
<th>Heading</th>
<td>Data</td>
</tr>
</table>
<p>
<img src="/static/imghw/default1.png" data-src="image.jpg" class="lazy" alt="Generic image" />
Cras a eros eget lorem fermentum malesuada. Phasellus condimentum libero vel lacus. Donec lectus nisl, adipiscing malesuada, sodales tincidunt, sagittis vitae, lacus. Proin nec pede. Maecenas adipiscing adipiscing risus.
</p>
</div><!--/content-->
<div id="column">
<ul>
<li>List item</li>
<li>List item</li>
<li>List item</li>
</ul>
<ol>
<li>List item</li>
<li>List item</li>
<li>List item</li>
<li>List item</li>
</ol>
</div><!--/column-->
<div id="footer">
<p>
© Website name, 2008.
</p>
</div><!--/footer-->
</div><!--/wrapper-->
</body>
</html>
Now the content is ready for some simple styling.
Step 3: Basic Style
We first use CSS to reset the margins and padding of elements in the XHTML document:
body, * {
margin: 0;
padding 0;
}
We'll spend some time styling the body element and making sure links in the document are highlighted appropriately:
body {
background: #FFF;
color: #000;
font-family: "helvetica", "arial", "verdana", sans-serif;
font-size: 62.5%;
}

a, a:active, a:link  {
color: #1A64AC;
text-decoration: underline;
}

a:visited {
color: #0D2F4F;
}
Next, we'll center our design in #wrapper divs and assign each div a faint border so we can see them when styling.
#wrapper {
margin: 0 auto;
width: 950px;
}
<br />
#wrapper, #header, #content, #column, #footer {
border: 1px #DDD solid;
}
While the CSS above does not centralize this design in Internet Explorer 6, the CSS has been kept basic for maximum flexibility. With a little more CSS, we almost have a complete
skeleton design for the front end of the framework - all that's left is some simple positioning:
#column, #content {
float: left;
font-size: 125%;
padding: 5px;
}

#column {
width: 200px;
}

#content {
margin-left 5px;
width: 	725px;
}

#header, #footer {
clear: both;
}
#column img, #content img {
border: 2px #DDD solid;
float: left;
margin: 0 5px 0 10px;
}
img.photo {
background: #DDD;
float: right !important;
padding: 25px 2px;
}
What we are left with at this stage is a simple website layout that we can use as the basis for a PHP framework front-end:
 Of course, for extra flexibility it might be useful to allow 2 columns of content by default, which can be done by adding more XHTML and CSS.
Step 4: Template from XHTML
The next step is to transfer the XHTML, CSS and images to
a skinsuitable for our PHP framework. To do this, we need to split the XHTML into three templates: header, main template, and footer. Due to the way the template system is structured, pages can be generated from any number of templates, but it is recommended to use at least header, footer and main templates, which means that, in general, we only need to copy and change if we want to create a structure slightly If there are different new pages, use the main template file. Header template for PHP framework (skins/default/templates/header.tpl.php)
The PHP framework's header template should contain an XHTML section, and
part:
<!DOCTYPE html PUBLIC "-//W3C//DTD XHTML 1.0 Strict//EN" "http://www.w3.org/TR/xhtml1/DTD/xhtml1-strict.dtd">
<html xmlns="http://www.w3.org/1999/xhtml" xml:lang="en" lang="en">
<head>
<title>{pagetitle}</title>
<meta name="description" content="{metadesc}" />
<meta name="keywords" content="{metakey}" />
<style type="text/css" title="Default page style" media="screen"><!--@import "style.css";--></style>
<link rel="icon" href="favicon.ico" type="image/x-icon" />
<link rel="shortcut icon" href="favicon.ico" type="image/x-icon" />
</head>
<body>
<div id="wrapper">
<div id="header">
<h2 id="a-href-title-Website-name-Website-name-a"><a href="#" title="Website name">Website name</a></h2>
</div>
PHP 框架的主模板 (skins/default/templates/main.tpl.php)
主模板应包括包含主要内容和列中任何内容的 div。我们现在可以为此内容插入占位符,而不是复制我们用来设置段落、有序列表和表格等元素样式的虚拟文本,占位符将根据内容所在的位置进行更新。
占位符内容是:
- {pagetitle} 页面标题。
- {maincontent} 页面的主要内容。
- {btitle} 和 {bcontent} 内容块的标题和内容。它包含在 rcolumn 循环中,因此可以在列中放置多个块。
<div id="content">
<h1 id="pagetitle">{pagetitle}</h1>
{maincontent}
</div><!--/content-->

<div id="column">
<!-- START rcolumn -->
<h2 id="btitle">{btitle}</h2>
{bcontent}
<!-- END rcolumn -->
</div><!--/column-->
PHP 框架的页脚模板 (skins/default/templates/footer.tpl.php)
最后,剩余的 XHTML 放入页脚文件中,该文件关闭 XHTML 文档和正文部分。我们通常使用它来在我们的网站上包含版权声明和“网页设计者”链接。
<div id="footer">
<p>
© Website name, 2008.
</p>
</div><!--/footer-->

</div><!--/wrapper-->
</body>
</html>
对于我们系列中 PHP 的中断表示歉意,但为我们的框架和使用它的应用程序构建皮肤格式的相关模板非常重要。 PHP5 框架开发系列中的第 4 部分将介绍基本的安全注意事项和基本的身份验证处理程序,然后我们将继续创建内容管理模型,并在第 5 部分中研究模型如何组合在一起。该系列中的内容:发送电子邮件、扩展我们的框架以及以创新的方式记录用户事件流。
The above is the detailed content of Building a PHP5 framework: Part 3. For more information, please follow other related articles on the PHP Chinese website!

Hot AI Tools

Undresser.AI Undress
AI-powered app for creating realistic nude photos

AI Clothes Remover
Online AI tool for removing clothes from photos.

Undress AI Tool
Undress images for free

Clothoff.io
AI clothes remover

AI Hentai Generator
Generate AI Hentai for free.

Hot Article
Hot Tools

Notepad++7.3.1
Easy-to-use and free code editor

SublimeText3 Chinese version
Chinese version, very easy to use

Zend Studio 13.0.1
Powerful PHP integrated development environment

Dreamweaver CS6
Visual web development tools

SublimeText3 Mac version
God-level code editing software (SublimeText3)
Hot Topics
 1378
1378
 52
52

 PHP 8.4 Installation and Upgrade guide for Ubuntu and Debian
Dec 24, 2024 pm 04:42 PM
PHP 8.4 Installation and Upgrade guide for Ubuntu and Debian
Dec 24, 2024 pm 04:42 PM
PHP 8.4 brings several new features, security improvements, and performance improvements with healthy amounts of feature deprecations and removals. This guide explains how to install PHP 8.4 or upgrade to PHP 8.4 on Ubuntu, Debian, or their derivati
 How To Set Up Visual Studio Code (VS Code) for PHP Development
Dec 20, 2024 am 11:31 AM
How To Set Up Visual Studio Code (VS Code) for PHP Development
Dec 20, 2024 am 11:31 AM
Visual Studio Code, also known as VS Code, is a free source code editor — or integrated development environment (IDE) — available for all major operating systems. With a large collection of extensions for many programming languages, VS Code can be c
 How do you parse and process HTML/XML in PHP?
Feb 07, 2025 am 11:57 AM
How do you parse and process HTML/XML in PHP?
Feb 07, 2025 am 11:57 AM
This tutorial demonstrates how to efficiently process XML documents using PHP. XML (eXtensible Markup Language) is a versatile text-based markup language designed for both human readability and machine parsing. It's commonly used for data storage an
 7 PHP Functions I Regret I Didn't Know Before
Nov 13, 2024 am 09:42 AM
7 PHP Functions I Regret I Didn't Know Before
Nov 13, 2024 am 09:42 AM
If you are an experienced PHP developer, you might have the feeling that you’ve been there and done that already.You have developed a significant number of applications, debugged millions of lines of code, and tweaked a bunch of scripts to achieve op
 Explain JSON Web Tokens (JWT) and their use case in PHP APIs.
Apr 05, 2025 am 12:04 AM
Explain JSON Web Tokens (JWT) and their use case in PHP APIs.
Apr 05, 2025 am 12:04 AM
JWT is an open standard based on JSON, used to securely transmit information between parties, mainly for identity authentication and information exchange. 1. JWT consists of three parts: Header, Payload and Signature. 2. The working principle of JWT includes three steps: generating JWT, verifying JWT and parsing Payload. 3. When using JWT for authentication in PHP, JWT can be generated and verified, and user role and permission information can be included in advanced usage. 4. Common errors include signature verification failure, token expiration, and payload oversized. Debugging skills include using debugging tools and logging. 5. Performance optimization and best practices include using appropriate signature algorithms, setting validity periods reasonably,
 PHP Program to Count Vowels in a String
Feb 07, 2025 pm 12:12 PM
PHP Program to Count Vowels in a String
Feb 07, 2025 pm 12:12 PM
A string is a sequence of characters, including letters, numbers, and symbols. This tutorial will learn how to calculate the number of vowels in a given string in PHP using different methods. The vowels in English are a, e, i, o, u, and they can be uppercase or lowercase. What is a vowel? Vowels are alphabetic characters that represent a specific pronunciation. There are five vowels in English, including uppercase and lowercase: a, e, i, o, u Example 1 Input: String = "Tutorialspoint" Output: 6 explain The vowels in the string "Tutorialspoint" are u, o, i, a, o, i. There are 6 yuan in total
 Explain late static binding in PHP (static::).
Apr 03, 2025 am 12:04 AM
Explain late static binding in PHP (static::).
Apr 03, 2025 am 12:04 AM
Static binding (static::) implements late static binding (LSB) in PHP, allowing calling classes to be referenced in static contexts rather than defining classes. 1) The parsing process is performed at runtime, 2) Look up the call class in the inheritance relationship, 3) It may bring performance overhead.
 What are PHP magic methods (__construct, __destruct, __call, __get, __set, etc.) and provide use cases?
Apr 03, 2025 am 12:03 AM
What are PHP magic methods (__construct, __destruct, __call, __get, __set, etc.) and provide use cases?
Apr 03, 2025 am 12:03 AM
What are the magic methods of PHP? PHP's magic methods include: 1.\_\_construct, used to initialize objects; 2.\_\_destruct, used to clean up resources; 3.\_\_call, handle non-existent method calls; 4.\_\_get, implement dynamic attribute access; 5.\_\_set, implement dynamic attribute settings. These methods are automatically called in certain situations, improving code flexibility and efficiency.
