
 Web Front-end
JS Tutorial
How to set the width of the selection area border on the canvas using FabricJS?
Web Front-end
JS Tutorial
How to set the width of the selection area border on the canvas using FabricJS?
How to set the width of the selection area border on the canvas using FabricJS?


In this article, we will learn how to set the width of the selection area border on the canvas using FabricJS. The selection area represents the area selected with the mouse, and all objects under this area will be selected. FabricJS allows us to adjust the width of the selection area border using the selectionLineWidth property.
Syntax
new fabric.Canvas(element: HTMLElement|String, { selectionLineWidth: Number }: Object)Parameters
Element - This parameter is
Options (optional) - This parameter is an object that provides additional customization of our canvas. Using this parameter, you can change many properties related to the canvas, such as color, cursor, and border width, among which selectionLineWidth is one property. It accepts a number that determines the width of the line used in the selection border. The default value is 1.
Example 1
Pass selectionLineWidth key to class
Let's look at a code example to understand how to use FabricJS settings The width of the selection area border in the canvas. The SelectionLineWidth parameter accepts a number as a value. The larger the number we set, the wider the border of the canvas area will be.
<!DOCTYPE html>
<html>
<head>
   <!-- Adding the Fabric JS Library-->
   <script src="https://cdnjs.cloudflare.com/ajax/libs/fabric.js/510/fabric.min.js"></script>
</head>
<body>
   <h2>Setting the width of the selection area border in canvas using FabricJs</h2>
   <p>Select an area around the object to see the width of the selection area border.</p>
   <canvas id="canvas"></canvas>
   <script>
      // Initiate a canvas instance
      var canvas = new fabric.Canvas("canvas", {
         selectionLineWidth: 23,
      });
      // Creating an instance of the fabric.Rect class
      var rect = new fabric.Rect({
         left: 170,
         top: 90,
         width: 60,
         height: 80,
         fill: "#006400",
         angle: 90,
      });
      // Adding it to the canvas
      canvas.add(rect);
      canvas.setWidth(document.body.scrollWidth);
      canvas.setHeight(250);
   </script>
</body>
</html>Example 2
Using selectionLineWidth with selectionColor and selectionBorderColor
We can combine the selectionLineWidth parameter with other parameters Using properties such as selectionColor and selectionBorderColor, they allow us to set the color of a selection and adjust the border color of that selection respectively. Let’s see what the code looks like:
<!DOCTYPE html>
<html>
<head>
   <!-- Adding the Fabric JS Library-->
   <script src="https://cdnjs.cloudflare.com/ajax/libs/fabric.js/510/fabric.min.js"></script>
</head>
<body>
   <h2>Setting the width of selection area border in canvas using Fabric</h2>
   <p>Select an area around the object to see the selection color and selection border color.</p>
   <canvas id="canvas"></canvas>
   <script>
      // Initiate a canvas instance
      var canvas = new fabric.Canvas("canvas", {
         selectionLineWidth: 3,
         selectionColor: "rgba(42,82,190,0.3)",
         selectionBorderColor: "black",
      });
      // Creating an instance of the fabric.Rect class
      var rect = new fabric.Rect({
         left: 170,
         top: 90,
         width: 60,
         height: 80,
         fill: "#006400",
         angle: 90,
      });
      // Adding it to the canvas
      canvas.add(rect);
      canvas.setWidth(document.body.scrollWidth);
      canvas.setHeight(250);
   </script>
</body>
</html>The above is the detailed content of How to set the width of the selection area border on the canvas using FabricJS?. For more information, please follow other related articles on the PHP Chinese website!

Hot AI Tools

Undresser.AI Undress
AI-powered app for creating realistic nude photos

AI Clothes Remover
Online AI tool for removing clothes from photos.

Undress AI Tool
Undress images for free

Clothoff.io
AI clothes remover

AI Hentai Generator
Generate AI Hentai for free.

Hot Article
Hot Tools

Notepad++7.3.1
Easy-to-use and free code editor

SublimeText3 Chinese version
Chinese version, very easy to use

Zend Studio 13.0.1
Powerful PHP integrated development environment

Dreamweaver CS6
Visual web development tools

SublimeText3 Mac version
God-level code editing software (SublimeText3)
Hot Topics


 Replace String Characters in JavaScript
Mar 11, 2025 am 12:07 AM
Replace String Characters in JavaScript
Mar 11, 2025 am 12:07 AM
Detailed explanation of JavaScript string replacement method and FAQ This article will explore two ways to replace string characters in JavaScript: internal JavaScript code and internal HTML for web pages. Replace string inside JavaScript code The most direct way is to use the replace() method: str = str.replace("find","replace"); This method replaces only the first match. To replace all matches, use a regular expression and add the global flag g: str = str.replace(/fi
 Custom Google Search API Setup Tutorial
Mar 04, 2025 am 01:06 AM
Custom Google Search API Setup Tutorial
Mar 04, 2025 am 01:06 AM
This tutorial shows you how to integrate a custom Google Search API into your blog or website, offering a more refined search experience than standard WordPress theme search functions. It's surprisingly easy! You'll be able to restrict searches to y
 Build Your Own AJAX Web Applications
Mar 09, 2025 am 12:11 AM
Build Your Own AJAX Web Applications
Mar 09, 2025 am 12:11 AM
So here you are, ready to learn all about this thing called AJAX. But, what exactly is it? The term AJAX refers to a loose grouping of technologies that are used to create dynamic, interactive web content. The term AJAX, originally coined by Jesse J
 Example Colors JSON File
Mar 03, 2025 am 12:35 AM
Example Colors JSON File
Mar 03, 2025 am 12:35 AM
This article series was rewritten in mid 2017 with up-to-date information and fresh examples. In this JSON example, we will look at how we can store simple values in a file using JSON format. Using the key-value pair notation, we can store any kind
 8 Stunning jQuery Page Layout Plugins
Mar 06, 2025 am 12:48 AM
8 Stunning jQuery Page Layout Plugins
Mar 06, 2025 am 12:48 AM
Leverage jQuery for Effortless Web Page Layouts: 8 Essential Plugins jQuery simplifies web page layout significantly. This article highlights eight powerful jQuery plugins that streamline the process, particularly useful for manual website creation
 What is 'this' in JavaScript?
Mar 04, 2025 am 01:15 AM
What is 'this' in JavaScript?
Mar 04, 2025 am 01:15 AM
Core points This in JavaScript usually refers to an object that "owns" the method, but it depends on how the function is called. When there is no current object, this refers to the global object. In a web browser, it is represented by window. When calling a function, this maintains the global object; but when calling an object constructor or any of its methods, this refers to an instance of the object. You can change the context of this using methods such as call(), apply(), and bind(). These methods call the function using the given this value and parameters. JavaScript is an excellent programming language. A few years ago, this sentence was
 Improve Your jQuery Knowledge with the Source Viewer
Mar 05, 2025 am 12:54 AM
Improve Your jQuery Knowledge with the Source Viewer
Mar 05, 2025 am 12:54 AM
jQuery is a great JavaScript framework. However, as with any library, sometimes it’s necessary to get under the hood to discover what’s going on. Perhaps it’s because you’re tracing a bug or are just curious about how jQuery achieves a particular UI
 10 Mobile Cheat Sheets for Mobile Development
Mar 05, 2025 am 12:43 AM
10 Mobile Cheat Sheets for Mobile Development
Mar 05, 2025 am 12:43 AM
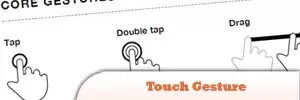
This post compiles helpful cheat sheets, reference guides, quick recipes, and code snippets for Android, Blackberry, and iPhone app development. No developer should be without them! Touch Gesture Reference Guide (PDF) A valuable resource for desig
