

Build a blog application homepage using Angular and MongoDB

In the first part of this tutorial series, you learned how to get started creating an Angular web application. You learned how to set up the application and create the login component.
In this part of the series, you will further write about the REST API required to interact with the banking side of MongoDB. You will also create the Home component, which will be displayed after the user successfully logs in.
start using
Let's start by cloning the source code for the first part of this tutorial series.
git clone https://github.com/royagasthyan/AngularBlogApp-Login AngularBlogApp-Home
Navigate to the project directory and install the required dependencies.
cd AngularBlogApp-Home/client
npm install
After installing the dependencies, restart the application server.
npm start
Point your browser to http://localhost:4200 and the application should be running.
Create Login REST API
In the project folder AngularBlogApp-Home, create another folder named server. You'll write a REST API using Node.js.
Navigate to the server folder and initialize the project.
cd server
npm init
Enter the required details and you should have your project initialized.
You will use the Express framework to create the server. Install Express using the following command:
npm install express --save
After installing Express, create a file named app.js. This will be the root file of the Node.js server.
Here is what the app.js file looks like:
const express = require('express')
const app = express()

app.get('/api/user/login', (req, res) => {
    res.send('Hello World!')
})

app.listen(3000, () => console.log('blog server running on port 3000!'))
As shown in the code above, you import express into app.js. Using express, you create an application app.
With app, you expose an endpoint /api/user/login which will display a message. Start the Node.js server using the following command:
node app.js
Point your browser to http://localhost:3000/api/user/login and you should see the message.
You will make a POST request from the Angular service to the server using the Username and Password parameters. So the request parameters need to be parsed.
Installation body-parser, this is Node.js body parsing middleware, used to parse request parameters.
npm install body-parser --save
After the installation is complete, import it into app.js .
const bodyParser = require('body-parser')
Add the following code to the app.js file.
app.use(bodyParser.json())
app.use(bodyParser.urlencoded({ extended : false}))
The two body-parser options above return middleware that only parses json and urlencoded bodies, and only looks at Content-Type Headers matching request type options.
You will use Mongoose to interact with MongoDB in Node.js. Therefore, install Mongoose using Node Package Manager (npm).
npm install mongoose --save
After installing mongoose, import it into app.js.
const mongoose = require('mongoose');
Define the MongoDB database URL in app.js.
const url = 'mongodb://localhost/blogDb';
Let’s connect to the MongoDB database using Mongoose. Its appearance is as follows:
app.post('/api/user/login', (req, res) => {
    mongoose.connect(url, function(err){
		if(err) throw err;
		console.log('connected successfully, username is ',req.body.username,' password is ',req.body.password);
	});
})
If a connection is established, the message will be logged along with the username and password .
Here is what the app.js file looks like:
const express = require('express')
const bodyParser = require('body-parser')
const app = express()
const mongoose = require('mongoose');
const url = 'mongodb://localhost/blogDb';

app.use(bodyParser.json())
app.use(bodyParser.urlencoded({ extended : false}))

app.post('/api/user/login', (req, res) => {
    mongoose.connect(url, function(err){
    	if(err) throw err;
		console.log('connected successfully, username is ',req.body.username,' password is ',req.body.password);
	});
})

app.listen(3000, () => console.log('blog server running on port 3000!'))
Restart the node server using the following command:
node app.js
To connect to a Node server from an Angular application, you need to set up a proxy. Create a file named proxy.json in the client/src folder. Its appearance is as follows:
{
    "/api/*": {
		"target": "http://localhost:3000",
		"secure": "false"
	}
}
Modify the clientpackage.json file to use the proxy file to launch the application.
"start": "ng serve --proxy-config proxy.json"
Save changes and start the client server.
npm start
Point your browser to http://localhost:4200 and enter your username and password. Click the login button and you should log the parameters into the node console.
Verify user login
To use Mongoose to interact with MongoDB, you need to define the schema and create a model. Within the server folder, create a folder named model.
Create a file named user.js in the model folder. Add the following code to the user.js file:
const mongoose = require('mongoose');
const Schema = mongoose.Schema;

// create a schema
const userSchema = new Schema({
  username: { type: String, required: true, unique: true },
  password: { type: String, required: true },
  name: { type: String }
}, { collection : 'user' });

const User = mongoose.model('User', userSchema);

module.exports = User;
As shown in the code above, you import mongoose into user.js. You created the userSchema using mongoose schema and the User model using the mongoose model.
将 user.js 文件导入到 app.js 文件中。
const User = require('./model/user');
在查询 MongoDB user 集合之前,您需要创建该集合。输入 mongo 转到 MongoDB shell。使用以下命令创建集合 user:
db.createCollection('user')
插入您要查询的记录。
 db.user.insert({
     name: 'roy agasthyan',
     username: 'roy',
     password: '123'
 })
现在,一旦 mongoose 连接到 MongoDB,您将使用传入的 用户名 和 密码 从数据库中找到记录。API 如下所示:
app.post('/api/user/login', (req, res) => {
    mongoose.connect(url,{ useMongoClient: true }, function(err){
		if(err) throw err;
		User.find({
			username : req.body.username, password : req.body.password
		}, function(err, user){
			if(err) throw err;
			if(user.length === 1){
				return res.status(200).json({
					status: 'success',
					data: user
				})
			} else {
				return res.status(200).json({
					status: 'fail',
					message: 'Login Failed'
				})
			}

		})
	});
})
如上面的代码所示,一旦收到数据库的响应,就会将其返回给客户端。
保存以上更改并尝试运行客户端和服务器。输入用户名 roy 和密码 123 ,您应该能够在浏览器控制台中查看结果。
重定向到主页组件
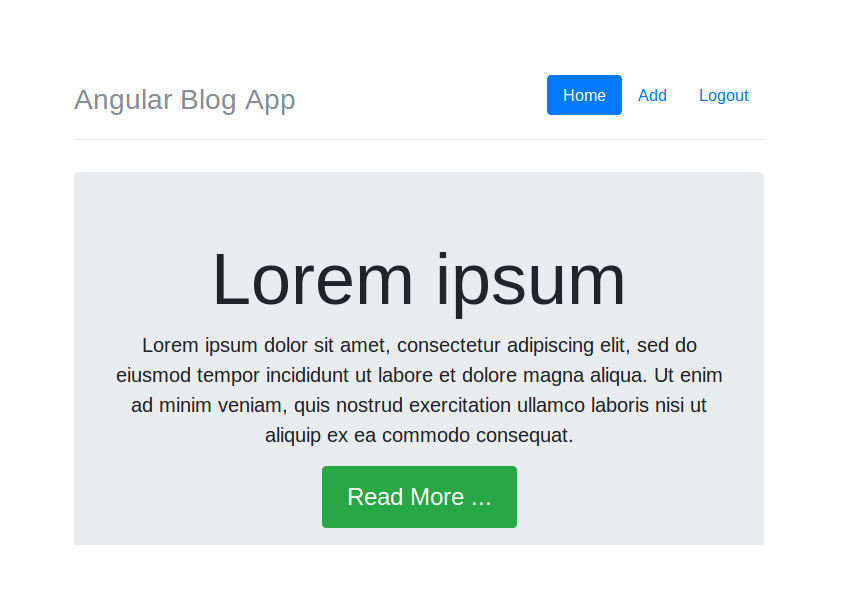
用户验证成功后,您需要将用户重定向到 Home 组件。因此,让我们首先创建 Home 组件。
在 src/app 文件夹中创建一个名为 Home 的文件夹。创建一个名为 home.component.html 的文件并添加以下 HTML 代码:
<header class="header clearfix">
<nav>
<ul class="nav nav-pills float-right">
<li class="nav-item">
<a class="nav-link active" href="#">Home <span class="sr-only">(current)</span></a>
</li>
<li class="nav-item">
<a class="nav-link" href="#">Add</a>
</li>
<li class="nav-item">
<a class="nav-link" href="#">Logout</a>
</li>
</ul>
</nav>
<h3 class="text-muted">Angular Blog App</h3>
</header>
<main role="main">
<div class="jumbotron">
<h1 class="display-3">Lorem ipsum</h1>
<p class="lead">Lorem ipsum dolor sit amet, consectetur adipiscing elit, sed do eiusmod tempor incididunt ut labore et dolore magna aliqua. Ut enim ad minim veniam, quis nostrud exercitation ullamco laboris nisi ut aliquip ex ea commodo consequat.</p>
<p><a class="btn btn-lg btn-success" href="#" role="button">Read More ...</a></p>
</div>
<div class="row marketing">
<div class="col-lg-6">
<h4>Subheading</h4>
<p>Donec id elit non mi porta gravida at eget metus. Maecenas faucibus mollis interdum.</p>
<h4>Subheading</h4>
<p>Morbi leo risus, porta ac consectetur ac, vestibulum at eros. Cras mattis consectetur purus sit amet fermentum.</p>
<h4>Subheading</h4>
<p>Maecenas sed diam eget risus varius blandit sit amet non magna.</p>
</div>
</div>
</main>
<footer class="footer">
<p>© Company 2017</p>
</footer>
创建一个名为 home.component.css 的文件并添加以下 CSS 样式:
.header,
.marketing,
.footer {
  padding-right: 1rem;
  padding-left: 1rem;
}

/* Custom page header */
.header {
  padding-bottom: 1rem;
  border-bottom: .05rem solid #e5e5e5;
}

.header h3 {
  margin-top: 0;
  margin-bottom: 0;
  line-height: 3rem;
}

/* Custom page footer */
.footer {
  padding-top: 1.5rem;
  color: #777;
  border-top: .05rem solid #e5e5e5;
}

/* Customize container */
@media (min-width: 48em) {
  .container {
    max-width: 46rem;
  }
}
.container-narrow > hr {
  margin: 2rem 0;
}

/* Main marketing message and sign up button */
.jumbotron {
  text-align: center;
  border-bottom: .05rem solid #e5e5e5;
}
.jumbotron .btn {
  padding: .75rem 1.5rem;
  font-size: 1.5rem;
}

/* Supporting marketing content */
.marketing {
  margin: 3rem 0;
}
.marketing p + h4 {
  margin-top: 1.5rem;
}

/* Responsive: Portrait tablets and up */
@media screen and (min-width: 48em) {
  /* Remove the padding we set earlier */
  .header,
  .marketing,
  .footer {
    padding-right: 0;
    padding-left: 0;
  }

  /* Space out the masthead */
  .header {
    margin-bottom: 2rem;
  }

  .jumbotron {
    border-bottom: 0;
  }
}
创建名为 home.component.ts 的组件文件并添加以下代码:
import { Component } from '@angular/core';

@Component({
  selector: 'app-home',
  templateUrl: './home.component.html',
  styleUrls: ['./home.component.css']
})
export class HomeComponent {

}
如上面的代码所示,您刚刚使用 @Component 装饰器创建了 HomeComponent 并指定了 选择器 , templateUrl 和 styleUrls。
将 HomeComponent 添加到 NgModules 中的 app.module.ts。
import { BrowserModule } from '@angular/platform-browser';
import { NgModule } from '@angular/core';
import { ROUTING } from './app.routing';
import { FormsModule } from '@angular/forms';
import { HttpClientModule } from '@angular/common/http';

import { RootComponent } from './root/root.component';
import { LoginComponent } from './login/login.component';
import { HomeComponent } from './home/home.component';


@NgModule({
  declarations: [
      RootComponent,
    LoginComponent,
    HomeComponent
  ],
  imports: [
    BrowserModule,
    ROUTING,
    FormsModule,
    HttpClientModule
  ],
  providers: [],
  bootstrap: [RootComponent]
})
export class AppModule { }
在app.routing.ts中导入HomeComponent,并为home定义路由。
import { RouterModule, Routes } from '@angular/router';
import { ModuleWithProviders } from '@angular/core/src/metadata/ng_module';

import { LoginComponent } from './login/login.component';
import { HomeComponent } from './home/home.component';

export const AppRoutes: Routes = [
    { path: '', component: LoginComponent },
	{ path: 'home', component: HomeComponent }
];

export const ROUTING: ModuleWithProviders = RouterModule.forRoot(AppRoutes);
在 login.component.ts 文件中的 validateLogin 方法中,成功验证后会将用户重定向到 HomeComponent。要重定向,您需要导入 Angular Router。
import { Router } from '@angular/router';
如果 API 调用的响应成功,您将使用 Angular Router 导航到 HomeComponent。
if(result['status'] === 'success') {
  this.router.navigate(['/home']);
} else {
  alert('Wrong username password');
}
以下是 login.component.ts 文件的外观:
import { Component } from '@angular/core';
import { LoginService } from './login.service';
import { User } from '../models/user.model';
import { Router } from '@angular/router';

@Component({
  selector: 'app-login',
  templateUrl: './login.component.html',
  styleUrls: ['./login.component.css'],
  providers: [ LoginService ]
})
export class LoginComponent {

  public user : User;

  constructor(private loginService: LoginService, private router: Router) {
      this.user = new User();
  }

  validateLogin() {
  	if(this.user.username && this.user.password) {
  		this.loginService.validateLogin(this.user).subscribe(result => {
        console.log('result is ', result);
        if(result['status'] === 'success') {
          this.router.navigate(['/home']);
        } else {
          alert('Wrong username password');
        }

      }, error => {
        console.log('error is ', error);
      });
  	} else {
  		alert('enter user name and password');
  	}
  }

}
保存以上更改并重新启动服务器。使用现有的用户名和密码登录应用程序,您将被重定向到 HomeComponent。
总结
在本教程中,您了解了如何编写用于用户登录的 REST API 端点。您学习了如何使用 Mongoose 从 Node.js 与 MongoDB 进行交互。成功验证后,您了解了如何使用 Angular Router 导航到 HomeComponent。
您学习编写 Angular 应用程序及其后端的体验如何?请在下面的评论中告诉我们您的想法和建议。
本教程的源代码可在 GitHub 上获取。
The above is the detailed content of Build a blog application homepage using Angular and MongoDB. For more information, please follow other related articles on the PHP Chinese website!

Hot AI Tools

Undresser.AI Undress
AI-powered app for creating realistic nude photos

AI Clothes Remover
Online AI tool for removing clothes from photos.

Undress AI Tool
Undress images for free

Clothoff.io
AI clothes remover

AI Hentai Generator
Generate AI Hentai for free.

Hot Article
Hot Tools

Notepad++7.3.1
Easy-to-use and free code editor

SublimeText3 Chinese version
Chinese version, very easy to use

Zend Studio 13.0.1
Powerful PHP integrated development environment

Dreamweaver CS6
Visual web development tools

SublimeText3 Mac version
God-level code editing software (SublimeText3)
Hot Topics
 1371
1371
 52
52

 Replace String Characters in JavaScript
Mar 11, 2025 am 12:07 AM
Replace String Characters in JavaScript
Mar 11, 2025 am 12:07 AM
Detailed explanation of JavaScript string replacement method and FAQ This article will explore two ways to replace string characters in JavaScript: internal JavaScript code and internal HTML for web pages. Replace string inside JavaScript code The most direct way is to use the replace() method: str = str.replace("find","replace"); This method replaces only the first match. To replace all matches, use a regular expression and add the global flag g: str = str.replace(/fi
 How do I create and publish my own JavaScript libraries?
Mar 18, 2025 pm 03:12 PM
How do I create and publish my own JavaScript libraries?
Mar 18, 2025 pm 03:12 PM
Article discusses creating, publishing, and maintaining JavaScript libraries, focusing on planning, development, testing, documentation, and promotion strategies.
 How do I optimize JavaScript code for performance in the browser?
Mar 18, 2025 pm 03:14 PM
How do I optimize JavaScript code for performance in the browser?
Mar 18, 2025 pm 03:14 PM
The article discusses strategies for optimizing JavaScript performance in browsers, focusing on reducing execution time and minimizing impact on page load speed.
 jQuery Matrix Effects
Mar 10, 2025 am 12:52 AM
jQuery Matrix Effects
Mar 10, 2025 am 12:52 AM
Bring matrix movie effects to your page! This is a cool jQuery plugin based on the famous movie "The Matrix". The plugin simulates the classic green character effects in the movie, and just select a picture and the plugin will convert it into a matrix-style picture filled with numeric characters. Come and try it, it's very interesting! How it works The plugin loads the image onto the canvas and reads the pixel and color values: data = ctx.getImageData(x, y, settings.grainSize, settings.grainSize).data The plugin cleverly reads the rectangular area of the picture and uses jQuery to calculate the average color of each area. Then, use
 How do I debug JavaScript code effectively using browser developer tools?
Mar 18, 2025 pm 03:16 PM
How do I debug JavaScript code effectively using browser developer tools?
Mar 18, 2025 pm 03:16 PM
The article discusses effective JavaScript debugging using browser developer tools, focusing on setting breakpoints, using the console, and analyzing performance.
 How to Build a Simple jQuery Slider
Mar 11, 2025 am 12:19 AM
How to Build a Simple jQuery Slider
Mar 11, 2025 am 12:19 AM
This article will guide you to create a simple picture carousel using the jQuery library. We will use the bxSlider library, which is built on jQuery and provides many configuration options to set up the carousel. Nowadays, picture carousel has become a must-have feature on the website - one picture is better than a thousand words! After deciding to use the picture carousel, the next question is how to create it. First, you need to collect high-quality, high-resolution pictures. Next, you need to create a picture carousel using HTML and some JavaScript code. There are many libraries on the web that can help you create carousels in different ways. We will use the open source bxSlider library. The bxSlider library supports responsive design, so the carousel built with this library can be adapted to any
 Enhancing Structural Markup with JavaScript
Mar 10, 2025 am 12:18 AM
Enhancing Structural Markup with JavaScript
Mar 10, 2025 am 12:18 AM
Key Points Enhanced structured tagging with JavaScript can significantly improve the accessibility and maintainability of web page content while reducing file size. JavaScript can be effectively used to dynamically add functionality to HTML elements, such as using the cite attribute to automatically insert reference links into block references. Integrating JavaScript with structured tags allows you to create dynamic user interfaces, such as tab panels that do not require page refresh. It is crucial to ensure that JavaScript enhancements do not hinder the basic functionality of web pages; even if JavaScript is disabled, the page should remain functional. Advanced JavaScript technology can be used (
 How to Upload and Download CSV Files With Angular
Mar 10, 2025 am 01:01 AM
How to Upload and Download CSV Files With Angular
Mar 10, 2025 am 01:01 AM
Data sets are extremely essential in building API models and various business processes. This is why importing and exporting CSV is an often-needed functionality.In this tutorial, you will learn how to download and import a CSV file within an Angular
