
 CMS Tutorial
WordPress
Continuing the journey: Building a web app from scratch with AngularJS and Firebase: Part 2
CMS Tutorial
WordPress
Continuing the journey: Building a web app from scratch with AngularJS and Firebase: Part 2
Continuing the journey: Building a web app from scratch with AngularJS and Firebase: Part 2

In the first part of this series, we learned how to get started creating applications using AngularJS and Firebase. We created the login page and implemented the login functionality using Firebase as the backend.
In this tutorial we will take this series to the next level. We will create and set up a registration page and learn how to do form validation in AngularJS.
start using
Let’s start by cloning the first part of this tutorial from GitHub.
git clone https://github.com/jay3dec/AngularJS_Firebase_Part1.git
After getting the code, navigate to the project directory and install the required dependencies.
cd AngularJS_Firebase_Part1
npm install
After installing all dependencies, start the server.
npm start
Point your browser to http://localhost:8000/app/#/home and the application should be running.
Create registration screen
We will first create a page for guest users to register. Navigate to AngularJS_Firebase_Part1/app and create a folder called register. In the register folder, create the register.html and register.js files. Here's what register.html looks like:
<!DOCTYPE html>
<html lang="en">

<head>
    <meta http-equiv="Content-Type" content="text/html; charset=UTF-8">
    <link rel="icon" href="http://getbootstrap.com/favicon.ico">

    <title>AngularJS & Firebase Web App</title>

    <link href="http://getbootstrap.com/dist/css/bootstrap.min.css" rel="stylesheet">
    <link href="http://getbootstrap.com/examples/signin/signin.css" rel="stylesheet">

    <link href="justified-nav.css" rel="stylesheet">

</head>

<body>

    <div class="container">
        <div class="jumbotron" style="padding-bottom:0px;">
            <h2>AngularJS & Firebase App!</h2>
        </div>
        <form class="form-signin" role="form">
            <input type="email" class="form-control" placeholder="Email address" required="" autofocus="">
            <input type="password" class="form-control" placeholder="Password" required="">
            <label class="checkbox">
                <a href="#"> Sign In</>
        </label>
        <button type="button" class="btn btn-lg btn-primary btn-block">Register</button>
      </form>

    </div>

</body></html>
As shown in the HTML code above, we use Bootstrap for HTML design.
In register.js we will declare the route for the application to access the registered view. $routeProvider has a method called when which we will use to create a route for the registered view. When defining a new route, we will set a templateUrl which will be rendered in index.html. In addition to this, we will also set up a controller for the newly created $scope in the registered view. A controller is the logic that controls a specific view. It should look like this:
'use strict';

angular.module('myApp.register', ['ngRoute'])

// Declared route
.config(['$routeProvider', function($routeProvider) {
    $routeProvider.when('/register', {
        templateUrl: 'register/register.html',
        controller: 'RegisterCtrl'
    });
}])

// Register controller
.controller('RegisterCtrl', [function() {

}]);
Now open app.js and add the registration module myApp.register to the application.
'use strict';

angular.module('myApp', [
    'ngRoute',
    'myApp.home',
    'myApp.register'  // Newly added register route
]).
config(['$routeProvider', function($routeProvider) {
    // Set defualt view of our app to home

    $routeProvider.otherwise({
        redirectTo: '/home'
    });
}]);
To display the registration page, we need to include register.js in the main HTML template file of the application. Open index.html and include the following:
<script src="register/register.js"></script>
Restart the server and point your browser to http://localhost:8000/app/index.html#/register, you should see the registration screen:
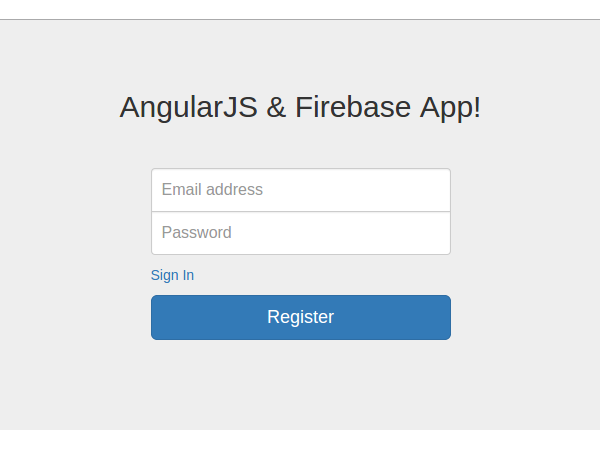
Next, let’s link the registration screen to the login screen. There is a sign up and sign in href in home.html and register.html respectively. We will set up two href sources so that they can be accessed from both pages.
In home.html:
<a href="#/register"> Sign Up<a/>
In register.html:
<a href="#/home"> Sign In<a/>
Form validation in AngularJS
When a user enters their email address and password on the registration screen, we need to verify something. Firstly, the email ID entered should be in a valid email ID format and secondly, the password entered should be of minimum length.
AngularJS provides FormController, which can track each element within the form. From the AngularJS documentation:
FormController keeps track of all its controls and nested forms and their status, such as valid/invalid or dirty/original.
FormController has some properties, such as $pristine, $dirty, $invalid, $valid wait. We'll see what these properties are, and we'll use some of them to implement form validation for our registration page.
First, we need to modify the form HTML to add the validation message. Modify the form HTML in register.html as shown in the figure.
<form class="form-signin" name="regForm">
    <div class="form-group">
        <label>Email</label>
        <input type="email" name="email" class="form-control" ng-model="user.email">
        <p>Enter a valid email.</p>
    </div>
    <div class="form-group">
        <label>Password</label>
        <input type="password" name="password" class="form-control" ng-model="user.password">
        <p>Min password length is 8 characters.</p>
    </div>
    <button type="button" class="btn btn-lg btn-primary btn-block">Register</button>
</form>
Save the changes, restart the server, and refresh the register page. You should see a page like this:
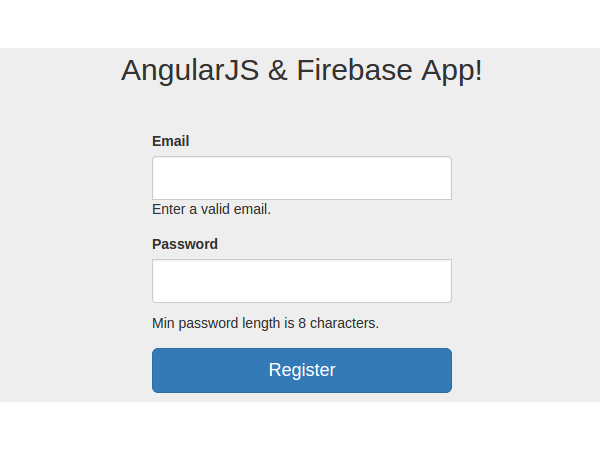
Now, as we can see in the above screen, the verification message is visible. We only need to display the email and password if they are invalid.
AngularJS 提供了一个名为 ngShow 的指令来根据特定的表达式显示 HTML。 (AngularJS 指令是 AngularJS 提供的扩展 HTML 属性,用于增强元素的功能。)因此,当输入电子邮件包含无效数据时,我们将使用 ngShow 显示验证消息。但我们如何知道输入的电子邮件是否无效呢?好吧,请记住我们之前讨论过的 FormController 属性。 FormController 有一个名为 $invalid 的属性,如果控件无效,则该属性为 True。如果输入的电子邮件无效,则 regForm.email.$invalid 将为 true。因此,我们将使用 $invalid 和 ngShow 来显示验证消息。修改电子邮件消息范围,如下所示:
<p ng-show="regForm.email.$invalid">Enter a valid email.</p>
保存更改,重新启动服务器,然后浏览到注册页面。您会看到电子邮件 ID 的验证消息不再显示。现在,尝试在输入电子邮件中输入一些数据,将会弹出错误消息。尝试输入有效的电子邮件地址,验证消息将会消失。但最初仍然显示密码最小长度的消息。让我们修复它。
AngularJS 提供了另一个名为 ng-minlength 的指令来设置任何输入控件的最小长度。我们将使用它来设置密码字段的最小长度,然后使用 ngShow 来显示/隐藏验证消息。修改密码字段以包含 ng-minlength 指令,如下所示:
<input type="password" name="password" class="form-control" ng-model="user.password" ng-minlength="8">
接下来修改密码字段的验证消息范围,如下所示:
<p ng-show="regForm.password.$error.minlength">Min password length is 8 characters.</p>
因此,如果密码字段的最小长度不符合密码输入字段中设置的最小长度,则 regForm.password.$error.minlength 将设置为“true”并且将会显示验证消息。
保存所有更改,重新启动服务器,然后浏览至注册页面。尝试输入密码值,验证消息将显示,直到密码长度为 8。
现在,为了突出显示无效的输入元素,我们可以使用一些样式。使用名为 ngClass 的 AngularJS 指令,我们可以使用 $invalid 属性动态突出显示错误的输入元素。因此,将 ngClass 指令添加到电子邮件和密码元素的父 div 中。
Enter a valid email.
<input type="password" name="password" class="form-control" ng-model="user.password" ng-minlength="8">Min password length is 8 characters.
保存更改,重新启动服务器,然后尝试浏览到注册页面。现在,对于无效条目,验证消息将显示如下:
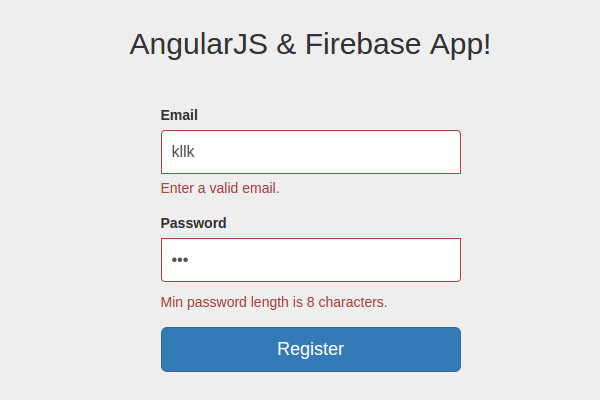
现在,正如您在上面的屏幕中看到的,在验证错误时, Register 按钮是已启用。除非输入的电子邮件和密码有效,否则我们将其禁用。 AngularJS 提供了一个名为 ngDisabled 的指令,它有助于根据表达式禁用元素。如果 email 和 password 已验证,则将设置 user.email 和 user.password 模型。因此,我们将使用这两个对象通过 ngDisabled 来启用/禁用注册按钮。修改注册按钮HTML,如图:
<button type="button" ng-disabled="!user.email || !user.password" class="btn btn-lg btn-primary btn-block">Register</button>
如您所见,如果 user.email 或 user.password 不为 false,则 ng-disabled 将为 true,这将是仅当数据无效时才出现这种情况。
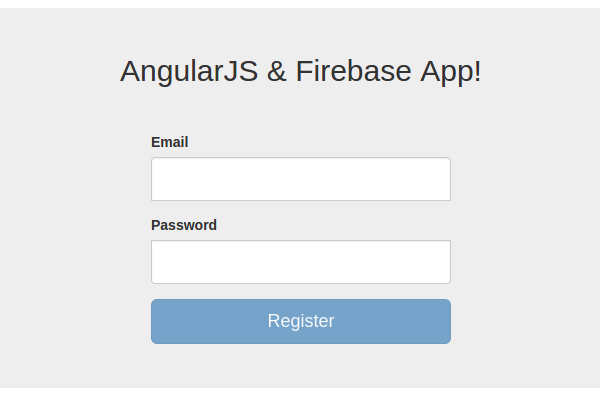
保存所有更改,重新启动服务器,并刷新注册页面。您会注意到,“注册”按钮已被禁用,并且在输入有效的电子邮件地址和密码之前将一直保持禁用状态。
验证登录屏幕
在登录屏幕上实施验证的方式与我们在注册屏幕上实施的方式非常相似。我建议您自己对登录屏幕实施验证作为练习。如果您遇到困难,请查看 登录 表单的修改后的 HTML 代码(位于 home.html 中,如下所示:
<form class="form-signin" name="signinForm" role="form">
    <div class="form-group" ng-class="{ 'has-error' : signinForm.email.$invalid }">
        <label>Email</label>
        <input type="email" name="email" class="form-control" ng-model="user.email">
        <p class="help-block" ng-show="signinForm.email.$invalid">Enter a valid email.</p>
    </div>
    <div class="form-group" ng-class="{ 'has-error' : signinForm.password.$invalid }">
        <label>Password</label>
        <input type="password" name="password" class="form-control" ng-model="user.password" ng-minlength="3">
        <p class="help-block" ng-show="signinForm.password.$error.minlength">Min password length is 8 characters.</p>
    </div>
    <label class="checkbox">
        <a href="#/register"> Sign Up</a>
    </label>
    <button ng-disabled="!user.email || !user.password" type="button" ng-click="SignIn($event)" class="btn btn-lg btn-primary btn-block">SignIn</button>
</form>
总结
在本教程的这一部分中,我们创建了注册页面并为其设置了路由。我们还了解了如何使用 AngularJS 为注册页面实现验证。
在下一部分中,我们将重点关注实现注册功能和一些其他功能。上述教程的源代码可在 GitHub 上获取。
请在下面的评论中告诉我们您的想法!
The above is the detailed content of Continuing the journey: Building a web app from scratch with AngularJS and Firebase: Part 2. For more information, please follow other related articles on the PHP Chinese website!

Hot AI Tools

Undresser.AI Undress
AI-powered app for creating realistic nude photos

AI Clothes Remover
Online AI tool for removing clothes from photos.

Undress AI Tool
Undress images for free

Clothoff.io
AI clothes remover

AI Hentai Generator
Generate AI Hentai for free.

Hot Article
Hot Tools

Notepad++7.3.1
Easy-to-use and free code editor

SublimeText3 Chinese version
Chinese version, very easy to use

Zend Studio 13.0.1
Powerful PHP integrated development environment

Dreamweaver CS6
Visual web development tools

SublimeText3 Mac version
God-level code editing software (SublimeText3)
Hot Topics


 Create WordPress Plugins With OOP Techniques
Mar 06, 2025 am 10:30 AM
Create WordPress Plugins With OOP Techniques
Mar 06, 2025 am 10:30 AM
This tutorial demonstrates building a WordPress plugin using object-oriented programming (OOP) principles, leveraging the Dribbble API. Let's refine the text for clarity and conciseness while preserving the original meaning and structure. Object-Ori
 How to Pass PHP Data and Strings to JavaScript in WordPress
Mar 07, 2025 am 09:28 AM
How to Pass PHP Data and Strings to JavaScript in WordPress
Mar 07, 2025 am 09:28 AM
Best Practices for Passing PHP Data to JavaScript: A Comparison of wp_localize_script and wp_add_inline_script Storing data within static strings in your PHP files is a recommended practice. If this data is needed in your JavaScript code, incorporat
 How to Embed and Protect PDF Files With a WordPress Plugin
Mar 09, 2025 am 11:08 AM
How to Embed and Protect PDF Files With a WordPress Plugin
Mar 09, 2025 am 11:08 AM
This guide demonstrates how to embed and protect PDF files within WordPress posts and pages using a WordPress PDF plugin. PDFs offer a user-friendly, universally accessible format for various content, from catalogs to presentations. This method ens
 Is WordPress easy for beginners?
Apr 03, 2025 am 12:02 AM
Is WordPress easy for beginners?
Apr 03, 2025 am 12:02 AM
WordPress is easy for beginners to get started. 1. After logging into the background, the user interface is intuitive and the simple dashboard provides all the necessary function links. 2. Basic operations include creating and editing content. The WYSIWYG editor simplifies content creation. 3. Beginners can expand website functions through plug-ins and themes, and the learning curve exists but can be mastered through practice.
 Why would anyone use WordPress?
Apr 02, 2025 pm 02:57 PM
Why would anyone use WordPress?
Apr 02, 2025 pm 02:57 PM
People choose to use WordPress because of its power and flexibility. 1) WordPress is an open source CMS with strong ease of use and scalability, suitable for various website needs. 2) It has rich themes and plugins, a huge ecosystem and strong community support. 3) The working principle of WordPress is based on themes, plug-ins and core functions, and uses PHP and MySQL to process data, and supports performance optimization.
 Is WordPress still free?
Apr 04, 2025 am 12:06 AM
Is WordPress still free?
Apr 04, 2025 am 12:06 AM
The core version of WordPress is free, but other fees may be incurred during use. 1. Domain names and hosting services require payment. 2. Advanced themes and plug-ins may be charged. 3. Professional services and advanced features may be charged.
 How much does WordPress cost?
Apr 05, 2025 am 12:13 AM
How much does WordPress cost?
Apr 05, 2025 am 12:13 AM
WordPress itself is free, but it costs extra to use: 1. WordPress.com offers a package ranging from free to paid, with prices ranging from a few dollars per month to dozens of dollars; 2. WordPress.org requires purchasing a domain name (10-20 US dollars per year) and hosting services (5-50 US dollars per month); 3. Most plug-ins and themes are free, and the paid price ranges from tens to hundreds of dollars; by choosing the right hosting service, using plug-ins and themes reasonably, and regularly maintaining and optimizing, the cost of WordPress can be effectively controlled and optimized.
 Should I use Wix or WordPress?
Apr 06, 2025 am 12:11 AM
Should I use Wix or WordPress?
Apr 06, 2025 am 12:11 AM
Wix is suitable for users who have no programming experience, and WordPress is suitable for users who want more control and expansion capabilities. 1) Wix provides drag-and-drop editors and rich templates, making it easy to quickly build a website. 2) As an open source CMS, WordPress has a huge community and plug-in ecosystem, supporting in-depth customization and expansion.
