Enhance database caching with advanced configuration in W3 Total Cache
So far, we have configured the W3 Total Cache Minification settings. In this tutorial, I will cover the advanced configuration of W3 Total Cache.
Database Cache
Database caching is an important factor in optimizing your website. Let me give you an example of a three-tier network: Now, applications are being deployed in multiple tiers to improve performance. This means that the application layer and data layer can exist on different hosts. The application displays the data as needed.
Here, the bottleneck is the data layer. A bottleneck is defined as the point at which the overall system's performance or capacity is limited by a number of components or resources. In our case this will be the data layer.
In order to improve performance, obviously we need the data to be right where the application layer is, but commercial databases are heavy enough to not be placed in the application layer, so we use other lightweight databases to cache the data layer host in the application.
To clarify the above description, think of it this way: A simple way to understand this type of caching is to think about dynamically serving pages in your WordPress website by querying the database again and again. The role of the database cache is to cache the most commonly used queries so that more static content can be retrieved quickly.
Advantages of database caching
- Scalability
- flexibility
- Availability
- performance
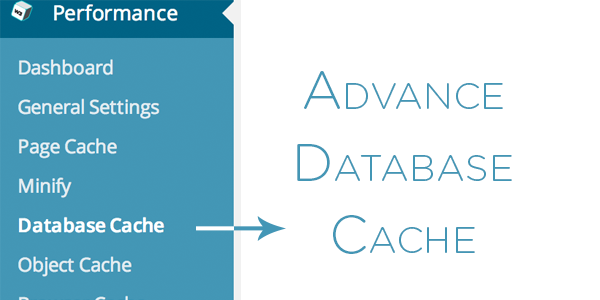
conventional
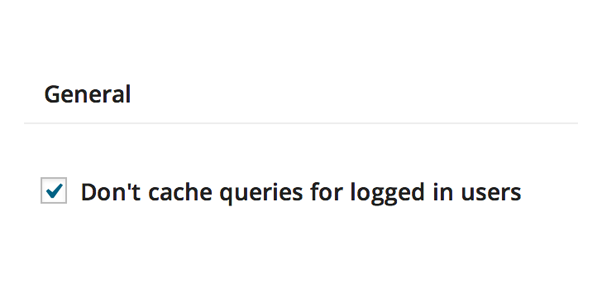
Let's start configuring the database cache. First, pay attention to the General tab. Check the option that tells the plug-in not to cache queries for logged in users. For example, if you are using WordPress as your CMS and selling paid content, then all the traffic you have is a set of logged in users, then you can uncheck this option.
advanced
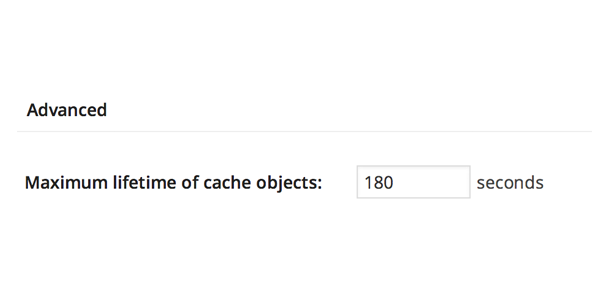
Maximum lifetime of cached objects
In the advanced settings, the first configuration is set to a value of 180 seconds. It determines the expiration time of unchanged cache items. The higher the value, the larger the cache. You can increase this value if you want to cache database queries for a longer period of time. It will significantly increase the cache size on disk.
Garbage collection interval
This setting defines how often you want the junk cache to be removed from disk. In the previous tutorial, we selected "Disk type cache", which is responsible for saving the cache on the host's disk storage. The garbage collection interval setting is responsible for removing wasteful cache. The default value of 3600 is fine in most cases.

Do not cache the following pages
Pages/URLs or directories defined in this box will not be cached. This setting helps us when we have problems dealing with a specific page or directory related to the plugin.

Ignored query stem
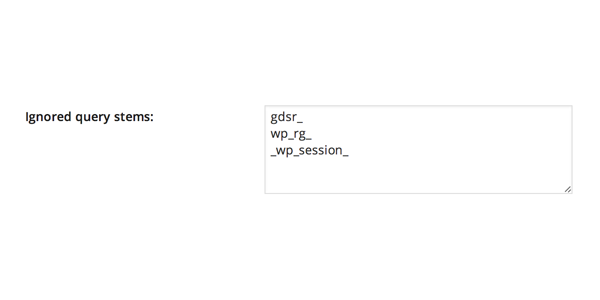
Sometimes plugins like WooCommerce and other rating plugins suffer from database caching. We tend to ignore database queries related to these plugins through this area. WooCommerce and other most commonly used plugins have been addressed. That said, you can see some default values that have been set.
For example, I had a problem with the ratings plugin, so I consulted Lester (the author of this plugin) and he told me to ignore the two stems wp_postmeta and wp_ in W3TC ratings. This example is just to give you an idea of how to solve the problem.
Please note that any prefix entered (set in wp-config.php) will be replaced with the current database prefix (default: wp_). You can use debug mode to identify query stems. If you still face any problem, you can read this solution.
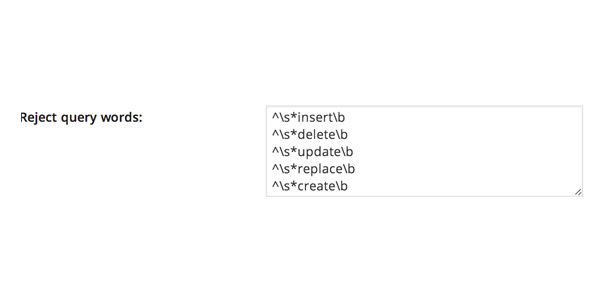
Reject query words
Leave this setting unless you are a database administrator and know what you are doing. This area is used to ignore certain patterns of database queries that are too important to be used directly instead of cached.
That's it. We'll cover object caching in the next tutorial. If you have any questions, I'd be happy to help.
The above is the detailed content of Enhance database caching with advanced configuration in W3 Total Cache. For more information, please follow other related articles on the PHP Chinese website!

Hot AI Tools

Undresser.AI Undress
AI-powered app for creating realistic nude photos

AI Clothes Remover
Online AI tool for removing clothes from photos.

Undress AI Tool
Undress images for free

Clothoff.io
AI clothes remover

AI Hentai Generator
Generate AI Hentai for free.

Hot Article

Hot Tools

Notepad++7.3.1
Easy-to-use and free code editor

SublimeText3 Chinese version
Chinese version, very easy to use

Zend Studio 13.0.1
Powerful PHP integrated development environment

Dreamweaver CS6
Visual web development tools

SublimeText3 Mac version
God-level code editing software (SublimeText3)

Hot Topics
 1386
1386
 52
52
 Is WordPress easy for beginners?
Apr 03, 2025 am 12:02 AM
WordPress is easy for beginners to get started. 1. After logging into the background, the user interface is intuitive and the simple dashboard provides all the necessary function links. 2. Basic operations include creating and editing content. The WYSIWYG editor simplifies content creation. 3. Beginners can expand website functions through plug-ins and themes, and the learning curve exists but can be mastered through practice.
 What is the WordPress good for?
Apr 07, 2025 am 12:06 AM
WordPressisgoodforvirtuallyanywebprojectduetoitsversatilityasaCMS.Itexcelsin:1)user-friendliness,allowingeasywebsitesetup;2)flexibilityandcustomizationwithnumerousthemesandplugins;3)SEOoptimization;and4)strongcommunitysupport,thoughusersmustmanageper
 Can I learn WordPress in 3 days?
Apr 09, 2025 am 12:16 AM
Can learn WordPress within three days. 1. Master basic knowledge, such as themes, plug-ins, etc. 2. Understand the core functions, including installation and working principles. 3. Learn basic and advanced usage through examples. 4. Understand debugging techniques and performance optimization suggestions.
 How much does WordPress cost?
Apr 05, 2025 am 12:13 AM
WordPress itself is free, but it costs extra to use: 1. WordPress.com offers a package ranging from free to paid, with prices ranging from a few dollars per month to dozens of dollars; 2. WordPress.org requires purchasing a domain name (10-20 US dollars per year) and hosting services (5-50 US dollars per month); 3. Most plug-ins and themes are free, and the paid price ranges from tens to hundreds of dollars; by choosing the right hosting service, using plug-ins and themes reasonably, and regularly maintaining and optimizing, the cost of WordPress can be effectively controlled and optimized.
 Should I use Wix or WordPress?
Apr 06, 2025 am 12:11 AM
Wix is suitable for users who have no programming experience, and WordPress is suitable for users who want more control and expansion capabilities. 1) Wix provides drag-and-drop editors and rich templates, making it easy to quickly build a website. 2) As an open source CMS, WordPress has a huge community and plug-in ecosystem, supporting in-depth customization and expansion.
 Is WordPress still free?
Apr 04, 2025 am 12:06 AM
The core version of WordPress is free, but other fees may be incurred during use. 1. Domain names and hosting services require payment. 2. Advanced themes and plug-ins may be charged. 3. Professional services and advanced features may be charged.
 Why would anyone use WordPress?
Apr 02, 2025 pm 02:57 PM
People choose to use WordPress because of its power and flexibility. 1) WordPress is an open source CMS with strong ease of use and scalability, suitable for various website needs. 2) It has rich themes and plugins, a huge ecosystem and strong community support. 3) The working principle of WordPress is based on themes, plug-ins and core functions, and uses PHP and MySQL to process data, and supports performance optimization.
 Is WordPress a CMS?
Apr 08, 2025 am 12:02 AM
WordPress is a Content Management System (CMS). It provides content management, user management, themes and plug-in capabilities to support the creation and management of website content. Its working principle includes database management, template systems and plug-in architecture, suitable for a variety of needs from blogs to corporate websites.


