
 Backend Development
Python Tutorial
How to create a BMI calculator web application using Python and PyWebIO?
Backend Development
Python Tutorial
How to create a BMI calculator web application using Python and PyWebIO?
How to create a BMI calculator web application using Python and PyWebIO?

PyWebio is a Python library that can be used to build web applications that require a simpler UI. It provides a variety of features to create a simple web browser. Anyone can use PyWebio to build simple web applications without prior knowledge of HTML and JavaScript.
This tutorial will explain two methods of creating a network to calculate BMI. Body mass index (BMI) measures body fat based on weight and height. It is commonly used to determine whether a person is underweight, normal, overweight, or obese.
Example
In this example, we define a "BMICalculator" class that contains all the methods needed to calculate and classify BMI. The ‘__init__’ method initializes the object’s properties to None.
Next, we use the "get_user_inputs()" method, which uses the "input()" function to get the user's height and weight. The 'calculate_bmi()' method then uses the formula to calculate the BMI and rounds the result to two decimal places. The ‘classify_weight_category()’ method uses if-elif-else statements to classify the user’s weight category based on the calculated BMI. The "display_results()" method uses the "put_text()" function to display the BMI and weight categories to the user.
Finally, we define the "calculate_bmi()" function, which creates an instance of the BMICalculator class, calls its methods in sequence, and displays the results to the user. This function serves as the entry point to the PyWebIO application.
from pywebio.input import input, FLOAT
from pywebio.output import put_text
class BMICalculator:
   def __init__(self):
      self.height = None
      self.weight = None
      self.bmi = None
      self.classification = None

   def calculate_bmi(self):

      # Get user's height and weight
      self.height = input("Please enter your height in meters (m):", type=FLOAT)
      self.weight = input("Please enter your weight in kilograms (kg):", type=FLOAT)

      # Calculate BMI
      self.bmi = self.weight / (self.height ** 2)

      # Determine BMI classification
      if self.bmi < 16:
         self.classification = "Severely underweight"
      elif self.bmi < 18.5:
         self.classification = "Underweight"
      elif self.bmi < 25:
         self.classification = "Normal (healthy weight)"
      elif self.bmi < 30:
         self.classification = "Overweight"
      elif self.bmi < 35:
         self.classification = "Moderately obese"
      else:
         self.classification = "Severely obese"

      # Display results to the user
      put_text("Based on your height of {}m and weight of {}kg, your BMI is {:.1f}. This means you are classified as {}.".format(self.height, self.weight, self.bmi, self.classification))

      # Create BMICalculator object
      bmi_calculator = BMICalculator()

      # Calculate BMI and display results
      bmi_calculator.calculate_bmi()
Output
When you run the above python script, it will open a new window as shown below -
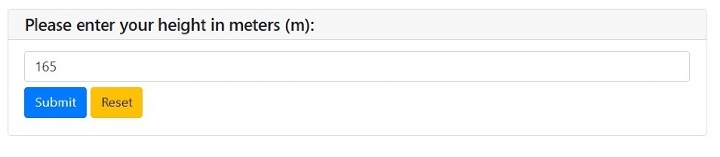
Enter your height (meters) and click the "Submit" button. After clicking the Submit button, the following screen will be displayed -
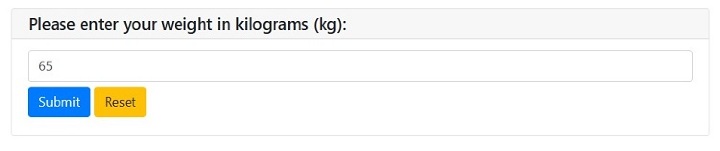
Now enter your weight in kilograms and click on the "Submit" button again. After clicking the "Submit" button, the results will be displayed as follows -
Based on your height of 1.7m and weight of 65kg, your BMI is 22.5. This means you are classified as Normal (healthy weight).
Example
This is another simple way to create a bmi web application. In this example, we define the "calculate_bmi()" function that prompts the user for height and weight. It then calculates BMI using the formula weight/(height/100)^2, rounds to two decimal places, and displays the result using the "put_text()" function. Next, it uses a series of if statements to determine the weight category based on the calculated BMI.
Finally, we use the "start_server()" function to start the web application and display the BMI calculator. We then set the title of the web application to "BMI Calculator" and the text on the "Calculate" button to "Calculate BMI."
from pywebio.input import *
from pywebio.output import *
from pywebio import start_server
def calculate_bmi():
   height = input("Enter your height (in cm)", type=FLOAT)
   weight = input("Enter your weight (in kg)", type=FLOAT)
   bmi = weight / ((height/100) ** 2)
   bmi = round(bmi, 2)
   weight_category = ""
   if bmi < 18.5:
      weight_category = "underweight"
   elif 18.5 <= bmi <= 24.9:
      weight_category = "normal weight"
   elif 25 <= bmi <= 29.9:
      weight_category = "overweight"
   else:
      weight_category = "obese"
   put_text("Your BMI is: %s" % bmi)
   put_text("You have a %s" % weight_category)
   if __name__ == '__main__':
      start_server(calculate_bmi, port=80, debug=True, title="BMI Calculator", button_text="Calculate BMI")
Output
When you run the above python script, it will open a new window as shown below -
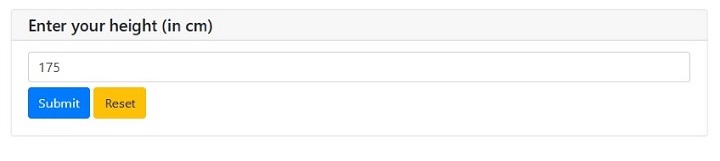
Enter your height (meters) and click the "Submit" button. After clicking the Submit button, the following screen will be displayed -
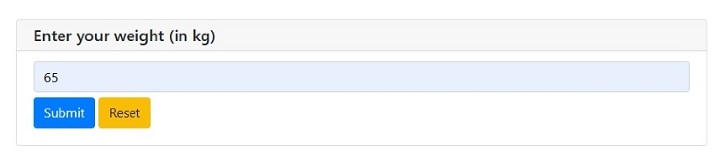
Now enter your weight in kilograms and click on the "Submit" button again. After clicking the "Submit" button, the results will be displayed as follows -
Your BMI is: 21.22
You have a normal weight
We learned that Pywebio is a powerful library for creating simple web applications. Developers can easily make web applications that require a simpler UI. It provides input/output functions to handle conversion between Python variables and web page elements, making it easy to build interactive web interfaces. One of the main advantages of PyWebIO is its ease of use. We can get started quickly by installing the library and importing the necessary functions into your Python code. PyWebIO also provides various built-in widgets such as text boxes, drop-down menus, and buttons that can be easily incorporated into web applications. It supports multiple web frameworks, including Flask, Django and Tornado, and can be easily integrated with existing Python web applications
The above is the detailed content of How to create a BMI calculator web application using Python and PyWebIO?. For more information, please follow other related articles on the PHP Chinese website!

Hot AI Tools

Undresser.AI Undress
AI-powered app for creating realistic nude photos

AI Clothes Remover
Online AI tool for removing clothes from photos.

Undress AI Tool
Undress images for free

Clothoff.io
AI clothes remover

AI Hentai Generator
Generate AI Hentai for free.

Hot Article
Hot Tools

Notepad++7.3.1
Easy-to-use and free code editor

SublimeText3 Chinese version
Chinese version, very easy to use

Zend Studio 13.0.1
Powerful PHP integrated development environment

Dreamweaver CS6
Visual web development tools

SublimeText3 Mac version
God-level code editing software (SublimeText3)
Hot Topics
 1378
1378
 52
52

 Python: Exploring Its Primary Applications
Apr 10, 2025 am 09:41 AM
Python: Exploring Its Primary Applications
Apr 10, 2025 am 09:41 AM
Python is widely used in the fields of web development, data science, machine learning, automation and scripting. 1) In web development, Django and Flask frameworks simplify the development process. 2) In the fields of data science and machine learning, NumPy, Pandas, Scikit-learn and TensorFlow libraries provide strong support. 3) In terms of automation and scripting, Python is suitable for tasks such as automated testing and system management.
 The 2-Hour Python Plan: A Realistic Approach
Apr 11, 2025 am 12:04 AM
The 2-Hour Python Plan: A Realistic Approach
Apr 11, 2025 am 12:04 AM
You can learn basic programming concepts and skills of Python within 2 hours. 1. Learn variables and data types, 2. Master control flow (conditional statements and loops), 3. Understand the definition and use of functions, 4. Quickly get started with Python programming through simple examples and code snippets.
 Navicat's method to view MongoDB database password
Apr 08, 2025 pm 09:39 PM
Navicat's method to view MongoDB database password
Apr 08, 2025 pm 09:39 PM
It is impossible to view MongoDB password directly through Navicat because it is stored as hash values. How to retrieve lost passwords: 1. Reset passwords; 2. Check configuration files (may contain hash values); 3. Check codes (may hardcode passwords).
 How to use AWS Glue crawler with Amazon Athena
Apr 09, 2025 pm 03:09 PM
How to use AWS Glue crawler with Amazon Athena
Apr 09, 2025 pm 03:09 PM
As a data professional, you need to process large amounts of data from various sources. This can pose challenges to data management and analysis. Fortunately, two AWS services can help: AWS Glue and Amazon Athena.
 How to start the server with redis
Apr 10, 2025 pm 08:12 PM
How to start the server with redis
Apr 10, 2025 pm 08:12 PM
The steps to start a Redis server include: Install Redis according to the operating system. Start the Redis service via redis-server (Linux/macOS) or redis-server.exe (Windows). Use the redis-cli ping (Linux/macOS) or redis-cli.exe ping (Windows) command to check the service status. Use a Redis client, such as redis-cli, Python, or Node.js, to access the server.
 How to read redis queue
Apr 10, 2025 pm 10:12 PM
How to read redis queue
Apr 10, 2025 pm 10:12 PM
To read a queue from Redis, you need to get the queue name, read the elements using the LPOP command, and process the empty queue. The specific steps are as follows: Get the queue name: name it with the prefix of "queue:" such as "queue:my-queue". Use the LPOP command: Eject the element from the head of the queue and return its value, such as LPOP queue:my-queue. Processing empty queues: If the queue is empty, LPOP returns nil, and you can check whether the queue exists before reading the element.
 How to view server version of Redis
Apr 10, 2025 pm 01:27 PM
How to view server version of Redis
Apr 10, 2025 pm 01:27 PM
Question: How to view the Redis server version? Use the command line tool redis-cli --version to view the version of the connected server. Use the INFO server command to view the server's internal version and need to parse and return information. In a cluster environment, check the version consistency of each node and can be automatically checked using scripts. Use scripts to automate viewing versions, such as connecting with Python scripts and printing version information.
 How secure is Navicat's password?
Apr 08, 2025 pm 09:24 PM
How secure is Navicat's password?
Apr 08, 2025 pm 09:24 PM
Navicat's password security relies on the combination of symmetric encryption, password strength and security measures. Specific measures include: using SSL connections (provided that the database server supports and correctly configures the certificate), regularly updating Navicat, using more secure methods (such as SSH tunnels), restricting access rights, and most importantly, never record passwords.
