

Building Testable Themes: A Beginner's Guide to Unit Testing

In the first two articles of this series, we took a high-level look at what unit testing is and how to apply it in a plug-in development environment. Of course, there’s more to WordPress than just writing plugins, right? An important part of a WordPress developer's job - and for some, the most important part - is theme development. So, in this article, we will learn how to develop a testable theme. Specifically, we'll look at how themes differ from plugins, and then we'll write an extremely simple theme that demonstrates the principles of unit testing and can be applied in future development.
Understand the difference between themes and plugins
Before we start creating a theme or reviewing any code, it is important to understand the difference between theme and plugin development. First, plugins can be written in two ways:
As an object that encapsulates a set of functions (that's what we do in this article).
- As a simple collection of functions
- Both methods do the same thing: that is, they use a collection of functions and filters to introduce new functionality to WordPress. The main difference is how the functions are encapsulated.
But when it comes to theme development, there is really only one way to develop a theme, and that is using the collection of functions defined in
functions.php. This brings the following two challenges to writing subject unit tests:
Since the theme is not object-oriented, we cannot actually store the objects in an array like in the previous article- We had to identify a way to write and evaluate theme features that would run independently of loading the theme into the browser
- Because good themes use a collection of filters and actions, we will create a theme that follows these best practices, and because the focus of this particular article is on unit testing themes, more emphasis will be on writing Test rather than create a beautiful, functional theme.
Preparing for unit testing
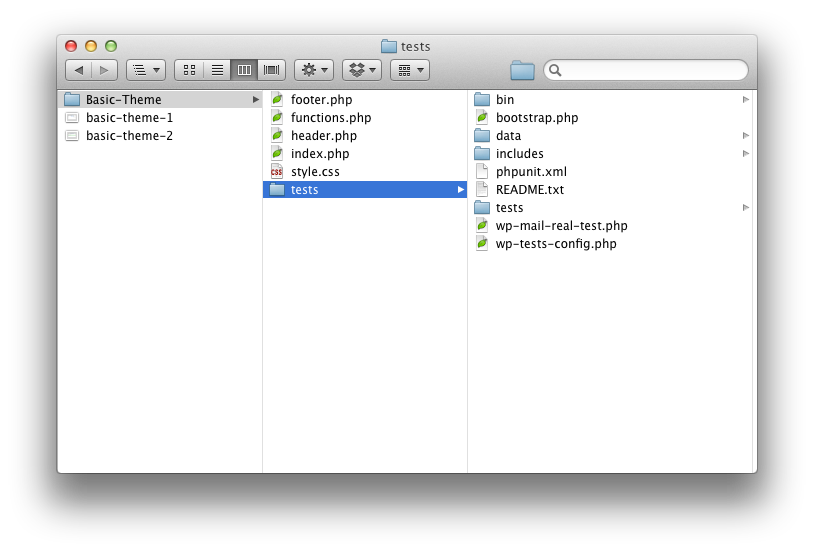
Before coding, let's initialize our project directory. We need to set up the framework of the theme so that a new directory is created for the theme within your WordPress theme directory. Mine is called
Basic Theme. Add the following files (we will fill them in later):
- footer.php
- functions.php
- header.php
- index.php
- style.css
- Let’s go ahead and delete the stylesheet so that WordPress recognizes the theme and allows us to activate it from the dashboard. To do this, add the following code:
/*
Theme Name: Basic Theme
Theme URI: TODO
Version: 1.0
Description: A basic theme used to demonstrate how to write unit tests for themes.
Author: Tom McFarlin
Author URI: https://tommcfarlin.com
License: GNU General Public License v2.0
License URI: http://www.gnu.org/licenses/gpl-2.0.html
*/
For completeness, go ahead and add the PHP opening and closing tags to the beginning and end of the function file. This will ensure we have a foundation when we start writing the topic functions later in this article.
and add a new directory called
tests. Here we need to do WordPress testing.
WordPress Testing: A Brief IntroductionEarlier in this series, I provided a link to the WordPress tests located on GitHub. While these tests are great, the latest, Automattic-maintained WordPress tests are in this Subversion repository.
If you are an advanced developer, then I recommend checking out these tests; however, if you are just starting out with unit testing - no problem! I've made all the source code (including the WordPress tests) available in a GitHub repository that you can download, reference, and use in your own projects.
After installing the test, your theme directory should look like this:
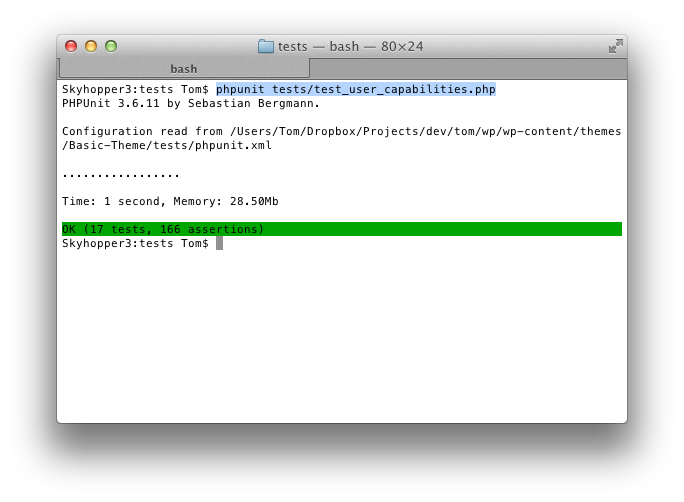
 Since PHPUnit must be executed from the command line, you will need to open a terminal session (or command prompt), navigate to the
directory, and then you should be able to run them using the following command (as an example):
phpunit tests/test_user_capabilities.php
基本主题:可单元测试的 WordPress 主题
此时,让我们继续激活仪表板中的主题。主题应该激活(如果没有激活,请确保模板文件中没有任何杂散字符)。如果您尝试查看主题,它自然会显示白屏。
在编写任何测试之前,让我们继续使用一些内容填充我们的模板文件,以便我们可以在前端显示一些内容。
在header.php中,添加以下代码:
<!DOCTYPE html>
<html>
	<head>
		<meta charset="UTF-8">
		<link rel="profile" href="http://gmpg.org/xfn/11" />
		<link rel="pingback" href="<?php bloginfo( 'pingback_url' ); ?>" />
		<title><?php wp_title( '' ); ?></title>
		<?php wp_head(); ?>
	</head>
	<body <?php body_class(); ?>>

		<div id="header">
			This is the header.
		</div><!-- /#header -->
在index.php中,添加以下代码:
<?php get_header(); ?>

	<div id="content">
		This is the content.
	</div><!-- /#content -->

<?php get_footer(); ?>
并在footer.php中添加以下代码:
		<div id="footer">
			This is the footer.
		</div><!-- /#footer -->

	</body>
</html>
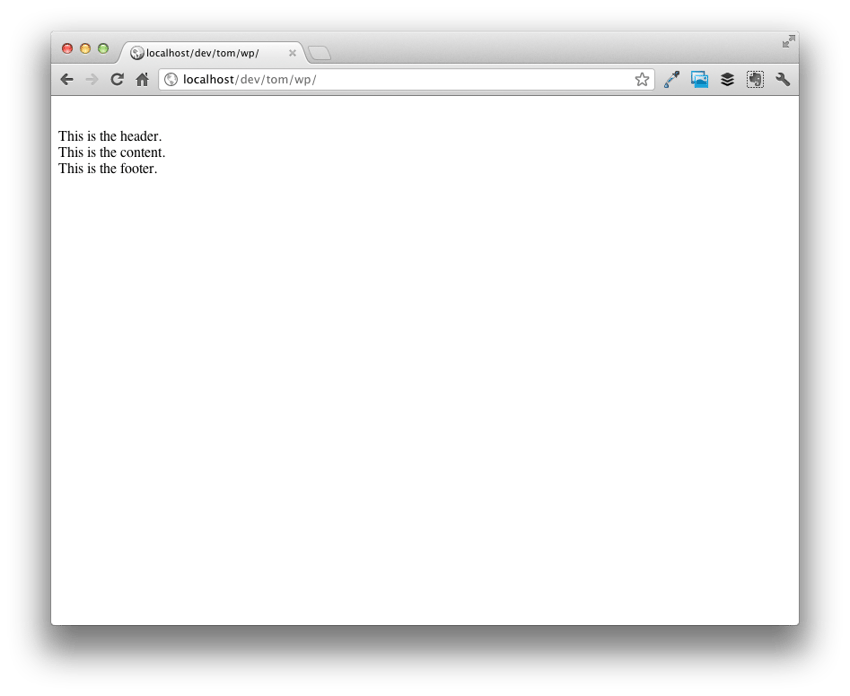
很简单,我知道,但这足以让我们在开始编写测试时使用。保存您的工作,在浏览器中查看主题,您应该会看到以下内容:
编写单元测试
测试主题激活
在您的 tests 目录中,创建一个名为 test_basic_theme.php 的文件,并对该文件进行存根处理,如下所示:
// Include the functions for the theme
include_once('../functions.php');

class Test_Basic_Theme extends WP_UnitTestCase {

} // end class
上面,我们定义了一个类,用于包装所有主题的单元测试。
首先,我们定义 setUp 方法。 setUp 方法是 WordPress 测试框架提供的函数,我们可以使用它在测试运行之前触发某些函数。例如,当 WordPress 测试运行时,它们会针对默认主题(即“211”)运行。在我们的例子中,我们希望针对我们自己的主题运行测试。
为此,我们需要告诉 WordPress 在运行其余测试之前实际切换主题。由于这需要在测试运行之前发生,因此需要在 setUp 方法中定义。有道理吗?
所以让我们编写 setUp 方法:
function setUp() {

	parent::setUp();
	switch_theme( 'Basic Theme', 'Basic Theme' );

} // end setup
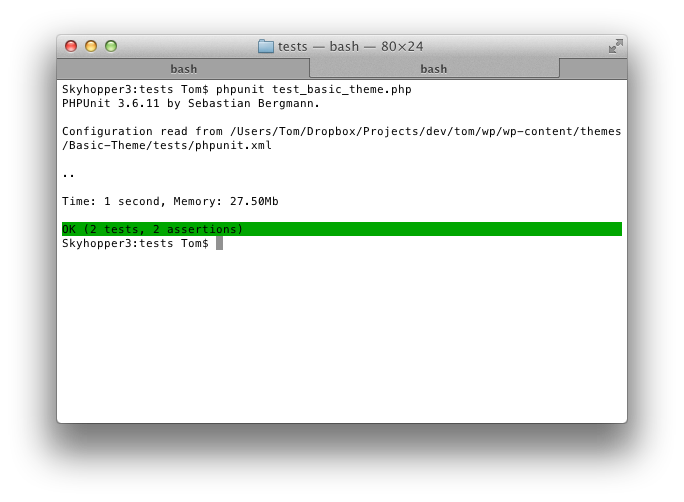
再次执行我们的测试。我们可以通过运行与最初设置测试时相同的命令来完成此操作:
phpunit tests/test_basic_theme.php
如果您已正确完成所有操作,那么在测试运行时您实际上应该会看到失败:
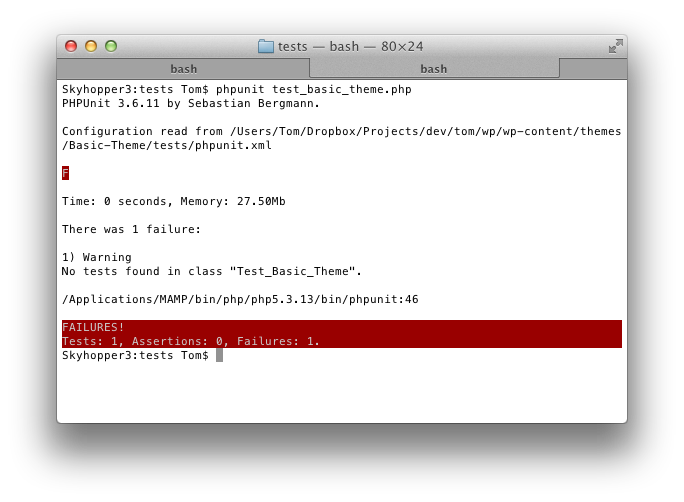
但错误消息很明确:“在类“Test_Basic_Theme””中找不到测试。因此,让我们减轻这种情况并为主题编写第一个测试。它可以是非常简单的事情,但请记住上一篇文章中我们不想只测试最佳路径,而是还要测试失败路径。
因此,我们需要测试基本主题是否处于活动状态以及“211”是否处于活动状态。为此,我们将使用assertTrue 方法和assertFalse 方法,并且我们将在两个函数的上下文中执行此操作。查看下面的代码并相应地更新您的测试文件:
function testActiveTheme() {

	$this->assertTrue( 'Basic Theme' == get_current_theme() );

} // end testThemeInitialization

function testInactiveTheme() {

	$this->assertFalse( 'Twenty Eleven' == get_current_theme() );

} // end testInactiveTheme
再次执行测试,您应该看到它们运行绿色。不错,对吧?
这是一个相对简单的功能,因此让我们考虑一下我们的主题可以具有的一些高级功能。
测试 jQuery 是否已入队
开箱即用的基本主题不包含 jQuery,因此我们将其包含在我们的主题中。如果您还记得之前的帖子,正确的单元测试方法如下:
- 编写测试
- 运行测试(它会失败)
- 编写使测试通过所需的代码
- 运行测试(它应该通过,允许第 3 步正确完成)
那么,让我们对 jQuery 执行此操作。
首先,我们需要编写一个测试来确定 jQuery 是否已加载。我们将使用 WordPress 函数 wp_script_is。由于主题在浏览器中经历正常的页面生命周期,因此我们需要使用 do_action 函数手动告诉 WordPress 加载 jQuery。
function testjQueryIsLoaded() {

	$this->assertFalse( wp_script_is( 'jquery' ) );

	do_action( 'wp_enqueue_scripts' );
	$this->assertTrue( wp_script_is( 'jquery' ) );

} // end testjQueryIsLoaded
在我们进一步讨论之前,这里有一些重要的事情需要注意:我不喜欢在一个函数中放置多个断言,因为我认为每个函数应该用于测试一个目的;然而,也有例外。在这里,我们需要确保在调用 do_action 之前未加载 jQuery。
无论如何,运行测试都会失败。因此,我们需要将代码添加到 functions.php 中,以确保将 jQuery 添加到我们的主题中。为此,请在函数文件中包含以下函数:
function basic_add_jquery() {

	wp_enqueue_script( 'jquery' );

} // end basic_remove_jquery
add_action( 'wp_enqueue_scripts', 'basic_add_jquery' );
最后,运行测试,它应该是绿色的。很简单,不是吗?
测试元描述
假设我们想要在主页上包含默认元描述。在最简单的情况下,它只不过是博客的描述。因此,按照上面概述的方法,我们引入一个函数来测试添加到 head 元素的元描述字符串是否符合我们的预期:
function testBasicMetaDescription() {

	$meta_description = '<meta name="description" content="' . get_bloginfo( 'description' ) . '" />';
	$this->expectOutputString( $meta_description, basic_meta_description() );

} // end testBasicMetaDescription
运行它——它会失败。请注意,我没有使用标准 assertTrue、assertFalse 函数 - 稍后会有更多详细信息。现在,我们将以下函数引入到functions.php中:
function basic_meta_description() {

	echo '<meta name="description" content="' . get_bloginfo( 'description' ) . '" />';

} // end basic_meta_description
add_action( 'wp_head', 'basic_meta_description' );
请注意,此函数挂钩到 wp_head 操作。为了将元描述写入 head 元素,我们必须回显字符串,而不是返回字符串。
现在,请注意,在上面的测试中,我们使用的是 expectOutputString。当我们需要评估一个回显一个字符串(而不是返回一个字符串)的函数时,这非常有用。由于 wp_head 操作将返回大量数据(即整个 head 元素),因此我们实际上只需要评估返回的元描述。这就是为什么我不调用 do_action( 'wp_head' ) ,而是简单地调用函数本身并根据我期望的结果评估输出。
再次运行 PHPUnit,您的测试应该全部通过。
测试所有事情
显然,我们只是触及了单元测试对主题开发的表面作用。还有很多东西可以测试 - 我们甚至还没有考虑过测试 The Loop、评估帖子格式的各种方法,甚至还没有考虑如何检查评论。
请记住,这是一本初学者指南,这三篇文章涵盖了很多内容。
无论如何,原则是相同的:问题是确保以编程方式触发适当的函数或操作,并在预期和意外情况下评估其输出。
最后,您可以在此 GitHub 存储库中找到整个项目以及记录的函数。
资源
以下是本文中使用的资源的摘要:
- 什么是单元测试?
- 构建可测试的插件
- PHPUnit
- 官方 WordPress 测试
assertTrueassertFalsewp_script_isdo_actionwp_headexpectOutputString- GitHub 上的基本主题
The above is the detailed content of Building Testable Themes: A Beginner's Guide to Unit Testing. For more information, please follow other related articles on the PHP Chinese website!

Hot AI Tools

Undresser.AI Undress
AI-powered app for creating realistic nude photos

AI Clothes Remover
Online AI tool for removing clothes from photos.

Undress AI Tool
Undress images for free

Clothoff.io
AI clothes remover

Video Face Swap
Swap faces in any video effortlessly with our completely free AI face swap tool!

Hot Article
Hot Tools

Notepad++7.3.1
Easy-to-use and free code editor

SublimeText3 Chinese version
Chinese version, very easy to use

Zend Studio 13.0.1
Powerful PHP integrated development environment

Dreamweaver CS6
Visual web development tools

SublimeText3 Mac version
God-level code editing software (SublimeText3)
Hot Topics
 1387
1387
 52
52

 Alipay PHP SDK transfer error: How to solve the problem of 'Cannot declare class SignData'?
Apr 01, 2025 am 07:21 AM
Alipay PHP SDK transfer error: How to solve the problem of 'Cannot declare class SignData'?
Apr 01, 2025 am 07:21 AM
Alipay PHP...
 Explain JSON Web Tokens (JWT) and their use case in PHP APIs.
Apr 05, 2025 am 12:04 AM
Explain JSON Web Tokens (JWT) and their use case in PHP APIs.
Apr 05, 2025 am 12:04 AM
JWT is an open standard based on JSON, used to securely transmit information between parties, mainly for identity authentication and information exchange. 1. JWT consists of three parts: Header, Payload and Signature. 2. The working principle of JWT includes three steps: generating JWT, verifying JWT and parsing Payload. 3. When using JWT for authentication in PHP, JWT can be generated and verified, and user role and permission information can be included in advanced usage. 4. Common errors include signature verification failure, token expiration, and payload oversized. Debugging skills include using debugging tools and logging. 5. Performance optimization and best practices include using appropriate signature algorithms, setting validity periods reasonably,
 Explain the concept of late static binding in PHP.
Mar 21, 2025 pm 01:33 PM
Explain the concept of late static binding in PHP.
Mar 21, 2025 pm 01:33 PM
Article discusses late static binding (LSB) in PHP, introduced in PHP 5.3, allowing runtime resolution of static method calls for more flexible inheritance.Main issue: LSB vs. traditional polymorphism; LSB's practical applications and potential perfo
 How does session hijacking work and how can you mitigate it in PHP?
Apr 06, 2025 am 12:02 AM
How does session hijacking work and how can you mitigate it in PHP?
Apr 06, 2025 am 12:02 AM
Session hijacking can be achieved through the following steps: 1. Obtain the session ID, 2. Use the session ID, 3. Keep the session active. The methods to prevent session hijacking in PHP include: 1. Use the session_regenerate_id() function to regenerate the session ID, 2. Store session data through the database, 3. Ensure that all session data is transmitted through HTTPS.
 Describe the SOLID principles and how they apply to PHP development.
Apr 03, 2025 am 12:04 AM
Describe the SOLID principles and how they apply to PHP development.
Apr 03, 2025 am 12:04 AM
The application of SOLID principle in PHP development includes: 1. Single responsibility principle (SRP): Each class is responsible for only one function. 2. Open and close principle (OCP): Changes are achieved through extension rather than modification. 3. Lisch's Substitution Principle (LSP): Subclasses can replace base classes without affecting program accuracy. 4. Interface isolation principle (ISP): Use fine-grained interfaces to avoid dependencies and unused methods. 5. Dependency inversion principle (DIP): High and low-level modules rely on abstraction and are implemented through dependency injection.
 How to automatically set permissions of unixsocket after system restart?
Mar 31, 2025 pm 11:54 PM
How to automatically set permissions of unixsocket after system restart?
Mar 31, 2025 pm 11:54 PM
How to automatically set the permissions of unixsocket after the system restarts. Every time the system restarts, we need to execute the following command to modify the permissions of unixsocket: sudo...
 How to debug CLI mode in PHPStorm?
Apr 01, 2025 pm 02:57 PM
How to debug CLI mode in PHPStorm?
Apr 01, 2025 pm 02:57 PM
How to debug CLI mode in PHPStorm? When developing with PHPStorm, sometimes we need to debug PHP in command line interface (CLI) mode...
 Explain late static binding in PHP (static::).
Apr 03, 2025 am 12:04 AM
Explain late static binding in PHP (static::).
Apr 03, 2025 am 12:04 AM
Static binding (static::) implements late static binding (LSB) in PHP, allowing calling classes to be referenced in static contexts rather than defining classes. 1) The parsing process is performed at runtime, 2) Look up the call class in the inheritance relationship, 3) It may bring performance overhead.
