

Making the ideal carousel, part 1

Carousels are a staple of streaming and e-commerce websites. Amazon and Netflix both use them as important navigation tools. In this tutorial, we'll evaluate the interaction design of both and use our findings to implement the perfect carousel.
In this tutorial series, we will also learn some features of the JavaScript motion engine Popmotion. It provides animation tools such as tweening (for pagination), pointer tracking (for scrolling), and spring physics (for our delightful finishing touches.)
Part 1 will evaluate how Amazon and Netflix implement scrolling. We will then implement a carousel that can be scrolled by touch.
By the end of this series, we will use spring physics to implement wheel and touchpad scrolling, paging, progress bars, keyboard navigation, and some small touches. We'll also touch on some basic function composition.
Is it perfect?
How to make the carousel "perfect"? It must be accessible via:
- Mouse: It should provide previous and next buttons that are easy to click and do not obscure the content.
- Touch: It should track the finger and then scroll with the same momentum as when the finger left the screen.
- Scroll Wheel: The often-overlooked Apple Magic Mouse and many laptop trackpads offer smooth horizontal scrolling. We should take advantage of these abilities!
- Keyboard: Many users are unwilling or unable to use the mouse to navigate. It's important to make our carousels accessible so these users can use our product as well.
Finally, we’ll take it one step further and make the carousel respond clearly and instinctively via spring physics when the slider reaches its end, making it a confident, enjoyable user experience.
set up
First, let's get the HTML and CSS needed to build a basic carousel by forking this CodePen.
Pen uses Sass to preprocess CSS and Babel to transpile ES6 JavaScript. I also added Popmotion, which can be accessed via window.popmotion.
If you wish, you can copy the code into a local project, but you need to make sure your environment supports Sass and ES6. You will also need to install Popmotion using npm install popmotion.
Create a new carousel
On any given page, we may have many carousels. So we need a way to encapsulate the state and functionality of each.
I will use factory function instead of class. Factory functions avoid using the often confusing this keyword and will simplify the code for this tutorial.
In your JavaScript editor, add this simple function:
function carousel(container) {
}

carousel(document.querySelector('.container'));
We will add carousel-specific code in this carousel function.
How and why to scroll
Our first task is to make the carousel scroll. We can solve this problem in two ways:
Native browser scrolling
The obvious solution is to set overflow-x:scroll on the slider. This will allow native scrolling on all browsers, including touch and horizontal mouse wheel devices.
However, this method also has disadvantages:
- Content outside the container will not be visible, which may limit our design.
- It also limits how we can use animation to indicate that the end point has been reached.
- Desktop browsers will have an ugly (albeit accessible!) horizontal scrollbar.
or:
animation translateX
We can also animate the translateX property of the carousel. This will be very versatile as we will be able to implement exactly the design we like. translateX also performs very well because, unlike the CSS left property, it can be processed by the device's GPU.
The disadvantage is that we have to re-implement the scrolling function using JavaScript. This means more work, more code.
How do Amazon and Netflix implement scrolling?
Both Amazon and Netflix carousels make different tradeoffs in solving this problem.
Amazon Animate the left property of the carousel in Desktop mode. Animating left is a very bad choice because changing it triggers a layout recalculation. This is CPU intensive and older machines will struggle to hit 60fps.
Whoever decided to animate left instead of translateX must be a real idiot (Spoiler: was me, back in 2012 .We were not so enlightened then.)
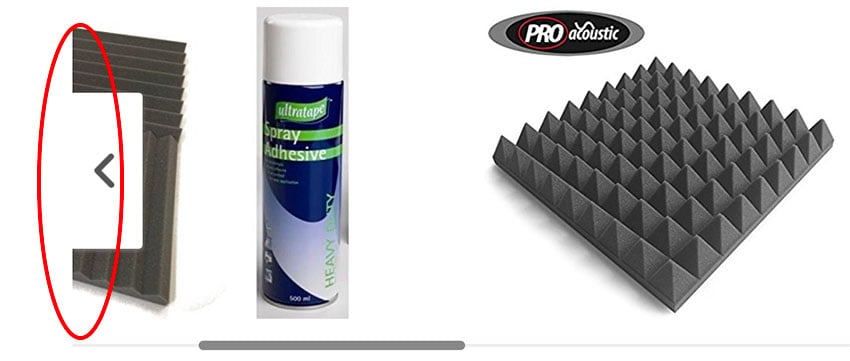
当检测到触摸设备时,轮播会使用浏览器的本机滚动。仅在“移动”模式下启用此功能的问题是使用水平滚轮的桌面用户会错过。这也意味着轮播之外的任何内容都必须在视觉上被切断:
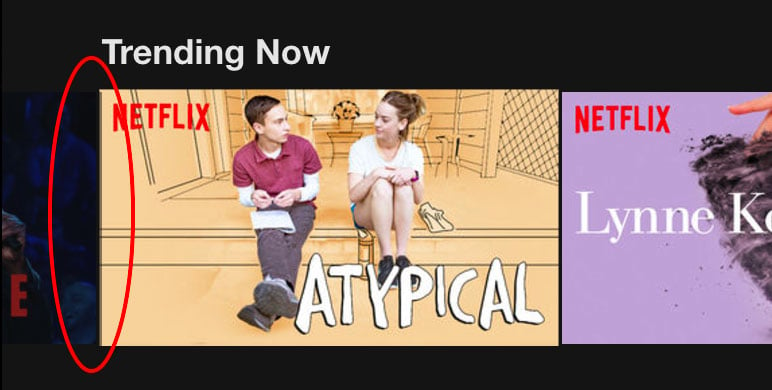
Netflix 正确动画轮播的 translateX 属性,并且在所有设备上均如此。这使他们能够拥有一种在轮播之外渗透的设计:
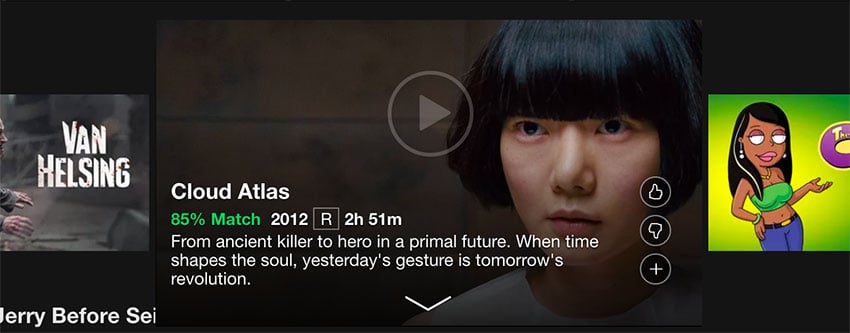
这反过来又允许他们做出奇特的设计,其中项目在轮播的 x 和 y 边缘之外放大,而周围的项目移开:
不幸的是,Netflix 对触摸设备滚动的重新实现并不令人满意:它使用基于手势的分页系统,感觉又慢又麻烦。也没有考虑水平滚轮。
我们可以做得更好。让我们编码吧!
像专业人士一样滚动
我们的第一步是获取 .slider 节点。当我们这样做时,让我们抓取它包含的项目,以便我们可以计算出滑块的尺寸。
function carousel(container) {
  const slider = container.querySelector('.slider');
  const items = slider.querySelectorAll('.item');
}
测量轮播
我们可以通过测量滑块的宽度来计算出滑块的可见区域:
const sliderVisibleWidth = slider.offsetWidth;
我们还需要其中包含的所有项目的总宽度。为了使我们的 carousel 函数保持相对干净,让我们将此计算放在文件顶部的单独函数中。
通过使用 getBoundingClientRect 测量第一项的 left 偏移量和最后一项的 right 偏移量,我们可以使用差异在它们之间找到所有项目的总宽度。
function getTotalItemsWidth(items) {
  const { left } = items[0].getBoundingClientRect();
  const { right } = items[items.length - 1].getBoundingClientRect();
  return right - left;
}
在我们的 sliderVisibleWidth 测量之后,写入:
const totalItemsWidth = getTotalItemsWidth(items);
我们现在可以算出我们的轮播应该允许滚动的最大距离。它是所有项目的总宽度,减去可见滑块的整个宽度。这提供了一个数字,允许最右边的项目与滑块的右侧对齐:
const maxXOffset = 0;
const minXOffset = - (totalItemsWidth - sliderVisibleWidth);
完成这些测量后,我们就可以开始滚动轮播了。
设置 translateX
Popmotion 附带 CSS 渲染器,用于简单且高效地设置 CSS 属性。它还带有一个值函数,可用于跟踪数字,更重要的是(我们很快就会看到),可用于查询其速度。
在 JavaScript 文件的顶部,像这样导入它们:
const { css, value } = window.popmotion;
然后,在设置 minXOffset 后,为滑块创建一个 CSS 渲染器:
const sliderRenderer = css(slider);
并创建一个 value 来跟踪滑块的 x 偏移量,并在滑块的 translateX 属性发生变化时更新它:
const sliderX = value(0, (x) => sliderRenderer.set('x', x));
现在,水平移动滑块就像编写一样简单:
sliderX.set(-100);
试试吧!
触摸滚动
我们希望轮播在用户 水平拖动滑块时开始滚动,并在用户停止触摸屏幕时停止滚动。我们的事件处理程序将如下所示:
let action;

function stopTouchScroll() {
  document.removeEventListener('touchend', stopTouchScroll);
}

function startTouchScroll(e) {
  document.addEventListener('touchend', stopTouchScroll);
}

slider.addEventListener('touchstart', startTouchScroll, { passive: false });
在我们的 startTouchScroll 函数中,我们想要:
- 停止任何其他为
sliderX提供动力的操作。 - 找到原点接触点。
- 监听下一个
touchmove事件,看看用户是垂直拖动还是水平拖动。
在document.addEventListener后添加:
if (action) action.stop();
这将阻止任何其他操作(例如我们将在 stopTouchScroll 中实现的物理动力动量滚动)移动滑块。如果滑块滚动经过他们想要单击的项目或标题,这将允许用户立即“捕获”滑块。
接下来,我们需要存储原点触摸点。这将使我们能够看到用户接下来将手指移动到哪里。如果是垂直移动,我们将允许页面像往常一样滚动。如果是水平移动,我们将滚动滑块。
我们希望在事件处理程序之间共享此 touchOrigin。所以在 let action; 之后添加:
let touchOrigin = {};
回到我们的 startTouchScroll 处理程序,添加:
const touch = e.touches[0];
touchOrigin = {
  x: touch.pageX,
  y: touch.pageY
};
我们现在可以向 document 添加一个 touchmove 事件监听器,以根据此 touchOrigin 确定拖动方向:
document.addEventListener('touchmove', determineDragDirection);
我们的 defineDragDirection 函数将测量下一个触摸位置,检查它是否实际移动,如果是,则测量角度以确定它是垂直还是水平:
function determineDragDirection(e) {
  const touch = e.changedTouches[0];
  const touchLocation = {
    x: touch.pageX,
    y: touch.pageY
  };
}
Popmotion 包含一些有用的计算器,用于测量两个 x/y 坐标之间的距离等内容。我们可以这样导入:
const { calc, css, value } = window.popmotion;
然后测量两点之间的距离是使用 distance 计算器:
const distance = calc.distance(touchOrigin, touchLocation);
现在,如果触摸已移动,我们可以取消设置此事件侦听器。
if (!distance) return;
document.removeEventListener('touchmove', determineDragDirection);
使用 angle 计算器测量两点之间的角度:
const angle = calc.angle(touchOrigin, touchLocation);
我们可以通过将其传递给以下函数来确定该角度是水平角度还是垂直角度。将此函数添加到我们文件的最顶部:
function angleIsVertical(angle) {
  const isUp = (
    angle <= -90 + 45 &&
    angle >= -90 - 45
  );
  const isDown = (
    angle <= 90 + 45 &&
    angle >= 90 - 45
  );

  return (isUp || isDown);
}
如果提供的角度在 -90 +/- 45 度(垂直向上)或 90 +/-45 度(垂直向下)范围内,此函数将返回 true。因此我们可以添加另一个 return 子句,如果此函数返回 true。
if (angleIsVertical(angle)) return;
指针跟踪
现在我们知道用户正在尝试滚动轮播,我们可以开始跟踪他们的手指。 Popmotion 提供了一个指针操作,可输出鼠标或触摸指针的 x/y 坐标。
首先导入指针:
const { calc, css, pointer, value } = window.popmotion;
要跟踪触摸输入,请将原始事件提供给 pointer:
action = pointer(e).start();
我们想要测量指针的初始 x 位置并将任何移动应用于滑块。为此,我们可以使用名为 applyOffset 的转换器。
转换器是纯函数,它接受一个值,并返回它——是的——转换后的值。例如:const double = (v) => v * 2。
const { calc, css, pointer, transform, value } = window.popmotion;
const { applyOffset } = transform;
applyOffset 是一个柯里化函数。这意味着当我们调用它时,它会创建一个新函数,然后可以向该函数传递一个值。我们首先使用要测量偏移量的数字(在本例中为 action.x 的当前值)以及要应用该偏移量的数字来调用它。在本例中,这就是我们的 sliderX。
因此我们的 applyOffset 函数将如下所示:
const applyPointerMovement = applyOffset(action.x.get(), sliderX.get());
我们现在可以在指针的 output 回调中使用此函数,将指针移动应用到滑块。
action.output(({ x }) => slider.set(applyPointerMovement(x)));
停下来,有风格
轮播现在可以通过触摸拖动!您可以使用 Chrome 开发者工具中的设备模拟来测试这一点。
感觉有点笨拙,对吧?您以前可能遇到过这样的滚动感觉:抬起手指,滚动就停止了。或者滚动停止,然后一个小动画接管以假装滚动继续。
我们不会那样做。我们可以使用 Popmotion 中的物理动作来获取 sliderX 的真实速度,并在一段时间内对其施加摩擦力。
首先,将其添加到我们不断增长的导入列表中:
const { calc, css, physics, pointer, value } = window.popmotion;
然后,在 stopTouchScroll 函数的末尾添加:
if (action) action.stop();

action = physics({
  from: sliderX.get(),
  velocity: sliderX.getVelocity(),
  friction: 0.2
})
  .output((v) => sliderX.set(v))
  .start();
这里,from 和 velocity 被设置为 sliderX 的当前值和速度。这确保了我们的物理模拟与用户的拖动运动具有相同的初始启动条件。
friction 被设置为 0.2。摩擦力设置为从 0 到 1 的值,其中 0 根本没有摩擦力,而 1 是绝对摩擦力摩擦。尝试使用此值来查看当用户停止拖动时它对轮播的“感觉”产生的变化。
数字越小,感觉越轻,数字越大,动作越重。对于滚动动作,我觉得 0.2 在不稳定和迟缓之间取得了很好的平衡。
边界
但是有一个问题!如果您一直在使用新的触摸旋转木马,那么这是显而易见的。我们没有限制移动,因此可以真正扔掉你的旋转木马!
还有另一个变压器可以完成这项工作,clamp。这也是一个柯里化函数,这意味着如果我们使用最小值和最大值调用它,例如 0 和 1,它将返回一个新函数。在此示例中,新函数将限制给定的任何数字在 0 和 1 之间:
clamp(0, 1)(5); // returns 1
首先导入clamp:
const { applyOffset, clamp } = transform;
我们希望在轮播中使用此夹紧功能,因此在定义 minXOffset 后添加此行:
const clampXOffset = clamp(minXOffset, maxXOffset);
我们将使用 pipe 转换器使用一些轻量函数组合来修改我们在操作上设置的两个 output。
管道
当我们调用函数时,我们这样写:
foo(0);
如果我们想将该函数的输出提供给另一个函数,我们可以这样写:
bar(foo(0));
这变得有点难以阅读,而且随着我们添加越来越多的功能,情况只会变得更糟。
使用 pipe,我们可以从 foo 和 bar 组成一个新函数,我们可以重用它:
const foobar = pipe(foo, bar);
foobar(0);
它也是按照自然的开始 -> 结束顺序编写的,这使得它更容易理解。我们可以使用它将 applyOffset 和 clamp 组合成一个函数。导入 pipe:
const { applyOffset, clamp, pipe } = transform;
将 output 回调替换为 pointer :
pipe(
  ({ x }) => x,
  applyOffset(action.x.get(), sliderX.get()),
  clampXOffset,
  (v) => sliderX.set(v)
)
并将 physicals 的 output 回调替换为:
pipe(clampXOffset, (v) => sliderX.set(v))
这种函数组合可以非常巧妙地从较小的、可重用的函数中创建描述性的、逐步的流程。
现在,当您拖动并抛出轮播时,它不会移动到其边界之外。
突然停止并不是很令人满意。但这是稍后部分的问题!
结论
这就是第 1 部分的全部内容。到目前为止,我们已经研究了现有的轮播,以了解不同滚动方法的优点和缺点。我们使用 Popmotion 的输入跟踪和物理原理,通过触摸滚动为轮播的 translateX 提供高性能动画。我们还了解了函数组合和柯里化函数。
您可以在此 CodePen 上获取“到目前为止的故事”的评论版本。
在接下来的几期中,我们将介绍:
- 用鼠标滚轮滚动
- 当窗口大小调整时重新测量轮播
- 分页,支持键盘和鼠标
- 借助弹簧物理原理实现令人愉悦的触感
期待在那里见到您!
The above is the detailed content of Making the ideal carousel, part 1. For more information, please follow other related articles on the PHP Chinese website!

Hot AI Tools

Undresser.AI Undress
AI-powered app for creating realistic nude photos

AI Clothes Remover
Online AI tool for removing clothes from photos.

Undress AI Tool
Undress images for free

Clothoff.io
AI clothes remover

AI Hentai Generator
Generate AI Hentai for free.

Hot Article
Hot Tools

Notepad++7.3.1
Easy-to-use and free code editor

SublimeText3 Chinese version
Chinese version, very easy to use

Zend Studio 13.0.1
Powerful PHP integrated development environment

Dreamweaver CS6
Visual web development tools

SublimeText3 Mac version
God-level code editing software (SublimeText3)
Hot Topics
 1378
1378
 52
52

 How do I create and publish my own JavaScript libraries?
Mar 18, 2025 pm 03:12 PM
How do I create and publish my own JavaScript libraries?
Mar 18, 2025 pm 03:12 PM
Article discusses creating, publishing, and maintaining JavaScript libraries, focusing on planning, development, testing, documentation, and promotion strategies.
 How do I optimize JavaScript code for performance in the browser?
Mar 18, 2025 pm 03:14 PM
How do I optimize JavaScript code for performance in the browser?
Mar 18, 2025 pm 03:14 PM
The article discusses strategies for optimizing JavaScript performance in browsers, focusing on reducing execution time and minimizing impact on page load speed.
 What should I do if I encounter garbled code printing for front-end thermal paper receipts?
Apr 04, 2025 pm 02:42 PM
What should I do if I encounter garbled code printing for front-end thermal paper receipts?
Apr 04, 2025 pm 02:42 PM
Frequently Asked Questions and Solutions for Front-end Thermal Paper Ticket Printing In Front-end Development, Ticket Printing is a common requirement. However, many developers are implementing...
 How do I debug JavaScript code effectively using browser developer tools?
Mar 18, 2025 pm 03:16 PM
How do I debug JavaScript code effectively using browser developer tools?
Mar 18, 2025 pm 03:16 PM
The article discusses effective JavaScript debugging using browser developer tools, focusing on setting breakpoints, using the console, and analyzing performance.
 Who gets paid more Python or JavaScript?
Apr 04, 2025 am 12:09 AM
Who gets paid more Python or JavaScript?
Apr 04, 2025 am 12:09 AM
There is no absolute salary for Python and JavaScript developers, depending on skills and industry needs. 1. Python may be paid more in data science and machine learning. 2. JavaScript has great demand in front-end and full-stack development, and its salary is also considerable. 3. Influencing factors include experience, geographical location, company size and specific skills.
 How do I use source maps to debug minified JavaScript code?
Mar 18, 2025 pm 03:17 PM
How do I use source maps to debug minified JavaScript code?
Mar 18, 2025 pm 03:17 PM
The article explains how to use source maps to debug minified JavaScript by mapping it back to the original code. It discusses enabling source maps, setting breakpoints, and using tools like Chrome DevTools and Webpack.
 The difference in console.log output result: Why are the two calls different?
Apr 04, 2025 pm 05:12 PM
The difference in console.log output result: Why are the two calls different?
Apr 04, 2025 pm 05:12 PM
In-depth discussion of the root causes of the difference in console.log output. This article will analyze the differences in the output results of console.log function in a piece of code and explain the reasons behind it. �...
 TypeScript for Beginners, Part 2: Basic Data Types
Mar 19, 2025 am 09:10 AM
TypeScript for Beginners, Part 2: Basic Data Types
Mar 19, 2025 am 09:10 AM
Once you have mastered the entry-level TypeScript tutorial, you should be able to write your own code in an IDE that supports TypeScript and compile it into JavaScript. This tutorial will dive into various data types in TypeScript. JavaScript has seven data types: Null, Undefined, Boolean, Number, String, Symbol (introduced by ES6) and Object. TypeScript defines more types on this basis, and this tutorial will cover all of them in detail. Null data type Like JavaScript, null in TypeScript
