

How to enable/disable Wake on LAN in Windows 11

Wake on LAN is a network feature on Windows 11 that allows you to remotely wake your computer from Hibernation or Sleep mode.
Although casual users don't use it often, this feature is very useful for network administrators and advanced users using wired networks, and today we will show you how to set it up.
How do I know if my computer supports Wake on LAN?
To use this feature, your computer will need the following:
- The PC needs to be connected to an ATX power supply so that you can remotely wake it from sleep mode.
- Access control lists need to be created and added to all routers in the network.
- The network card needs to support the wake-up LAN function.
- For this feature to work, both computers need to be on the same network.
While most Ethernet adapters support the Wake on LAN feature over an Ethernet cable, this feature typically does not work with wireless adapters. If you're using it with a Wi-Fi adapter, make sure it has Wake on Wireless LAN or Wake on Wi-Fi.
How do I enable Wake on LAN on my computer?
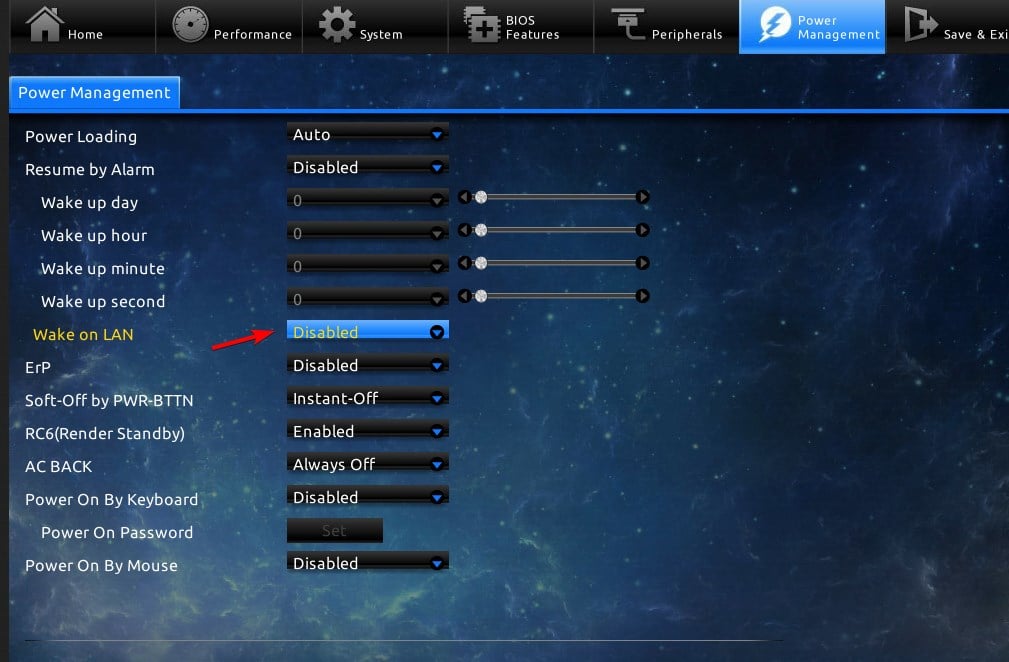
1. Configure BIOS
- Restart the computer.
- While restarting, press and hold or or the motherboard's dedicated BIOS key. F2Del
- Navigate to the Power Management section from the BIOS menu.
- Find Wake on LAN and set it to Enabled.

- Save changes and exit BIOS.
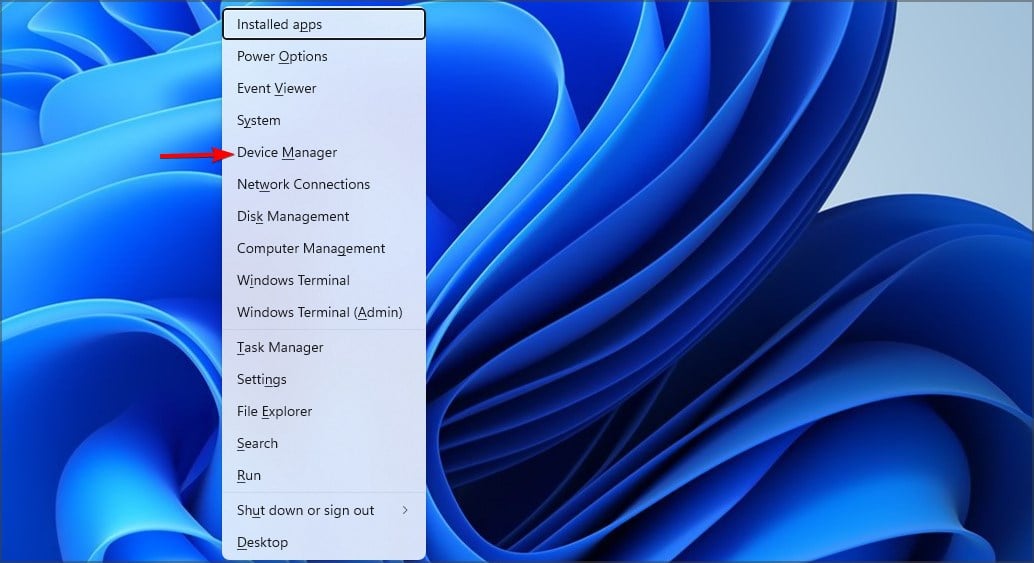
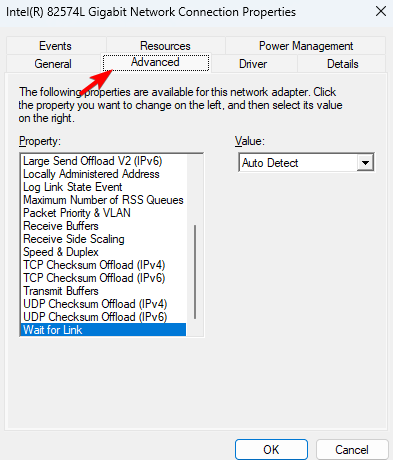
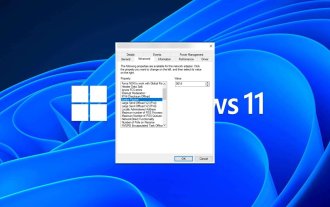
2. Change network adapter settings
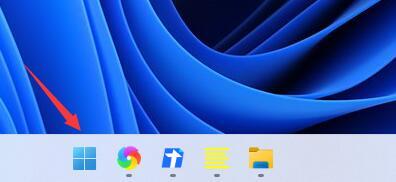
- button and select Device Manager. WindowsX
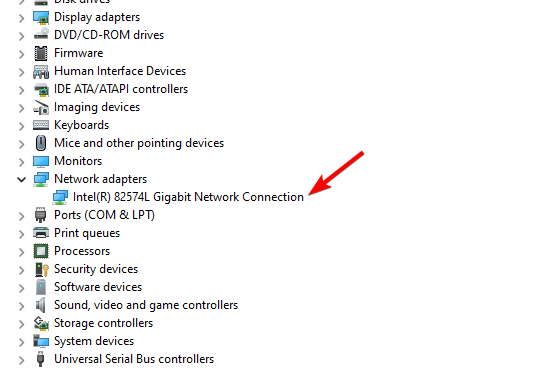
- Find your network adapter and double-click it.
- Navigate to the Advanced Options tab. After that, select MagicPackWake and set it to Enabled.
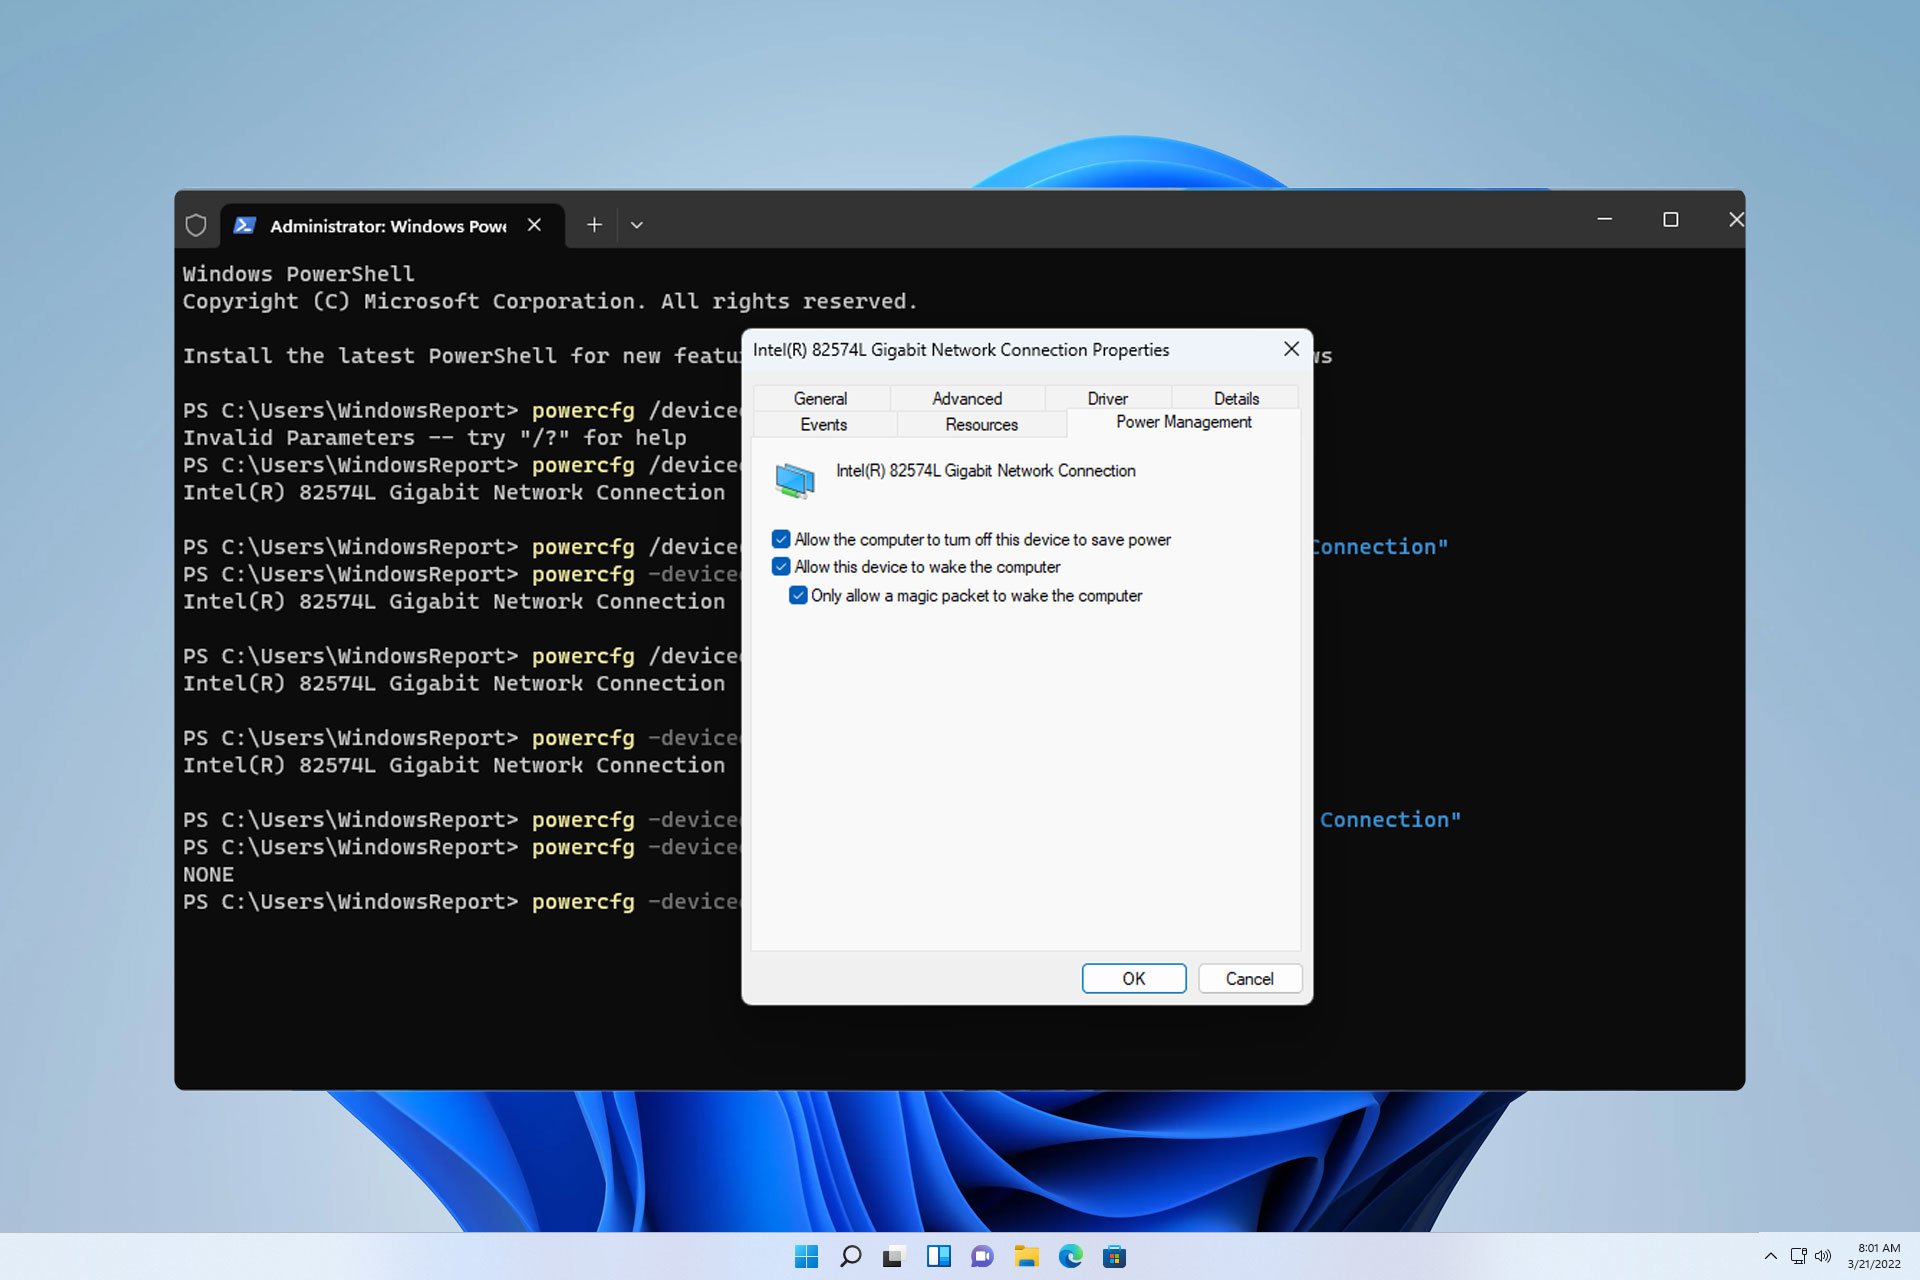
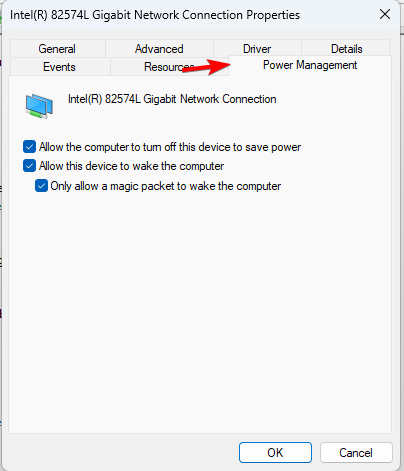
- Finally, go to the Power Management tab, and enable all options . Click OK to save the new power options.
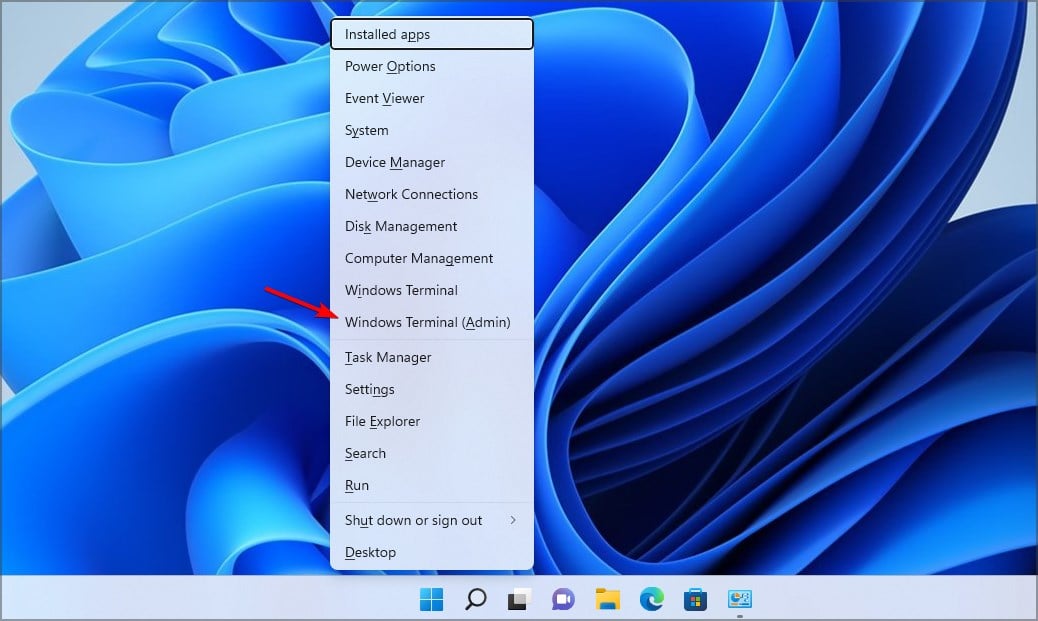
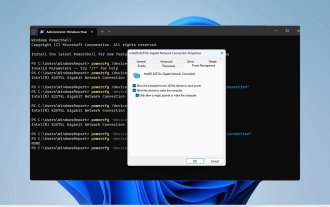
3. Use the command line
- keys and select Windows Terminal (Administrator). WindowsX
- Run the following command
<strong>powercfg /devicequery wake_programmable</strong> - Find your adapter from the list of network adapters.
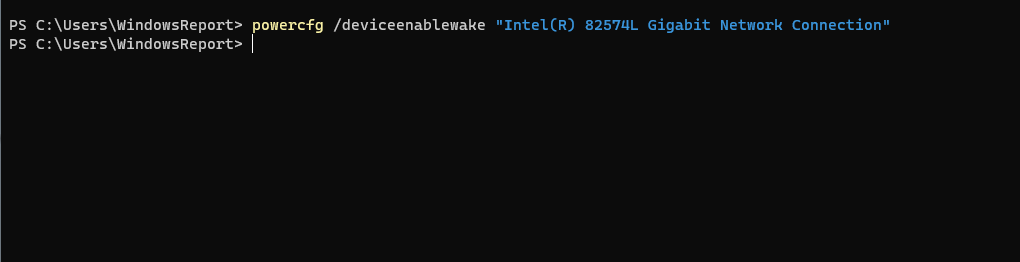
- Now run the following command:
<strong>powercfg /deviceenablewake "Adapter Name"</strong>
- After completing this, WoL functionality should be enabled.
How to turn off Wake on LAN on Windows 11?
To disable Wake on LAN on Windows 11, you just need to follow the same steps as above, but this time disable all settings that mention this feature.
You can also use the command line to quickly complete:
- Open Terminal as administrator.
- Run the following command:
<strong>powercfg -devicequery wake_armed</strong>
- Find your network adapter in the list.
- Now run the following command:
<strong>powercfg -devicedisablewake "Adapter Name"</strong>


Why does Wake on LAN work on Windows? Not working in 11?
- Your remote wake-up software configuration is incorrect.
- Wake on LAN is not configured correctly on the remote computer.
- The device that woke up the remote computer could not find the remote computer.
- If the MAC address of the ghost packet does not match the MAC address of the remote computer, Wake on LAN will not work.
Wake on LAN on Windows 11 is easy to set up and if you are a network administrator or a PC enthusiast you can use it, however, if you do not configure it correctly, you may end up with your laptop waking up on its own Or problems such as Wi-Fi disconnection after sleep mode.
The above is the detailed content of How to enable/disable Wake on LAN in Windows 11. For more information, please follow other related articles on the PHP Chinese website!

Hot AI Tools

Undresser.AI Undress
AI-powered app for creating realistic nude photos

AI Clothes Remover
Online AI tool for removing clothes from photos.

Undress AI Tool
Undress images for free

Clothoff.io
AI clothes remover

Video Face Swap
Swap faces in any video effortlessly with our completely free AI face swap tool!

Hot Article
Hot Tools

Notepad++7.3.1
Easy-to-use and free code editor

SublimeText3 Chinese version
Chinese version, very easy to use

Zend Studio 13.0.1
Powerful PHP integrated development environment

Dreamweaver CS6
Visual web development tools

SublimeText3 Mac version
God-level code editing software (SublimeText3)
Hot Topics
 1392
1392
 52
36
110
52
36
110

 How to adjust MTU size on Windows 11
Aug 25, 2023 am 11:21 AM
How to adjust MTU size on Windows 11
Aug 25, 2023 am 11:21 AM
If you're suddenly experiencing a slow internet connection on Windows 11 and you've tried every trick in the book, it might have nothing to do with your network and everything to do with your maximum transmission unit (MTU). Problems may occur if your system sends or receives data with the wrong MTU size. In this post, we will learn how to change MTU size on Windows 11 for smooth and uninterrupted internet connection. What is the default MTU size in Windows 11? The default MTU size in Windows 11 is 1500, which is the maximum allowed. MTU stands for maximum transmission unit. This is the maximum packet size that can be sent or received on the network. every support network
![WLAN expansion module has stopped [fix]](https://img.php.cn/upload/article/000/465/014/170832352052603.gif?x-oss-process=image/resize,m_fill,h_207,w_330) WLAN expansion module has stopped [fix]
Feb 19, 2024 pm 02:18 PM
WLAN expansion module has stopped [fix]
Feb 19, 2024 pm 02:18 PM
If there is a problem with the WLAN expansion module on your Windows computer, it may cause you to be disconnected from the Internet. This situation is often frustrating, but fortunately, this article provides some simple suggestions that can help you solve this problem and get your wireless connection working properly again. Fix WLAN Extensibility Module Has Stopped If the WLAN Extensibility Module has stopped working on your Windows computer, follow these suggestions to fix it: Run the Network and Internet Troubleshooter to disable and re-enable wireless network connections Restart the WLAN Autoconfiguration Service Modify Power Options Modify Advanced Power Settings Reinstall Network Adapter Driver Run Some Network Commands Now, let’s look at it in detail
 How to solve win11 DNS server error
Jan 10, 2024 pm 09:02 PM
How to solve win11 DNS server error
Jan 10, 2024 pm 09:02 PM
We need to use the correct DNS when connecting to the Internet to access the Internet. In the same way, if we use the wrong dns settings, it will prompt a dns server error. At this time, we can try to solve the problem by selecting to automatically obtain dns in the network settings. Let’s take a look at the specific solutions. How to solve win11 network dns server error. Method 1: Reset DNS 1. First, click Start in the taskbar to enter, find and click the "Settings" icon button. 2. Then click the "Network & Internet" option command in the left column. 3. Then find the "Ethernet" option on the right and click to enter. 4. After that, click "Edit" in the DNS server assignment, and finally set DNS to "Automatic (D
 Fix 'Failed Network Error' downloads on Chrome, Google Drive and Photos!
Oct 27, 2023 pm 11:13 PM
Fix 'Failed Network Error' downloads on Chrome, Google Drive and Photos!
Oct 27, 2023 pm 11:13 PM
What is the "Network error download failed" issue? Before we delve into the solutions, let’s first understand what the “Network Error Download Failed” issue means. This error usually occurs when the network connection is interrupted during downloading. It can happen due to various reasons such as weak internet connection, network congestion or server issues. When this error occurs, the download will stop and an error message will be displayed. How to fix failed download with network error? Facing “Network Error Download Failed” can become a hindrance while accessing or downloading necessary files. Whether you are using browsers like Chrome or platforms like Google Drive and Google Photos, this error will pop up causing inconvenience. Below are points to help you navigate and resolve this issue
 Fix: WD My Cloud doesn't show up on the network in Windows 11
Oct 02, 2023 pm 11:21 PM
Fix: WD My Cloud doesn't show up on the network in Windows 11
Oct 02, 2023 pm 11:21 PM
If WDMyCloud is not showing up on the network in Windows 11, this can be a big problem, especially if you store backups or other important files in it. This can be a big problem for users who frequently need to access network storage, so in today's guide, we'll show you how to fix this problem permanently. Why doesn't WDMyCloud show up on Windows 11 network? Your MyCloud device, network adapter, or internet connection is not configured correctly. The SMB function is not installed on the computer. A temporary glitch in Winsock can sometimes cause this problem. What should I do if my cloud doesn't show up on the network? Before we start fixing the problem, you can perform some preliminary checks:
 What should I do if the earth is displayed in the lower right corner of Windows 10 when I cannot access the Internet? Various solutions to the problem that the Earth cannot access the Internet in Win10
Feb 29, 2024 am 09:52 AM
What should I do if the earth is displayed in the lower right corner of Windows 10 when I cannot access the Internet? Various solutions to the problem that the Earth cannot access the Internet in Win10
Feb 29, 2024 am 09:52 AM
This article will introduce the solution to the problem that the globe symbol is displayed on the Win10 system network but cannot access the Internet. The article will provide detailed steps to help readers solve the problem of Win10 network showing that the earth cannot access the Internet. Method 1: Restart directly. First check whether the network cable is not plugged in properly and whether the broadband is in arrears. The router or optical modem may be stuck. In this case, you need to restart the router or optical modem. If there are no important things being done on the computer, you can restart the computer directly. Most minor problems can be quickly solved by restarting the computer. If it is determined that the broadband is not in arrears and the network is normal, that is another matter. Method 2: 1. Press the [Win] key, or click [Start Menu] in the lower left corner. In the menu item that opens, click the gear icon above the power button. This is [Settings].
 How to enable/disable Wake on LAN in Windows 11
Sep 06, 2023 pm 02:49 PM
How to enable/disable Wake on LAN in Windows 11
Sep 06, 2023 pm 02:49 PM
Wake on LAN is a network feature on Windows 11 that allows you to remotely wake your computer from hibernation or sleep mode. While casual users don't use it often, this feature is useful for network administrators and power users using wired networks, and today we'll show you how to set it up. How do I know if my computer supports Wake on LAN? To use this feature, your computer needs the following: The PC needs to be connected to an ATX power supply so that you can wake it from sleep mode remotely. Access control lists need to be created and added to all routers in the network. The network card needs to support the wake-up-on-LAN function. For this feature to work, both computers need to be on the same network. Although most Ethernet adapters use
 USB to HDMI adapter not working properly on Windows 11/10
Feb 19, 2024 pm 12:00 PM
USB to HDMI adapter not working properly on Windows 11/10
Feb 19, 2024 pm 12:00 PM
If you're having issues with your USB to HDMI adapter not working properly on Windows, it could be because of an outdated graphics card driver or a problem with the adapter itself. The following content will help you resolve this dilemma. Fix USB to HDMI adapter not working on Windows 11/10 Use the following solutions to fix USB to HDMI adapter not working on Windows 10/11: Update Display Adapter Driver Rollback Graphics Driver Unplug and Plug USB to HDMI Adapter Updated BIOS Let's get started. 1] Update Display Adapter Driver Issues may be caused by outdated or corrupted display adapter drivers. You can try downloading from the official website of the manufacturer