How to install Angular on Windows 11 or 10 using Command Prompt
But why use Angular?
Before we delve into the installation process, let’s quickly take a look at some of the benefits of using Angular that make it worth considering for web development. Angular provides a powerful structured framework for building modern web applications. It is known for:
- Its component-based architecture allows you to build and maintain complex applications with ease.
- Web applications created with Angular run seamlessly on a variety of platforms and devices.
- Angular optimizes your application for better performance, making it load quickly and run smoothly.
- Active community, ample resources, tutorials and support for Angular development.
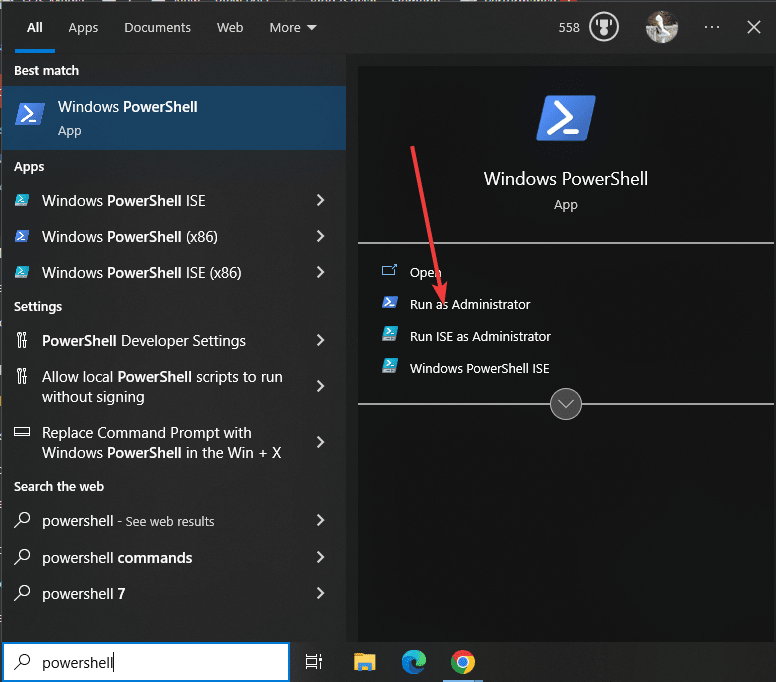
step 1. Open PowerShell or CMD as Administrator
Here, we are using PowerShell, but you can also use Command Prompt as the steps are the same for both. However, make sure you access them as an administrator as we need superuser privileges to install the application using the command line.
To give an idea – just click on the WindowsStart button and search for PowerShell or CMD and click on the option – “Run as administrator”
Step 2. Check that Winget is available
On all Windows 11, including the latest version Windows 10 users will have Microsoft's package manager Winget. However, to confirm its presence on your system, type the given command after opening Powershell or CMD.
winget -v
You will see the current version of the package manager in the output, confirming that it is available for use.
Step 3. Install Node.js & NPM
First of all, we need to install Node.js and its package manager NPM (Node Package Manager) on our Windows 10 or 11 system. Not only do we need NPM to install Angular, we also need to get the tools we need to build web applications.
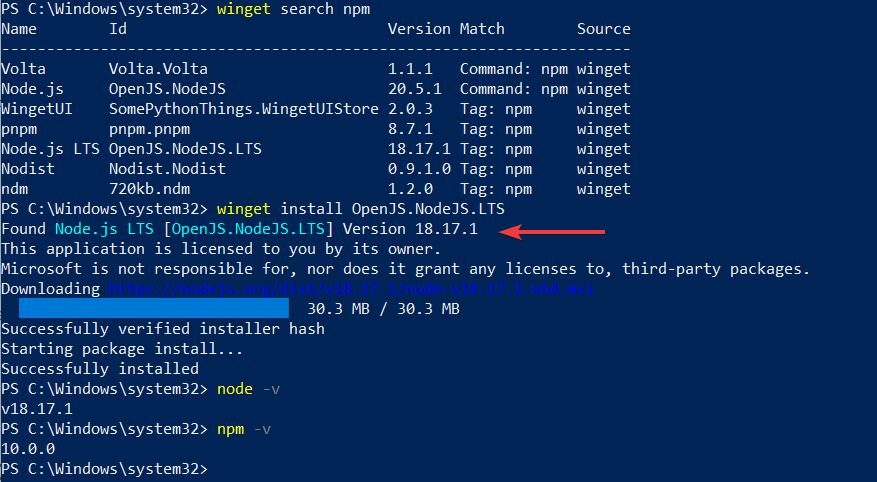
Installing Nodejs with this NPM using Winget will automatically appear on your system. At the time of writing this article, the latest version of Node is 20, but Angular only supports LTS versions, so we will choose the 18.x version of Node.js.
winget install OpenJS.NodeJS.LTS
Wait a few seconds and the system will set up this JavaScript runtime environment for you.
Now, close the command terminal or PowerShell and open it again so that the system can recognize the Node and NPM command tools . To check the version of installed node and NPM you can use:
node -v
npm -v
Also, it is crucial to stay up to date. You can update npm by running the following command in the terminal:
npm install -g npm@latest
Step 4. Install Angular CLI on Windows 10 or 11
The Angular CLI (command line interface) on Windows simplifies the process of creating, building, and deploying Angular applications. To install it, follow these steps:
You already have a Windows Command Prompt or PowerShell with administrator rights. So, just run the following command to install Angular CLI globally:
npm install -g @angular/cli
Once the installation is complete, you can verify the installation by checking the Angular CLI version:
However, before checking the version of Angular , enable execution of PowerShell scripts that are disabled by default. No, you will be able to run ng tools commands. So, run:
Set-ExecutionPolicy -Scope CurrentUser -ExecutionPolicy RemoteSigned
Press Y and press the Enter key.
After running:
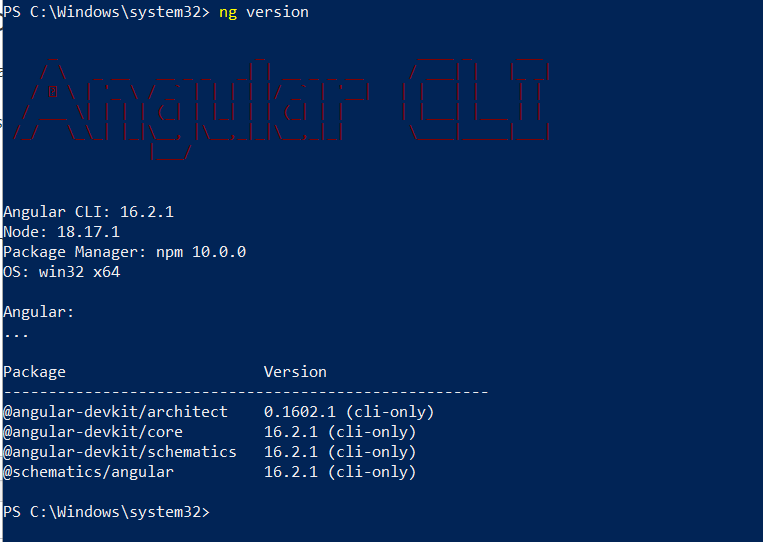
ng version
You should see the installed Angular CLI version.
Note: If the command is not found, close and open PowerShell or CMD again.
Step 5. Create your first Angular project
Now that we have installed Angular CLI on Windows 11 or 10 system, it’s time to start from the first step, let’s create a simple Angular project to understand it How it works.
Create a directory where you want to save the Angular project files, say – MyApp
mkdir myapp
Now use the cd command in the terminal to switch to this directory .
cd myapp
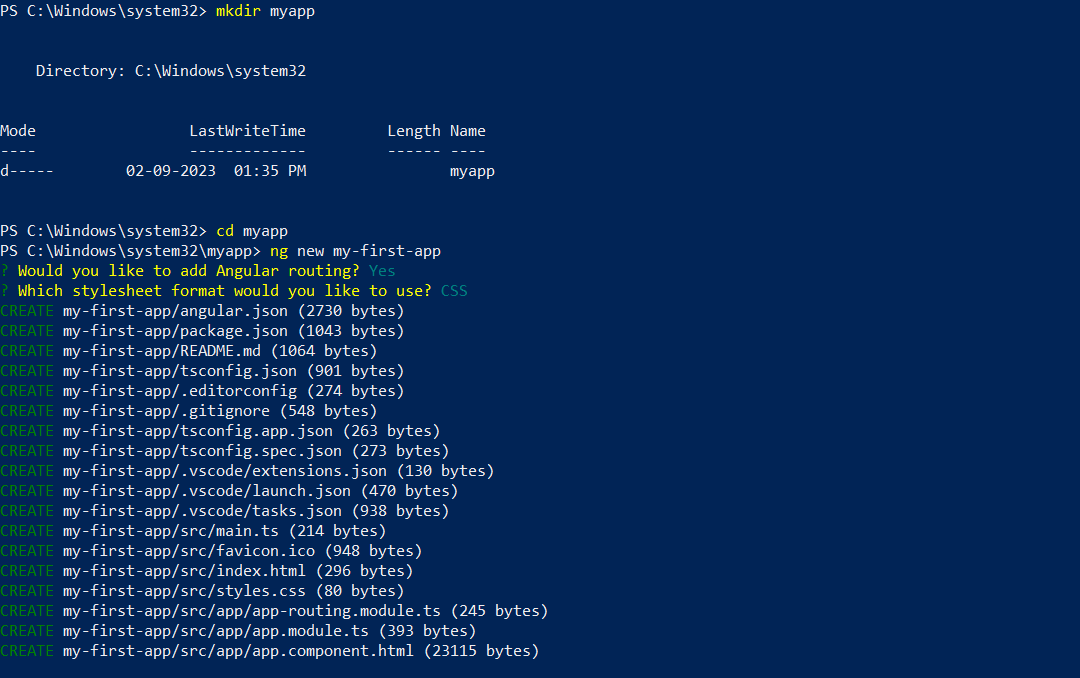
Run the following command to generate a new Angular project:
ng new my-first-app
Replace "My First Application" with your desired project name.
Angular CLI 将提示您为项目选择一些配置选项。您现在可以通过按 Enter 键选择默认选项。
生成项目后,导航到项目文件夹:
cd my-first-app
最后,通过运行以下命令启动 Angular 开发服务器:
ng serve
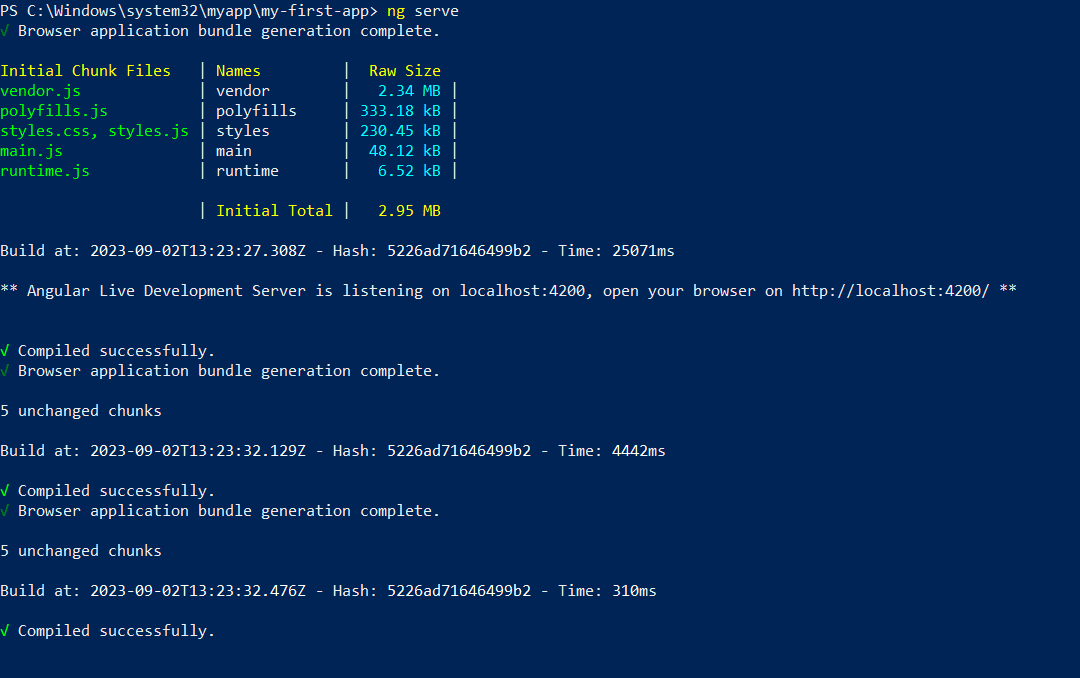
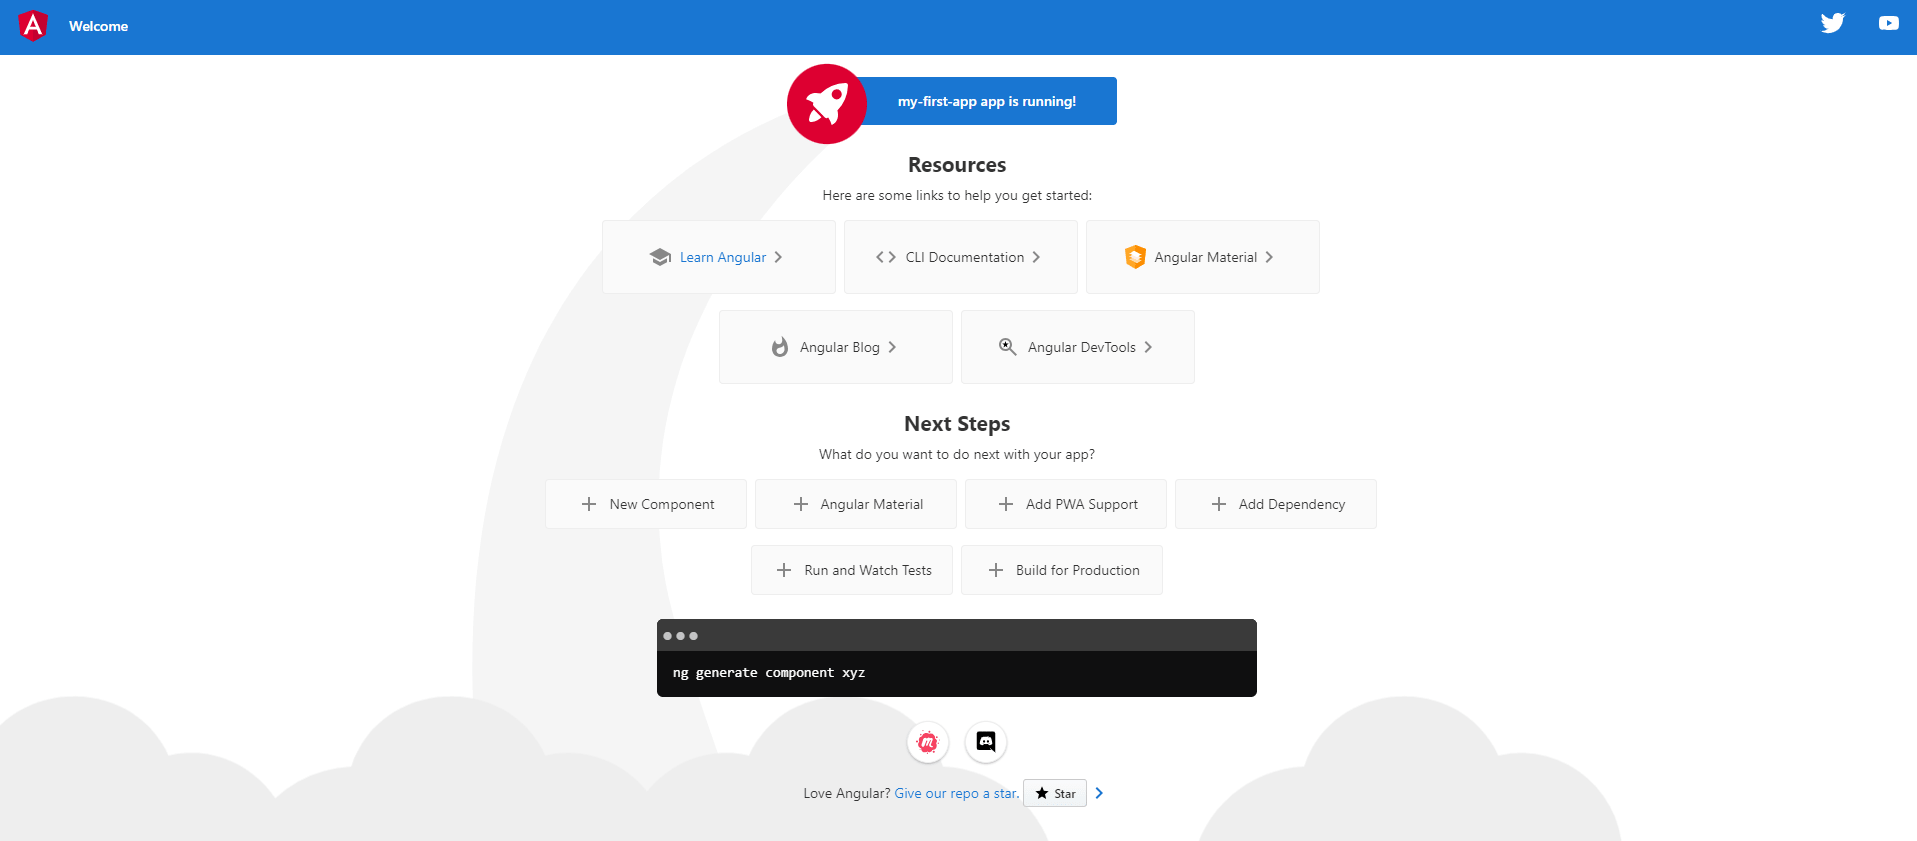
这将编译您的 Angular 应用程序,并使其可用于 http://localhost:4200/ 预览。打开浏览器并指向它。
6. 卸载(可选)
如果一段时间后您想使用Powershell或CMD终端从Windows中删除Angular,那么以下是要遵循的命令:
要仅删除角度:
npm remove -g @angular/cli
要删除 Nodejs 和 NPM,请执行以下操作:
winget uninstall OpenJS.NodeJS.LTS
The above is the detailed content of How to install Angular on Windows 11 or 10 using Command Prompt. For more information, please follow other related articles on the PHP Chinese website!

Hot AI Tools

Undresser.AI Undress
AI-powered app for creating realistic nude photos

AI Clothes Remover
Online AI tool for removing clothes from photos.

Undress AI Tool
Undress images for free

Clothoff.io
AI clothes remover

Video Face Swap
Swap faces in any video effortlessly with our completely free AI face swap tool!

Hot Article

Hot Tools

Notepad++7.3.1
Easy-to-use and free code editor

SublimeText3 Chinese version
Chinese version, very easy to use

Zend Studio 13.0.1
Powerful PHP integrated development environment

Dreamweaver CS6
Visual web development tools

SublimeText3 Mac version
God-level code editing software (SublimeText3)

Hot Topics
 1386
1386
 52
52
 Unable to save changes to Photos app error in Windows 11
Mar 04, 2024 am 09:34 AM
If you encounter the Unable to save changes error while using the Photos app for image editing in Windows 11, this article will provide you with solutions. Unable to save changes. An error occurred while saving. Please try again later. This problem usually occurs due to incorrect permission settings, file corruption, or system failure. So, we’ve done some deep research and compiled some of the most effective troubleshooting steps to help you resolve this issue and ensure you can continue to use the Microsoft Photos app seamlessly on your Windows 11 device. Fix Unable to Save Changes to Photos App Error in Windows 11 Many users have been talking about Microsoft Photos app error on different forums
 Learn how to use the Boundless Notes app on iPhone and iPad
Nov 18, 2023 pm 01:45 PM
What is Boundless Notes on iPhone? Like the iOS17 Diary app, Boundless Notes is a productivity app with tons of creative potential. It’s a great place to turn ideas into reality. You can schedule projects, brainstorm ideas, or create mood boards so you never run out of space to express your ideas. The app allows you to add photos, videos, audios, documents, PDFs, web links, stickers, and more anywhere on an unlimited canvas. Many of the tools in Boundless Notes (like brushes, shapes, and more) will be familiar to anyone who uses iWork apps like Keynote or Notes. Real-time collaboration with colleagues, teammates, and group project members is also easy because Freeform allows
 Photos cannot open this file because the format is not supported or the file is corrupted
Feb 22, 2024 am 09:49 AM
In Windows, the Photos app is a convenient way to view and manage photos and videos. Through this application, users can easily access their multimedia files without installing additional software. However, sometimes users may encounter some problems, such as encountering a "This file cannot be opened because the format is not supported" error message when using the Photos app, or file corruption when trying to open photos or videos. This situation can be confusing and inconvenient for users, requiring some investigation and fixes to resolve the issues. Users see the following error when they try to open photos or videos on the Photos app. Sorry, Photos cannot open this file because the format is not currently supported, or the file
 How to connect Apple Vision Pro to PC
Apr 08, 2024 pm 09:01 PM
The Apple Vision Pro headset is not natively compatible with computers, so you must configure it to connect to a Windows computer. Since its launch, Apple Vision Pro has been a hit, and with its cutting-edge features and extensive operability, it's easy to see why. Although you can make some adjustments to it to suit your PC, and its functionality depends heavily on AppleOS, so its functionality will be limited. How do I connect AppleVisionPro to my computer? 1. Verify system requirements You need the latest version of Windows 11 (Custom PCs and Surface devices are not supported) Support 64-bit 2GHZ or faster fast processor High-performance GPU, most
 How to solve application startup error 0xc000012d problem
Jan 02, 2024 pm 12:53 PM
When a friend's computer is missing certain files, the application cannot start normally with error code 0xc000012d. In fact, it can be solved by re-downloading the files and installing them. The application cannot start normally 0xc000012d: 1. First, the user needs to download ".netframework". 2. Then find the download address and download it to your computer. 3. Then double-click on the desktop to start running. 4. After the installation is completed, return to the wrong program location and open the program again.
 MS Paint not working properly in Windows 11
Mar 09, 2024 am 09:52 AM
Microsoft Paint not working in Windows 11/10? Well, this seems to be a common problem and we have some great solutions to fix it. Users have been complaining that when trying to use MSPaint, it doesn't work or open. Scrollbars in the app don't work, paste icons don't show up, crashes, etc. Luckily, we've collected some of the most effective troubleshooting methods to help you resolve issues with Microsoft Paint app. Why doesn't Microsoft Paint work? Some possible reasons why MSPaint is not working on Windows 11/10 PC are as follows: The security identifier is corrupted. hung system
 Fix caa90019 Microsoft Teams error
Feb 19, 2024 pm 02:30 PM
Many users have been complaining about encountering error code caa90019 every time they try to log in using Microsoft Teams. Even though this is a convenient communication app, this mistake is very common. Fix Microsoft Teams Error: caa90019 In this case, the error message displayed by the system is: "Sorry, we are currently experiencing a problem." We have prepared a list of ultimate solutions that will help you resolve Microsoft Teams error caa90019. Preliminary steps Run as administrator Clear Microsoft Teams application cache Delete settings.json file Clear Microsoft from Credential Manager
 Shazam app not working in iPhone: Fix
Jun 08, 2024 pm 12:36 PM
Having issues with the Shazam app on iPhone? Shazam helps you find songs by listening to them. However, if Shazam isn't working properly or doesn't recognize the song, you'll have to troubleshoot it manually. Repairing the Shazam app won't take long. So, without wasting any more time, follow the steps below to resolve issues with Shazam app. Fix 1 – Disable Bold Text Feature Bold text on iPhone may be the reason why Shazam is not working properly. Step 1 – You can only do this from your iPhone settings. So, open it. Step 2 – Next, open the “Display & Brightness” settings there. Step 3 – If you find that “Bold Text” is enabled


