

How to use Vue to implement calendar selection effects


How to use Vue to implement calendar selection effects
In modern web application development, calendar selection is a common functional requirement. Through calendar selection, users can easily select dates to query events or make appointments. In this article, we will introduce how to use the Vue framework to implement a simple and practical calendar selection effect to meet the needs of daily development.
- Build a Vue project
First, we need to build a project based on the Vue framework. You can use Vue CLI to quickly build a project skeleton, or manually build a simple project structure. - Installing dependencies
In the root directory of the project, open the terminal and execute the following command to install the necessary dependencies:
npm install vue vue-router vuex
- Create the calendar component
In In the Vue project, we need to create a calendar component to display the calendar interface. Create a Calendar.vue file in the src directory and add the following code:
<template>
  <div class="calendar">
    <h2 id="year-年-month-月">{{ year }}年{{ month }}月</h2>
    <table>
      <thead>
        <tr>
          <th v-for="week in weeks" :key="week">{{ week }}</th>
        </tr>
      </thead>
      <tbody>
        <tr v-for="week in calendar" :key="week">
          <td v-for="day in week" :key="day" @click="selectDate(day)">{{ day }}</td>
        </tr>
      </tbody>
    </table>
  </div>
</template>

<script>
export default {
  data() {
    return {
      now: new Date(),
      year: 0,
      month: 0,
      weeks: ['日', '一', '二', '三', '四', '五', '六'],
      calendar: []
    };
  },
  mounted() {
    this.updateCalendar();
  },
  methods: {
    updateCalendar() {
      const firstDay = new Date(this.now.getFullYear(), this.now.getMonth(), 1);
      const lastDay = new Date(this.now.getFullYear(), this.now.getMonth() + 1, 0);
      this.year = this.now.getFullYear();
      this.month = this.now.getMonth() + 1;

      const gap = firstDay.getDay();
      const days = lastDay.getDate();
      let calendar = [];
      let week = [];

      for (let i = 0; i < gap; i++) {
        week.push('');
      }
      for (let i = 1; i <= days; i++) {
        week.push(i);
        if ((gap + i) % 7 === 0) {
          calendar.push(week);
          week = [];
        }
      }
      if (week.length) {
        calendar.push(week);
      }

      this.calendar = calendar;
    },
    selectDate(day) {
      // 处理日期选择逻辑
    }
  }
};
</script>

<style scoped>
.calendar {
  display: inline-block;
  padding: 10px;
  border: 1px solid #ccc;
}

.calendar h2 {
  margin: 0 0 10px;
  text-align: center;
}

.calendar table {
  width: 100%;
  table-layout: fixed;
}

.calendar th,
.calendar td {
  padding: 5px;
  text-align: center;
}

.calendar td {
  cursor: pointer;
}

.calendar .selected {
  background-color: #ccc;
}
</style>- Using the calendar component in the project
Introduce the Calendar component where calendar selection effects are needed. , and use it:
<template>
  <div>
    <Calendar></Calendar>
  </div>
</template>

<script>
import Calendar from '@/components/Calendar';

export default {
  components: {
    Calendar
  }
};
</script>Through the above steps, we have implemented a basic calendar selection component. Users can click on a date to select a date, and the selected date will have a special style.
You can add more functions to the calendar component according to actual needs, such as limiting the optional date range, adding event markers, etc. Through the powerful features and component-based development of the Vue framework, we can efficiently implement calendar selection effects and improve user experience.
The above is the detailed content of How to use Vue to implement calendar selection effects. For more information, please follow other related articles on the PHP Chinese website!

Hot AI Tools

Undresser.AI Undress
AI-powered app for creating realistic nude photos

AI Clothes Remover
Online AI tool for removing clothes from photos.

Undress AI Tool
Undress images for free

Clothoff.io
AI clothes remover

AI Hentai Generator
Generate AI Hentai for free.

Hot Article
Hot Tools

Notepad++7.3.1
Easy-to-use and free code editor

SublimeText3 Chinese version
Chinese version, very easy to use

Zend Studio 13.0.1
Powerful PHP integrated development environment

Dreamweaver CS6
Visual web development tools

SublimeText3 Mac version
God-level code editing software (SublimeText3)
Hot Topics
 1385
1385
 52
52

 What should I do if the win11 dual-screen calendar does not exist on the second monitor?
Jun 12, 2024 pm 05:47 PM
What should I do if the win11 dual-screen calendar does not exist on the second monitor?
Jun 12, 2024 pm 05:47 PM
An important tool for organizing your daily work and routine in Windows 11 is the display of time and date in the taskbar. This feature is usually located in the lower right corner of the screen and gives you instant access to the time and date. By clicking this area, you can bring up your calendar, making it easier to check upcoming appointments and dates without having to open a separate app. However, if you use multiple monitors, you may run into issues with this feature. Specifically, while the clock and date appear on the taskbar on all connected monitors, the ability to click the date and time on a second monitor to display the calendar is unavailable. As of now, this feature only works on the main display - it's unlike Windows 10, where clicking on any
 Win10 calendar displays week numbers
Jan 04, 2024 am 08:41 AM
Win10 calendar displays week numbers
Jan 04, 2024 am 08:41 AM
Many users want to use the win10 calendar tool to check the current number of days, but the calendar does not automatically display this function. In fact, we only need to make simple settings to see the cumulative number of weeks this year ~ win10 calendar displays weeks Digital setting tutorial: 1. Enter calendar in the search in the lower left corner of the desktop and open the application. 2. In the open calendar application, click the "gear" icon in the lower left corner, and the settings will pop up on the right. We click "Calendar Settings" 3. Continue in the open calendar settings, find "Week Number" and then change the week Just adjust the number option to "the first day of the year". 4. After completing the above settings, click "Week" to see this year's week number statistics.
 Outlook calendar not syncing;
Mar 26, 2024 am 09:36 AM
Outlook calendar not syncing;
Mar 26, 2024 am 09:36 AM
If your Outlook calendar cannot sync with Google Calendar, Teams, iPhone, Android, Zoom, Office account, etc., please follow the steps below to resolve the issue. The calendar app can be connected to other calendar services such as Google Calendar, iPhone, Android, Microsoft Office 365, etc. This is very useful because it can sync automatically. But what if OutlookCalendar fails to sync with third-party calendars? Possible reasons could be selecting the wrong calendar for synchronization, calendar not visible, background application interference, outdated Outlook application or calendar application, etc. Preliminary fix for Outlook calendar not syncing
 Can't open the calendar in the lower right corner of win10
Dec 26, 2023 pm 05:07 PM
Can't open the calendar in the lower right corner of win10
Dec 26, 2023 pm 05:07 PM
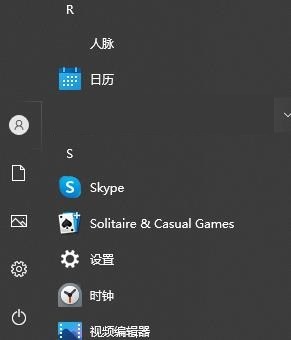
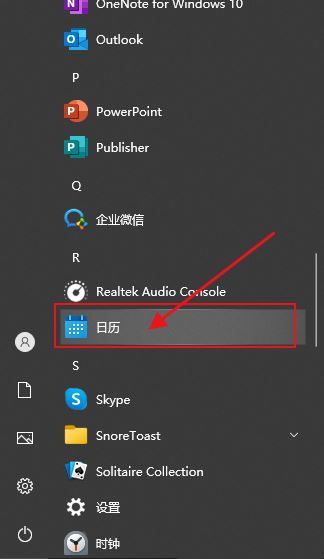
Some friends who use the win0 system have encountered the situation where the win10 calendar cannot be opened. This is just a normal computer glitch. It can be solved in the privacy settings of the win10 system. Today, the editor has brought a detailed solution. Below Let’s take a look. Solution to the problem that the calendar cannot be opened in the lower right corner of win10 1. Click Start in the win10 system → click the program list button above → find Pinyin (Chinese) R → Calendar 2. When using it for the first time, new events may not be opened (mouse If you lean up, there will be no dark blue selected), you can set it in privacy. Click the three-bar icon in the upper left corner of the desktop → there will be a settings menu at the bottom; 3. Click Privacy in the pop-up interface; 4. If you have used settings before, you can click on the left
 What should I do if there are no pop-up reminders for calendar events in Win10? How to recover if calendar event reminders are gone in Win10
Jun 09, 2024 pm 02:52 PM
What should I do if there are no pop-up reminders for calendar events in Win10? How to recover if calendar event reminders are gone in Win10
Jun 09, 2024 pm 02:52 PM
The calendar can help users record your schedule and even set reminders. However, many users are asking what to do if calendar event reminders do not pop up in Windows 10? Users can first check the Windows update status or clear the Windows App Store cache to perform the operation. Let this site carefully introduce to users the analysis of the problem of Win10 calendar event reminder not popping up. To add calendar events, click the "Calendar" program in the system menu. Click the left mouse button on a date in the calendar. Enter the event name and reminder time in the editing window, and click the "Save" button to add the event. Solving the problem of win10 calendar event reminder not popping up
 No Period Lost Purchasing Office: New calendar and birthday series peripherals!
Feb 29, 2024 pm 12:00 PM
No Period Lost Purchasing Office: New calendar and birthday series peripherals!
Feb 29, 2024 pm 12:00 PM
The Lost Purchasing Office is confirmed to be updated at 11 am on February 28th. Players can go to Taobao to search the Purchasing Office and select the store category to purchase. This time we bring you the MBCC birthday party series and 2024 Desk Calendar peripherals. Come together. Take a look at the product details this time. No Period Lost Purchasing Office: New calendar and birthday series peripherals! There is something new in the Lost Procurement Office! - Pre-sale time: February 28, 2024 11:00 - March 13, 2024 23:59 Purchase address: Taobao search [Unexpected Lost Purchasing Office] Select [Store] category to enter the store for purchase; peripheral introduction: The new peripherals released this time are MBCC birthday party series and 2024 desk calendar peripherals. Please click on the long image for details. The Purchasing Office introduces new peripherals—MBCC students
 How to solve the problem that the time in win11 is always inaccurate? Win11 time adjustment tutorial quickly solves the problem of inaccurate time
Apr 19, 2024 am 09:31 AM
How to solve the problem that the time in win11 is always inaccurate? Win11 time adjustment tutorial quickly solves the problem of inaccurate time
Apr 19, 2024 am 09:31 AM
If your Windows 11 computer displays the wrong time, it can cause a lot of problems and even prevent you from connecting to the internet. In fact, some applications refuse to open or run when the system displays an incorrect date and time. So how should this problem be solved? Let’s take a look below! Method 1: 1. We first right-click on the blank space of the taskbar below and select Taskbar Settings 2. Find taskbarcorneroverflow3 on the right in the taskbar settings, then find clock or clock above it and select to turn it on. Method 2: 1. Press the keyboard shortcut win+r to call up run, enter regedit and press Enter to confirm. 2. Open the Registry Editor and find HKEY in it
 How to implement calendar component using Vue?
Jun 25, 2023 pm 01:28 PM
How to implement calendar component using Vue?
Jun 25, 2023 pm 01:28 PM
Vue is a very popular front-end framework. It provides many tools and functions, such as componentization, data binding, event handling, etc., which can help developers build efficient, flexible and easy-to-maintain Web applications. In this article, I will introduce how to implement a calendar component using Vue. 1. Requirements analysis First, we need to analyze the requirements of this calendar component. A basic calendar should have the following functions: display the calendar page of the current month; support switching to the previous month or next month; support clicking on a certain day,
