

How to easily change Recycle Bin settings on Windows 11

For most people, the Recycle Bin is simply a storage for deleted files that can be restored later or permanently deleted. What you may not realize is that you can configure it and decide what happens when files are deleted from your computer.
Given how easy it is to change these settings, you should be able to adjust them in no time and enjoy the new look, efficiency, and customization of your Recycle Bin.
Why do I need to manage my recycle bin settings? If you're not careful, the Recycle Bin can fill up with files that you don't need to keep permanently but want to keep just in case. That's why you need to decide what happens to these files instead of letting them hang.
Additionally, you may end up with a slower computer with unnecessary files taking up valuable space on your hard drive. A better solution is to set rules for what is stored there and when it is automatically deleted.
How to change the Recycle Bin settings on Windows 11?
1. Find and access the Recycle Bin in Windows 11
By default, the Recycle Bin is saved on the desktop, but if not, you can enable it by:
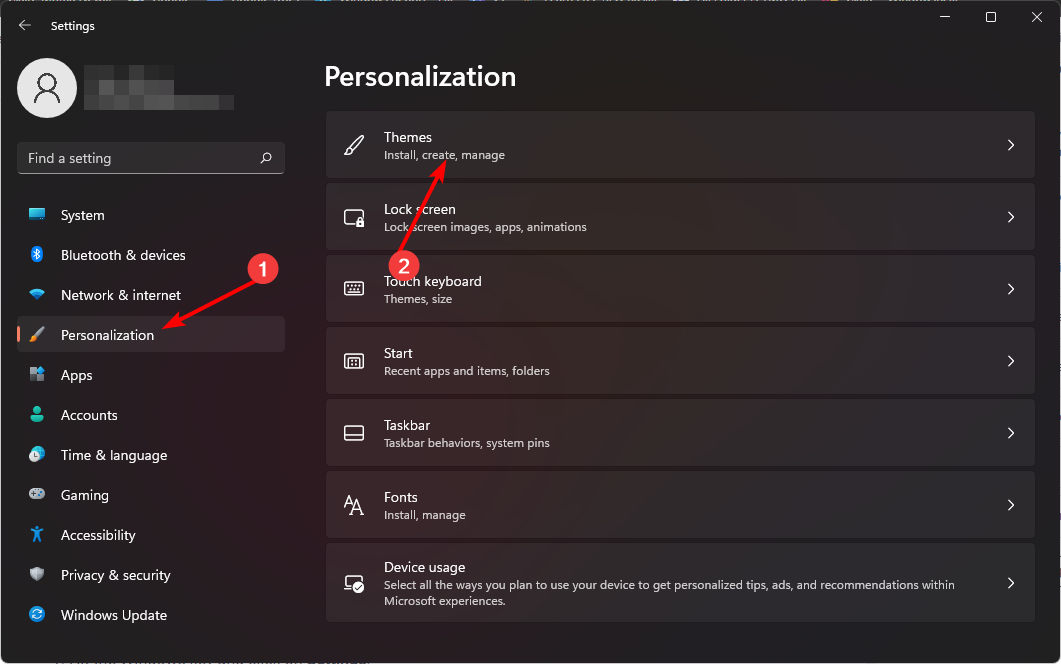
- Tap the key and click Settings. Windows
- Select Personalization and click Theme.

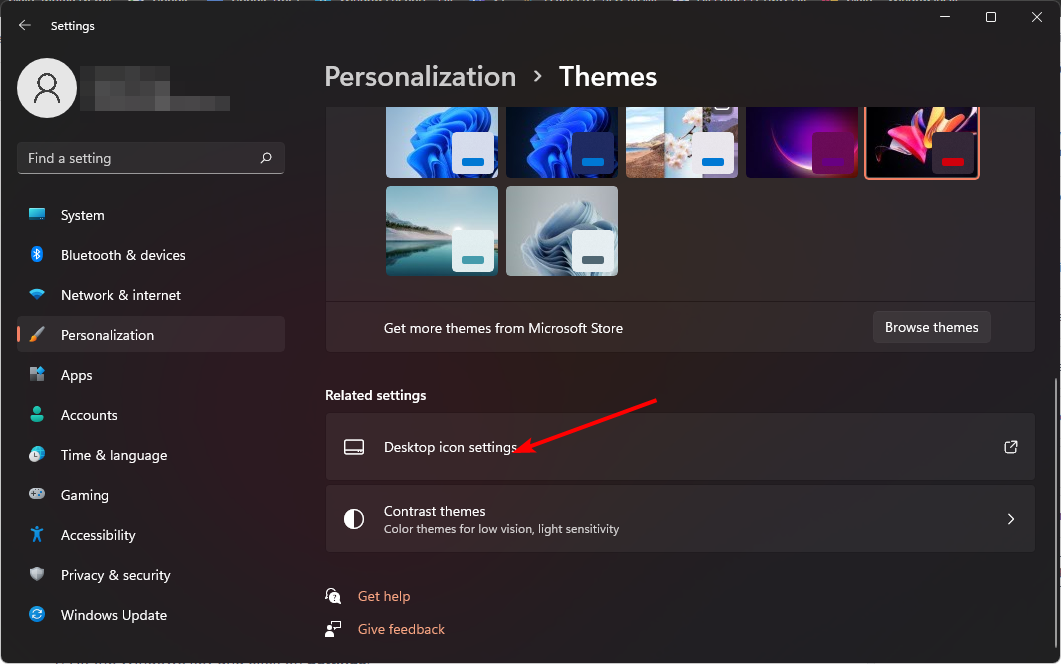
- Click Desktop Icon Settings.
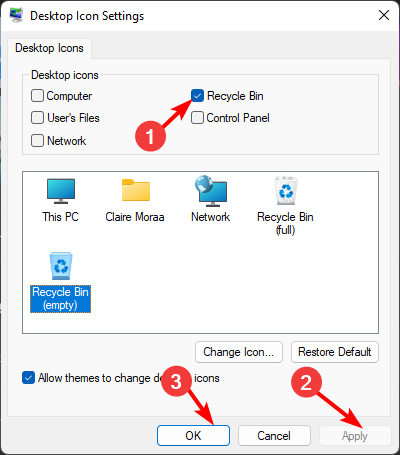
- In the next dialog box, make sure the Recycle Bin checkbox is checked to show on desktop, then click Apply and OK".
If you want to hide the Recycle Bin on your desktop, just reverse engineer these steps.
2. Adjust the general settings of the Windows 11 Recycle Bin
1. Pin the Recycle Bin to the taskbar
- Right-click an empty area on the desktop and select New> ;A shortcut.
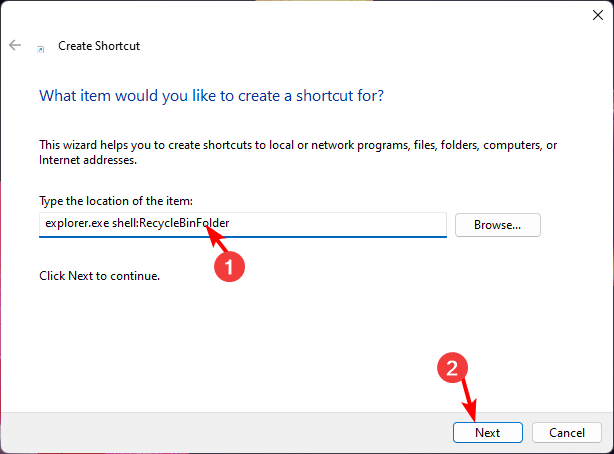
- Type the following as the path directory for the shortcut and click Next:
<strong>explorer.exe shell:RecycleBinFolder</strong>
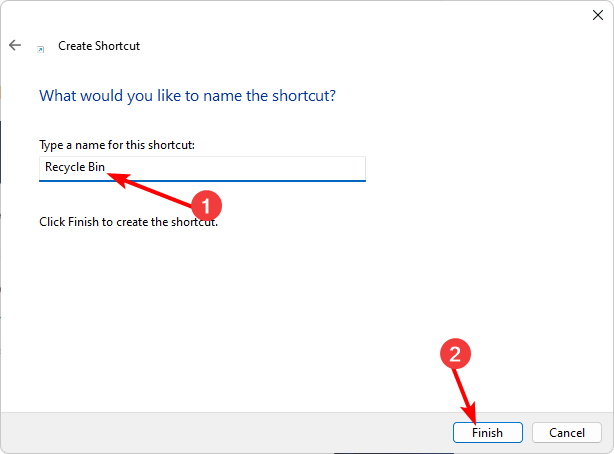
- Set the name to "Recycle Bin" and click "Done".
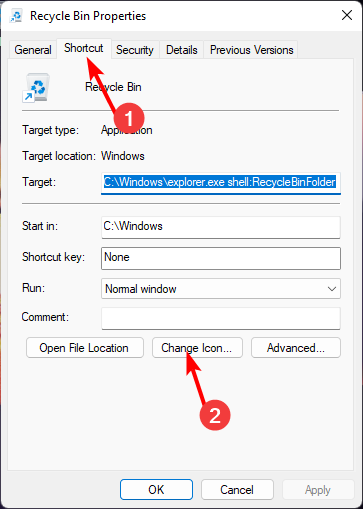
- Right-click the newly created shortcut and select "Properties".
- Navigate to the "Shortcuts" tab and click the "Change" icon.
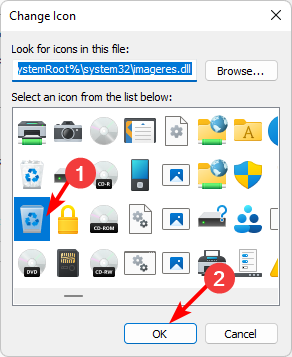
- Select a Trash icon from the list and click OK.
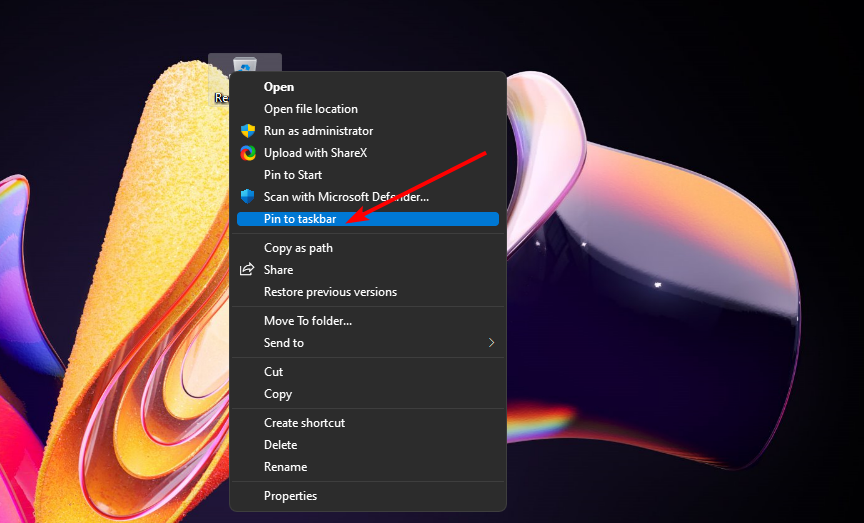
- Right-click the changed icon again and click Pin to taskbar.
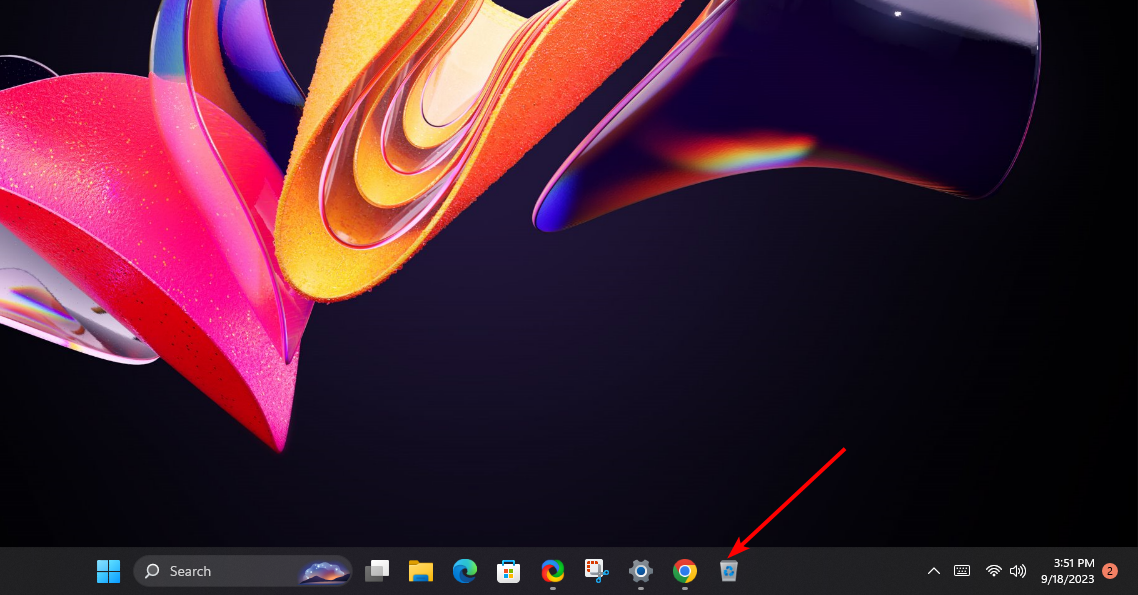
- The Recycle Bin should appear on the taskbar.
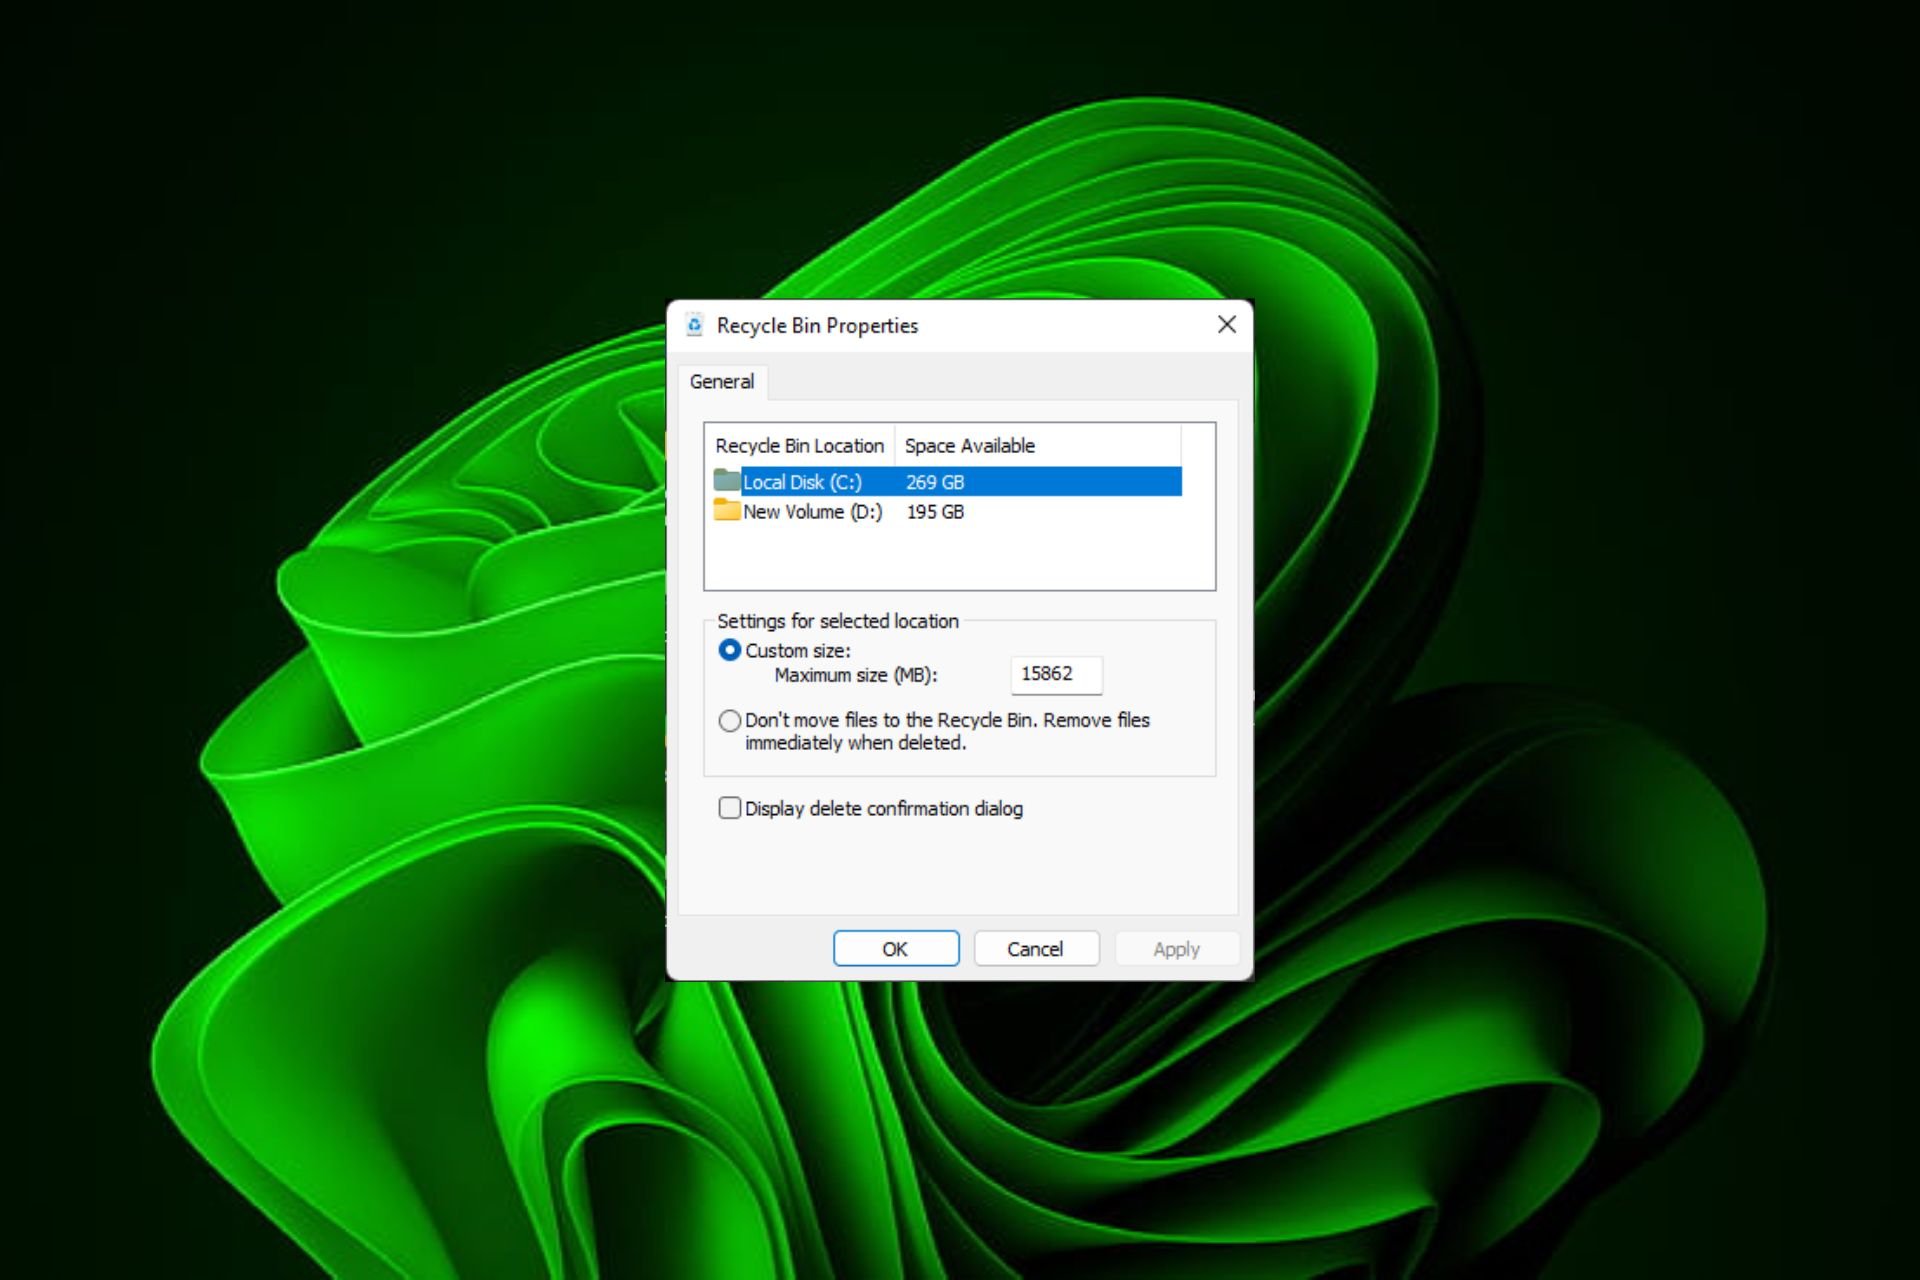
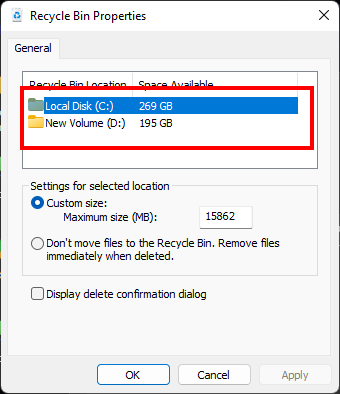
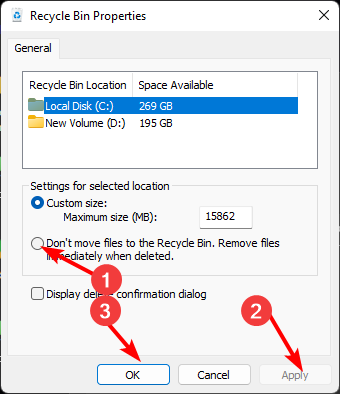
2. Adjust Recycle Bin storage
- Find the Recycle Bin icon on the desktop, right-click it, and select Properties.
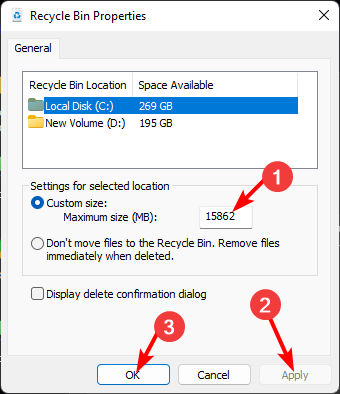
- Select a drive (preferably one with more free space).
- Under "Custom size" enter a graphic that is higher than the group and click "OK".
3. Manage folder and file icons in Windows 11 Recycle Bin
1. Change Recycle Bin icon
- Click the key and Click Settings. Windows
- Select Personalization and click Theme.
- Click Desktop Icon Settings.
- In the next dialog box, click the Change icon.
- You can select from the built-in icon list or download and click to browse.

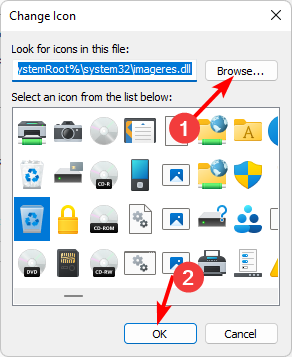
For more options on how to change the recycle bin icon, check out our detailed article.
2. Restore the default icon
- Click the key and click Settings. Windows
- Select Personalization and click Theme.
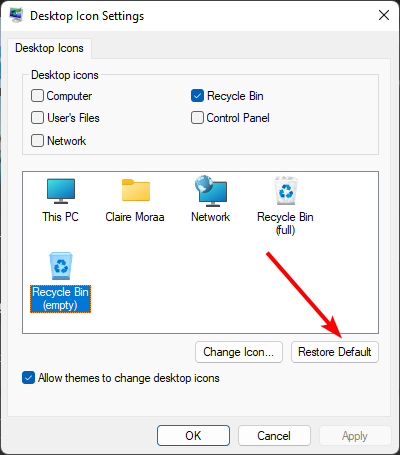
- Click Desktop Icon Settings.
- In the next dialog box, click "Restore Defaults".
4. Delete files from the Recycle Bin in Windows 11
1. Turn on deletion confirmation
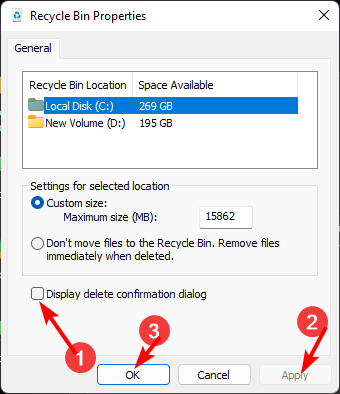
- Find the Recycle Bin icon on the desktop , right-click it and select Properties.
- Select the Show deletion confirmation dialog box and click Apply and OK.
2. Set the deletion schedule
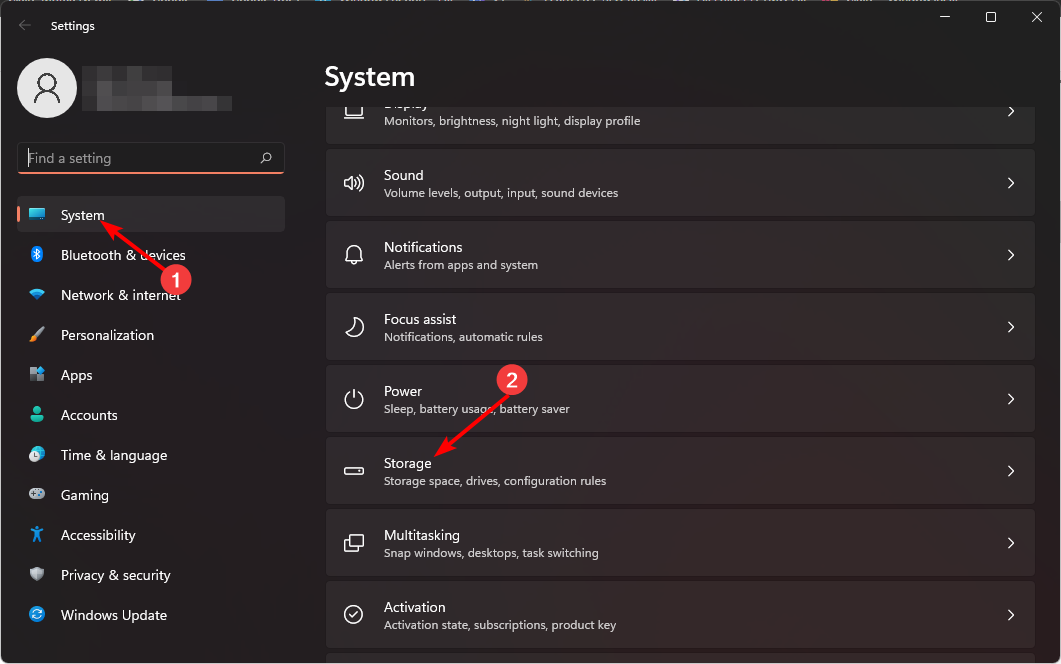
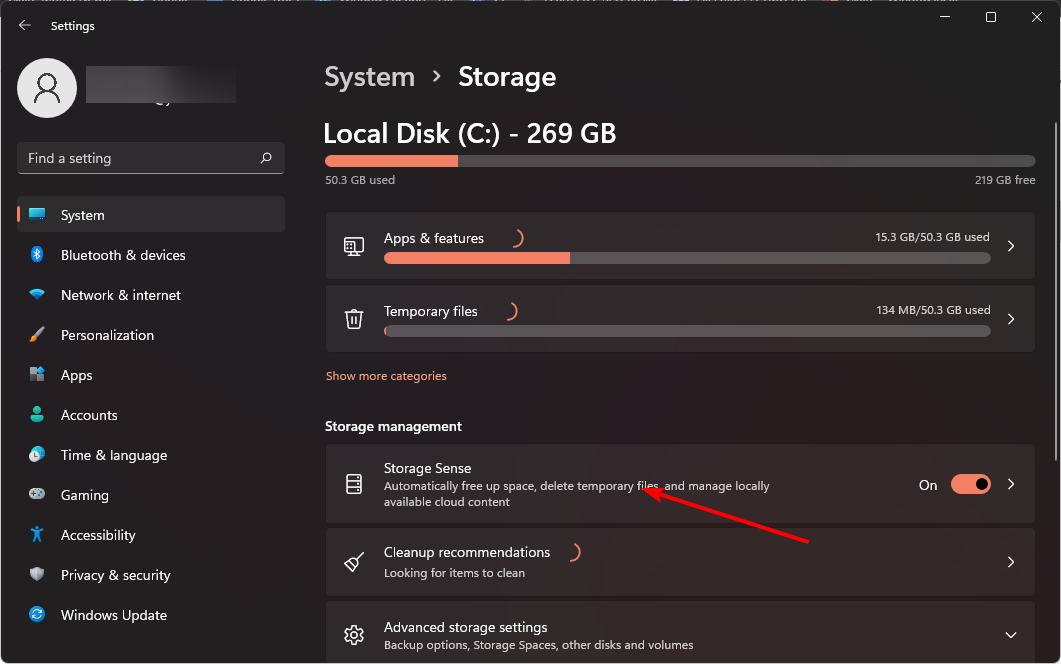
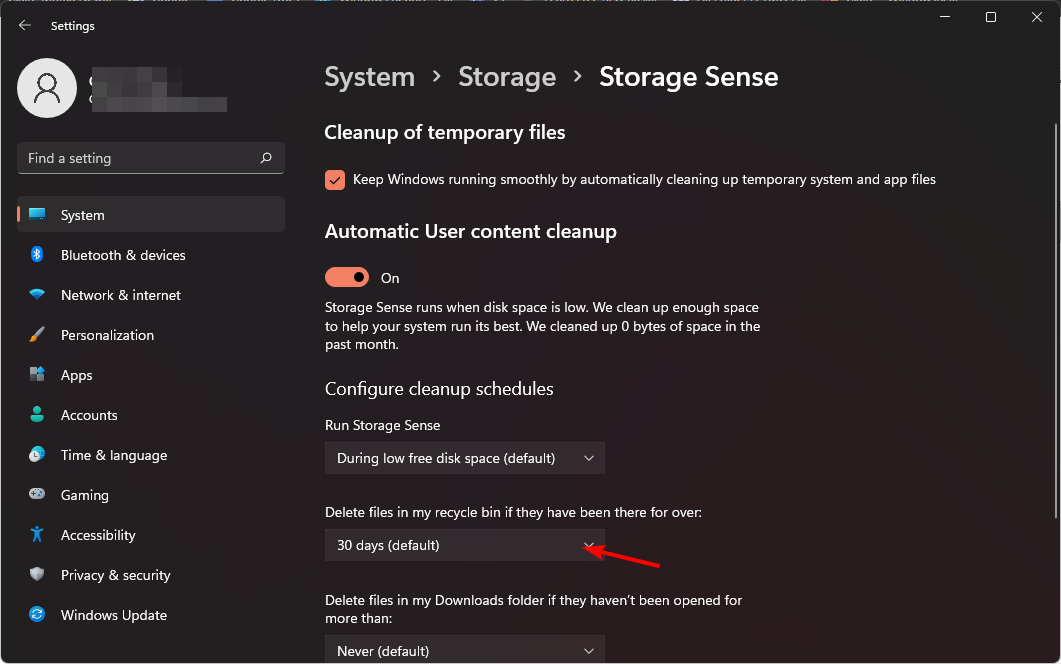
- Click the Start menu icon and then click Settings.
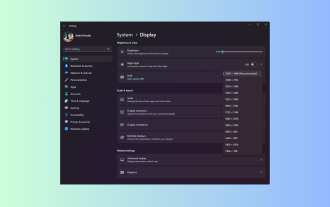
- Select the system and click Storage.
- Click Storage Sense.
- In the "Delete files in my Recycle Bin if they've been there longer than " option, select a time period you're familiar with from the drop-down menu.
Learn how to automatically empty the Recycle Bin in Windows 10.
3. Delete files permanently
- Find the Recycle Bin icon on the desktop, right-click it and select Properties.
- CheckDo not move files to the Recycle Bin. Delete files immediately after deletion option and click Apply and OK.
#Backing up your files is important because once you delete files, they cannot be retrieved.
So, how easy is it? You can change the recycle bin settings without any third-party software or resources. Once again, the Windows GUI is here for you. Changing your Recycle Bin settings can have a significant impact on your computing experience, so try it now.
The above is the detailed content of How to easily change Recycle Bin settings on Windows 11. For more information, please follow other related articles on the PHP Chinese website!

Hot AI Tools

Undresser.AI Undress
AI-powered app for creating realistic nude photos

AI Clothes Remover
Online AI tool for removing clothes from photos.

Undress AI Tool
Undress images for free

Clothoff.io
AI clothes remover

AI Hentai Generator
Generate AI Hentai for free.

Hot Article
Hot Tools

Notepad++7.3.1
Easy-to-use and free code editor

SublimeText3 Chinese version
Chinese version, very easy to use

Zend Studio 13.0.1
Powerful PHP integrated development environment

Dreamweaver CS6
Visual web development tools

SublimeText3 Mac version
God-level code editing software (SublimeText3)
Hot Topics
 1377
1377
 52
52

 How to enable or disable DLNA on Windows 11
Sep 28, 2023 pm 11:05 PM
How to enable or disable DLNA on Windows 11
Sep 28, 2023 pm 11:05 PM
DLNA streaming has been around for a long time and is considered one of the more user-friendly options. Given its compatibility with a variety of devices and systems, you shouldn’t have problems connecting to one. So, let us understand how to enable DLNA in Windows 11. There are two methods, use the built-in Windows DLNA (Digital Living Network Alliance) feature or install a third-party application. While the former works well and provides the best experience, you can try the app with its enhanced feature set. We will list both options. What are the benefits of using DLNA? DLNA allows media streaming across devices on the network, provided the streaming device is compatible with the standard. Once set up on a smart TV or other system, you can
 Windows 11 Guide: How to adjust the display resolution in Hyper-V
Sep 23, 2023 pm 08:25 PM
Windows 11 Guide: How to adjust the display resolution in Hyper-V
Sep 23, 2023 pm 08:25 PM
If you are using Hyper-V to run virtual machines on a Windows 11 machine, you may need to change the display resolution of one or both VMs. In this guide, we will introduce simple methods and step-by-step instructions to adjust and optimize display resolution in Hyper-V environment. How to adjust screen resolution in Hyper-V? Before moving on to the detailed steps to change Hyper-V screen resolution on Windows 11, be sure to complete the following checks for smoother operation: Make sure you are logged in with an administrator account. Make sure graphics drivers are updated. Back up important data in the VM. Make sure Hyper-V is enabled. 1. Setting up using Hyper-V First, we will enable enhanced session mode; for this
 Solution: Your organization requires you to change your PIN
Oct 04, 2023 pm 05:45 PM
Solution: Your organization requires you to change your PIN
Oct 04, 2023 pm 05:45 PM
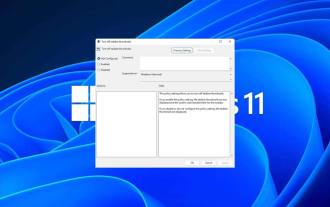
The message "Your organization has asked you to change your PIN" will appear on the login screen. This happens when the PIN expiration limit is reached on a computer using organization-based account settings, where they have control over personal devices. However, if you set up Windows using a personal account, the error message should ideally not appear. Although this is not always the case. Most users who encounter errors report using their personal accounts. Why does my organization ask me to change my PIN on Windows 11? It's possible that your account is associated with an organization, and your primary approach should be to verify this. Contacting your domain administrator can help! Additionally, misconfigured local policy settings or incorrect registry keys can cause errors. Right now
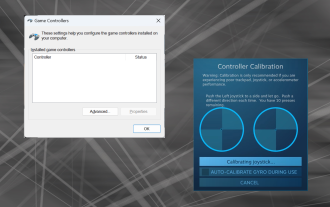 How to properly calibrate your Xbox One controller on Windows 11
Sep 21, 2023 pm 09:09 PM
How to properly calibrate your Xbox One controller on Windows 11
Sep 21, 2023 pm 09:09 PM
Since Windows has become the gaming platform of choice, it's even more important to identify its gaming-oriented features. One of them is the ability to calibrate an Xbox One controller on Windows 11. With built-in manual calibration, you can get rid of drift, random movement, or performance issues and effectively align the X, Y, and Z axes. If the available options don't work, you can always use a third-party Xbox One controller calibration tool. Let’s find out! How do I calibrate my Xbox controller on Windows 11? Before proceeding, make sure you connect your controller to your computer and update your Xbox One controller's drivers. While you're at it, also install any available firmware updates. 1. Use Wind
 How to show folder size on Windows 11?
Sep 23, 2023 pm 06:13 PM
How to show folder size on Windows 11?
Sep 23, 2023 pm 06:13 PM
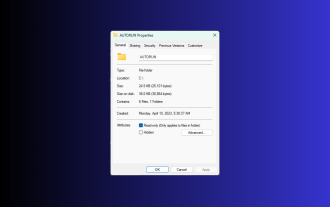
By default, Windows 11 does not display folder sizes in File Explorer, however, you can make certain changes in Explorer settings to make them visible. In this guide, we will discuss some of the easiest ways to display folder sizes so that you can effectively manage disk space on your PC. How to check the size of a folder on Windows 11? 1. Use the folder's Properties window to open a Windows Explorer window by pressing +. WindowsE Go to the folder whose size you want to check, right-click on it and select "Properties" from the context menu. In the folder properties window, go to the "General" tab and find the "Size" section to find out how much space the folder takes up. 2. Enable "
 How to disable taskbar thumbnail preview in Win11? Turn off the taskbar icon display thumbnail technique by moving the mouse
Feb 29, 2024 pm 03:20 PM
How to disable taskbar thumbnail preview in Win11? Turn off the taskbar icon display thumbnail technique by moving the mouse
Feb 29, 2024 pm 03:20 PM
This article will introduce how to turn off the thumbnail function displayed when the mouse moves the taskbar icon in Win11 system. This feature is turned on by default and displays a thumbnail of the application's current window when the user hovers the mouse pointer over an application icon on the taskbar. However, some users may find this feature less useful or disruptive to their experience and want to turn it off. Taskbar thumbnails can be fun, but they can also be distracting or annoying. Considering how often you hover over this area, you may have inadvertently closed important windows a few times. Another drawback is that it uses more system resources, so if you've been looking for a way to be more resource efficient, we'll show you how to disable it. but
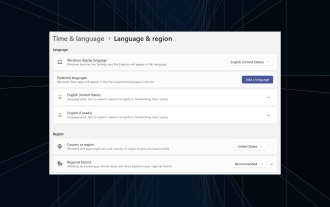 How to Completely Remove Unwanted Display Languages on Windows 11
Sep 24, 2023 pm 04:25 PM
How to Completely Remove Unwanted Display Languages on Windows 11
Sep 24, 2023 pm 04:25 PM
Work on the same setup for too long or share your PC with others. You may have some language packs installed, which often create conflicts. So, it’s time to remove unwanted display languages in Windows 11. Speaking of conflicts, when there are multiple language packs, inadvertently pressing Ctrl+Shift changes the keyboard layout. If not taken care of, this can be a hindrance to the task at hand. So, let’s jump right into the method! How to remove display language from Windows 11? 1. From Settings press + to open the Settings app, go to Time & Language from the navigation pane and click on Language & Region. WindowsI click the ellipsis next to the display language you want to remove and select Remove from the pop-up menu. Click "
 Resolved: Windows 11 23H2 not showing up in Windows Update
Nov 08, 2023 pm 02:46 PM
Resolved: Windows 11 23H2 not showing up in Windows Update
Nov 08, 2023 pm 02:46 PM
Microsoft recently rolled out Windows 11 version 23H2 to all compatible devices, but it didn't appear for many people. This version was earlier only available to users in the Beta and Dev channels. Ever since its public release, users have been eager to try out the latest operating system version. First, Microsoft rolls out updates in stages, with some users receiving them before others. This does not mean that your device is not compatible or will not receive updates. However, if a few days have passed, you should check for problems. Why doesn't Windows1123H2 appear? When the device blocks newer versions of Windows, there are corrupt update components, or the computer fails due to lack of TPM2.0 or Secure Boot