

How to remove a frequently used program group from the Start menu

Whenever you install apps in Windows, you often find yourself using more programs than you know what to do with. These apps can be useful if you want to easily access certain tasks or settings in the Start menu. However, not everyone may need them.
If you are one of those users who prefers a clean Start menu interface, you can take charge of what appears here, and we'll show you how to do so by removing frequently used program groups.
How to remove a frequently used program group from the Start menu?
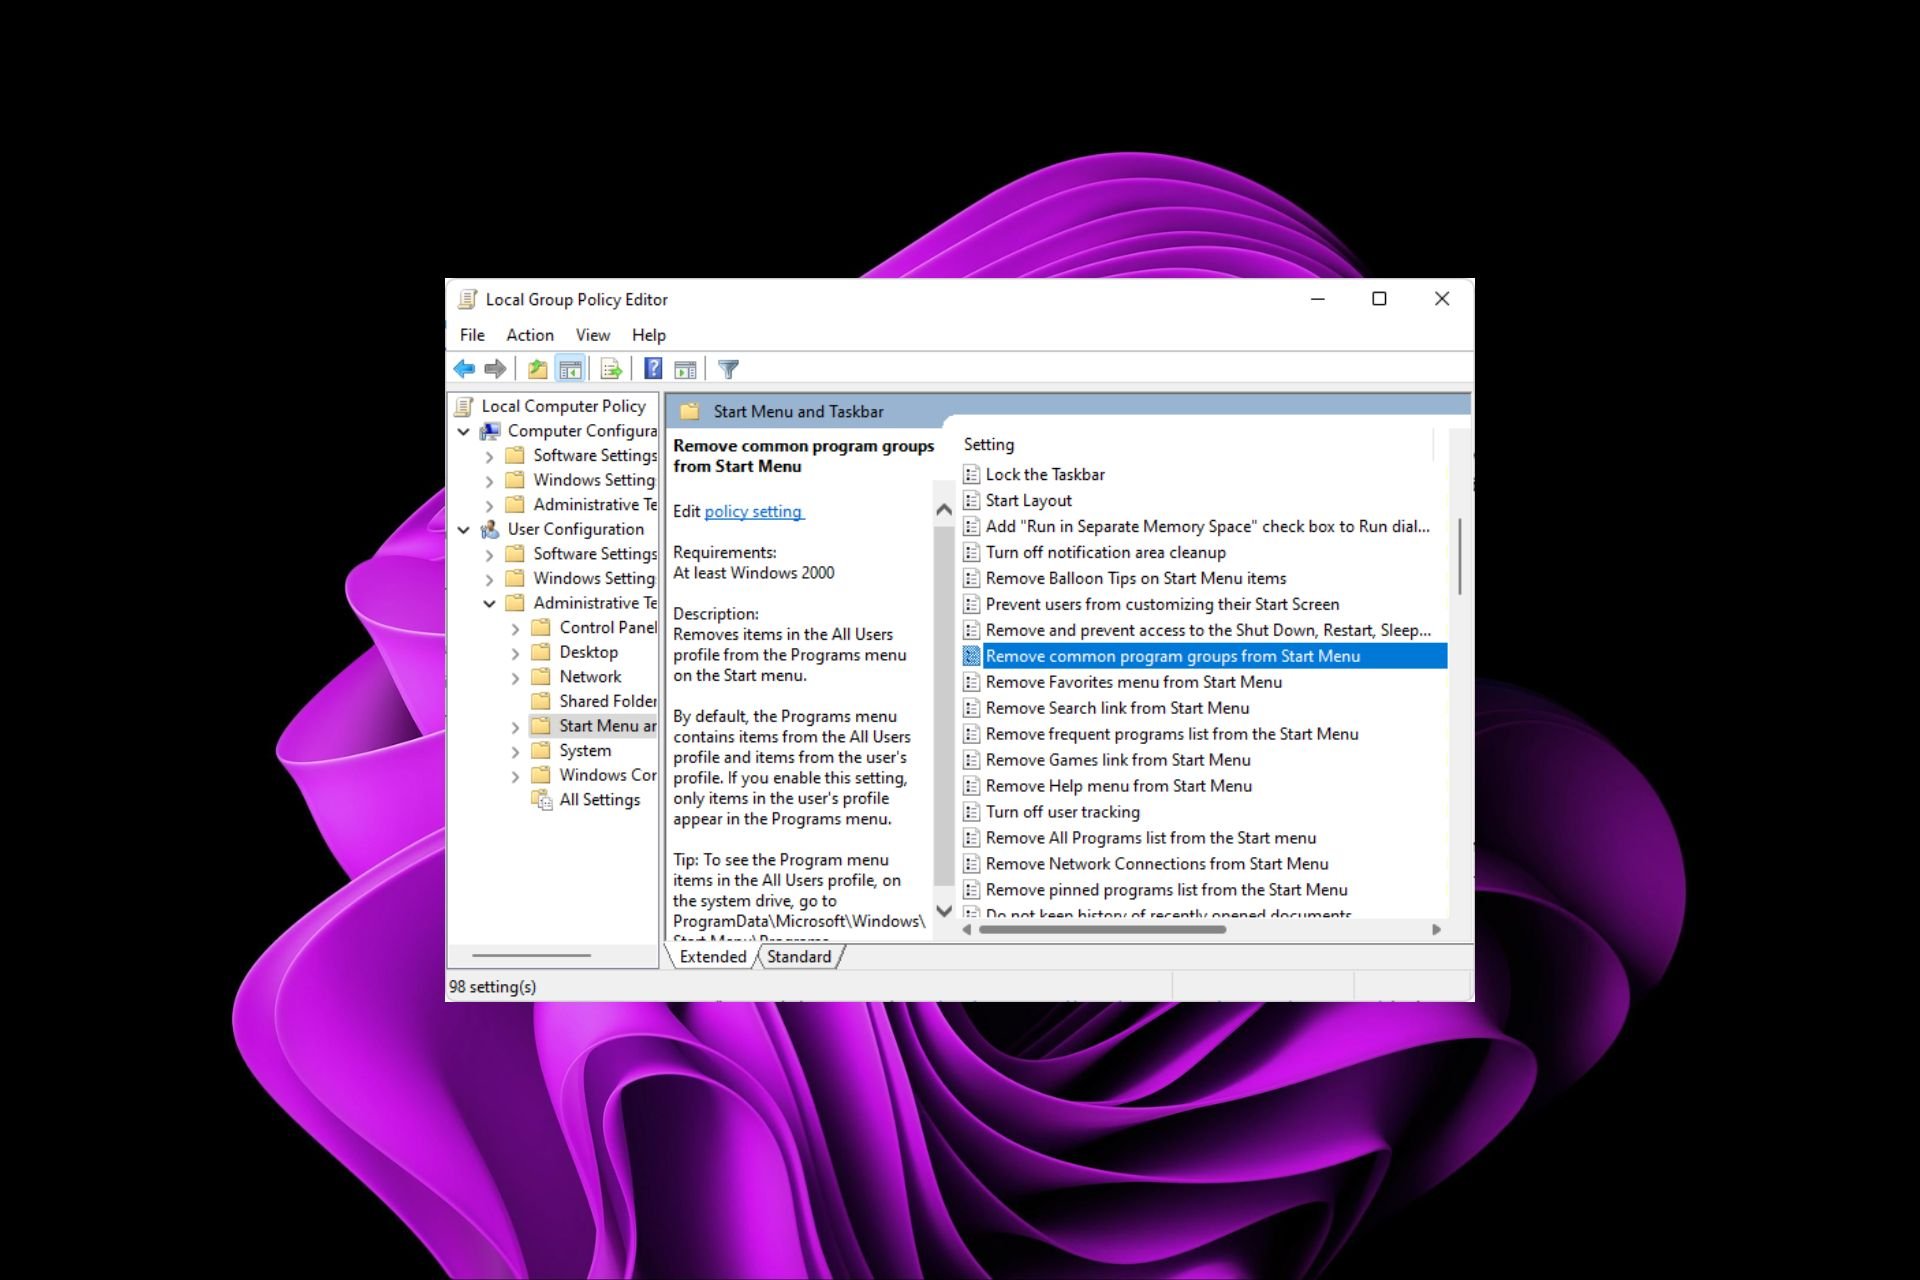
1. Use the Group Policy Editor
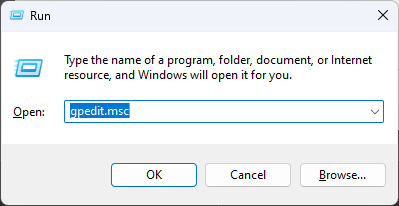
- Press to openRun the command. WindowsR
- Type gpedit.msc in the dialog box and click to open Group Polic y Editor.gpedit.msc Enter

- Navigate to the following location:
<strong>User Configuration/Administrative Templates/Start Menu and Taskbar</strong> - Double-click the "Remove frequently used program groups from the Start Menu" policy setting.
- Check the Enabled box.
- Click Apply and OK to save the changes, then restart your PC for the changes to take effect.


2. Use the Registry Editor
 NOTE As a safety precaution, please back up the registry or create a restore point before making any changes, as things can be very unreliable. predict.
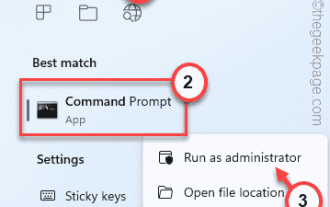
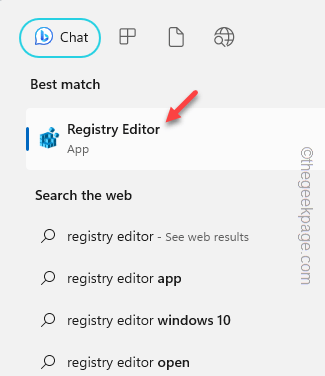
- Press to open and run the command. WindowsR
- Type Registry Editor in the dialog box and click to open Registry Editor. Enter
- Navigate to the following location:
<strong>HKEY_CURRENT_USER\Software\Microsoft\Windows\CurrentVersion\Policies\Explorer</strong> - Double-click the NoCommonGroups entry, but if it is not available, right-click in an empty area, select "New>DWORD (32-bit value)", and name it "New".
- In the Value Data entry, set it to 0 to disable, and then close Registry Editor.

How to add a frequently used program group to the Start menu?
If you want common apps back on the Start menu, just reverse engineer the above steps. For Group Policy options, set the option to "Disabled" and for Registry Editor, set Value Data to 0.
By removing all frequently used program groups, remember that any changes will apply to all user profiles on that PC. This means features like HomeGroup will be unnecessary as you can no longer share files. You might as well go ahead and delete your homegroup, especially if it's slowing down your device.
Hopefully you now only have the apps you want to see on the Start Menu. If you face any problems using default apps, it's a good idea to uninstall pre-installed apps, especially if you rarely use them.
If it's the Windows 11 interface that's giving you trouble, you can change that too. Most users prefer the classic Start menu, so don't hesitate to revert to the old way.
The above is the detailed content of How to remove a frequently used program group from the Start menu. For more information, please follow other related articles on the PHP Chinese website!

Hot AI Tools

Undresser.AI Undress
AI-powered app for creating realistic nude photos

AI Clothes Remover
Online AI tool for removing clothes from photos.

Undress AI Tool
Undress images for free

Clothoff.io
AI clothes remover

AI Hentai Generator
Generate AI Hentai for free.

Hot Article
Hot Tools

Notepad++7.3.1
Easy-to-use and free code editor

SublimeText3 Chinese version
Chinese version, very easy to use

Zend Studio 13.0.1
Powerful PHP integrated development environment

Dreamweaver CS6
Visual web development tools

SublimeText3 Mac version
God-level code editing software (SublimeText3)
Hot Topics
 1377
1377
 52
52

 Windows 11: The easy way to import and export start layouts
Aug 22, 2023 am 10:13 AM
Windows 11: The easy way to import and export start layouts
Aug 22, 2023 am 10:13 AM
In Windows 11, the Start menu has been redesigned and features a simplified set of apps arranged in a grid of pages, unlike its predecessor, which had folders, apps, and apps on the Start menu. Group. You can customize the Start menu layout and import and export it to other Windows devices to personalize it to your liking. In this guide, we’ll discuss step-by-step instructions for importing Start Layout to customize the default layout on Windows 11. What is Import-StartLayout in Windows 11? Import Start Layout is a cmdlet used in Windows 10 and earlier versions to import customizations for the Start menu into
 How to disable display scaling for high DPI settings in Windows 11 or 10
May 22, 2023 pm 10:11 PM
How to disable display scaling for high DPI settings in Windows 11 or 10
May 22, 2023 pm 10:11 PM
The default display scaling feature on Windows 10 or later is a core component of the Windows operating system. But sometimes, this feature of certain apps can cause compatibility issues, unreadable text, blurry logos, and ultimately, app crashes. This can be a huge headache if you're dealing with 2160p or higher resolutions. There are many ways to disable the default display scaling feature on high DPI settings. We've selected the best ones and detailed step-by-step instructions for each process. How to Disable Display Scaling on High DPI Settings There is a way, all you have to do is disable high DPI scaling for a single application, and there is a way to do it for the entire Window
 Select where to get apps missing issue in Windows 11/10
Apr 14, 2023 am 11:22 AM
Select where to get apps missing issue in Windows 11/10
Apr 14, 2023 am 11:22 AM
Windows provides users with an option so that they can choose to get their apps from "Anywhere" to "Microsoft Store Only." However, in some cases, Windows users have reported an issue where they cannot find the "Choose where to get apps" option that is missing from the Settings page. This can be a nightmare situation for you, like setting it to app store only mode, you can't sideload any apps from anywhere! Don't worry. You can apply a registry fix to resolve this issue. Workaround –1. Restart the system. If this is a one-time failure, restarting should fix it. 2. You need an administrator account to
 How to fix Registry Editor not opening in Windows 11, 10
May 23, 2023 pm 11:31 PM
How to fix Registry Editor not opening in Windows 11, 10
May 23, 2023 pm 11:31 PM
Registry Editor is the tool we use to fix Windows system errors. It is the center of registry keys and, with appropriate adjustments, can solve most problems. But in rare cases, Registry Editor may also hang. Many users have reported seeing errors when trying to search for a key that does not exist on their system. If you try to cancel the search the application will hang and even if you don't cancel the search the application will freeze with the following message. Registry Editor has stopped working. The root cause of the problem is the length of the subkey. This error occurs if the length of the subkey exceeds 255 bytes. However, sometimes, it can also be because of a virus or malware. If you notice this issue on your system, don't panic. In this article, let us discuss solving
 Fix: An error occurred and not all updates were successfully uninstalled
May 23, 2023 pm 09:07 PM
Fix: An error occurred and not all updates were successfully uninstalled
May 23, 2023 pm 09:07 PM
Windows updates often make Windows devices better and more useful to billions of users. But sometimes some updates may not work properly, so you can easily choose to uninstall some recently installed updates. The process is very simple and Windows will roll back the current update. After uninstalling updates, you may see this prompt on your screen "An error occurred and not all updates were successfully uninstalled." If you get this, the uninstall process did not complete successfully, so you have to resolve the issue manually. Fix 1 – Uninstall updates using CMD There is a very easy way to uninstall the required updates. 1. Just click on the Windows icon in the middle of the taskbar. 2. Next start writing "cmd" in the search box at the top
 Windows search highlight option grayed out issue fixed
Apr 27, 2023 pm 11:55 PM
Windows search highlight option grayed out issue fixed
Apr 27, 2023 pm 11:55 PM
Search highlighting shows your recently completed past searches. But what if you can't enable the Search Highlight option in Settings because it's grayed out? If that's the case, you're missing out on a lot of aspects. Search highlighting greatly enhances your search experience and makes it easy for you to perform repeat queries very quickly. There is a very simple fix for this issue and you can fix the grayed out search highlight issue in just a few minutes. Fix 1 – Change the value of Disable Search Box Suggestion Use Registry Editor to change the value of DisableSearchBoxSuggetion to resolve this issue. Step 1 – Click Windows+R keys to open a run box. Then, type "Note" in the box
 How to Default 'Show More Options' in Windows 11's Right-Click Menu
Jul 10, 2023 pm 12:33 PM
How to Default 'Show More Options' in Windows 11's Right-Click Menu
Jul 10, 2023 pm 12:33 PM
One of the most annoying changes that we users never want is the inclusion of "Show more options" in the right-click context menu. However, you can remove it and get back the classic context menu in Windows 11. No more multiple clicks and looking for these ZIP shortcuts in context menus. Follow this guide to return to a full-blown right-click context menu on Windows 11. Fix 1 – Manually adjust the CLSID This is the only manual method on our list. You will adjust specific keys or values in Registry Editor to resolve this issue. NOTE – Registry edits like this are very safe and will work without any issues. Therefore, you should create a registry backup before trying this on your system. Step 1 – Try it
 How to fix Windows Security automatic sample submission being turned off?
Apr 21, 2023 pm 05:43 PM
How to fix Windows Security automatic sample submission being turned off?
Apr 21, 2023 pm 05:43 PM
Automatic sample submission is an underlying feature of Windows Security Center that automatically sends suspicious files from your computer to Microsoft for further inspection. It usually runs in the background and doesn't bother you at all. But what if this automatic sample submission keeps turning off automatically. There are multiple users with the same issue and they have escalated the issue to multiple forums. Implement these solutions on your system and the problem will disappear in no time. Fix 1 – Try a registry hack where you have to create a subkey and some value to keep autosampling off automatically. 1. You have to open the Registry Editor. So, press Win key + S key at the same time and type “regedit”. 2. See "Registry Editor"