

DYMO Driver for Windows 11: How to Download and Install

Drivers are critical software that help pass commands between the operating system and the device, and it’s even more important to get the latest Dymo drivers for Windows 11.
When upgrading your operating system, you may experience connection issues or printer issues if previously installed drivers are incompatible with the current iteration. Even other ways, it is recommended to use the latest drivers to enjoy seamless connection.
Does Dymo LabelWriter work with Windows 11?
Yes, the latest models of LabelWriter are compatible with Windows 11, including models 550, 550 Turbo, 450, 450 Turbo and 450 Turbo.
But some older devices cannot run on Windows 11. This includes the 310, 330, 330 Turbo and 400 Turbo, according to the Dymo compatibility chart.
How do we test, review and rate?
Over the past 6 months we have been working on a new moderation system for how we produce content. Using this, we subsequently redid much of the article to provide practical, hands-on expertise on the guides we produced.
For more details, you can read how we test, review, and rate on WindowsReport.
How to download and install DYMO driver on Windows 11?
1. Download and install from the official website
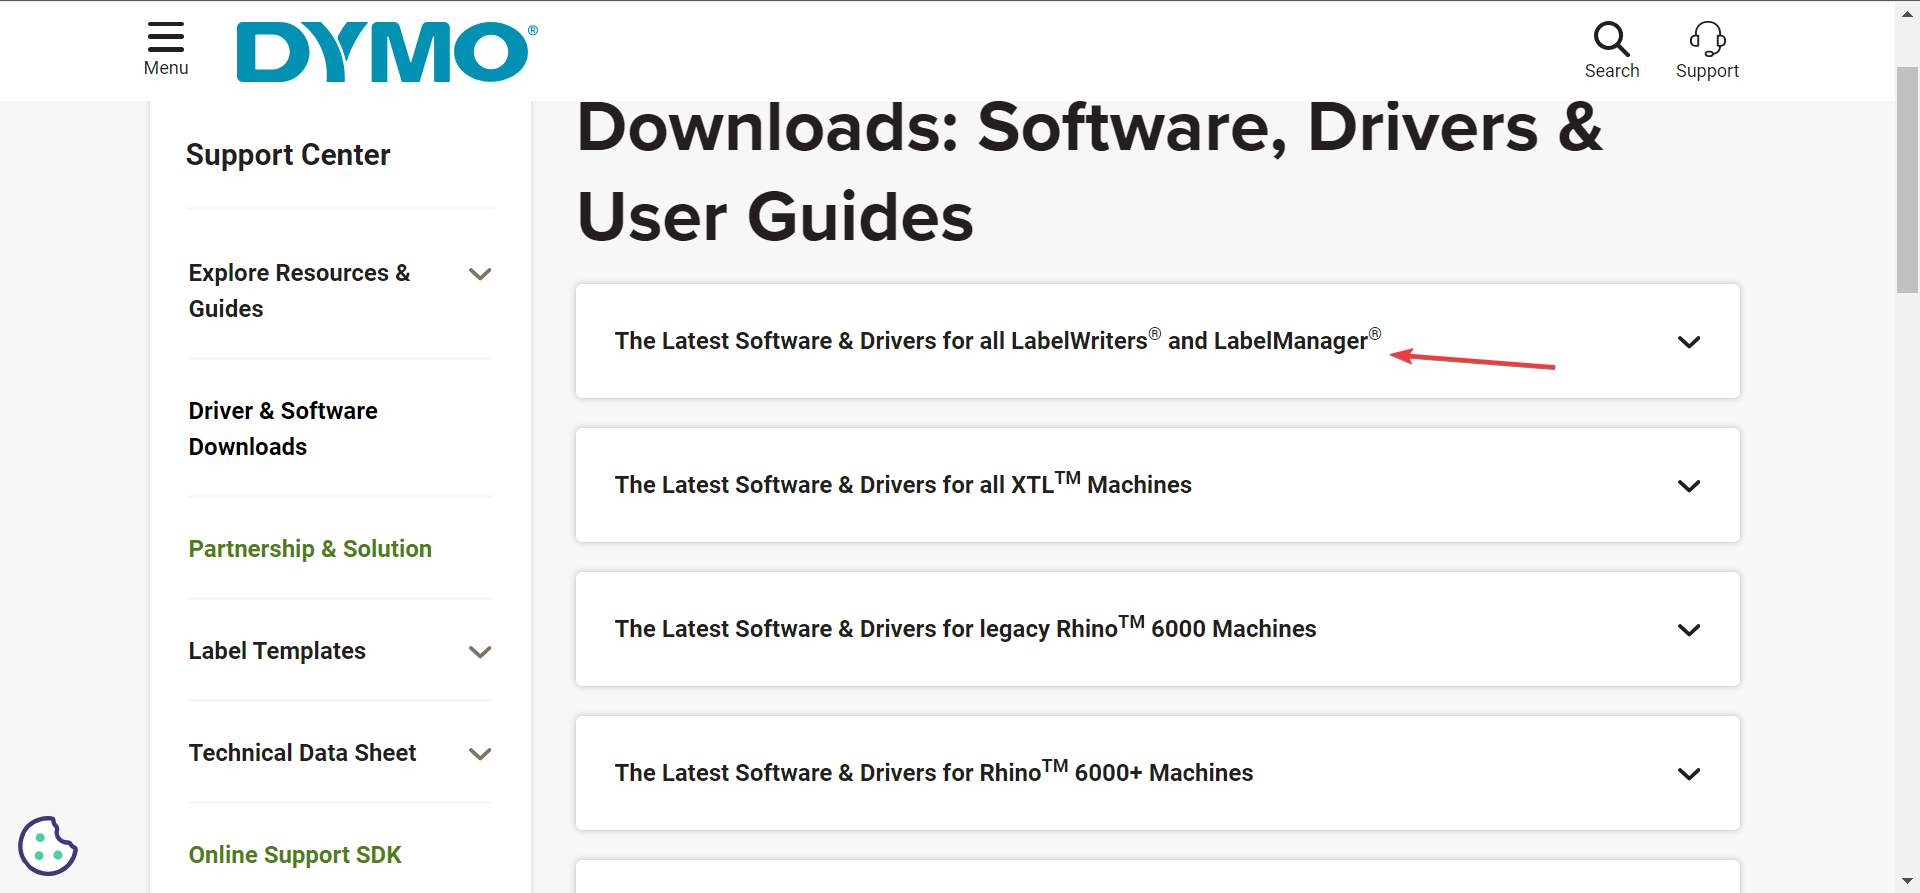
- Go to Dymo’s Support Center webpage and expand the section that lists your printer model. For example, for the Dymo LabelWriter 450 driver download, we will select the latest software and drivers for all LabelWriters and LabelManagers.

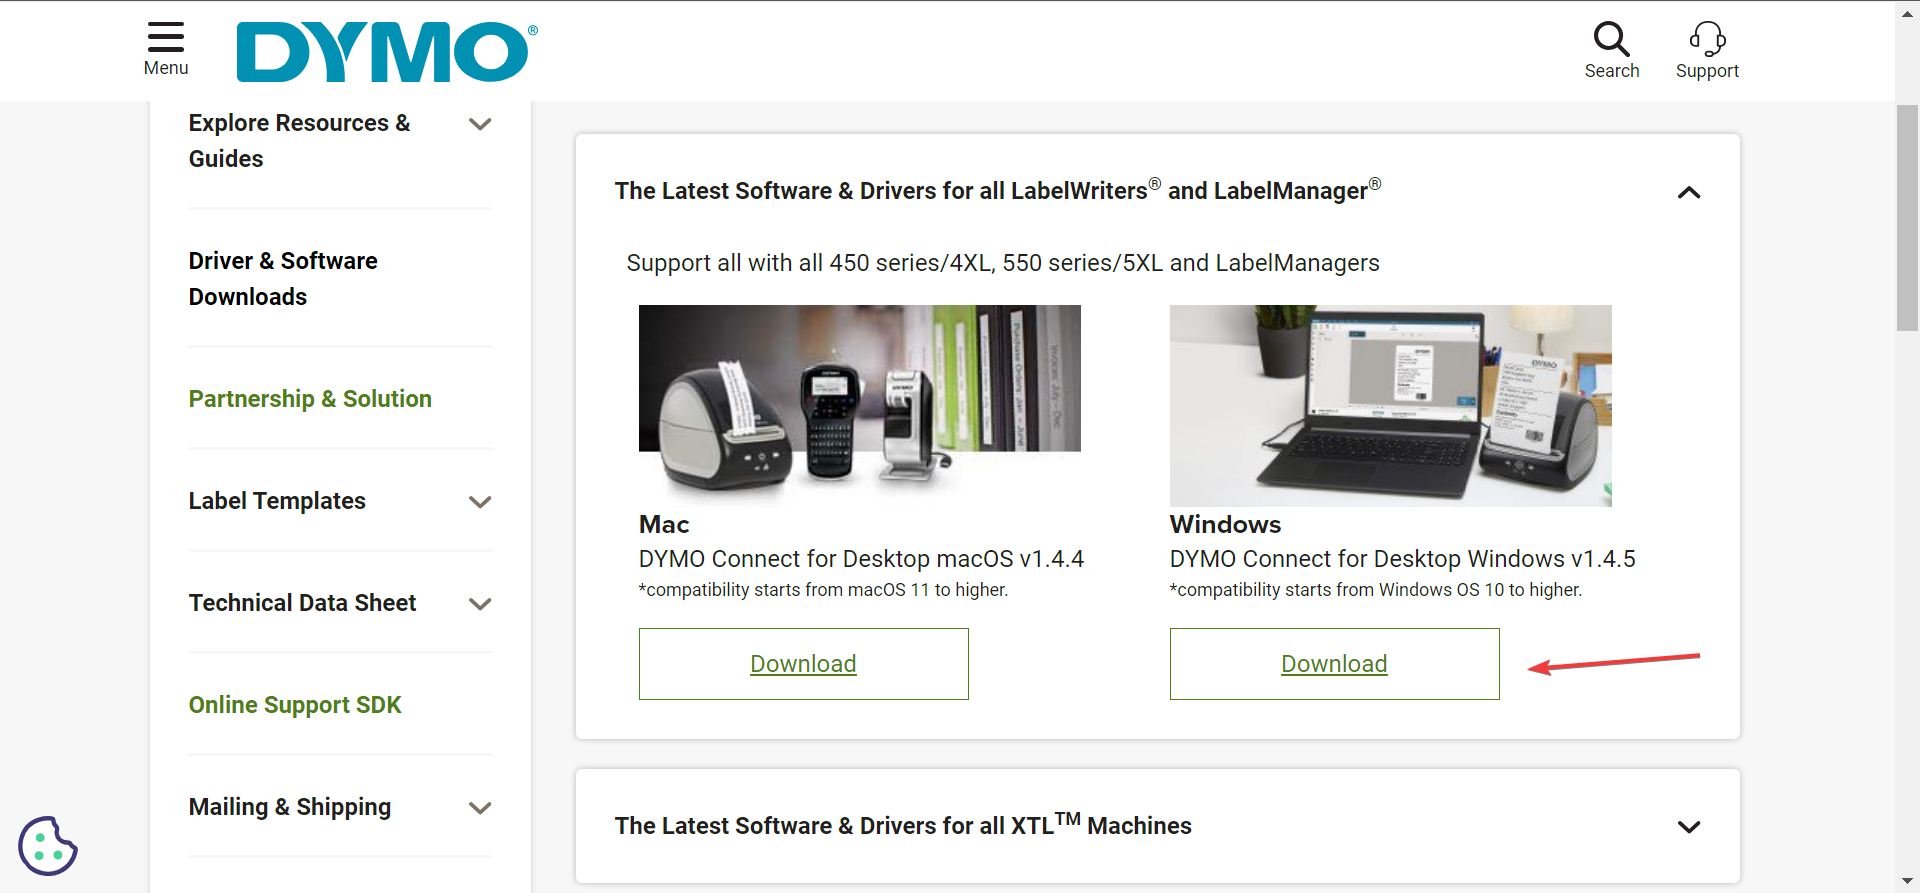
- Click the Download button under the Dymo connection in the desktop window.
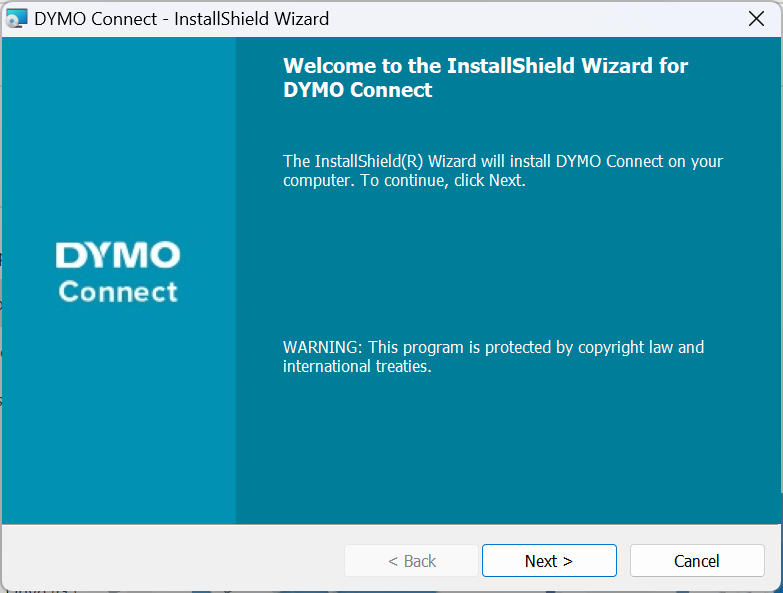
- After downloading the Dymo software, double-click the DCDSetup file to run it.
- Click "is" at the UAC prompt.
- Now, follow the on-screen instructions to complete the installation process.
After downloading Dymo Connect, establish a connection to your printer and it will automatically install the latest Dymo 400 and other Windows drivers, depending on the connected printer. Additionally, it is recommended that you install the Dymo connection utility for seamless operation.
Keep in mind that different Dymo printer models require different software. For example, you need Dymo IDs for XTL and Rhino machines.
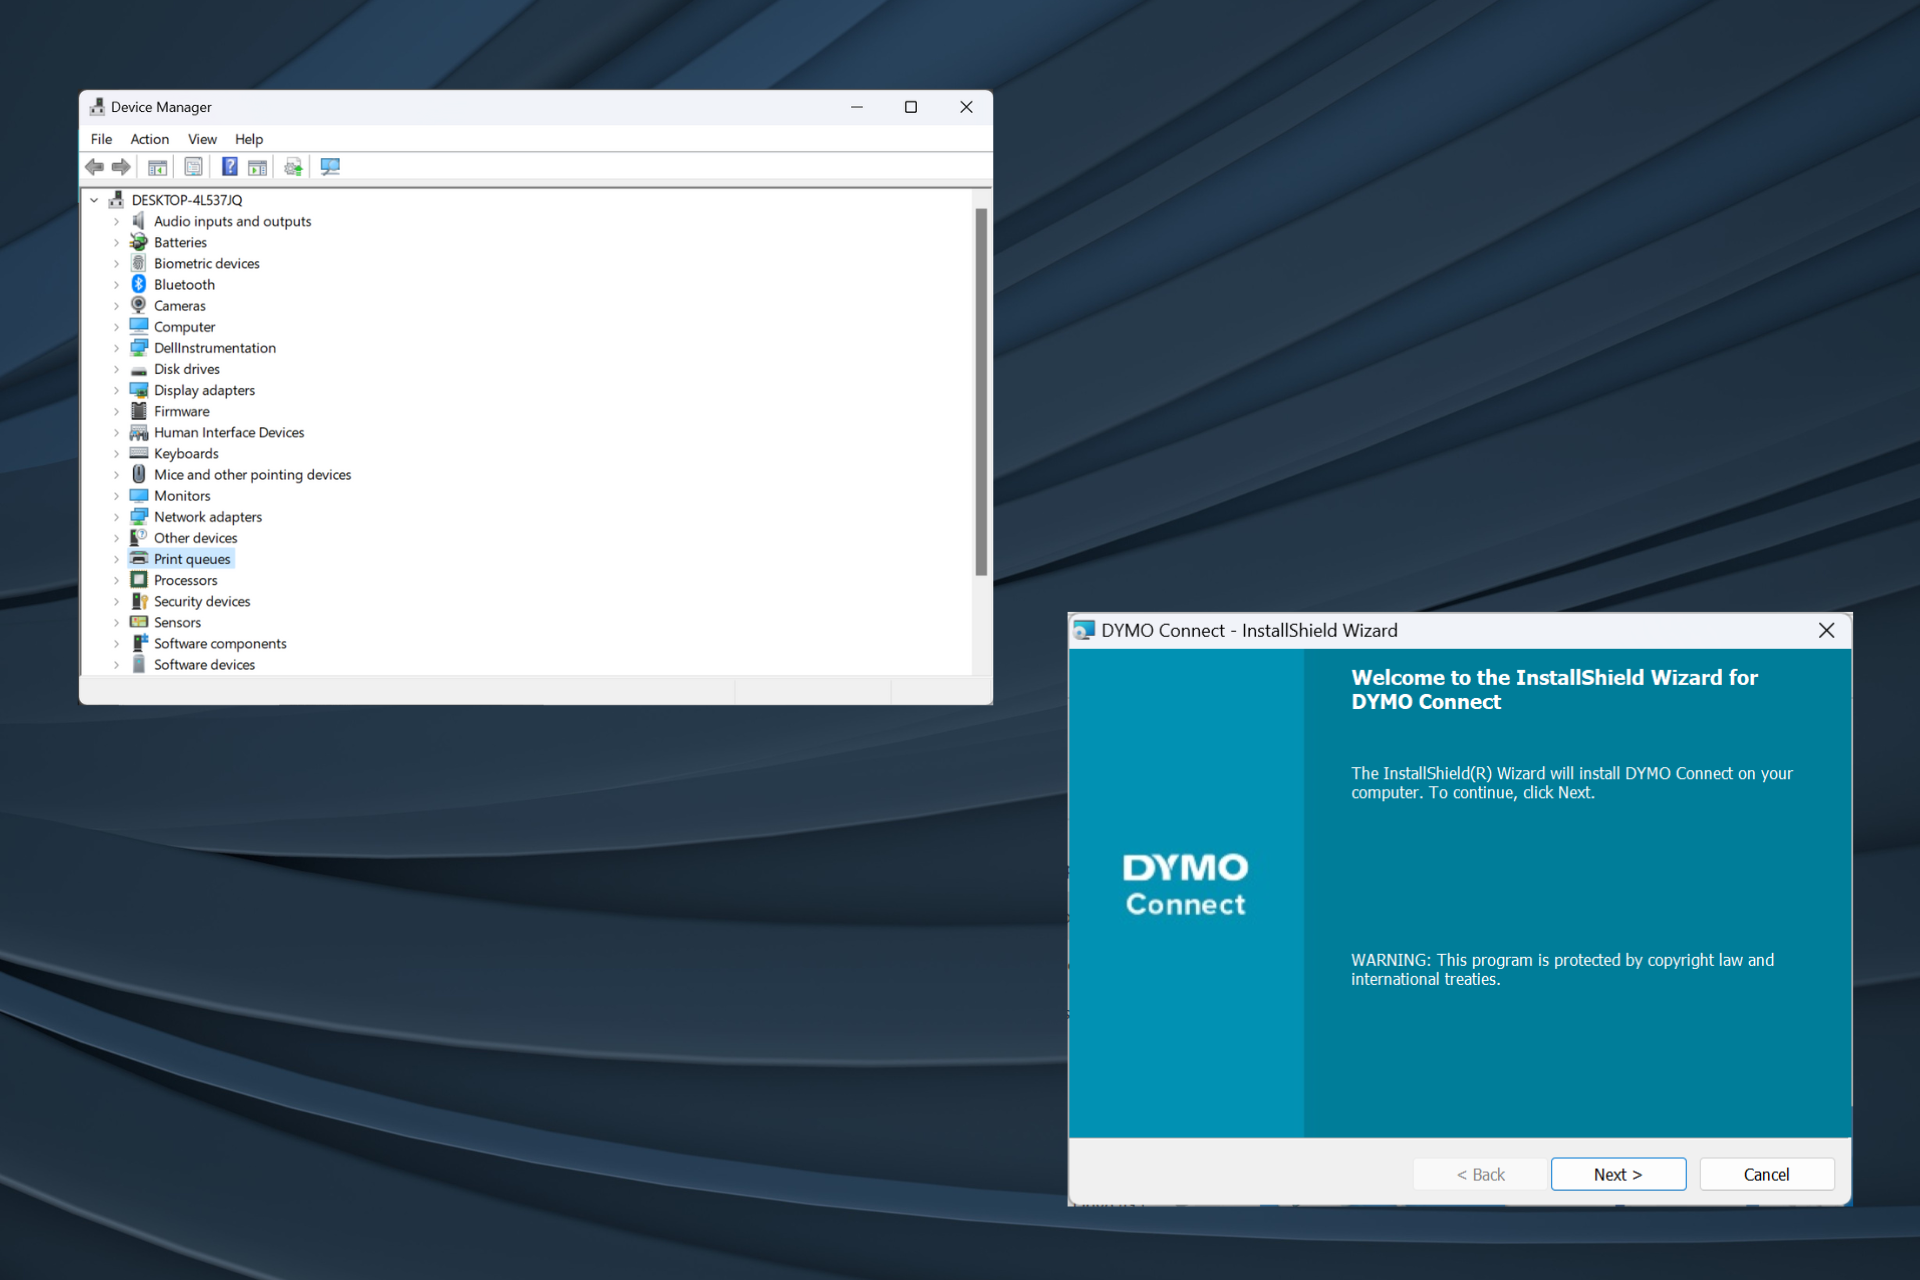
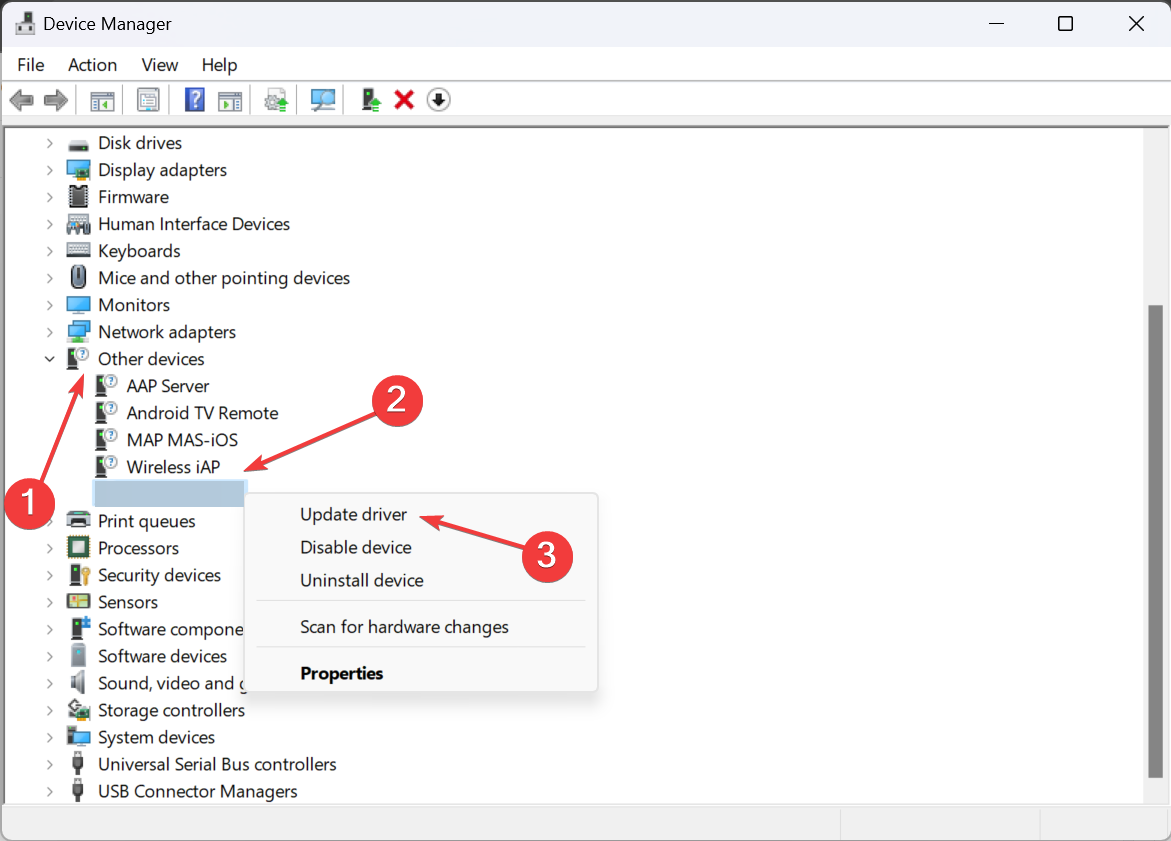
2. Via Device Manager
- Press to open the "Power User" menu and select "Device Manager" from the list of options. WindowsX
- Expand the printer entry, right-click the Dymo printer and select Update Driver. If your printer is not listed here, check the "Other Devices" category and make sure the hidden devices are visible.
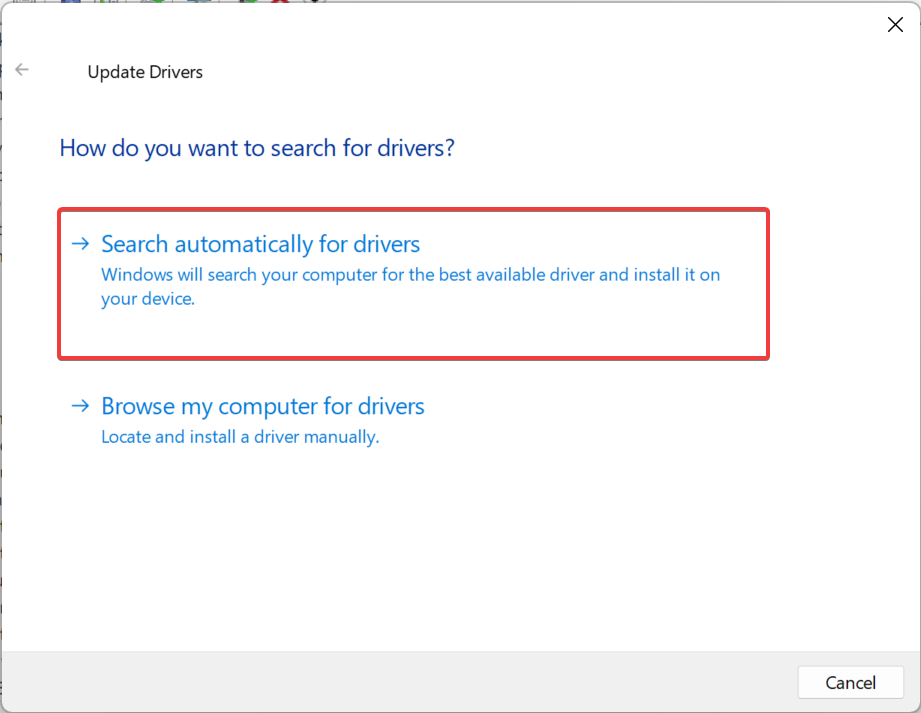
- Now, click Search automatically for drivers and wait for Windows to install the best version available locally.
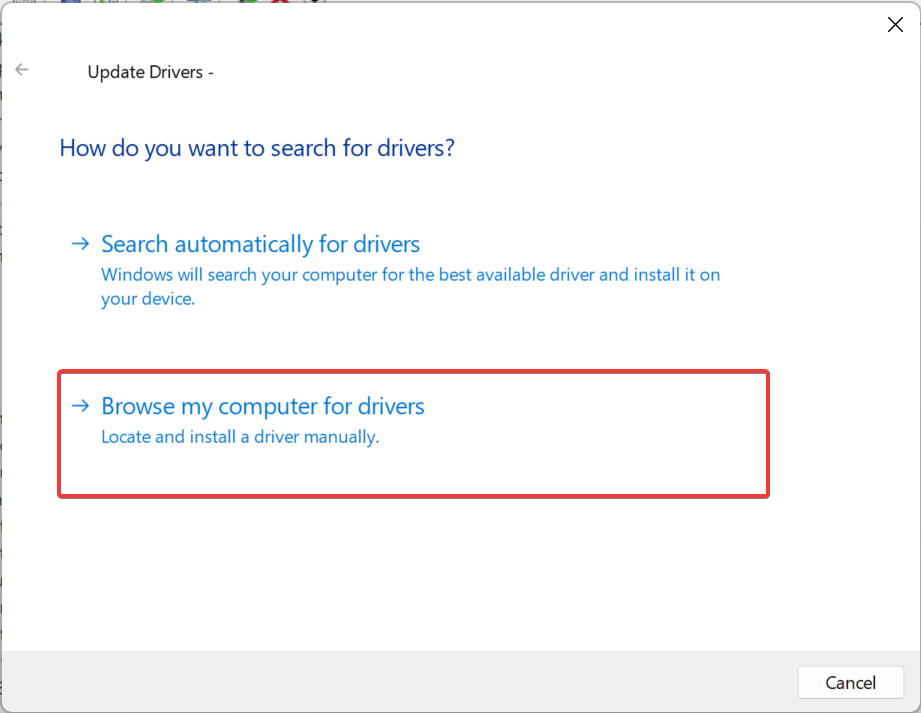
- If this doesn't work, go to Driver Update again and this time, select Browse my computer for driver.
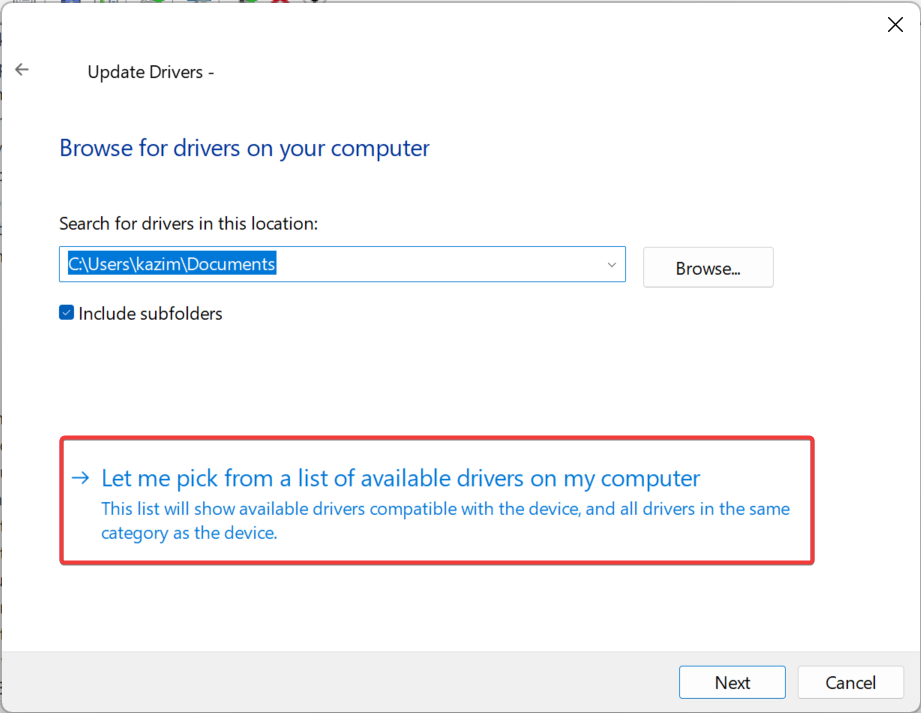
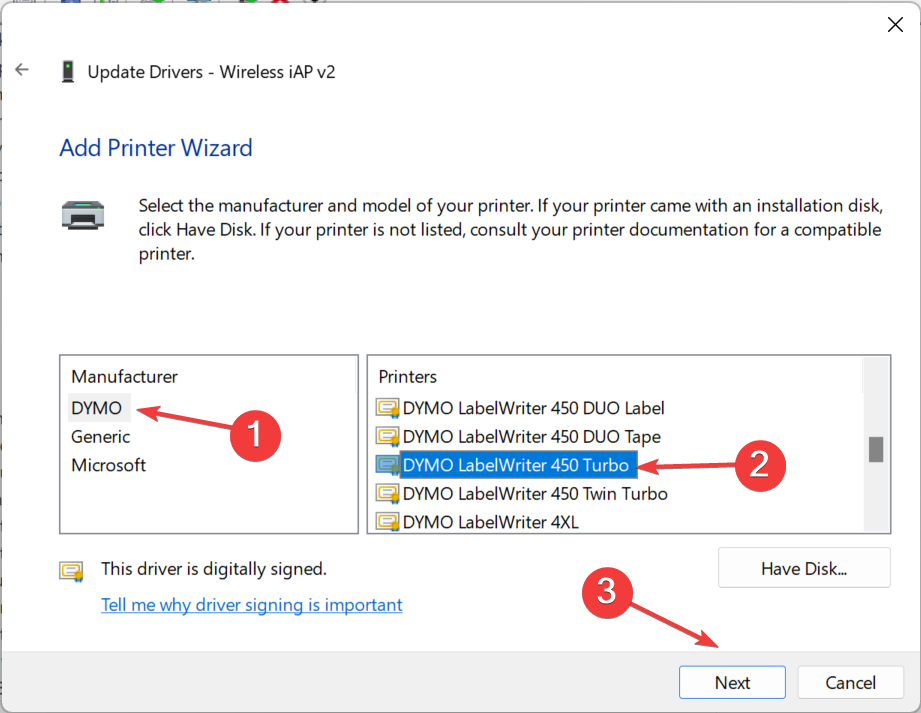
- Click Let MeSelect from a list of available drivers on your computer.
- If a list of devices is displayed, select Printers and click Next.
- Select DYMO from the left pane, then select your printer model from the right and click Next.
- After installing the printer driver, restart your computer for the changes to take effect.
If you are experiencing device issues, such as Dymo printing black marks, an easy solution is to install the latest printer driver. Make sure you choose the correct model, as incompatible drivers may cause your device to malfunction.
3. Use a Driver Update Utility
Many of us don’t feel comfortable with manual driver installation, which makes sense as any mistake here could cause the device to fail Use, even temporarily.
This is where the automatic driver update tool comes in. The best ones automatically identify all connected devices, find the latest driver versions for each, and then download them.
Will the Windows 10 printer driver run on Windows 11?
We cannot generalize. For some printers, drivers from Windows 10 will work on Windows 11, but for others, they won't. So it comes down to the specific model, your PC's hardware, and other changes during the upgrade.
For example, early after the latest version was released, Brother printers connected via USB did not work properly, but the issue was resolved in subsequent updates.
You now know that Dymo printer driver download in Windows 11 is not that complicated. The best part is that you can install printer drivers without administrative rights.
In the unlikely event that your printer stops working, please uninstall recent operating system updates, run a dedicated troubleshooter or install the latest drivers!
The above is the detailed content of DYMO Driver for Windows 11: How to Download and Install. For more information, please follow other related articles on the PHP Chinese website!
Hot AI Tools

Undresser.AI Undress
AI-powered app for creating realistic nude photos

AI Clothes Remover
Online AI tool for removing clothes from photos.

Undress AI Tool
Undress images for free

Clothoff.io
AI clothes remover

Video Face Swap
Swap faces in any video effortlessly with our completely free AI face swap tool!
Hot Article
Hot Tools

Notepad++7.3.1
Easy-to-use and free code editor

SublimeText3 Chinese version
Chinese version, very easy to use

Zend Studio 13.0.1
Powerful PHP integrated development environment

Dreamweaver CS6
Visual web development tools

SublimeText3 Mac version
God-level code editing software (SublimeText3)
Hot Topics
 1393
1393
 52
1205
24
52
1205
24

 How to make Google Maps the default map in iPhone
Apr 17, 2024 pm 07:34 PM
How to make Google Maps the default map in iPhone
Apr 17, 2024 pm 07:34 PM
The default map on the iPhone is Maps, Apple's proprietary geolocation provider. Although the map is getting better, it doesn't work well outside the United States. It has nothing to offer compared to Google Maps. In this article, we discuss the feasible steps to use Google Maps to become the default map on your iPhone. How to Make Google Maps the Default Map in iPhone Setting Google Maps as the default map app on your phone is easier than you think. Follow the steps below – Prerequisite steps – You must have Gmail installed on your phone. Step 1 – Open the AppStore. Step 2 – Search for “Gmail”. Step 3 – Click next to Gmail app
 Does Logitech ghub driver not support win7? -Why can Logitech ghub driver only be installed on the c drive?
Mar 18, 2024 pm 05:37 PM
Does Logitech ghub driver not support win7? -Why can Logitech ghub driver only be installed on the c drive?
Mar 18, 2024 pm 05:37 PM
Does Logitech ghub driver not support win7? Not compatible. Since Windows 7 has stopped updating and is no longer Microsoft's main operating system, many new software no longer supports it, such as Logitech ghub. The main interface of the Logitech driver: 1. The main software interface is on the left. The three buttons are lighting, buttons, and sensitivity settings. 2. In the settings of the lighting interface, the general special effects are relatively conventional, and the audio visual effects are the highlight. They can change color according to the sound frequency, and can be set according to the high, middle and bass bands, with different colors and effects. 3. In button settings, users can edit them here according to their special requirements. 4. In the sensitivity settings, many users will have some of their own settings. They can add the DPI speed switching point by themselves, but
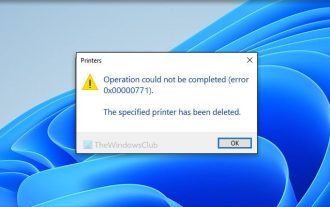 Unable to complete operation (Error 0x0000771) Printer error
Mar 16, 2024 pm 03:50 PM
Unable to complete operation (Error 0x0000771) Printer error
Mar 16, 2024 pm 03:50 PM
If you encounter an error message when using your printer, such as the operation could not be completed (error 0x00000771), it may be because the printer has been disconnected. In this case, you can solve the problem through the following methods. In this article, we will discuss how to fix this issue on Windows 11/10 PC. The entire error message says: The operation could not be completed (error 0x0000771). The specified printer has been deleted. Fix 0x00000771 Printer Error on Windows PC To fix Printer Error the operation could not be completed (Error 0x0000771), the specified printer has been deleted on Windows 11/10 PC, follow this solution: Restart Print Spool
 Steps to restore Logitech driver to default configuration
Feb 28, 2024 am 11:04 AM
Steps to restore Logitech driver to default configuration
Feb 28, 2024 am 11:04 AM
Facing the Logitech driver that cannot be used normally, it can only be solved by restoring the factory settings. However, many friends do not know how to restore the factory settings. The following will provide you with detailed steps to restore the factory settings. I hope it can help you. Steps to restore the Logitech driver to the default configuration: 1. First download the Logitech dedicated driver software GHub, and open it after the download is complete. 2. Then open the mouse to set up, and click the settings (gear) in the upper right corner. 3. At the bottom, click "Restore default settings" , click directly and reopen the software to restore factory settings. How to connect the Logitech driver to the device 1. Open the back cover of the mouse and take out the wireless mouse socket. 2. Select the mouse socket next to the computer. 3. Set the corresponding parameter information for the mouse. 4. Bluetooth pair the device and long press Bluetooth.
 What should I do if WPS cannot start the printer job?
Mar 20, 2024 am 08:20 AM
What should I do if WPS cannot start the printer job?
Mar 20, 2024 am 08:20 AM
We can use office software to produce various electronic documents. Electronic documents greatly save the use of paper and are easier to save and read. However, sometimes according to work requirements, superiors require printing out paper documents for everyone to circulate. Document writing It's fine but unable to print. It's very difficult to encounter such a situation. The course we brought today can solve this problem. The following lesson is: What should I do if WPS cannot start the printer job? When trying to print a document using a LAN printer, a problem occurred, saying "WPSOffice cannot start the print job. Please check whether the printer is turned on and online." But in fact, the printer is powered on and online. 2. Click "OK", then click on the upper left corner of the title bar as shown in the picture
 Lenovo Xiaoxin Panda Pro Panda Printer Pro goes on sale on May 6: black and white laser printing, built-in learning resources, 999 yuan
May 01, 2024 am 08:46 AM
Lenovo Xiaoxin Panda Pro Panda Printer Pro goes on sale on May 6: black and white laser printing, built-in learning resources, 999 yuan
May 01, 2024 am 08:46 AM
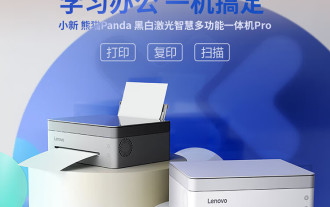
According to news from this site on April 30, Lenovo Xiaoxin PandaPro Panda Printer Pro is now available on JD.com. This printer will go on sale on May 6. It supports black and white laser printing, has an optional two-color body, and has built-in learning resources. The initial price is 999. Yuan. Lenovo Xiaoxin Panda Printer Pro measures 350x275x141mm and is available in two color options: Xiling White and Qingcheng Gray. This printer supports 2.4GHz/5GHz dual-band Wi-Fi, USB wired and other connection methods. It can print with one click after being configured with the network, and can also achieve NFC one-touch printing. Xiaoxin Panda Printer Pro supports black and white laser printing and can print 22 pages per minute. In addition to printing functions, this model also supports copying and scanning functions, with a color scanning resolution of 4800d.
 How to download Razer mouse driver
Mar 11, 2024 pm 03:40 PM
How to download Razer mouse driver
Mar 11, 2024 pm 03:40 PM
Steps to download the Razer mouse driver: 1. Open the browser and enter the Razer official website; 2. On the official website page, find and click "Technical Support" or a similar option; 3. On the technical support page, select "Mouse" or the specific subcategory; 4. On the mouse driver download page, you can see various mouse models and their corresponding drivers; 5. Click the download link for the selected driver; 6. After the download is completed, check whether the downloaded file is complete , make sure nothing is damaged or missing.
 Clock app missing in iPhone: How to fix it
May 03, 2024 pm 09:19 PM
Clock app missing in iPhone: How to fix it
May 03, 2024 pm 09:19 PM
Is the clock app missing from your phone? The date and time will still appear on your iPhone's status bar. However, without the Clock app, you won’t be able to use world clock, stopwatch, alarm clock, and many other features. Therefore, fixing missing clock app should be at the top of your to-do list. These solutions can help you resolve this issue. Fix 1 – Place the Clock App If you mistakenly removed the Clock app from your home screen, you can put the Clock app back in its place. Step 1 – Unlock your iPhone and start swiping to the left until you reach the App Library page. Step 2 – Next, search for “clock” in the search box. Step 3 – When you see “Clock” below in the search results, press and hold it and