

How to use the Hyperf framework for environment configuration management


How to use the Hyperf framework for environment configuration management
With the development of business, the environment configuration management of applications has become more and more important. Good configuration management makes it easy to switch between environments and avoids hardcoding sensitive information. The Hyperf framework is a high-performance microservice framework based on Swoole and PHP7. It provides a powerful environment configuration management mechanism that can easily manage the configuration of different environments.
This article will introduce how to use the Hyperf framework for environment configuration management and provide specific code examples.
1. Preparation
First, we need to install the Hyperf framework. It can be installed through Composer:
composer require hyperf/hyperf
After the installation is complete, we can create a new Hyperf project.
2. Configuration file
The Hyperf framework uses the .env file as the configuration file, in which we can define the configuration of different environments. Create an .env file in the root directory with the following content:
APP_NAME=Hyperf
APP_ENV=dev
APP_DEBUG=true

DB_HOST=127.0.0.1
DB_PORT=3306
DB_USERNAME=root
DB_PASSWORD=123456
DB_DATABASE=hyperf
This defines the application name (APP_NAME), operating environment (APP_ENV), database connection information and other configurations. These configurations can be modified according to different environments.
3. Environment Configuration Class
In the Hyperf framework, we can use the Environment class to manage environment configuration. First, we need to create an Environment class, inherit from HyperfContractStdoutLoggerInterface, and implement the HyperfContractStdoutLoggerInterface interface. For example, we can create an Environment class in the app/Service directory with the following content:
<?php

namespace AppService;

use PsrContainerContainerInterface;
use HyperfContractStdoutLoggerInterface;

class Environment implements StdoutLoggerInterface
{
    protected $container;

    public function __construct(ContainerInterface $container)
    {
        $this->container = $container;
    }

    public function output($messages, $type = self::INFO)
    {
        // 输出日志到控制台
    }

    public function get($key, $default = null)
    {
        // 获取环境变量值
        return env($key, $default);
    }
}In this class, we use PsrContainerContainerInterface to obtain the application container instance. The Environment class implements the output log method (output) and the method of obtaining the environment variable value (get). Among them, the method of obtaining the environment variable value uses the env() function, which can obtain the configuration in the .env file.
4. Configuration registration
Next, we need to register the Environment class into the Hyperf container. Open the config/autoload/di.php file and add the following code:
return [
    // ...

    HyperfContractStdoutLoggerInterface::class => function () {
        return new AppServiceEnvironment(HyperfUtilsApplicationContext::getContainer());
    },
];In this way, the Environment class will be registered to the Hyperf container and we can use it elsewhere.
5. Using configuration
Now, we can use the configuration defined in the .env file in the code. Taking database connection as an example, we can use the following code in a controller or other service class to obtain the configuration:
<?php

namespace AppController;

use HyperfDiAnnotationInject;
use HyperfContractStdoutLoggerInterface;

class IndexController extends AbstractController
{
    /**
     * @Inject
     * @var StdoutLoggerInterface
     */
    protected $environment;

    public function index()
    {
        $dbHost = $this->environment->get('DB_HOST');
        $dbPort = $this->environment->get('DB_PORT');
        $dbUsername = $this->environment->get('DB_USERNAME');
        $dbPassword = $this->environment->get('DB_PASSWORD');
        $dbDatabase = $this->environment->get('DB_DATABASE');

        // 使用数据库配置进行连接
    }
}In this way, we can use the get method of the Environment class to obtain the configuration defined in the .env file, and used in the code.
6. Switch environment
During development and deployment, we need to switch to different environments. The Hyperf framework provides configurations for different environments and defines the APP_ENV variable in the .env file. We can switch the configuration of different environments by modifying the APP_ENV variable in the .env file.
For example, we can change .APP_ENV=dev to APP_ENV=prod to switch to the production environment. Then restart the Hyperf service to load the configuration of the production environment.
Summary:
Through the environment configuration management mechanism of the Hyperf framework, we can easily manage the configuration of different environments and avoid the problem of hard-coding sensitive information. Just define different environment configurations in the .env file, and then use the Environment class to get the configuration. This environment configuration management method is very useful during the development and deployment process, and can greatly improve the flexibility and maintainability of the application.
The above is an introduction and sample code for using the Hyperf framework for environment configuration management. I hope it will be helpful to everyone.
The above is the detailed content of How to use the Hyperf framework for environment configuration management. For more information, please follow other related articles on the PHP Chinese website!

Hot AI Tools

Undresser.AI Undress
AI-powered app for creating realistic nude photos

AI Clothes Remover
Online AI tool for removing clothes from photos.

Undress AI Tool
Undress images for free

Clothoff.io
AI clothes remover

Video Face Swap
Swap faces in any video effortlessly with our completely free AI face swap tool!

Hot Article
Hot Tools

Notepad++7.3.1
Easy-to-use and free code editor

SublimeText3 Chinese version
Chinese version, very easy to use

Zend Studio 13.0.1
Powerful PHP integrated development environment

Dreamweaver CS6
Visual web development tools

SublimeText3 Mac version
God-level code editing software (SublimeText3)
Hot Topics
 1386
1386
 52
52

 How to use DirectX repair tool? Detailed usage of DirectX repair tool
Mar 15, 2024 am 08:31 AM
How to use DirectX repair tool? Detailed usage of DirectX repair tool
Mar 15, 2024 am 08:31 AM
The DirectX repair tool is a professional system tool. Its main function is to detect the DirectX status of the current system. If an abnormality is found, it can be repaired directly. There may be many users who don’t know how to use the DirectX repair tool. Let’s take a look at the detailed tutorial below. 1. Use repair tool software to perform repair detection. 2. If it prompts that there is an abnormal problem in the C++ component after the repair is completed, please click the Cancel button, and then click the Tools menu bar. 3. Click the Options button, select the extension, and click the Start Extension button. 4. After the expansion is completed, re-detect and repair it. 5. If the problem is still not solved after the repair tool operation is completed, you can try to uninstall and reinstall the program that reported the error.
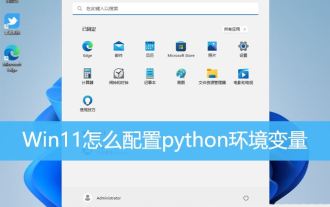 How to configure python environment variables in Win11? Tips for adding environment variables in win11python
Feb 29, 2024 pm 04:30 PM
How to configure python environment variables in Win11? Tips for adding environment variables in win11python
Feb 29, 2024 pm 04:30 PM
Win11 system is the latest Windows operating system, and users may encounter some configuration problems when using it. Among them, configuring Python environment variables is a common requirement because it allows users to easily use Python commands from any location. This article will introduce how to configure Python environment variables in Win11 system so that users can use the Python programming language more conveniently. 1. [Right-click] this computer on the desktop, and select [Properties] in the menu item that opens; 2. Then, under related links, find and click [Advanced System Settings]; 3. In the system properties window, click [Environment] at the bottom Variables]; 4. In the environment variables window, under system variables, select [Path], and then click
 Introduction to HTTP 525 status code: explore its definition and application
Feb 18, 2024 pm 10:12 PM
Introduction to HTTP 525 status code: explore its definition and application
Feb 18, 2024 pm 10:12 PM
Introduction to HTTP 525 status code: Understand its definition and usage HTTP (HypertextTransferProtocol) 525 status code means that an error occurred on the server during the SSL handshake, resulting in the inability to establish a secure connection. The server returns this status code when an error occurs during the Transport Layer Security (TLS) handshake. This status code falls into the server error category and usually indicates a server configuration or setup problem. When the client tries to connect to the server via HTTPS, the server has no
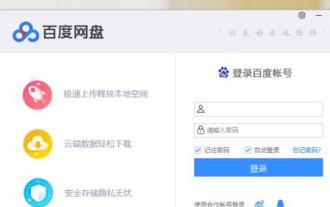 How to use Baidu Netdisk-How to use Baidu Netdisk
Mar 04, 2024 pm 09:28 PM
How to use Baidu Netdisk-How to use Baidu Netdisk
Mar 04, 2024 pm 09:28 PM
Many friends still don’t know how to use Baidu Netdisk, so the editor will explain how to use Baidu Netdisk below. If you are in need, hurry up and take a look. I believe it will be helpful to everyone. Step 1: Log in directly after installing Baidu Netdisk (as shown in the picture); Step 2: Then select "My Sharing" and "Transfer List" according to the page prompts (as shown in the picture); Step 3: In "Friend Sharing", you can share pictures and files directly with friends (as shown in the picture); Step 4: Then select "Share" and then select computer files or network disk files (as shown in the picture); Fifth Step 1: Then you can find friends (as shown in the picture); Step 6: You can also find the functions you need in the "Function Treasure Box" (as shown in the picture). The above is the editor’s opinion
 Learn to copy and paste quickly
Feb 18, 2024 pm 03:25 PM
Learn to copy and paste quickly
Feb 18, 2024 pm 03:25 PM
How to use the copy-paste shortcut keys Copy-paste is an operation we often encounter when using computers every day. In order to improve work efficiency, it is very important to master the copy and paste shortcut keys. This article will introduce some commonly used copy and paste shortcut keys to help readers perform copy and paste operations more conveniently. Copy shortcut key: Ctrl+CCtrl+C is the shortcut key for copying. By holding down the Ctrl key and then pressing the C key, you can copy the selected text, files, pictures, etc. to the clipboard. To use this shortcut key,
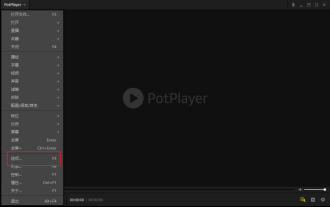 How to use potplayer-How to use potplayer
Mar 04, 2024 pm 06:10 PM
How to use potplayer-How to use potplayer
Mar 04, 2024 pm 06:10 PM
Potplayer is a very powerful media player, but many friends still don’t know how to use potplayer. Today I will introduce how to use potplayer in detail, hoping to help everyone. 1. PotPlayer shortcut keys. The default common shortcut keys for PotPlayer player are as follows: (1) Play/pause: space (2) Volume: mouse wheel, up and down arrow keys (3) forward/backward: left and right arrow keys (4) bookmark: P- Add bookmarks, H-view bookmarks (5) full screen/restore: Enter (6) multiple speeds: C-accelerate, 7) Previous/next frame: D/
 What is the KMS activation tool? How to use the KMS activation tool? How to use KMS activation tool?
Mar 18, 2024 am 11:07 AM
What is the KMS activation tool? How to use the KMS activation tool? How to use KMS activation tool?
Mar 18, 2024 am 11:07 AM
The KMS Activation Tool is a software tool used to activate Microsoft Windows and Office products. KMS is the abbreviation of KeyManagementService, which is key management service. The KMS activation tool simulates the functions of the KMS server so that the computer can connect to the virtual KMS server to activate Windows and Office products. The KMS activation tool is small in size and powerful in function. It can be permanently activated with one click. It can activate any version of the window system and any version of Office software without being connected to the Internet. It is currently the most successful and frequently updated Windows activation tool. Today I will introduce it Let me introduce to you the kms activation work
 How to merge cells using shortcut keys
Feb 26, 2024 am 10:27 AM
How to merge cells using shortcut keys
Feb 26, 2024 am 10:27 AM
How to use the shortcut keys for merging cells In daily work, we often need to edit and format tables. Merging cells is a common operation that can merge multiple adjacent cells into one cell to improve the beauty of the table and the information display effect. In mainstream spreadsheet software such as Microsoft Excel and Google Sheets, the operation of merging cells is very simple and can be achieved through shortcut keys. The following will introduce the shortcut key usage for merging cells in these two software. exist
