

How to install pandas library

Installation method of pandas library: 1. Use pip to install Pandas; 2. Use conda to install Pandas; 3. Use Python integrated development environment; 4. Use Anaconda Navigator; 5. Use Python package manager easy_install to install Pandas . Detailed introduction: 1. Use pip to install Pandas. pip is a package management tool for Python. It is usually installed with Python. You can use pip and so on.

The operating system for this tutorial: Windows 10 system, DELL G3 computer.
Installing the Pandas library is an important step for data analysis and processing, because Pandas provides rich data structures and data analysis tools, making data operations easier and more efficient. Before you start using Pandas, you need to install it into your Python environment. This article will detail the different ways on how to install the Pandas library.
Method 1: Use pip to install Pandas
Pip is a package management tool for Python and is usually installed with Python. You can use pip to install Pandas. Here are the steps to install Pandas via pip:
Step 1: Open Terminal or Command Prompt
First, open Terminal (Linux and macOS) or Command Prompt (Windows ).
Step 2: Run the installation command
In a terminal or command prompt, enter the following command to install Pandas:
pip install pandas
If you are using the Python 3.x version, You can use the following command:
pip3 install pandas
After running the above command, pip will download Pandas from the Python software repository (PyPI) and install it into your Python environment.
Step 3: Verify Pandas installation
After the installation is complete, you can verify whether Pandas was successfully installed. In a terminal or command prompt, enter the following command to open the Python interpreter:
python
or if you are using Python 3.x:
python3
Then try importing in the Python interpreter Pandas:
import pandas as pd
If no error message appears, Pandas has been successfully installed. You can now start using Pandas for data analysis and processing in Python.
Method 2: Use conda to install Pandas
conda is a popular environment management and package management tool, usually used in conjunction with Anaconda or Miniconda. If you use Anaconda or Miniconda, you can use conda to install Pandas. Here are the steps to install Pandas via conda:
Step 1: Open the Terminal or Anaconda/Miniconda environment
First, open the Terminal (Linux and macOS) or Anaconda/Miniconda environment on your computer .
Step 2: Run the installation command
In the terminal or Anaconda/Miniconda environment, enter the following command to install Pandas:
conda install pandas
After running the above command, conda will start from The Conda repository downloads Pandas and installs it into your environment.
Step 3: Verify Pandas installation
After the installation is complete, you can verify whether Pandas was successfully installed. In the terminal, enter the following command to open the Python interpreter:
python
Or if you are using Python 3.x:
bashCopy codepython3
Then try importing Pandas in the Python interpreter:
import pandas as pd
If no error message appears, Pandas has been successfully installed. You can now start using Pandas for data analysis and processing in an Anaconda/Miniconda environment.
Method 3: Use Python integrated development environment (IDE)
If you are using a Python integrated development environment (such as Jupyter Notebook, PyCharm, VSCode, etc.), you can use the integrated terminal of the IDE Use pip or conda to install Pandas. The following are the steps to install Pandas through the integrated development environment (taking Jupyter Notebook as an example):
Step 1: Open Jupyter Notebook
First, open Jupyter Notebook (if it is already installed) or your favorite Python integrated development environment.
Step 2: Create a new Notebook or Python script
In Jupyter Notebook, you can create a new Notebook or create a new code unit in an existing Notebook.
Step 3: Run the installation command
In the code unit, enter the following command to install Pandas using pip:
!pip install pandas
Or use conda to install Pandas (if you are using Anaconda or Miniconda):
!conda install pandas
Then run the code unit and the installation will take place in the Notebook.
Step 4: Verify Pandas installation
In Notebook, create a new code unit and try to import Pandas in it:
import pandas as pd
If no error message appears, explain Pandas has been installed successfully. You can now use Pandas in Jupyter Notebook for data analysis and processing.
Method 4: Use Anaconda Navigator
If you use Anaconda or Miniconda, you can use Anaconda Navigator to install Pandas. Here are the steps to install Pandas via Anaconda Navigator:
Step 1: Open Anaconda Navigator
First, open Anaconda Navigator.
Step 2: Create or select an environment
In Anaconda Navigator, you can create a new environment or select an existing environment.
Step 3: Select environment and open terminal
在环境管理界面中,选择你要使用的环境,然后在右侧点击“打开终端”以打开终端窗口。
步骤 4:运行安装命令
在终端中,输入以下命令来使用 conda 安装 Pandas:
conda install pandas
运行上述命令后,conda 将会从 Conda 软件仓库下载 Pandas 并将其安装到选定的环境中。
步骤 5:验证 Pandas 安装
安装完成后,你可以验证 Pandas 是否成功安装。在终端中,输入以下命令来打开 Python 解释器:
python
或者如果你使用的是 Python 3.x:
python3
然后在 Python 解释器中尝试导入 Pandas:
import pandas as pd
如果没有出现错误提示,说明 Pandas 已经成功安装。你现在可以在选定的 Anaconda 环境中使用 Pandas 进行数据分析和处理。
方法五:使用 Python 包管理器 easy_install 安装 Pandas(不推荐)
虽然easy_install是 Python 的另一种包管理工具,但它在安装 Pandas 方面不如 pip 和 conda 方便,因此不推荐使用。如果你仍然希望使用 easy_install,你可以按照以下步骤安装 Pandas:
步骤 1:打开终端或命令提示符
首先,打开你的计算机上的终端(Linux 和 macOS)或命令提示符(Windows)。
步骤 2:运行安装命令
在终端或命令提示符中,输入以下命令来使用 easy_install 安装 Pandas:
easy_install pandas
运行上述命令后,easy_install 将会从 Python 软件仓库(PyPI)下载 Pandas 并将其安装到你的 Python 环境中。
步骤 3:验证 Pandas 安装
安装完成后,你可以验证 Pandas 是否成功安装。在终端或命令提示符中,输入以下命令来打开 Python 解释器:
python
或者如果你使用的是 Python 3.x:
python3
然后在 Python 解释器中尝试导入 Pandas:
import pandas as pd
如果没有出现错误提示,说明 Pandas 已经成功安装。你现在可以开始在 Python 中使用 Pandas 进行数据分析和处理。不过,由于 easy_install 的不足之处,建议使用 pip 或 conda 来安装 Pandas。
验证 Pandas 安装的示例
以下是一个简单的示例,用于验证 Pandas 是否成功安装并运行。你可以在 Python 解释器中执行以下代码:
import pandas as pd# 创建一个简单的数据帧(DataFrame)data = {'Name': ['Alice', 'Bob', 'Charlie', 'David'],        'Age': [25, 30, 35, 40]}

df = pd.DataFrame(data)# 打印数据帧的内容print(df)如果运行这段代码没有出现错误,并且成功打印了数据帧的内容,那么 Pandas 已经正确安装和配置。
注意事项和建议
虚拟环境(Virtual Environment):为了避免不同项目之间的依赖冲突,建议在项目目录中使用虚拟环境来管理依赖和包。你可以使用 Python 的 venv、virtualenv、conda 等工具来创建虚拟环境。
升级 Pandas:如果你已经安装了 Pandas,但想要升级到最新版本,可以使用 pip 或 conda 提供的升级命令,例如 pip install --upgrade pandas 或 conda update pandas。
查看 Pandas 文档:Pandas 提供了详细的文档,包括教程和示例。你可以访问 Pandas 官方网站
学习 Pandas:Pandas 是一个功能强大的库,可以进行复杂的数据分析和操作。建议你学习 Pandas 的基本用法和高级功能,以充分利用它的潜力。
总之,安装 Pandas 是进行数据分析和数据处理的重要步骤。根据你的需求和偏好,你可以选择使用 pip、conda、集成开发环境或其他方法来安装 Pandas。随着你深入学习和使用 Pandas,它将成为你处理数据的有力工具,为数据科学和分析提供支持。
The above is the detailed content of How to install pandas library. For more information, please follow other related articles on the PHP Chinese website!

Hot AI Tools

Undresser.AI Undress
AI-powered app for creating realistic nude photos

AI Clothes Remover
Online AI tool for removing clothes from photos.

Undress AI Tool
Undress images for free

Clothoff.io
AI clothes remover

AI Hentai Generator
Generate AI Hentai for free.

Hot Article
Hot Tools

Notepad++7.3.1
Easy-to-use and free code editor

SublimeText3 Chinese version
Chinese version, very easy to use

Zend Studio 13.0.1
Powerful PHP integrated development environment

Dreamweaver CS6
Visual web development tools

SublimeText3 Mac version
God-level code editing software (SublimeText3)
Hot Topics


 deepseek web version official entrance
Mar 12, 2025 pm 01:42 PM
deepseek web version official entrance
Mar 12, 2025 pm 01:42 PM
The domestic AI dark horse DeepSeek has risen strongly, shocking the global AI industry! This Chinese artificial intelligence company, which has only been established for a year and a half, has won wide praise from global users for its free and open source mockups, DeepSeek-V3 and DeepSeek-R1. DeepSeek-R1 is now fully launched, with performance comparable to the official version of OpenAIo1! You can experience its powerful functions on the web page, APP and API interface. Download method: Supports iOS and Android systems, users can download it through the app store; the web version has also been officially opened! DeepSeek web version official entrance: ht
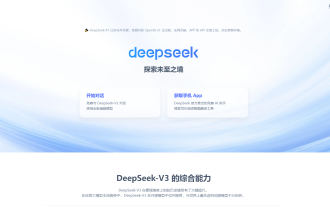
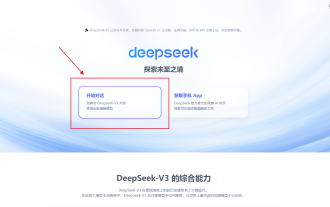 In-depth search deepseek official website entrance
Mar 12, 2025 pm 01:33 PM
In-depth search deepseek official website entrance
Mar 12, 2025 pm 01:33 PM
At the beginning of 2025, domestic AI "deepseek" made a stunning debut! This free and open source AI model has a performance comparable to the official version of OpenAI's o1, and has been fully launched on the web side, APP and API, supporting multi-terminal use of iOS, Android and web versions. In-depth search of deepseek official website and usage guide: official website address: https://www.deepseek.com/Using steps for web version: Click the link above to enter deepseek official website. Click the "Start Conversation" button on the homepage. For the first use, you need to log in with your mobile phone verification code. After logging in, you can enter the dialogue interface. deepseek is powerful, can write code, read file, and create code
 How to solve the problem of busy servers for deepseek
Mar 12, 2025 pm 01:39 PM
How to solve the problem of busy servers for deepseek
Mar 12, 2025 pm 01:39 PM
DeepSeek: How to deal with the popular AI that is congested with servers? As a hot AI in 2025, DeepSeek is free and open source and has a performance comparable to the official version of OpenAIo1, which shows its popularity. However, high concurrency also brings the problem of server busyness. This article will analyze the reasons and provide coping strategies. DeepSeek web version entrance: https://www.deepseek.com/DeepSeek server busy reason: High concurrent access: DeepSeek's free and powerful features attract a large number of users to use at the same time, resulting in excessive server load. Cyber Attack: It is reported that DeepSeek has an impact on the US financial industry.