
 Web Front-end
H5 Tutorial
Overview and examples of capturing audio and video information using HTML5_html5 tutorial tips
Web Front-end
H5 Tutorial
Overview and examples of capturing audio and video information using HTML5_html5 tutorial tips
Overview and examples of capturing audio and video information using HTML5_html5 tutorial tips

Capturing audio and video information has long been a difficulty in Web development. For many years, we have relied on browser plug-ins to fulfill this need.
In HTML 5, there are many APIs that can access hardware devices, such as Geolocation API to access GPS devices, Orientation API to access accelerometer devices, WebGL API to access GPU devices, Web Audio API to access audio playback devices, etc. . These APIs are very powerful because developers can directly access the underlying hardware devices by writing JavaScript script code.
This article introduces a new API that allows web applications to have the ability to access the user's camera and microphone devices by using the navigatior.getUserMedia() method.
History of technology development for capturing media data
In the past few years, the need to access client local devices in web applications began to emerge, so the W3C organization decided to organize A DAP (Device APIS POLICY) working group to develop a unified standard for the realization of this requirement.
Let’s take a look at what happened in 2011:
Capturing media data in HTML page files
The first standard to be developed by the DAP working group is how Capture media data in HTML pages of web applications. They decided to overload the input element of type file () and add a new attribute value to the accept attribute.
If the developer wants to implement the function of users taking pictures through the camera, they can write the code as shown below.
The code for recording video data and audio data is similar:
< input type="file" accept="audio/*;capture=microphone">
In these codes, just use the file control (input element of type file) to complete the photo taking or the ability to record media data. However, because these codes still lack the ability to implement some related requirements (such as rendering captured video data in canvas elements, or applying WEBGL filters to captured video data), they have not been widely used by developers. application.
Supported browsers:
Android 3.0 browser
Chrome for Android (0.16)
Firefox Mobile 10.0
device element
If you use the file control, capture the media data and process it Processing capabilities are very limited, so a new standard emerged that could support any device. This standard uses the device element.
Opera browser is the first browser to capture video data through the device element. Almost on the same day, the WhatWG organization decided to use the navigator.getUserMedia() method to capture media data. A week later, Opera launched a new browser that supports the navigator.getUserMedia() method. Later, Microsoft Tools launched the IE 9 browser that supports this method. The usage of
device element is as follows.
<script> <br>function update(stream) { <br>document. querySelector('video').src = stream.url; <br>} <br></script>
Supported browsers:
Unfortunately, no official version of the browser supports the device element so far.
WEBRTC
Recently, due to the emergence of WebRTC (Web Real Time Communication: Web real-time communication) API, media data capture technology has made great progress. Google, Opera, Mozilla and other companies are working hard to implement it in their browsers.
WebRTC API is an API closely related to the getUserMedia method, which provides the ability to access the client's local camera or microphone device.
Supported browsers:
So far, in the Chrome 18 version of the browser, WebRTC can be used after setting it in the chrome://flags page. In the Chrome 21 version of the browser, this API is used by default. , no more settings required. The WebRTC API is supported by default in browsers above Opera 12 and Firefox 17.
Using the getUserMedia method
By using the getUserMedia method, we can directly access the client's local camera device and microphone device without relying on plug-ins.
Detecting browser support
You can use the method shown below to detect whether the browser supports the getUserMedia method.
function hasGetUserMedia() {
/ /Please note: The prefix
return is not used in Opera browser!!(navigator.getUserMedia || navigator.webkitGetUserMedia ||
navigator.mozGetUserMedia || navigator.msGetUserMedia);
}
if (hasGetUserMedia()) {
alert('Your browser supports the getUserMedia method');
}
else {
alert('Your browser does not support the getUserMedia method');
}
Get permission to access the device
In order to access the client camera device and microphone device, we first need to obtain permission. The first parameter of the getUserMedia method is an object specifying the media type. For example, when you want to access the camera device, the first parameter should be {video:true}. In order to access the camera device and microphone device at the same time, you need to use the {video:true,audio:true} parameters. The code is as follows:
In this code, the use of video elements is combined. Please note that we do not use the src attribute value of the video element, but specify a URL address that refers to the media file for the video element, and convert the LocalMediaStream object representing the video data obtained from the camera into a Blob URL.
In this code, the autoplay attribute is also used for the video element. If this attribute is not used, the video element will stay at the first frame obtained.
Please note: In the Chrome browser, if you only use {audio:true}, a BUG will occur. In the Opera browser, the audio element cannot be used either.
If you want multiple browsers to support the getUserMedia method at the same time, please use the code as shown below:
window.URL = window.URL || window.webkitURL;
navigator.getUserMedia = navigator.getUserMedia || navigator.webkitGetUserMedia ||
navigator. mozGetUserMedia || navigator.msGetUserMedia;
var video = document.getElementById('video');
if (navigator.getUserMedia) {
navigator.getUserMedia({audio: true, video: true}, function (stream) {
video.src = window.URL.createObjectURL(stream);
}, onFailSoHard);
}
else {
alert('Your browser does not support getUserMedia Method');
}
Security
In some browsers, when the getUserMedia method is called, a prompt window is displayed asking the user whether to allow or deny access to their camera or microphone.
Take photos
In the Canvas API, you can use the ctx.drawImage(video,0,0) method to output a certain frame in the video element to the canvas element. Of course, since we have output the captured image information from the user's camera to the video element, of course, we can also output the image information to the canvas element through the video element, that is, to realize the real-time photo taking function. The code is as follows.
Apply CSS Filters
So far, CSS filters can be used in Chrome 18 and above browsers.
Through the use of CSS filters, we can add various image filter effects to the video captured in the video element.
<script> <br>var idx = 0; <br>var filters = ['grayscale', 'sepia', 'blur', 'brightness', 'contrast', 'hue-rotate', <br>'hue-rotate2', ' hue-rotate3', 'saturate', 'invert', '']; <br>function changeFilter(e) { <br>var el = e.target; <br>el.className = ''; <br>var effect = filters[idx % filters.length]; // loop through filters. <br>if (effect) { <br>el.classList.add(effect); <br>} <br>} <br>document. getElementById('video').addEventListener('click', changeFilter, false); <br></script>

Hot AI Tools

Undresser.AI Undress
AI-powered app for creating realistic nude photos

AI Clothes Remover
Online AI tool for removing clothes from photos.

Undress AI Tool
Undress images for free

Clothoff.io
AI clothes remover

Video Face Swap
Swap faces in any video effortlessly with our completely free AI face swap tool!

Hot Article
Hot Tools

Notepad++7.3.1
Easy-to-use and free code editor

SublimeText3 Chinese version
Chinese version, very easy to use

Zend Studio 13.0.1
Powerful PHP integrated development environment

Dreamweaver CS6
Visual web development tools

SublimeText3 Mac version
God-level code editing software (SublimeText3)
Hot Topics
 1393
1393
 52
1209
24
52
1209
24

 How to adjust audio balance in Win11? (Win11 adjusts the left and right channels of volume)
Feb 11, 2024 pm 05:57 PM
How to adjust audio balance in Win11? (Win11 adjusts the left and right channels of volume)
Feb 11, 2024 pm 05:57 PM
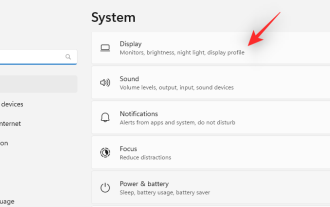
When listening to music or watching movies on a Win11 computer, if the speakers or headphones sound unbalanced, users can manually adjust the balance level according to their needs. So how do we adjust? In response to this problem, the editor has brought a detailed operation tutorial, hoping to help everyone. How to balance left and right audio channels in Windows 11? Method 1: Use the Settings app to tap the key and click Settings. Windows click System and select Sound. Choose more sound settings. Click on your speakers/headphones and select Properties. Navigate to the Levels tab and click Balance. Make sure "left" and
 Bose Soundbar Ultra launch experience: Home theater right out of the box?
Feb 06, 2024 pm 05:30 PM
Bose Soundbar Ultra launch experience: Home theater right out of the box?
Feb 06, 2024 pm 05:30 PM
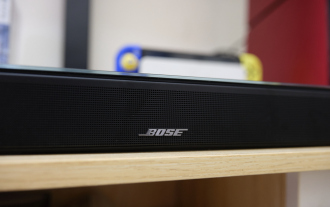
For as long as I can remember, I have had a pair of large floor-standing speakers at home. I have always believed that a TV can only be called a TV if it is equipped with a complete sound system. But when I first started working, I couldn’t afford professional home audio. After inquiring and understanding the product positioning, I found that the sound bar category is very suitable for me. It meets my needs in terms of sound quality, size and price. Therefore, I decided to go with the soundbar. After careful selection, I selected this panoramic soundbar product launched by Bose in early 2024: Bose home entertainment speaker Ultra. (Photo source: Photographed by Lei Technology) Generally speaking, if we want to experience the "original" Dolby Atmos effect, we need to install a measured and calibrated surround sound + ceiling at home.
![How to adjust the audio balance [left and right channels] on Windows 11](https://img.php.cn/upload/article/000/000/164/169641822765817.jpg?x-oss-process=image/resize,m_fill,h_207,w_330) How to adjust the audio balance [left and right channels] on Windows 11
Oct 04, 2023 pm 07:17 PM
How to adjust the audio balance [left and right channels] on Windows 11
Oct 04, 2023 pm 07:17 PM
If you listen to music or watch movies on your Windows computer, you may have noticed that the sound is louder on one side than the other. This may be the default setting for the audio device. Fortunately, adjusting your system's audio balance is fairly easy. This article explains the steps to do this. Why is one side of my headphones quieter on Windows 11? Most of the time, the problem could be that the headphones are not plugged in tightly or have a loose connection. Additionally, if the headphone jack is damaged, you have a problem with your sound card, or your audio device is experiencing interference, you will notice a difference in the sound. Another reason could be because of the wiring inside them. The wires may have become loose or disconnected from each other, which can cause problems with communication between different parts of the headset. How to balance left and right audio channels in Windows 11
 7 Ways to Reset Sound Settings on Windows 11
Nov 08, 2023 pm 05:17 PM
7 Ways to Reset Sound Settings on Windows 11
Nov 08, 2023 pm 05:17 PM
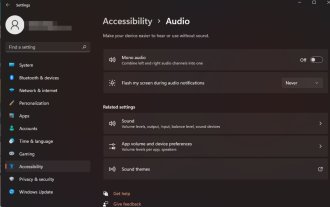
While Windows is capable of managing sound on your computer, you may still want to intervene and reset your sound settings in case you encounter audio issues or glitches. However, with the aesthetic changes Microsoft has made in Windows 11, zeroing in on these settings has become more difficult. So, let’s dive into how to find and manage these settings on Windows 11 or reset them in case any issues arise. How to Reset Sound Settings in Windows 11 in 7 Easy Ways Here are seven ways to reset sound settings in Windows 11, depending on the issue you are facing. let's start. Method 1: Reset app sound and volume settings Press the button on your keyboard to open the Settings app. Click now
 How to quickly enable or disable mono audio on Windows 11
Sep 22, 2023 pm 06:29 PM
How to quickly enable or disable mono audio on Windows 11
Sep 22, 2023 pm 06:29 PM
If one of your speakers breaks down and no longer works, your sound quality will suffer. Replacing it right away may not be an option, but you can enable the mono audio setting for standardized sound output. However, it's disabled by default, so here's how to merge the left and right channels into one on a Windows computer. Is it better to turn mono audio on or off? It depends on the situation. If you have a lot of background noise or your subject moves a lot, mono sound may be the best choice for your project. However, if you want more control over the sound or an immersive experience where every little sound matters, stereo mode would be a better choice. What are the benefits of mono audio? Listening to audio doesn't require much concentration. sounds more
 How to set up the microphone in realtek high-definition audio manager
Jan 02, 2024 am 09:33 AM
How to set up the microphone in realtek high-definition audio manager
Jan 02, 2024 am 09:33 AM
The win10 system is a system that can carry out various settings and adjustments. Today, the editor brings you the solution on how to set the microphone in realtek high-definition audio manager! If you are interested, come and take a look. How to set the microphone in realtek high-definition audio manager: 1. Find the "realtek high-definition audio manager" icon in the show hidden icons in the lower left corner of the desktop. 2. Click to enter the interface. The first thing you see is the "Speaker Page". In this interface, you can adjust the speaker sound through speaker configuration. 3. Next is the sound effect. You can choose the sound effect environment you want as well as "equalizer, pop, rock, club" and so on. 4. Next is the indoor sound quality correction. Indoor space correction can only correct the "
 How to enable Windows 11 audio enhancements
Jan 26, 2024 am 10:54 AM
How to enable Windows 11 audio enhancements
Jan 26, 2024 am 10:54 AM
Some friends have reported that even if the sound in their computer is turned up to the maximum, the volume is still too low. At this time, the enhanced audio function in the system can be turned on. So how should it be done? Next, the editor will give you a detailed introduction. Friends who need it can take a look at how to turn on enhanced audio in Win11. How to open: 1. Right-click Start in the taskbar in the lower left corner and select "Settings" in the option list. 2. After entering the new interface, click the "Sound" option in "System". 3. Then click "All Sound Devices" in "Advanced". 4. Then select "Headphones" or "Speakers" in "Output Devices". 5. Finally, find "Enhanced Audio" and turn on the switch button on the right side of it.
 Access metadata of various audio and video files using Python
Sep 05, 2023 am 11:41 AM
Access metadata of various audio and video files using Python
Sep 05, 2023 am 11:41 AM
We can access the metadata of audio files using Mutagen and the eyeD3 module in Python. For video metadata we can use movies and the OpenCV library in Python. Metadata is data that provides information about other data, such as audio and video data. Metadata for audio and video files includes file format, file resolution, file size, duration, bitrate, etc. By accessing this metadata, we can manage media more efficiently and analyze the metadata to obtain some useful information. In this article, we will take a look at some of the libraries or modules provided by Python for accessing metadata of audio and video files. Access audio metadata Some libraries for accessing audio file metadata are - using mutagenesis
