

How to edit messages on iPhone

The native Messages app on iPhone lets you easily edit sent texts. This way, you can correct your mistakes, punctuation, and even autocorrect wrong phrases/words that may have been applied to your text.
In this article, we will learn how to edit messages on iPhone.
How to Edit Messages on iPhone
- Required: iPhone running iOS 16 or later.
You can only edit iMessage text on the Messages app, and then only within 15 minutes of sending the original text. Non-iMessage text is not supported, so they cannot be retrieved or edited.
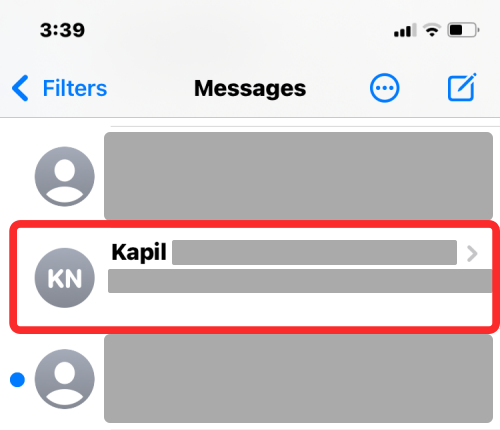
- Launch the Messages app on your iPhone.

- In Messages, select the conversation from which you want to edit the message.
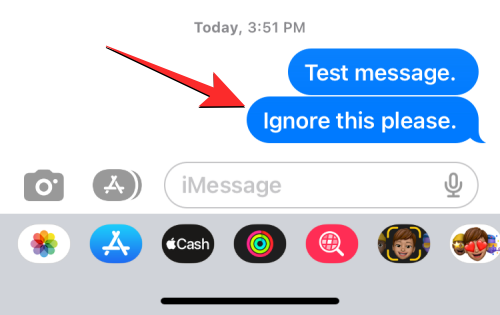
- When the conversation loads, find the message you want to edit and long press it.
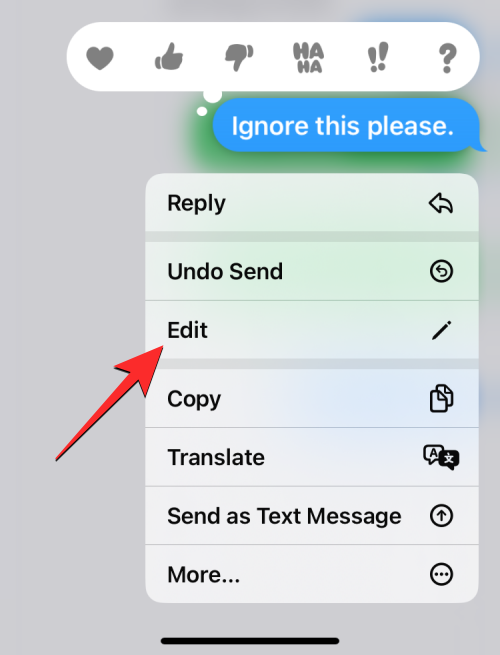
- When you do this, an overflow menu will appear on the screen. On this menu, click Edit.
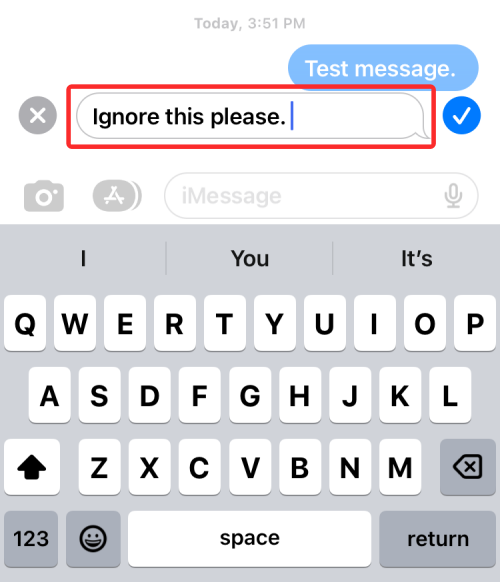
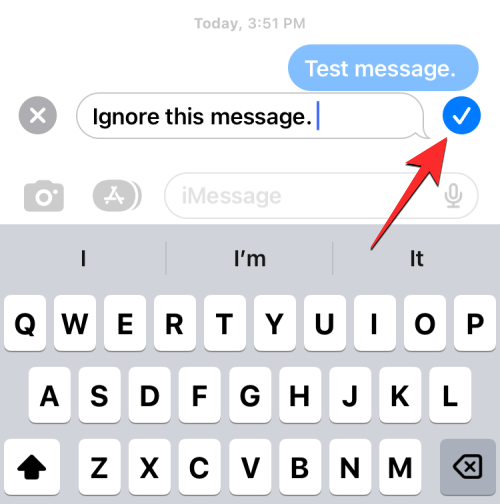
- The selected message will now appear in the text box with the keyboard shown at the bottom.
- Now, make necessary corrections to the text and click on the checkmark icon on the right to save the changes.
- When you save edited text, the new text will appear in the conversation with an "Edited" label underneath it.


If you want to make further corrections to an edited message, you can repeat these steps to edit the same message. You can edit a message sent up to 5 times within 15 minutes of sending the original message.
What happens when you edit a message in iMessage?
When you edit a message, your changes will be immediately visible as soon as you click the checkmark icon. This change will be reflected on all devices involved in the conversation. During the editing process, the content of the original message will appear in the conversation, and once changes are made, both you and the recipient will now see the newly edited message in place of the original message.
The only difference here is that new messages will be accompanied by an "Edited" tag underneath the related message. Both you and the recipient can view the original message and subsequent versions by clicking on this "Edited" label.
How long can I edit a sent message?
You can only edit sent messages for a maximum of 15 minutes. You can make up to 5 changes to the original message within this time frame. Once either of these two limits is reached, the editing options will disappear from the overflow menu when you long-press on a sent message.
The above is the detailed content of How to edit messages on iPhone. For more information, please follow other related articles on the PHP Chinese website!

Hot AI Tools

Undresser.AI Undress
AI-powered app for creating realistic nude photos

AI Clothes Remover
Online AI tool for removing clothes from photos.

Undress AI Tool
Undress images for free

Clothoff.io
AI clothes remover

AI Hentai Generator
Generate AI Hentai for free.

Hot Article
Hot Tools

Notepad++7.3.1
Easy-to-use and free code editor

SublimeText3 Chinese version
Chinese version, very easy to use

Zend Studio 13.0.1
Powerful PHP integrated development environment

Dreamweaver CS6
Visual web development tools

SublimeText3 Mac version
God-level code editing software (SublimeText3)
Hot Topics


 Windows 11: The easy way to import and export start layouts
Aug 22, 2023 am 10:13 AM
Windows 11: The easy way to import and export start layouts
Aug 22, 2023 am 10:13 AM
In Windows 11, the Start menu has been redesigned and features a simplified set of apps arranged in a grid of pages, unlike its predecessor, which had folders, apps, and apps on the Start menu. Group. You can customize the Start menu layout and import and export it to other Windows devices to personalize it to your liking. In this guide, we’ll discuss step-by-step instructions for importing Start Layout to customize the default layout on Windows 11. What is Import-StartLayout in Windows 11? Import Start Layout is a cmdlet used in Windows 10 and earlier versions to import customizations for the Start menu into
 What does it mean when a message has been sent but rejected by the other party?
Mar 07, 2024 pm 03:59 PM
What does it mean when a message has been sent but rejected by the other party?
Mar 07, 2024 pm 03:59 PM
The message has been sent but rejected by the other party. This means that the sent information has been successfully sent from the device, but for some reason, the other party did not receive the message. More specifically, this is usually because the other party has set certain permissions or taken certain actions, which prevents your information from being received normally.
 iOS 17: How to use emojis as stickers in Messages
Sep 18, 2023 pm 05:13 PM
iOS 17: How to use emojis as stickers in Messages
Sep 18, 2023 pm 05:13 PM
In iOS17, Apple has added several new features to its Messages app to make communicating with other Apple users more creative and fun. One of the features is the ability to use emojis as stickers. Stickers have been around in the Messages app for years, but so far, they haven't changed much. This is because in iOS17, Apple treats all standard emojis as stickers, allowing them to be used in the same way as actual stickers. This essentially means you're no longer limited to inserting them into conversations. Now you can also drag them anywhere on the message bubble. You can even stack them on top of each other to create little emoji scenes. The following steps show you how it works in iOS17
 How to swipe right and reply quickly in iMessage on iOS 17
Sep 20, 2023 am 10:45 AM
How to swipe right and reply quickly in iMessage on iOS 17
Sep 20, 2023 am 10:45 AM
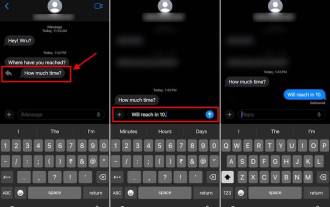
How to Use Swipe to Reply in iMessages on iPhone Note: The Swipe to Reply feature only works with iMessage conversations in iOS 17, not regular SMS conversations in the Messages app. Open the Messages app on your iPhone. Then, head to the iMessage conversation and simply swipe right on the iMessage you want to reply to. Once this is done, the selected iMessage will be in focus while all other messages will be blurred in the background. You'll see a text box for typing a reply and a "+" icon for accessing iMessage apps like Check-ins, Places, Stickers, Photos, and more. Just enter your message,
 How to Default 'Show More Options' in Windows 11's Right-Click Menu
Jul 10, 2023 pm 12:33 PM
How to Default 'Show More Options' in Windows 11's Right-Click Menu
Jul 10, 2023 pm 12:33 PM
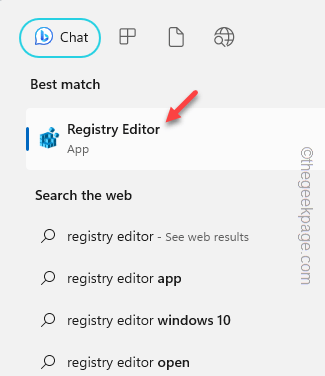
One of the most annoying changes that we users never want is the inclusion of "Show more options" in the right-click context menu. However, you can remove it and get back the classic context menu in Windows 11. No more multiple clicks and looking for these ZIP shortcuts in context menus. Follow this guide to return to a full-blown right-click context menu on Windows 11. Fix 1 – Manually adjust the CLSID This is the only manual method on our list. You will adjust specific keys or values in Registry Editor to resolve this issue. NOTE – Registry edits like this are very safe and will work without any issues. Therefore, you should create a registry backup before trying this on your system. Step 1 – Try it
 How to restore the deleted hosts file
Feb 22, 2024 pm 10:48 PM
How to restore the deleted hosts file
Feb 22, 2024 pm 10:48 PM
Title: How to restore the hosts file after deletion Summary: The hosts file is a very important file in the operating system and is used to map domain names to IP addresses. If you accidentally delete the hosts file, you may be unable to access certain websites or have other network problems. This article will introduce how to recover accidentally deleted hosts file in Windows and Mac operating systems. Text: 1. Restore hosts file in Windows operating system. Hosts file in Windows operating system
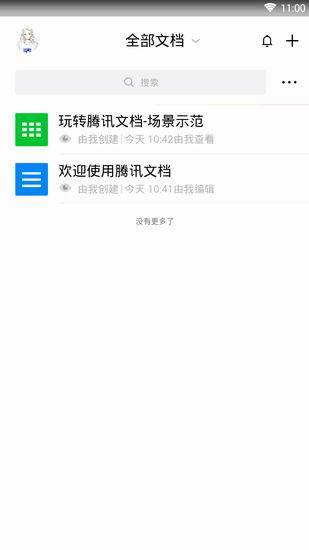 How to edit documents in Tencent Docs? -Tencent Document Editing Document Tutorial Guide
Mar 19, 2024 am 08:19 AM
How to edit documents in Tencent Docs? -Tencent Document Editing Document Tutorial Guide
Mar 19, 2024 am 08:19 AM
Does anyone know how to edit documents in Tencent Docs? It doesn't matter if you don't know. Today, the editor will introduce detailed graphic explanations on how to edit documents in Tencent Docs. I hope it can help you. Detailed graphic explanation of editing documents in Tencent Documents 1. First, enter Tencent Documents directly (if you don’t have it, download it now!) and log in directly (QQ and TIM two login methods are supported) 2. After logging in, click Add in the upper right corner No., directly create online documents, online forms, new folders, etc.! 3. Then enter the information according to your needs!
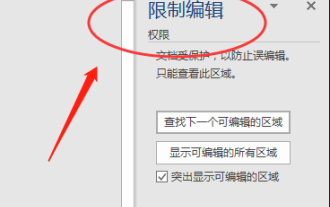 What to do if word document cannot be edited
Mar 19, 2024 pm 09:37 PM
What to do if word document cannot be edited
Mar 19, 2024 pm 09:37 PM
After editing the document, we will save the document to provide convenience for editing and modifying the document next time. Sometimes we can modify it directly after clicking on the edited document, but sometimes for some unknown reason, there is no response no matter how we click on the word document, and the command will not be executed. , what should I do if the word document cannot be edited? Don’t worry, the editor will help you solve this problem. Let’s take a look at the operation process. After opening a Word document, when editing text, you will see a "Restrict Editing" prompt displayed on the right side of the page, as shown in the figure below. 2. You need to cancel editing and you need to know the set password. Click "Stop Protection" below the pop-up prompt, as shown in the figure below. 3. Then enter the password in the "Unprotect Document" dialog box and click OK, as shown in the figure below.