win7 installation tutorial
The win7 system is a stable system that many users particularly like. It is also the system that the editor has used for the longest time. Many old computers who want a stable system will choose win7. Many users want to install it. Let’s take a look at the details below. Installation, reinstallation, and upgrade tutorials.

win7U disk installation preparations
1. First prepare a U disk with a memory size of 8G or more, and then downloadUDisk creation tool to the computer. Insert the USB flash drive into the computer and follow the tool prompts to create a system USB flash drive.
2. Download the system you want to install and put the file in a USB flash drive. The system size is generally 3-7GB.
win7U disk installation enters pe operation
1. Restart the computer and press F12 when booting to enter the startup item selection. (Different computer models have different startup item buttons. Generally, the computer startup button is F8, F9, F11, F12, ESC)
2. Many systems need to be installed before entering PE. (The data will be gone after partitioning. Everyone has different partition formats based on different configurations and system requirements.)
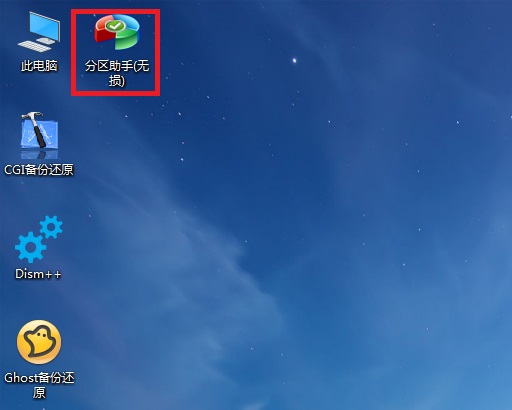
win7U disk installation System process
1. Click on the downloaded system installation file .iso. After opening, click the exe installation file to install the system program with one click.
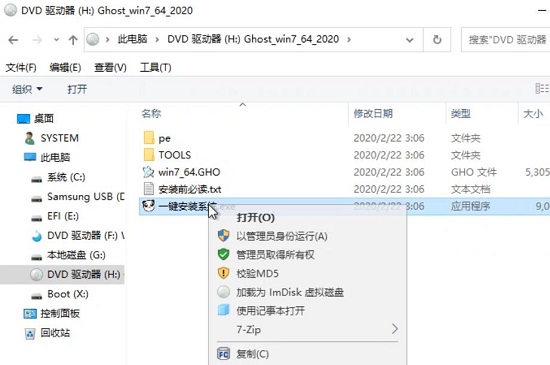
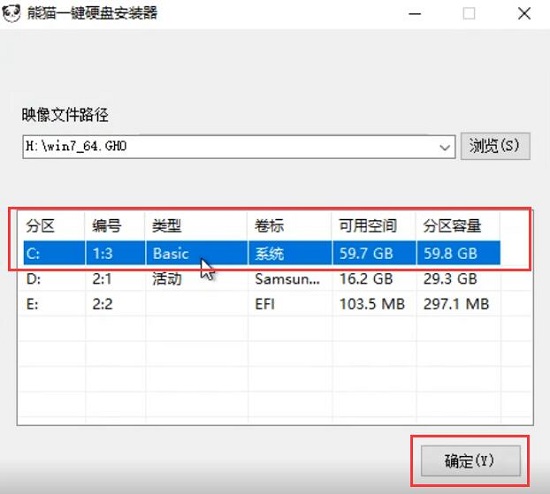
2. Click here on the system disk (default is C drive) to install, click OK to start the smart installation process.
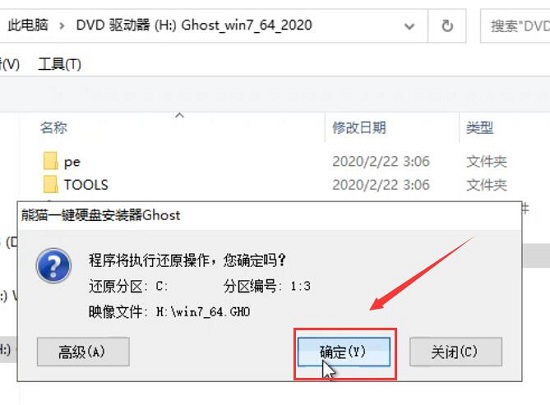
#4. All subsequent installation steps are automatic. If there is a pop-up, click Next and confirm.
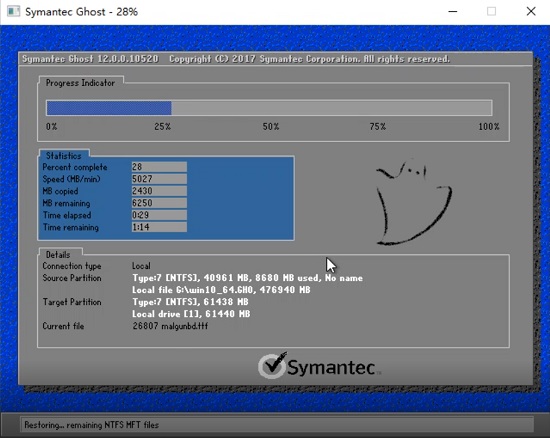
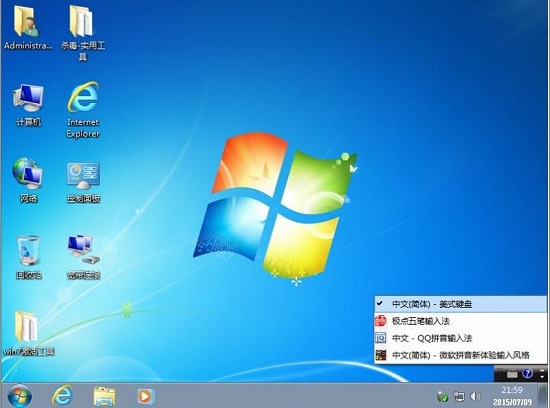
7. After the installation is completed, enter the system interface. You can start using the new windows7 system.
Windows7 installation tutorial summary
| Original installation tutorial | |
| Original direct installation |
Original U disk |
| Official Genuine |
Mirror Installation |
| Non-ghost | Ghost |
| Old computer |
Laptop computer |
| Installation of each version Tutorial | |
| Ultimate Edition |
Enterprise Edition |
| Professional Edition |
lite version |
| Pure version |
English version |
| Brand system installation | |
| U disk of this site |
Direct installation of this site |
| Direct installation of system home |
deep technology |
| Computer Company |
新radish Home |
| Tomato Garden |
风林山 |
| 雨林木风 |
|
| U disk brand installation | |
| Black Shark |
大白菜 |
| 小白 |
Cloud Knight |
|
U disk upgrade | |
|
Genuine upgrade |
|
|
Upgrade Professional Edition |
|
|
老桃毛 |
|
|
u disk installation master |
|
1. Do not use a higher version to install a lower version (such as win10 to install win7), other installation problems are prone to occur
2. Do not install it in a 32-bit system environment To install 64-bit win7, you need to start the installation through other media (such as PE installation, U disk startup)
The above is the detailed content of win7 installation tutorial. For more information, please follow other related articles on the PHP Chinese website!

Hot AI Tools

Undresser.AI Undress
AI-powered app for creating realistic nude photos

AI Clothes Remover
Online AI tool for removing clothes from photos.

Undress AI Tool
Undress images for free

Clothoff.io
AI clothes remover

AI Hentai Generator
Generate AI Hentai for free.

Hot Article

Hot Tools

Notepad++7.3.1
Easy-to-use and free code editor

SublimeText3 Chinese version
Chinese version, very easy to use

Zend Studio 13.0.1
Powerful PHP integrated development environment

Dreamweaver CS6
Visual web development tools

SublimeText3 Mac version
God-level code editing software (SublimeText3)

Hot Topics
 The computer screen is enlarged
Mar 13, 2024 am 11:00 AM
How to restore the computer screen that has become larger If your computer screen has become larger, you can try the following methods to restore it: Use keyboard shortcuts to restore the screen zoom: Hold down the Ctrl key and scroll the mouse wheel at the same time to restore the screen zoom ratio. First open the system "Settings" and then find the "Display" setting to enter. Modify the "Scale Ratio" or "Resolution" to restore it. For Haul on Apple computers under the mac system, you need to click on "System Preferences" in the upper left corner and then enter the "Accessibility" settings. First, right-click on a blank area of the computer desktop and select screen resolution. Then pull down the small arrow of resolution and click on the recommended resolution. Select the recommended resolution and click OK. After confirmation, in the pop-up dialog window, you will see
![What should I do if my Bluetooth peripheral device does not have a driver? [solved]](https://img.php.cn/upload/article/000/465/014/171033721377290.jpg?x-oss-process=image/resize,m_fill,h_207,w_330) What should I do if my Bluetooth peripheral device does not have a driver? [solved]
Mar 13, 2024 pm 09:40 PM
What should I do if my Bluetooth peripheral device does not have a driver? [solved]
Mar 13, 2024 pm 09:40 PM
When many users use the Bluetooth function, an error message box pops up: The driver for the bluetooth peripheral device cannot be found, and an exclamation mark is displayed when opening the device manager. What is going on? In response to this problem, today I will share with you how to deal with the problem that the driver for the bluetooth peripheral device cannot be found. How to solve the problem that the driver cannot be found for bluetooth peripheral devices? Right-click the Bluetooth icon in the lower right corner to display Bluetooth devices. Right-click the paired Bluetooth device and click Delete Device, and the Bluetooth peripheral device will disappear. There is an uninstalled "Bluetooth Peripheral Device" in "Device Manager"
 Can I access the Internet by plugging the network cable directly into my computer?
Apr 25, 2024 am 08:30 AM
Can I access the Internet by plugging the network cable directly into my computer? If it is a desktop, it cannot be used directly. You need to open the computer network sharing center, find the adapter interface, and click on the Ethernet card properties. Then open settings, click the "Configuration" option, select "Advanced" and find the connection speed and duplex mode. Finally, change "Automatic Detection" to "10M Duplex" or "10M Half-Duplex", and click to confirm that there is a router. Connect the computer to the router with a network cable to access the Internet. Use a network cable to connect the LAN interface of the computer and the router. After the connection is completed, you can access the Internet normally. Can you access the Internet after checking that the host is online? Under normal circumstances, the new computer will be able to access the Internet as long as all the hardware drivers are installed, including the network card driver. ,So
 Where are the graphics card drivers installed? On which disk are the graphics card drivers installed?
Mar 14, 2024 am 09:40 AM
The computer needs to install the corresponding driver to ensure the normal operation of the system. So which disk is the graphics card driver installed on? If you encounter a situation where you need to modify the disk location, which disk should you install on? In fact, most drivers are installed on the C drive by default. Let’s take a look at the details below. Which disk is the graphics card driver installed on? Some drivers are installed on the system disk by default and do not let you choose. If you are asked to choose, of course you can install other disks. It is certainly better to divide the hard disk into multiple partitions than one partition. The access speed through the C drive is faster than the D drive, and the D drive is larger than the E drive. Since we generally don’t put anything on the C drive, if we allocate 10G to it, it would be better to use 4G at most and install a driver on it. And like drivers and some application software,
 How to adjust the fonts on the computer to be blurry
Mar 24, 2024 pm 09:01 PM
How to adjust the fonts on the computer screen to be blurry 1. Question 6: What to do if the fonts are blurry after adjusting the resolution of the computer? Right-click on the desktop - Properties - Appearance - Font Size. You can adjust the font to large or extra large. If you are vague. 2. First, right-click on the desktop and click to select resolution, as shown in the figure. 2 Then, use the mouse to drag the resolution to the highest level and click Save, as shown in the picture. 3. The computer desktop fonts are blurred mainly for the following reasons: Incorrect resolution settings: If the resolution is set too low, all images and fonts on the screen will become blurred, especially on large screens. It is recommended to adjust the resolution to the highest level to ensure the best display effect. 4. First, we click on the windows icon under the desktop, and in the pop-up window, we click
 What should I do if I get a black screen after installing the NVIDIA graphics card driver? Solution to black screen after installing graphics card driver
Mar 13, 2024 pm 02:34 PM
Many of our users' computers use NVIDIA graphics cards, so they need to install the NVIDIA graphics card driver. However, some users will enter a black screen as soon as they install the graphics card driver, causing the need to restart. After multiple attempts, the installation fails. So what is the solution to this problem? What's the solution? Today, the editor of the software tutorial will share effective solutions for the majority of users. Next, let us learn about the detailed steps. Solution to black screen when installing NVIDIA graphics card driver: 1. First, right-click [This PC] on the desktop and select [Manage] to enter it. 2. After entering the [Computer Management Page], click [Device Manager], click to expand [Display Adapter] according to the picture on the right side of the current page, and click [Video Card Driver]
 Huawei mobile phone USB sharing network to computer
May 08, 2024 am 08:25 AM
How to connect a Huawei phone to a computer via USB to access the Internet. First, we open the phone settings and search for "HDB". Then we click to open "Mobile Network Sharing" in More. Then we can click to open "USB Sharing Network" in the pop-up window. Summary First, connect the Huawei mobile phone to the computer through the data cable. Open "Settings" on your phone and enter the settings interface. Click "Personal Hotspot", select "USB tethering" and click the switch button at the back to turn it on. First click "Settings About Phone", then click "Version Number" 7 times in succession. You will be prompted to enter developer mode. Then return to the "Settings" list, "Developer Options" will appear, then click to enter "Developer Options", turn on the "USB Debugging" switch, and click
 How to download Razer mouse driver
Mar 11, 2024 pm 03:40 PM
Steps to download the Razer mouse driver: 1. Open the browser and enter the Razer official website; 2. On the official website page, find and click "Technical Support" or a similar option; 3. On the technical support page, select "Mouse" or the specific subcategory; 4. On the mouse driver download page, you can see various mouse models and their corresponding drivers; 5. Click the download link for the selected driver; 6. After the download is completed, check whether the downloaded file is complete , make sure nothing is damaged or missing.


