
Recently, users using win10 1903 reported that the firewall cannot be started and shut down normally, and it displays a gray stop unavailable status. How to solve it? We cannot stop the service manually, but it can be modified through the registry. How to solve this problem, let’s take a look at the specific tutorial with the editor below.

Method 1: Control Panel
1. First, look for the Control Panel on the computer desktop, and then click the Control Panel icon to launch it.

#2. Then, we find and select the item named "System and Security" on the page that pops up next.
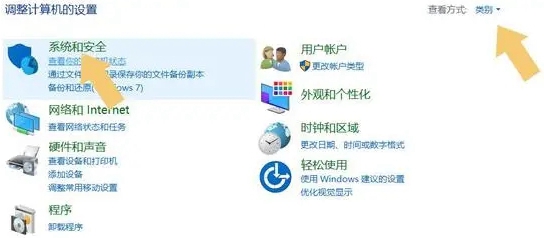
3. Note that after starting the control panel, you find that the "System and Security" option is not at the front.
4. Just click on Find the "View By" button on the upper right and change it to the "Category" option mode.
5. Click the System and Security options again, and find and select the "Windows Defender Firewall" item in the new page.
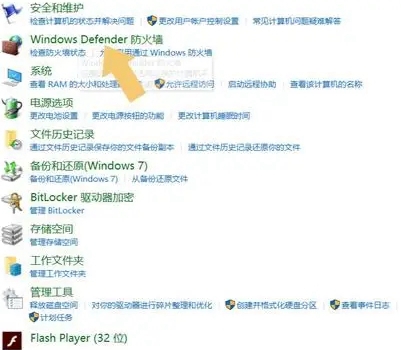
#6. Double-click it to enter the details and find the option "Turn Windows Defender Firewall on or off" in the left menu bar.
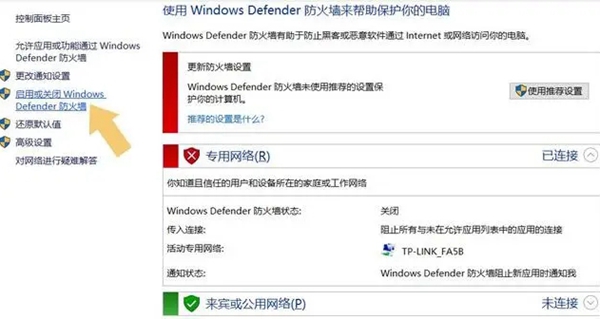
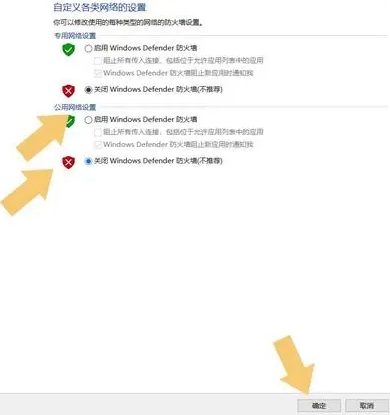
#7. Click and adjust the corresponding two items to the off state, and finally click the Confirm button to achieve the selected goal.
Method 2: Update and Security
Set through the "Windows Update and Security" option in the computer system settings. First, please find and launch the "Windows Update & Security" item in the Computer Settings page.
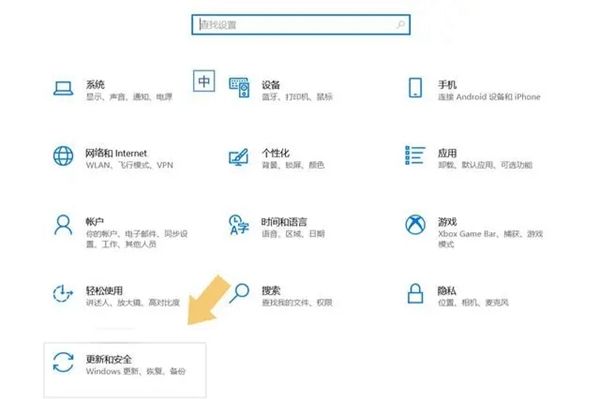
After completing the above steps, please press the Enter key on the keyboard or left-click the Update and Security option, then find and Expand the Windows Security module.
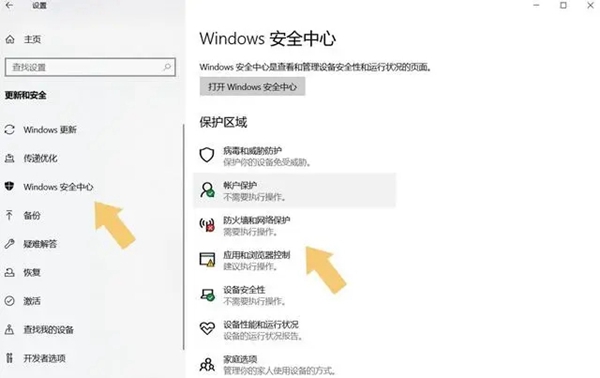
Follow the system boot, click on the expanded "Windows Security Center" module, then continue to find and select "Firewall and Network Protection" on the menu bar on the right options.
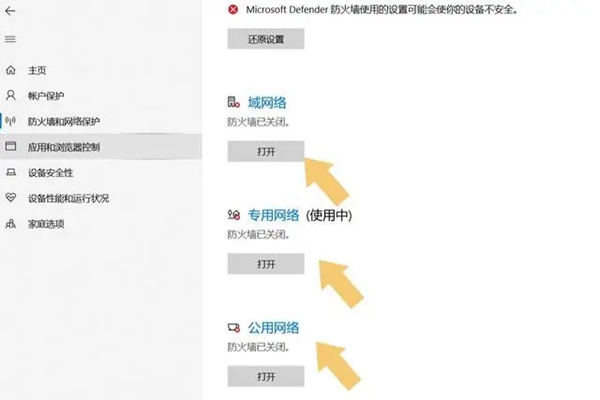
Next, in the newly appeared interface, turn off the "Domain Network", "Private Network" and "Public Network" in turn, and click the confirmation button below to ensure that the setting changes take effect.
The above is the detailed content of How to turn off the firewall in win10 1903. For more information, please follow other related articles on the PHP Chinese website!
 How to light up Douyin close friends moment
 microsoft project
 What is phased array radar
 How to use fusioncharts.js
 Yiou trading software download
 The latest ranking of the top ten exchanges in the currency circle
 What to do if win8wifi connection is not available
 How to recover files emptied from Recycle Bin


