

Unable to detect Win10 plugged in headset microphone device

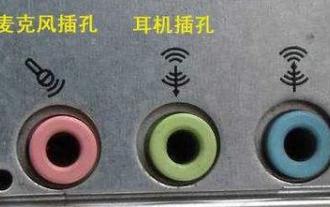
Recently, many friends have discovered that when using the microphone, there is no display device inside. What is going on? Because there are many minor problems with the win10 system, let’s take a look at the specific solutions.

Win10 plugs in the headset microphone and does not display the device solution
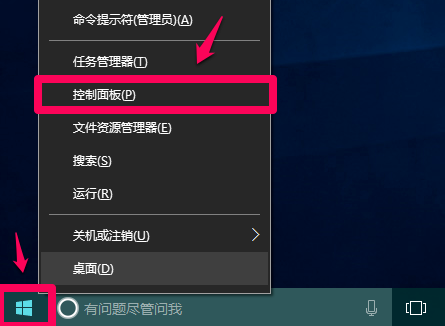
1. Right-click on the lower left corner of the system desktop and click on the start menu Click;
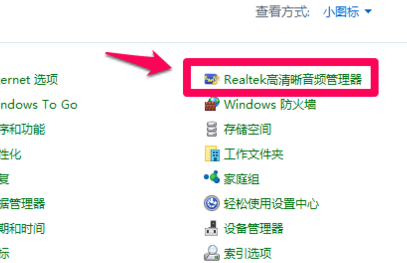
2. Double-click the left button in the control panel to open Realtek High Definition Audio Manager;
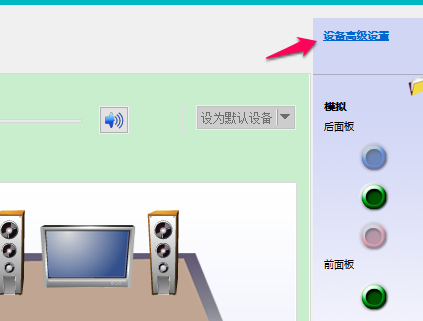
3. In the opened Realtek High Definition Audio Manager window, we click on the upper right corner;
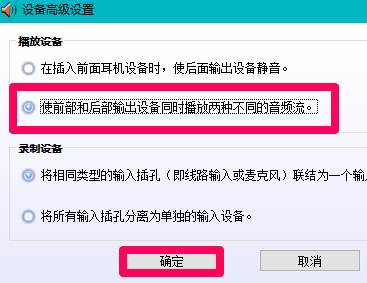
4. In the device advanced settings window, we can see the default settings of the playback device The options are: mute the rear output device when the front headphone device is plugged in;
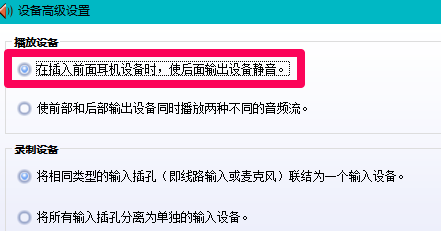
5. Our option to change the playback device is: mute the front and rear output devices at the same time Play two different audio streams, and then click: OK;
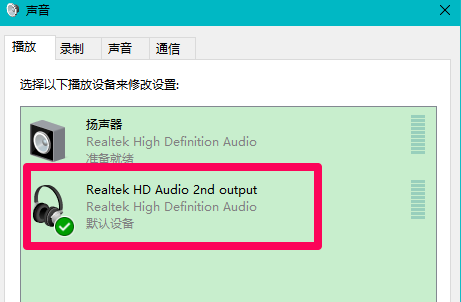
6. Open the sound-play window, and you can see that the headphones have been displayed in the window.
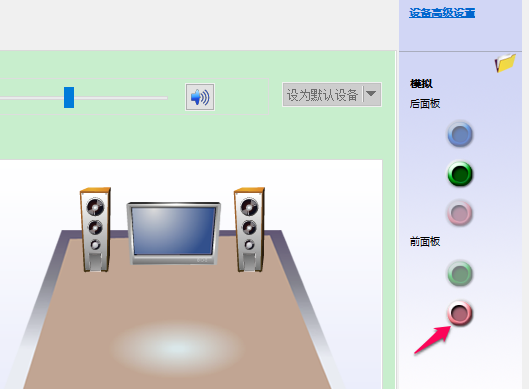
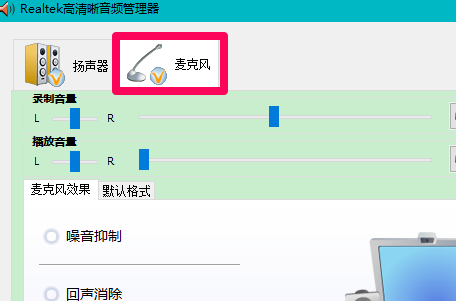
#7. In the Realtek High Definition Audio Manager window, left-click the microphone jack on the front panel;
8. In the pop-up dialog box that the device should be verified as, you can see that the inserted device is: headset instead of microphone;
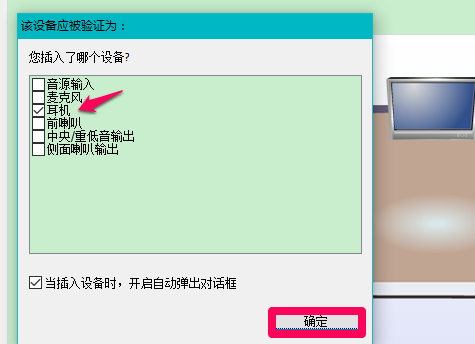
9. We click on the microphone , then click: OK. In the Realtek High Definition Audio Manager window, you can see that the device microphone is displayed;
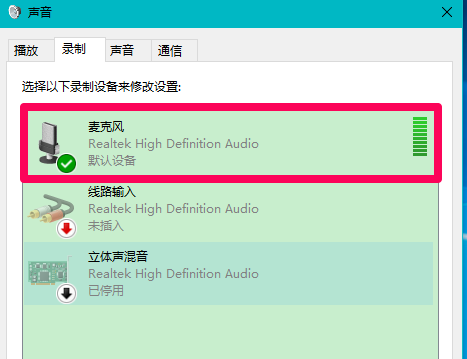
10. In the Sound-Recording window, it is also displayed. A device with a microphone.
The above is the detailed content of Unable to detect Win10 plugged in headset microphone device. For more information, please follow other related articles on the PHP Chinese website!

Hot AI Tools

Undresser.AI Undress
AI-powered app for creating realistic nude photos

AI Clothes Remover
Online AI tool for removing clothes from photos.

Undress AI Tool
Undress images for free

Clothoff.io
AI clothes remover

AI Hentai Generator
Generate AI Hentai for free.

Hot Article
Hot Tools

Notepad++7.3.1
Easy-to-use and free code editor

SublimeText3 Chinese version
Chinese version, very easy to use

Zend Studio 13.0.1
Powerful PHP integrated development environment

Dreamweaver CS6
Visual web development tools

SublimeText3 Mac version
God-level code editing software (SublimeText3)
Hot Topics
 1378
1378
 52
52

 Hyperx headset microphone has no sound
Feb 16, 2024 am 09:12 AM
Hyperx headset microphone has no sound
Feb 16, 2024 am 09:12 AM
The quality of hyperx headphones has always been very good, but some users find that the microphone of the headphones has no sound when using it. There are many possible reasons for this situation. Here are some of them. Several kinds. There is no sound from the hyperx headset microphone. 1. Connect and check whether the microphone is fully inserted into the headphone jack. You can try plugging and unplugging it a few times. 2. If other equipment conditions permit, you can plug the headset into other normally operating equipment to see if it can be used normally and whether the audio link is normal. 3. Audio settings Check the audio settings to make sure that the speakers and microphone are enabled normally and not muted or at a low volume. 4. To disable the software, you can try disabling the audio adapter.
 Logitech headset microphone is silent, please fix it
Jan 18, 2024 am 08:03 AM
Logitech headset microphone is silent, please fix it
Jan 18, 2024 am 08:03 AM
Some users may encounter the problem of no sound from the headset microphone when using Logitech drivers. Check whether the headset microphone cable is plugged in properly or whether the headset is muted. This can be solved by turning it on in the settings. There is no sound from the Logitech-driven headset microphone: 1. Users need to first check whether the headset microphone is plugged into the wrong wire. 2. If it is wrong, just plug it in again. If not, then you need to check whether the headset microphone is broken. 3. Open "Settings" and search for "Control Panel" in "Settings". 4. Select "Hardware and Sound". 5. Click "Manage Audio Devices". 6. After entering the interface, click the "Recording" option and double-click "Microphone". 7. After entering, click "Level" to increase the microphone volume to the maximum. If it is not loud enough, you can strengthen the microphone settings. 8. Last look
 How to solve the microphone mute problem in Win10 Knives Out
Jan 11, 2024 am 10:24 AM
How to solve the microphone mute problem in Win10 Knives Out
Jan 11, 2024 am 10:24 AM
Knives Out is a very popular game on Windows 10 computers. Many friends like to play it with their friends, but many of them encounter the situation where the microphone has no sound, so what should I do? Let’s take a look at the solution below. What to do if there is no sound from the Knives Out microphone in Windows 10: 1. Enter the Knives Out game interface and turn on the microphone switch. 2. Enter the game settings and check "My Microphone" in the sound settings. 3. If it still doesn’t work, click Start in the lower left corner and open the “Control Panel”. 4. After opening, click "Hardware and Sound" and then "Manage Audio Devices". 5. Select the "Recording" tab and double-click "Microphone". 6. Click "Use this device". 7. Then turn up the volume.
 Solve the problem that the microphone is connected but not recognized in win11
Jan 29, 2024 pm 06:57 PM
Solve the problem that the microphone is connected but not recognized in win11
Jan 29, 2024 pm 06:57 PM
Nowadays, when many users use win11 system, they may encounter the problem that the microphone is connected to the computer but shows that it is not plugged in, causing the device to not work properly. For this situation, I will share with you two solutions. If you need detailed operation steps, please visit this site. What to do if the win11 microphone is connected but it says not plugged in: Method 1: 1. Click the start menu or search button below. 3. Open Hardware and Sound in the Control Panel. 5. After opening, click Advanced Device Settings in the upper right corner. Method 2: 1. There are also cases where your microphone is not connected properly. 2. You can try to replug and unplug the microphone cable to see if it can solve the problem.
 Using the MINUS operator in SQL
Feb 18, 2024 pm 04:53 PM
Using the MINUS operator in SQL
Feb 18, 2024 pm 04:53 PM
Usage of MINUS in SQL and specific code examples In SQL, MINUS is an operator used to perform a difference operation between two result sets. It is used to delete the same rows from the first result set as in the second result set. The result set returned by the MINUS operator will contain rows that exist only in the first result set. The following uses specific code examples to demonstrate the usage of MINUS: Assume there are two tables - "table1" and "table2", their structures are as follows: Table name: table1 field
 Can't allow access to camera and microphone in iPhone
Apr 23, 2024 am 11:13 AM
Can't allow access to camera and microphone in iPhone
Apr 23, 2024 am 11:13 AM
Are you getting "Unable to allow access to camera and microphone" when trying to use the app? Typically, you grant camera and microphone permissions to specific people on a need-to-provide basis. However, if you deny permission, the camera and microphone will not work and will display this error message instead. Solving this problem is very basic and you can do it in a minute or two. Fix 1 – Provide Camera, Microphone Permissions You can provide the necessary camera and microphone permissions directly in settings. Step 1 – Go to the Settings tab. Step 2 – Open the Privacy & Security panel. Step 3 – Turn on the “Camera” permission there. Step 4 – Inside, you will find a list of apps that have requested permission for your phone’s camera. Step 5 – Open the “Camera” of the specified app
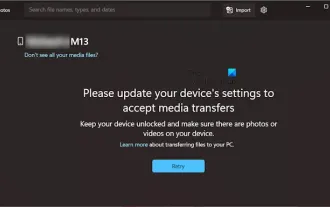 Please update your device settings to accept media transfers
Feb 19, 2024 pm 12:24 PM
Please update your device settings to accept media transfers
Feb 19, 2024 pm 12:24 PM
We will show you how to fix media transfer error when connecting your phone to PC via USB cable. When you try to import photos and videos from your phone to your computer, you may encounter a "Please update your device's settings to accept media transfers" error message displayed by the Photos app. Please update your device settings to accept media transfers Update your device settings to allow media transfers to resolve the error message. Restart your two devices Use different USB cables Check your Android phone settings Install the MTP USB device driver Use other methods to transfer your photos and videos Let’s get started. 1] Restart both devices It is recommended that you first try to restart your devices, including computers and phones, when you encounter a temporary failure. Heavy
 Where to set up the iPhone 12 microphone_Apple 12 microphone setting tutorial
Mar 22, 2024 pm 06:36 PM
Where to set up the iPhone 12 microphone_Apple 12 microphone setting tutorial
Mar 22, 2024 pm 06:36 PM
1. Click [Privacy] in the phone settings menu. 2. Click the [Microphone] option. 3. Turn on the switch that requires permissions for the application. This article takes iphone12 as an example and is applicable to ios14 system
