
In our laptops, we often encounter situations where the power supply is clearly connected, but it turns out that it is not charging. So how can we solve the problem of Win11 power supply being connected but not charging? In fact, we only need to modify the power configuration.
1. First open the "Start Menu"

2. Then open the "Settings"

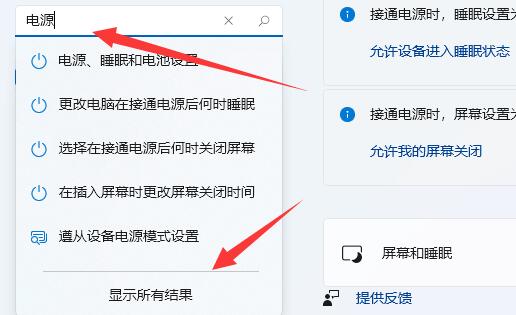
3. Then click on the upper left corner to search for "Power" and click "Show all results"
4. Then slide down the screen to find and open "Select Power Plan"

5. After opening it, find our plan and click "Change Plan Settings"

6. Then click "Change Advanced Power Settings"

7. Finally, find the "Minimum Processor Status" and "Maximum Processor" Status", set to "100%" respectively and confirm to save.

The above is the detailed content of Win11 is connected to power but not charging. For more information, please follow other related articles on the PHP Chinese website!
 Three mainstream frameworks for web front-end
 What is a host
 What are the types of lasso tools in PS?
 Bitcoin buying and selling process on Huobi.com
 How to solve the problem that tomcat cannot display the page
 how to change ip address
 Free erp management system software
 What platform is Fengxiangjia?


