

导出MySQL用户权限_MySQL

在对MySQL数据库进行迁移的时候,有时候也需要迁移源数据库内的用户与权限。对于这个迁移我们可以从mysql.user表来获取用户的相关权限来生成相应的SQL语句,然后在目标服务器上来执行生成的SQL语句即可。本文提供了生成提取用户权限的脚本并给出演示。
1、生成用户权限的脚本
[root@HKBO ~]# more exp_grant.sh
#!/bin/bash
#Function export user privileges

pwd=123456
expgrants()
{
  mysql -B -u'root' -p${pwd} -N $@ -e "SELECT CONCAT(
    'SHOW GRANTS FOR ''', user, '''@''', host, ''';'
    ) AS query FROM mysql.user" | \
  mysql -u'root' -p${pwd} $@ | \
  sed 's/\(GRANT .*\)/\1;/;s/^\(Grants for .*\)/-- \1 /;/--/{x;p;x;}'
}
expgrants > ./grants.sql2、生成权限SQL脚本
[root@HKBO ~]# ./exp_grant.sh

[root@HKBO ~]# head grants.sql
-- Grants for root@127.0.0.1
GRANT ALL PRIVILEGES ON *.* TO 'root'@'127.0.0.1' IDENTIFIED BY PASSWORD '*EB3EA446C759C9DA93F84FCB56430DBEF051A9DD' WITH GRANT OPTION;
GRANT ALL PRIVILEGES ON `CNBO0815`.* TO 'root'@'127.0.0.1' WITH GRANT OPTION;

-- Grants for root@172.16.10.%
GRANT ALL PRIVILEGES ON *.* TO 'root'@'172.16.10.%' IDENTIFIED BY PASSWORD '*6BB4837EB74329105EE4568DDA7DC67ED2CA2AD9';

-- Grants for CNBO@192.168.1.%
GRANT USAGE ON *.* TO 'CNBO'@'192.168.1.%' IDENTIFIED BY PASSWORD '*ABD91BAD4A3448428563952E281015B237310EA8';
         ...........................

--Author : Leshami
--Blog : http://blog.csdn.net/leshami3、在目标服务器上执行脚本
将生成的脚本在目标服务器上执行即可。 mysql -uname -ppwd
a、目标服务上为非空服务器,已经存在一些账户及权限应考虑会覆盖的问题。
b、如果仅仅需要迁移非root用户,可以在原脚本中添加过滤条件,即 where user'root' 。
参考:
http://serverfault.com/questions/8860/how-can-i-export-the-privileges-from-mysql-and-then-import-to-a-new-server


Hot AI Tools

Undresser.AI Undress
AI-powered app for creating realistic nude photos

AI Clothes Remover
Online AI tool for removing clothes from photos.

Undress AI Tool
Undress images for free

Clothoff.io
AI clothes remover

AI Hentai Generator
Generate AI Hentai for free.

Hot Article
Hot Tools

Notepad++7.3.1
Easy-to-use and free code editor

SublimeText3 Chinese version
Chinese version, very easy to use

Zend Studio 13.0.1
Powerful PHP integrated development environment

Dreamweaver CS6
Visual web development tools

SublimeText3 Mac version
God-level code editing software (SublimeText3)
Hot Topics
 1378
1378
 52
52

 How to use Xiaohongshu account to find users? Can I find my mobile phone number?
Mar 22, 2024 am 08:40 AM
How to use Xiaohongshu account to find users? Can I find my mobile phone number?
Mar 22, 2024 am 08:40 AM
With the rapid development of social media, Xiaohongshu has become one of the most popular social platforms. Users can create a Xiaohongshu account to show their personal identity and communicate and interact with other users. If you need to find a user’s Xiaohongshu number, you can follow these simple steps. 1. How to use Xiaohongshu account to find users? 1. Open the Xiaohongshu APP, click the "Discover" button in the lower right corner, and then select the "Notes" option. 2. In the note list, find the note posted by the user you want to find. Click to enter the note details page. 3. On the note details page, click the "Follow" button below the user's avatar to enter the user's personal homepage. 4. In the upper right corner of the user's personal homepage, click the three-dot button and select "Personal Information"
 Log in to Ubuntu as superuser
Mar 20, 2024 am 10:55 AM
Log in to Ubuntu as superuser
Mar 20, 2024 am 10:55 AM
In Ubuntu systems, the root user is usually disabled. To activate the root user, you can use the passwd command to set a password and then use the su- command to log in as root. The root user is a user with unrestricted system administrative rights. He has permissions to access and modify files, user management, software installation and removal, and system configuration changes. There are obvious differences between the root user and ordinary users. The root user has the highest authority and broader control rights in the system. The root user can execute important system commands and edit system files, which ordinary users cannot do. In this guide, I'll explore the Ubuntu root user, how to log in as root, and how it differs from a normal user. Notice
 Enable root permissions with one click (quickly obtain root permissions)
Jun 02, 2024 pm 05:32 PM
Enable root permissions with one click (quickly obtain root permissions)
Jun 02, 2024 pm 05:32 PM
It allows users to perform more in-depth operations and customization of the system. Root permission is an administrator permission in the Android system. Obtaining root privileges usually requires a series of tedious steps, which may not be very friendly to ordinary users, however. By enabling root permissions with one click, this article will introduce a simple and effective method to help users easily obtain system permissions. Understand the importance and risks of root permissions and have greater freedom. Root permissions allow users to fully control the mobile phone system. Strengthen security controls, customize themes, and users can delete pre-installed applications. For example, accidentally deleting system files causing system crashes, excessive use of root privileges, and inadvertent installation of malware are also risky, however. Before using root privileges
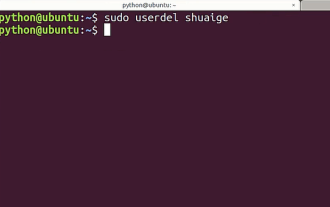 Tutorial: How to delete a normal user account in Ubuntu system?
Jan 02, 2024 pm 12:34 PM
Tutorial: How to delete a normal user account in Ubuntu system?
Jan 02, 2024 pm 12:34 PM
Many users have been added to the Ubuntu system. I want to delete the users that are no longer in use. How to delete them? Let’s take a look at the detailed tutorial below. 1. Open the terminal command line and use the userdel command to delete the specified user. Be sure to add the sudo permission command, as shown in the figure below. 2. When deleting, be sure to be in the administrator directory. Ordinary users do not have this permission. , as shown in the figure below 3. After the delete command is executed, how to judge whether it has been truly deleted? Next we use the cat command to open the passwd file, as shown in the figure below 4. We see that the deleted user information is no longer in the passwd file, which proves that the user has been deleted, as shown in the figure below 5. Then we enter the home file
 What is sudo and why is it important?
Feb 21, 2024 pm 07:01 PM
What is sudo and why is it important?
Feb 21, 2024 pm 07:01 PM
sudo (superuser execution) is a key command in Linux and Unix systems that allows ordinary users to run specific commands with root privileges. The function of sudo is mainly reflected in the following aspects: Providing permission control: sudo achieves strict control over system resources and sensitive operations by authorizing users to temporarily obtain superuser permissions. Ordinary users can only obtain temporary privileges through sudo when needed, and do not need to log in as superuser all the time. Improved security: By using sudo, you can avoid using the root account during routine operations. Using the root account for all operations may lead to unexpected system damage, as any mistaken or careless operation will have full permissions. and
 How to set permission access in QQ space
Feb 23, 2024 pm 02:22 PM
How to set permission access in QQ space
Feb 23, 2024 pm 02:22 PM
How to set permission access in QQ space? You can set permission access in QQ space, but most friends don’t know how to set permission access in QQ space. Next is the diagram of how to set permission access in QQ space brought by the editor for users. Text tutorial, interested users come and take a look! QQ usage tutorial QQ space how to set permission access 1. First open the QQ application, click [Avatar] in the upper left corner of the main page; 2. Then expand the personal information area on the left and click the [Settings] function in the lower left corner; 3. Enter the settings page Swipe to find the [Privacy] option; 4. Next in the privacy interface, select the [Permission Settings] service; 5. Then challenge to the latest page and select [Space Dynamics]; 6. Set up in QQ Space again
 Analysis of user password storage mechanism in Linux system
Mar 20, 2024 pm 04:27 PM
Analysis of user password storage mechanism in Linux system
Mar 20, 2024 pm 04:27 PM
Analysis of user password storage mechanism in Linux system In Linux system, the storage of user password is one of the very important security mechanisms. This article will analyze the storage mechanism of user passwords in Linux systems, including the encrypted storage of passwords, the password verification process, and how to securely manage user passwords. At the same time, specific code examples will be used to demonstrate the actual operation process of password storage. 1. Encrypted storage of passwords In Linux systems, user passwords are not stored in the system in plain text, but are encrypted and stored. L
 Discuz Forum Permission Management: Read Permission Setting Guide
Mar 10, 2024 pm 05:33 PM
Discuz Forum Permission Management: Read Permission Setting Guide
Mar 10, 2024 pm 05:33 PM
Discuz forum permission management: Read the permission setting guide In Discuz forum management, permission setting is a crucial part. Among them, the setting of reading permissions is particularly important, as it determines the scope of content that different users can see in the forum. This article will introduce in detail the reading permission settings of the Discuz forum and how to flexibly configure it for different needs. 1. Basic concepts of reading permissions In the Discuz forum, reading permissions mainly include the following concepts that need to be understood: Default reading permissions: Default after new user registration
