
U disk reinstallation system can help users reinstall the system when the computer freezes, blue screen, black screen, or cannot boot. Many users don’t know how to install it, or they get confused after seeing the tutorial. It’s actually very simple. Just look at the detailed graphic steps to install a new and easy-to-use system on your computer. Let’s take a look at the detailed steps below. Bar.

Note: This The software used in the tutorial is completely free, green and non-toxic. Both desktop and laptop users can install the system according to the tutorial!
1. First prepare a U disk with a memory size of 8G or more, and then download the U disk creation tool to your computer. Insert the USB flash drive into the computer and follow the tool prompts to create a system USB flash drive.
2. Download the system you want to install and put the file in a USB flash drive. The system size is generally 3-7GB.
1. Restart the computer and press F12 when booting to enter the startup item selection. (Different computer models have different startup item buttons. Generally, the computer starts The keys are F8, F9, F11, F12, ESC)
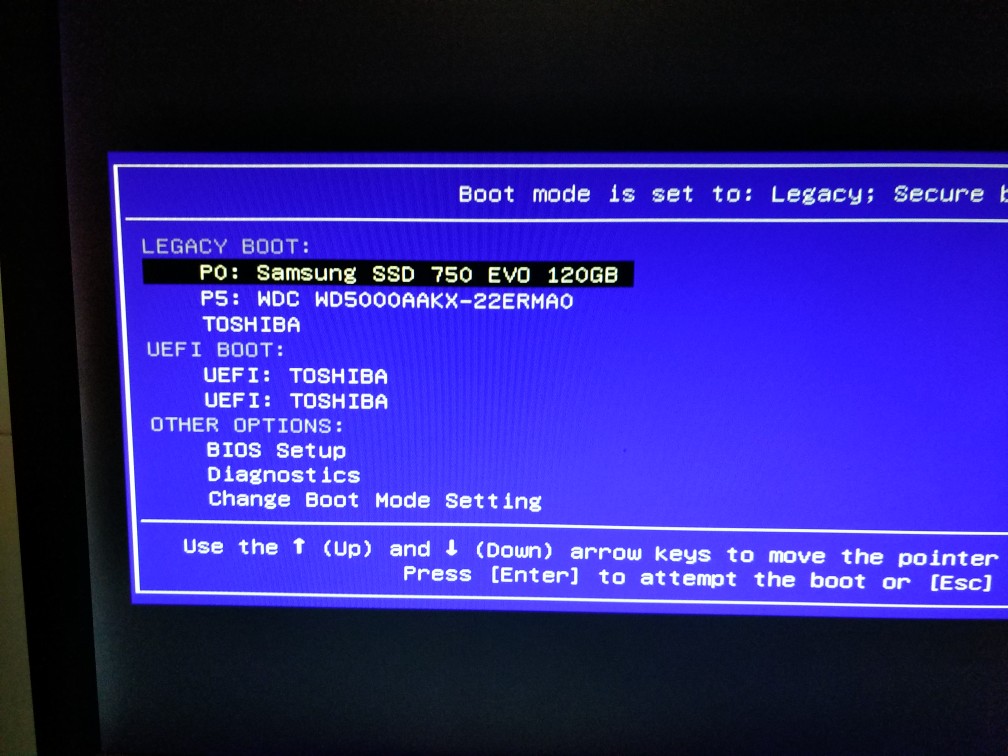
2. Then use the direction keys to select the option where the U disk is located in the list. It will usually have the word USB or U Enter the brand name of the USB flash drive (Sandisk, Toshiba, etc.), and then press Enter to enter the PE menu selection interface of the USB flash drive.
Find the U disk to be booted and identify the UEFI and Legacy modes
The micro PEU disk supports two boot methods:
Legacy

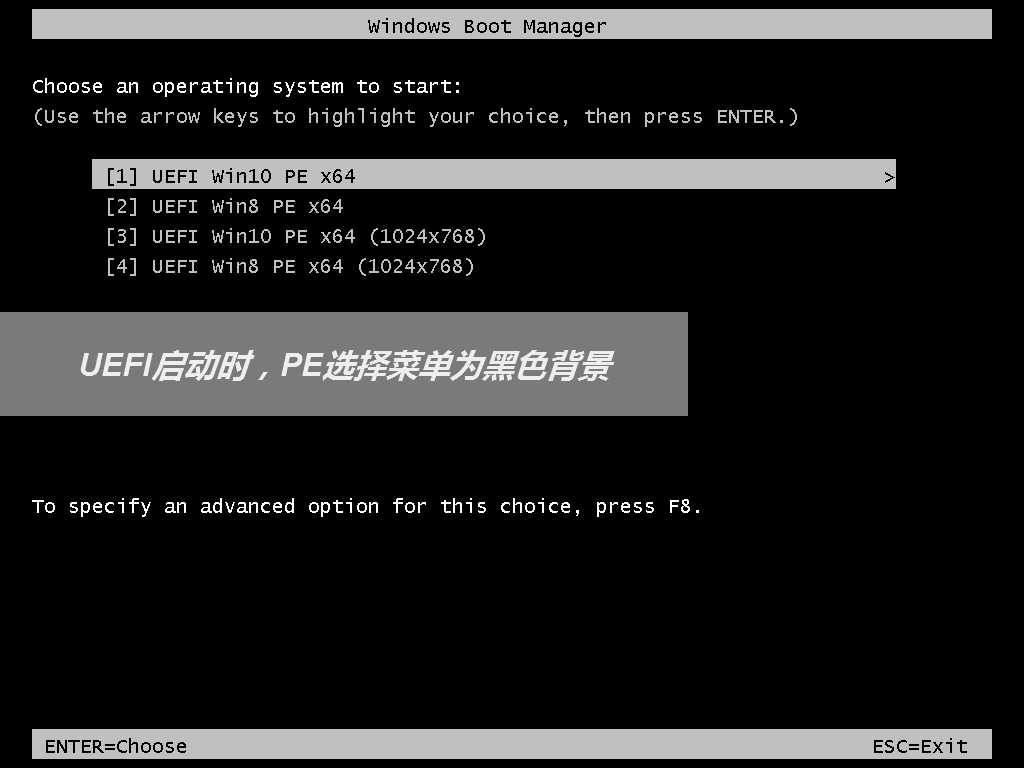
3. Select a suitable WinPE system version to enter
Micro PEU disk supports multiple PE systems. You can choose on demand in the black or blue PE selection interface. The blue menu of legacy startup allows you to freely decide the PE system version and bit number 32-bit or 64-bit.
The black menu of UEFI startup has been The number of bits is automatically determined according to the machine, and you can only select the system version. 10PE and 8PE are the two most commonly used PEs at present. 10PE is used for newer machines, and 8PE is used for older machines.
If you are not sure, just choose the default Win10PEx64. The specific functional differences between 10PE, 8PE, 32-bit and 64-bit will be listed separately in subsequent tutorials. After selecting, hit Enter to officially enter the PE system.

If you can successfully enter this PE desktop and know whether you are entering legacy mode PE or UEFI mode PE (by selecting the PE version in the menu page The background is blue/black (OK), and the first step is completed. Although it may seem like only a small step has been completed now, it is a big step towards success.
Note! The partitioning tutorial will completely format the hard drive.
This partition method can reclassify the partition into GPT or MBR.
Be sure to back up your data before partitioning.
To perform this operation, you need to use professional partitioning tools. Here we recommend the partition assistant, which is relatively simple and intuitive. Open the "Partition Assistant (lossless)" on the PE desktop. You will see a list of your current hard drives.
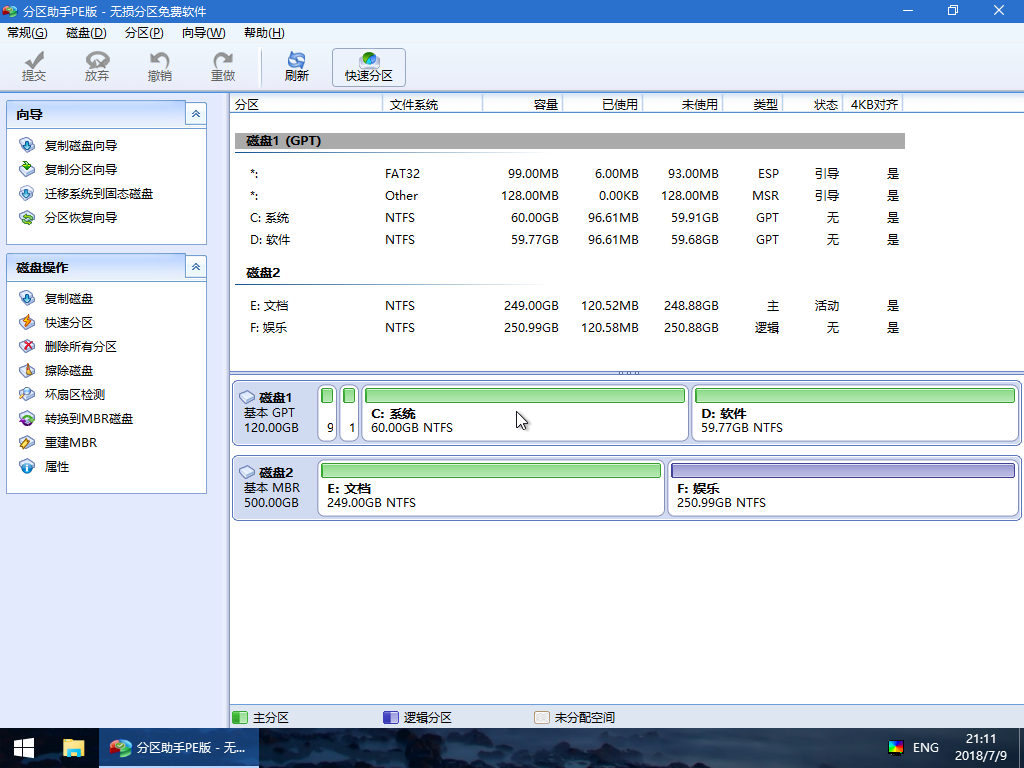
Right-click on the hard disk that needs to be partitioned and select Quick Partition.
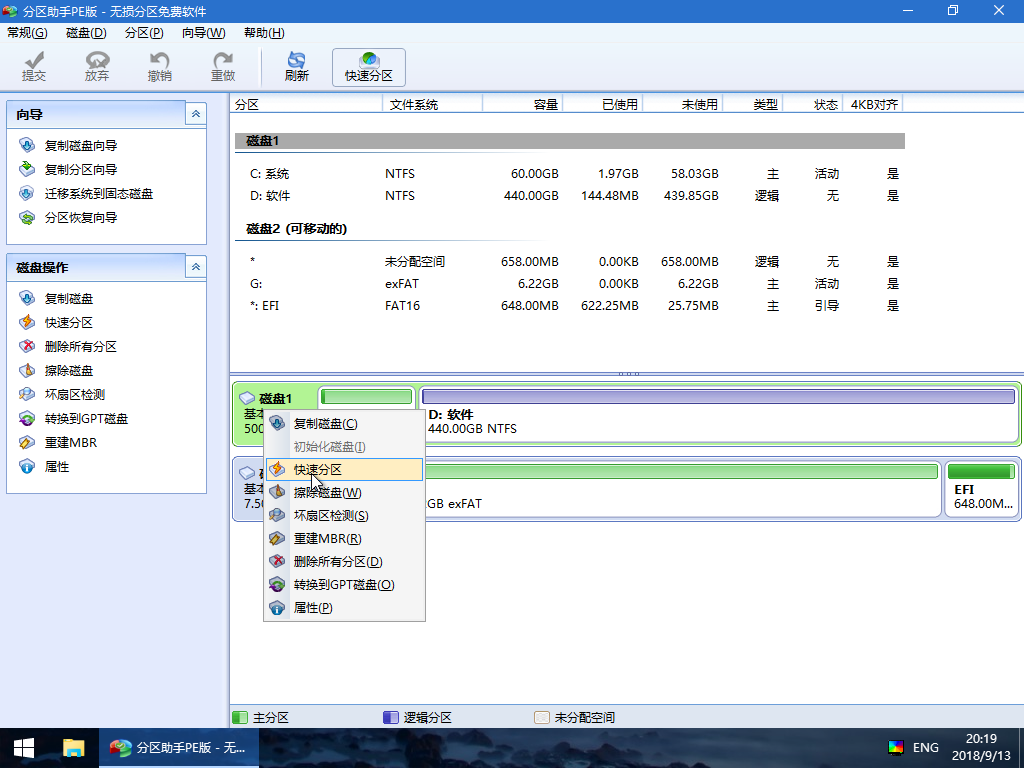
In the pop-up quick partition window, select the number of partitions required, partition table type GPT or MBR, 4K alignment, etc., and then click to start execution.
Note:
If you need to use UEFI to boot the system, you must select the GPT partition table here. If you use Legacy mode to boot the computer, you must select MBR here.
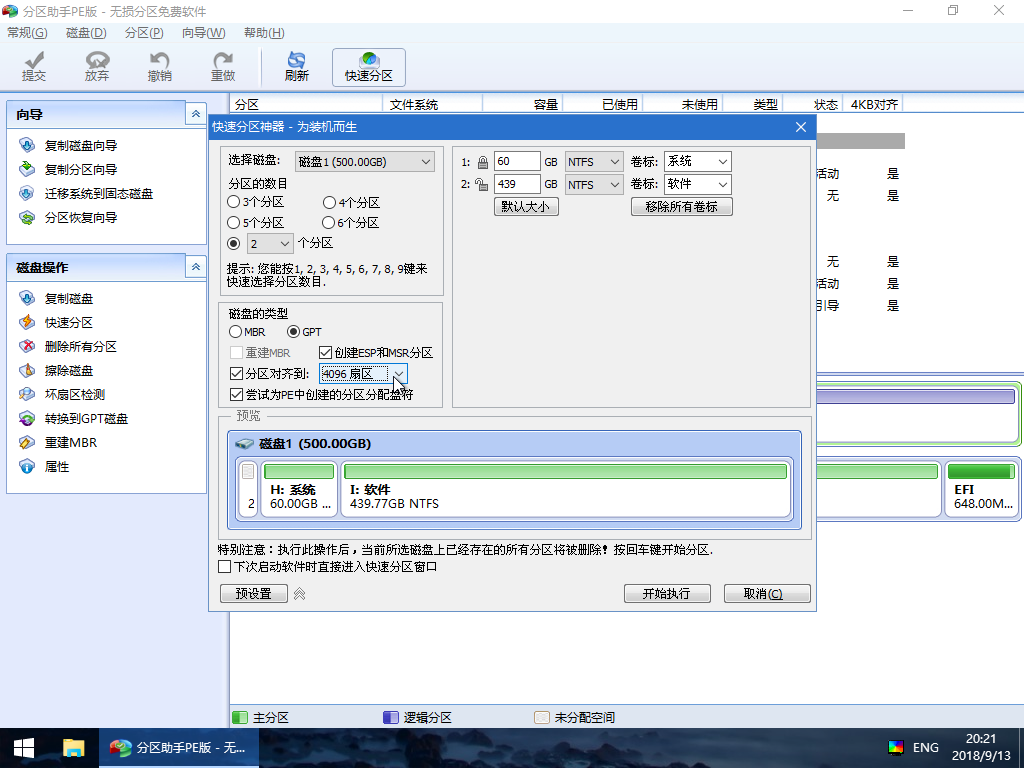
Wait for the partition operation to be completed after the execution is completed.
1. Directly open the system with the U disk to start the one-click smart installation.
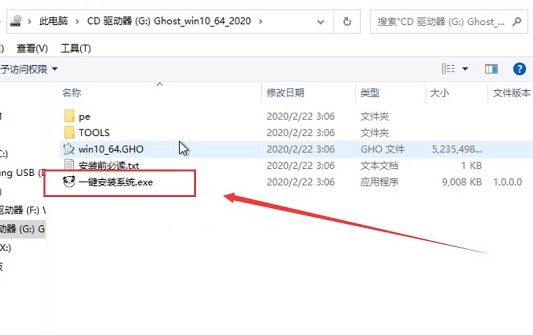
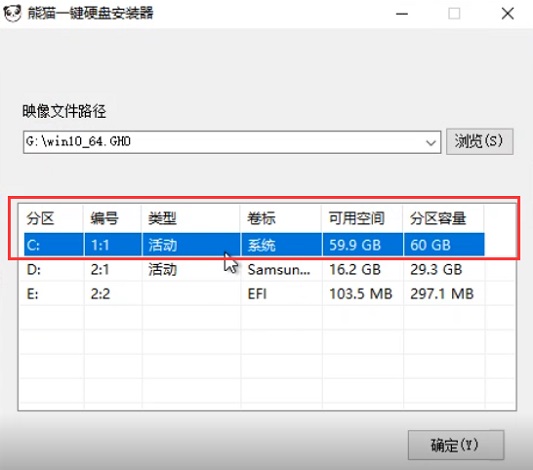
#3. Ghost is restoring computer system settings, please wait patiently.
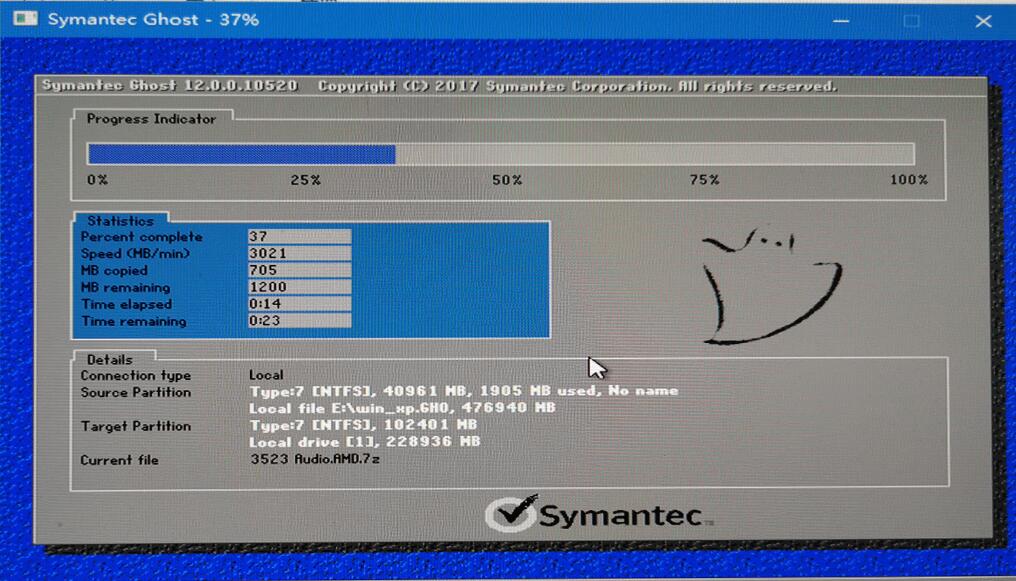
4. Then the system will automatically install the driver for the users, and no operation is required during the whole process. (Install the necessary drivers for users to prevent the system from being unable to be used normally after the system is installed successfully.)
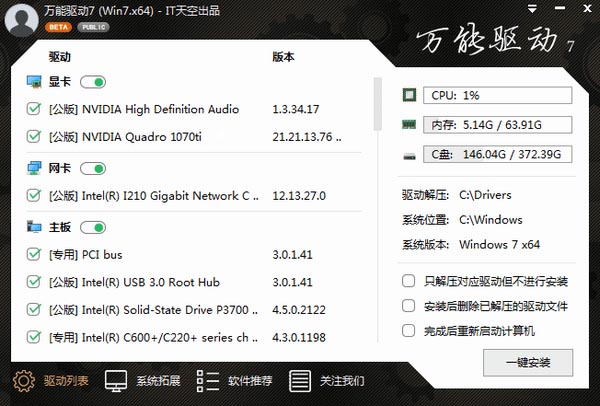
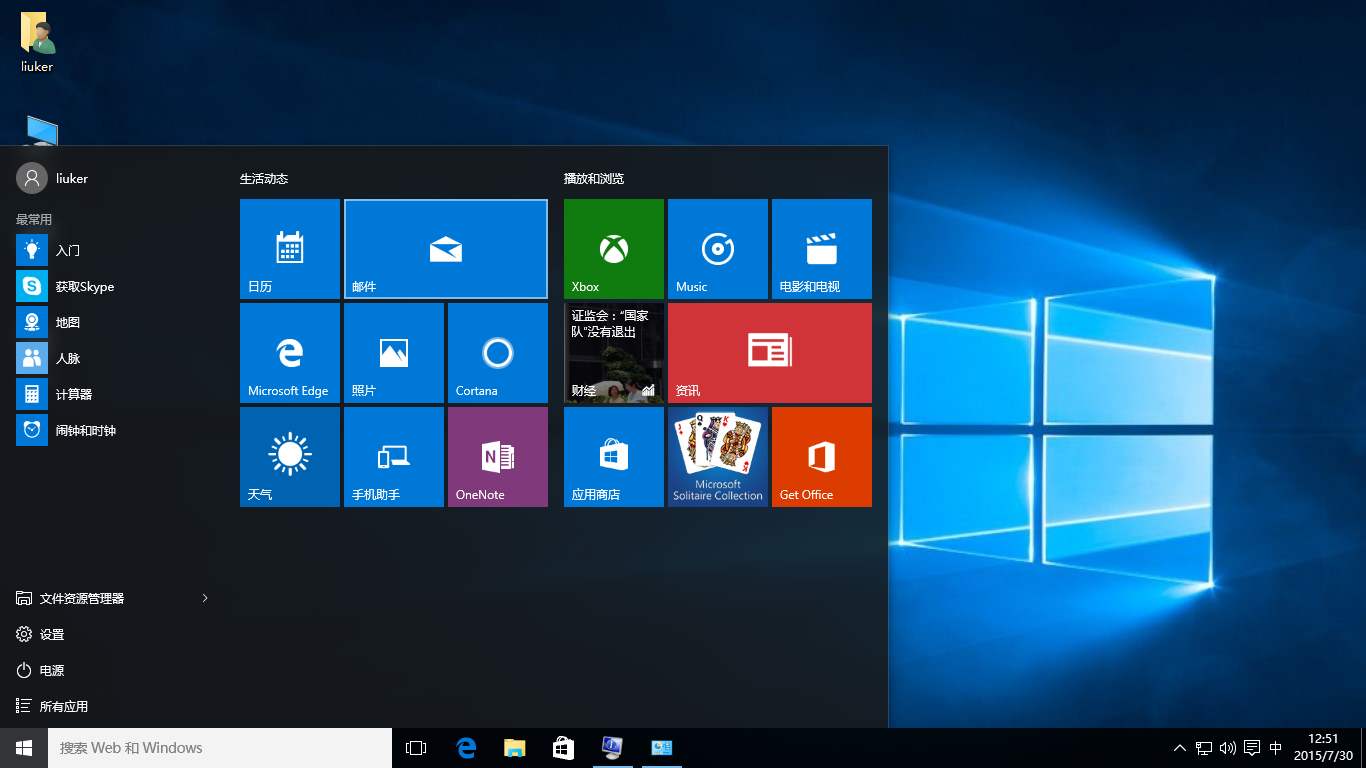
5. After the system is installed, restart and it can be used normally. .
The above is the detailed content of Reinstalling the system from USB disk. For more information, please follow other related articles on the PHP Chinese website!
 setInterval
 What is the shortcut key for brush size?
 Detailed explanation of linux dd command
 How to solve disk parameter errors
 What are the SEO diagnostic methods?
 What are the css3 gradient properties?
 The most promising coin in 2024
 What does pycharm mean when running in parallel?
 The difference between PD fast charging and general fast charging


