Home > System Tutorial > Windows Series > Steps to enable experience sharing function - How to operate in Win10?

Steps to enable experience sharing function - How to operate in Win10?

WBOY
Release: 2023-12-28 14:36:06
forward
1400 people have browsed it

The latest version of Windows 10 system provides an experience sharing function, which can facilitate and quickly exchange data with nearby computers through sharing. So how to enable the experience sharing function of Windows 10 system? Let’s take a look with the editor.

Steps to enable experience sharing function - How to operate in Win10?

Detailed steps to enable experience sharing function in Win10

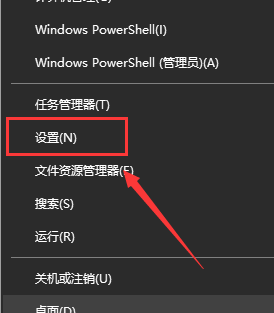
In Win10 system, right-click the "Start" button on the desktop and select the "Settings" menu item.
Steps to enable experience sharing function - How to operate in Win10?

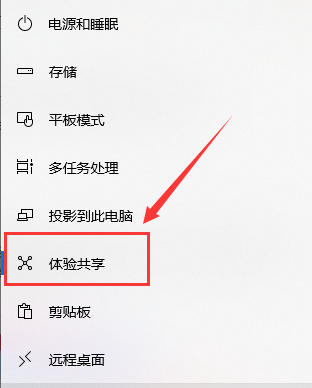
Then, in the system settings window, click the "Experience Sharing" menu option in the left sidebar.
Steps to enable experience sharing function - How to operate in Win10?

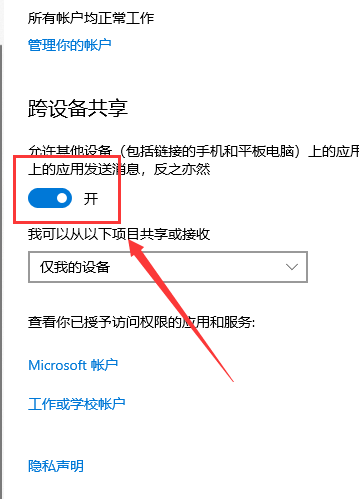
Click and find the "Cross-device sharing" setting item in the right window and turn on "Allow apps on other devices".
Steps to enable experience sharing function - How to operate in Win10?

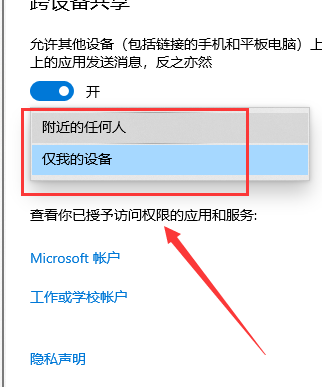
Finally we select the "Anyone Nearby" menu item so that we can share files with nearby devices.
Steps to enable experience sharing function - How to operate in Win10?

The above is the detailed content of Steps to enable experience sharing function - How to operate in Win10?. For more information, please follow other related articles on the PHP Chinese website!

Related labels:
source:somode.com
Statement of this Website
The content of this article is voluntarily contributed by netizens, and the copyright belongs to the original author. This site does not assume corresponding legal responsibility. If you find any content suspected of plagiarism or infringement, please contact admin@php.cn
Popular Tutorials
More>
Latest Downloads
More>
Web Effects
Website Source Code
Website Materials
Front End Template