Solutions to font changes after updating IDEA under Ubuntu Linux
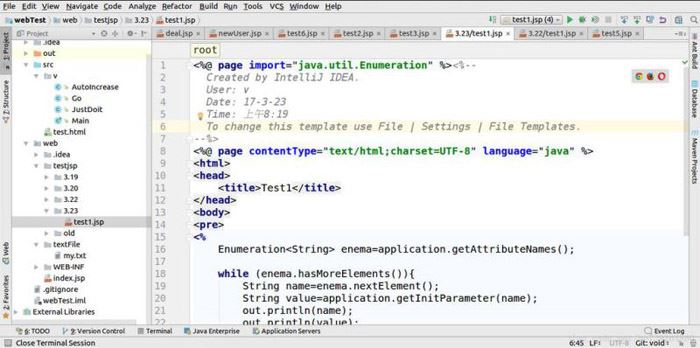
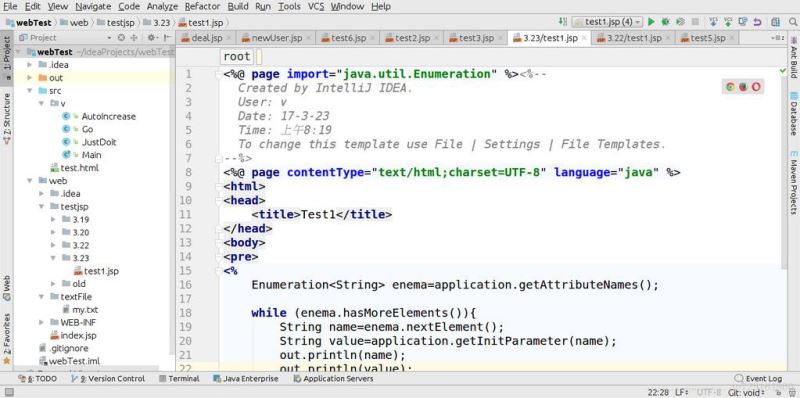
An update of idea came early this morning. Without thinking too much, I went to the official website and downloaded the 2017.1 version of idea and installed it on my computer. However, I found that I encountered a very embarrassing problem:

Before update

Updated
Thinking about it carefully, it should not be a system problem, because everyone is using the same font, so I went to find the font setting file of idea and searched for it but couldn't find a good answer.
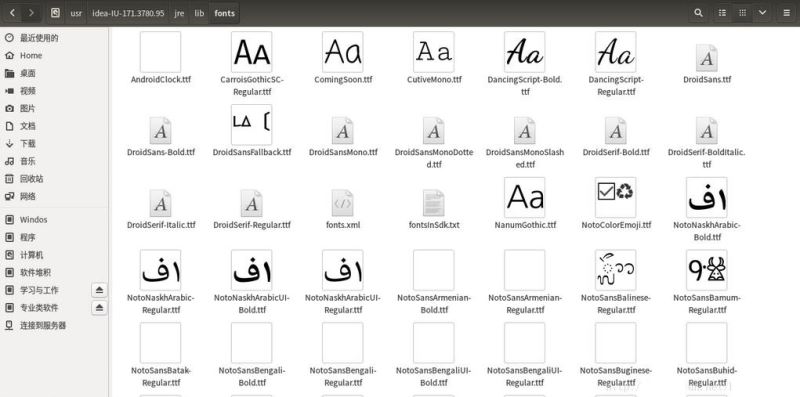
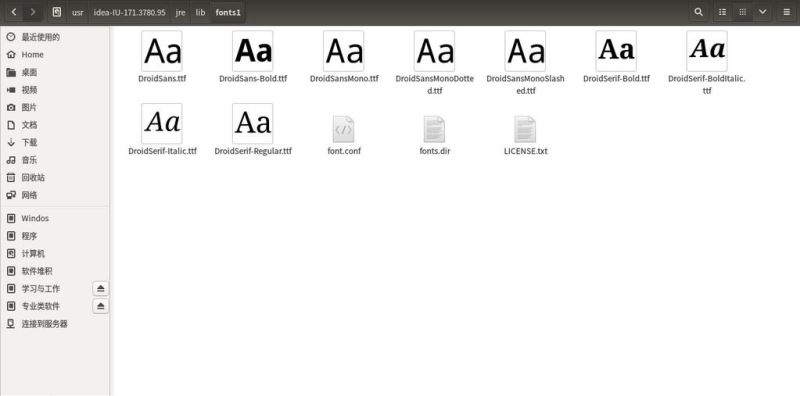
So I looked for it myself, and finally I found that I could search for a folder by directly searching for fonts in the idea folder. Compare:

old version

new version
This is where the problem lies. It is obvious that the fonts of the new version are much smaller than the fonts of the old version. (Actually, I find this interface quite interesting, because it means that the idea does not directly reference the system fonts, but copies the font directory and then calls the font. I don’t know the specific implementation process of the idea. But I think this is probably how it works)
It’s easy to do now, just copy all the old fonts files to the new fonts files, restart the idea, and the long-lost Ubuntu fonts will be back!
The above is the detailed content of Solutions to font changes after updating IDEA under Ubuntu Linux. For more information, please follow other related articles on the PHP Chinese website!

Hot AI Tools

Undresser.AI Undress
AI-powered app for creating realistic nude photos

AI Clothes Remover
Online AI tool for removing clothes from photos.

Undress AI Tool
Undress images for free

Clothoff.io
AI clothes remover

AI Hentai Generator
Generate AI Hentai for free.

Hot Article

Hot Tools

Notepad++7.3.1
Easy-to-use and free code editor

SublimeText3 Chinese version
Chinese version, very easy to use

Zend Studio 13.0.1
Powerful PHP integrated development environment

Dreamweaver CS6
Visual web development tools

SublimeText3 Mac version
God-level code editing software (SublimeText3)

Hot Topics
 1378
1378
 52
52
 How to start apache
Apr 13, 2025 pm 01:06 PM
The steps to start Apache are as follows: Install Apache (command: sudo apt-get install apache2 or download it from the official website) Start Apache (Linux: sudo systemctl start apache2; Windows: Right-click the "Apache2.4" service and select "Start") Check whether it has been started (Linux: sudo systemctl status apache2; Windows: Check the status of the "Apache2.4" service in the service manager) Enable boot automatically (optional, Linux: sudo systemctl
 What to do if the apache80 port is occupied
Apr 13, 2025 pm 01:24 PM
When the Apache 80 port is occupied, the solution is as follows: find out the process that occupies the port and close it. Check the firewall settings to make sure Apache is not blocked. If the above method does not work, please reconfigure Apache to use a different port. Restart the Apache service.
 The importance of Debian Sniffer in network monitoring
Apr 12, 2025 pm 11:03 PM
Although the search results do not directly mention "DebianSniffer" and its specific application in network monitoring, we can infer that "Sniffer" refers to a network packet capture analysis tool, and its application in the Debian system is not essentially different from other Linux distributions. Network monitoring is crucial to maintaining network stability and optimizing performance, and packet capture analysis tools play a key role. The following explains the important role of network monitoring tools (such as Sniffer running in Debian systems): The value of network monitoring tools: Fast fault location: Real-time monitoring of network metrics, such as bandwidth usage, latency, packet loss rate, etc., which can quickly identify the root cause of network failures and shorten the troubleshooting time.
 How to optimize the performance of debian readdir
Apr 13, 2025 am 08:48 AM
In Debian systems, readdir system calls are used to read directory contents. If its performance is not good, try the following optimization strategy: Simplify the number of directory files: Split large directories into multiple small directories as much as possible, reducing the number of items processed per readdir call. Enable directory content caching: build a cache mechanism, update the cache regularly or when directory content changes, and reduce frequent calls to readdir. Memory caches (such as Memcached or Redis) or local caches (such as files or databases) can be considered. Adopt efficient data structure: If you implement directory traversal by yourself, select more efficient data structures (such as hash tables instead of linear search) to store and access directory information
 How to restart the apache server
Apr 13, 2025 pm 01:12 PM
To restart the Apache server, follow these steps: Linux/macOS: Run sudo systemctl restart apache2. Windows: Run net stop Apache2.4 and then net start Apache2.4. Run netstat -a | findstr 80 to check the server status.
 How to learn Debian syslog
Apr 13, 2025 am 11:51 AM
This guide will guide you to learn how to use Syslog in Debian systems. Syslog is a key service in Linux systems for logging system and application log messages. It helps administrators monitor and analyze system activity to quickly identify and resolve problems. 1. Basic knowledge of Syslog The core functions of Syslog include: centrally collecting and managing log messages; supporting multiple log output formats and target locations (such as files or networks); providing real-time log viewing and filtering functions. 2. Install and configure Syslog (using Rsyslog) The Debian system uses Rsyslog by default. You can install it with the following command: sudoaptupdatesud
 How to solve the problem that apache cannot be started
Apr 13, 2025 pm 01:21 PM
Apache cannot start because the following reasons may be: Configuration file syntax error. Conflict with other application ports. Permissions issue. Out of memory. Process deadlock. Daemon failure. SELinux permissions issues. Firewall problem. Software conflict.
 Does the internet run on Linux?
Apr 14, 2025 am 12:03 AM
The Internet does not rely on a single operating system, but Linux plays an important role in it. Linux is widely used in servers and network devices and is popular for its stability, security and scalability.


