
Recently, the editor received a lot of private messages in the background. Many friends came to this site to ask the editor how to add the word font library for the Lenovo notebook. The editor didn't know it at first, so he went to the Internet to collect relevant information and finally found it. I have learned how to add new fonts to office in win10. The detailed content is in the article below. If you need it, please come to this site to take a look.

The specific steps are as follows:
1. Let’s first open “Start” in the lower left corner of the desktop ” button, and then click the Open Document option in the menu list;
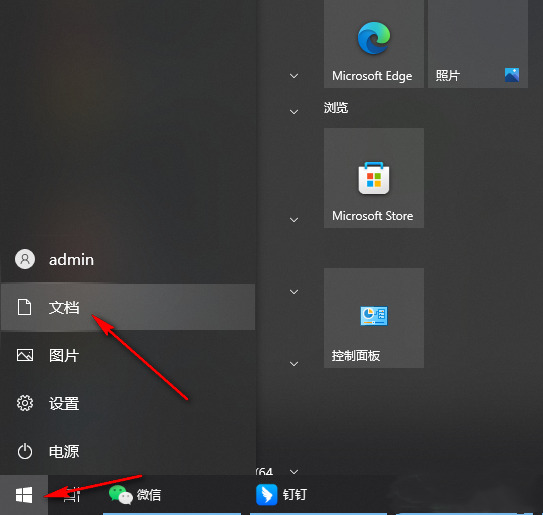
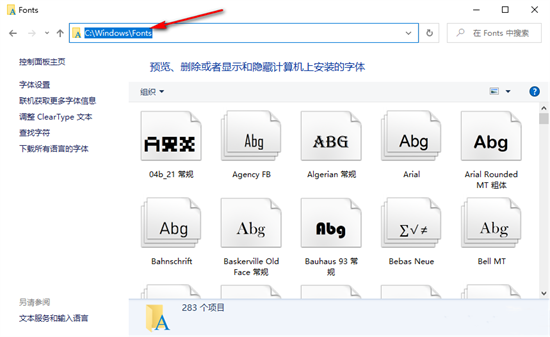
2. After entering the document page, we click the folder icon in the path box on the page, and then Select all paths, then replace the path with "C:WindowsFonts" and click the Enter key to enter the font folder;
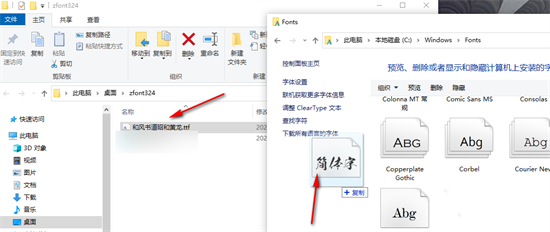
3. We will download the unzipped fonts ourselves Right-click the file and "Install for all users", or drag it directly into the folder;
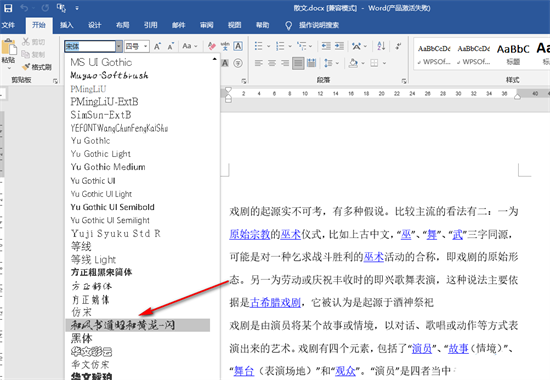
4. After the installation is complete, we use Word to open a text document, Then open the font option in the "Start" sub-toolbar on this page;

5. After opening the font option, you can find the one you just installed in the drop-down list. font.
The above is the detailed content of How to add Word font library to Lenovo notebook in Win10 and add new fonts to Office. For more information, please follow other related articles on the PHP Chinese website!
 How to turn off win10 upgrade prompt
 The difference between lightweight application servers and cloud servers
 CMD close port command
 The difference between external screen and internal screen broken
 How to jump with parameters in vue.js
 Cell sum
 How to intercept harassing calls
 virtual digital currency


