
 System Tutorial
Windows Series
Detailed explanation of the complete tutorial on lossless reinstallation of win7 U disk system
System Tutorial
Windows Series
Detailed explanation of the complete tutorial on lossless reinstallation of win7 U disk system
Detailed explanation of the complete tutorial on lossless reinstallation of win7 U disk system

Many win7 system users sometimes experience system failures. Nowadays, it is a common method to use a USB flash drive to reinstall the system. However, many users still don’t know how to solve this problem. Here are some compiled by the editor. Let’s take a look at the detailed tutorial~
Detailed solution tutorial for win7 U disk reinstallation system:
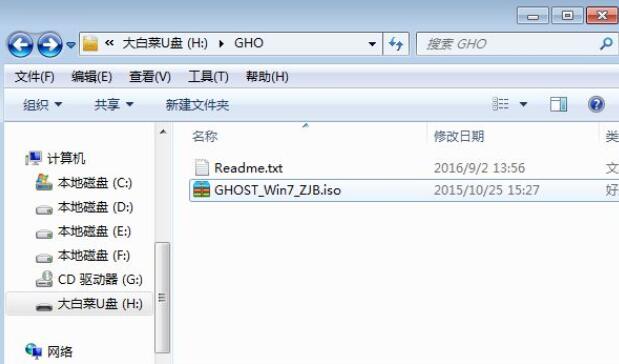
1. After making the U disk boot disk, copy the downloaded win7 iso file directly to In the GHO directory of the USB flash drive, the iso image does not need to be decompressed.
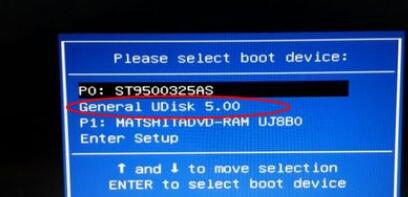
2. Insert the U disk into the computer that needs to reinstall the win7 system. After restarting, press F12, F11, Esc and other shortcut keys to open the boot menu and select the U disk. Option and press Enter. For computers that do not support these startup keys, check the second point to set the U disk startup method.
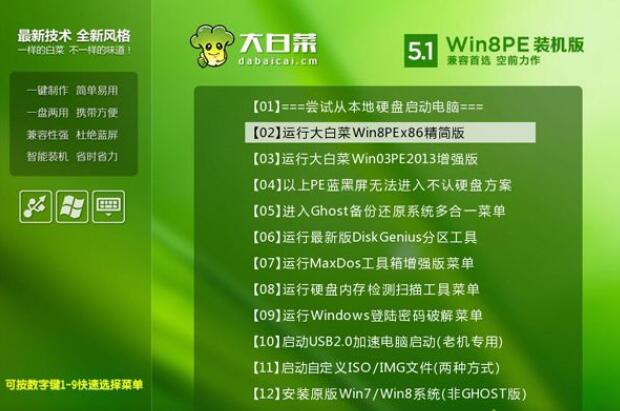
3. Boot from the U disk to enter this main menu, press number 2 or use the direction keys to select the option and press Enter to start the pe system. If you cannot enter, choose to run the old version. PE system.
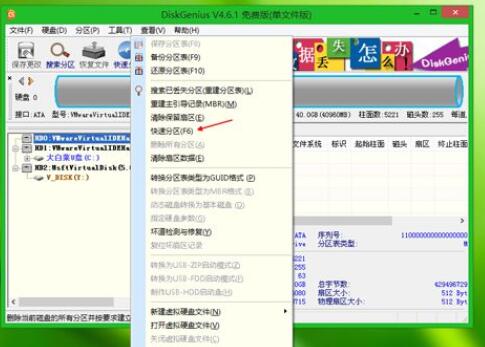
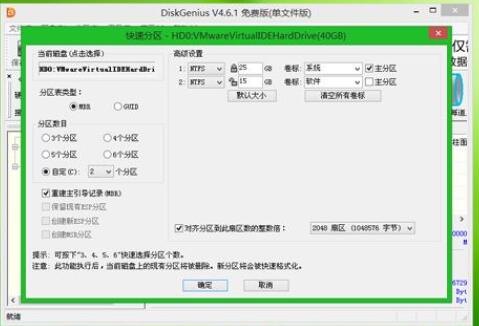
4. After booting, enter the pe system. If you do not need a partition, you can jump directly to step 6. If you need to repartition, back up all data, then double-click to open the "DG Differentiation Tool", right-click the hard disk and select "Quick Differentiation".
5. Set the number and size of partitions. Generally, the C drive is recommended to be 35G or above. If it is a solid-state drive, check "Align Partitions" to align 4k, and click OK , perform the hard disk partitioning process.
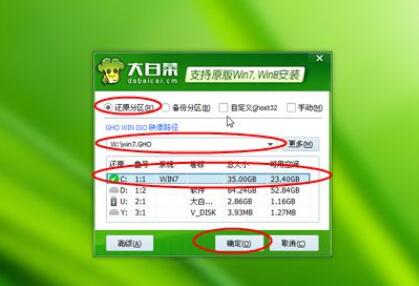
6. After completing the partition, open "Chinese cabbage one-click installation" and select the win7 iso image as the image path. The gho file will be automatically extracted. Click the drop-down box and select win7.gho file.

7. Then click "Restore Partition" and select the location of the system disk, usually the C drive. If the C drive is not displayed, you can click "Volume Label", "Disk Size" selection and click OK.
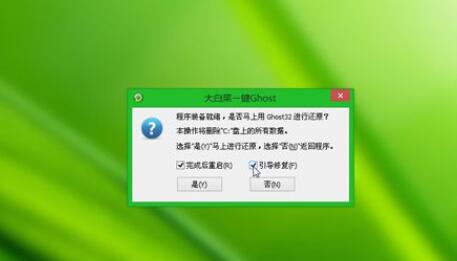
8. After confirmation, a floating window pops up, check "Restart after completion" and "Boot Repair", and click Yes to start the restoration process.
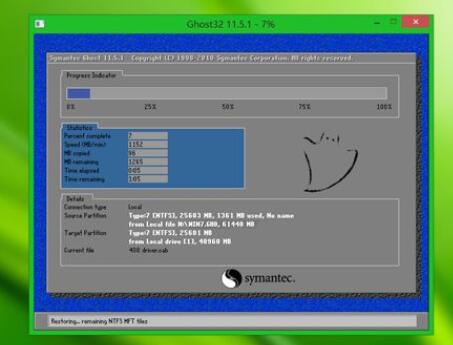
9. Next, perform the operation of restoring the win7 system to the C drive. This process will take about 5 minutes to complete.
10. After the operation is completed, the computer will automatically restart. At this time, pull out the U disk, restart to enter this interface, and continue the process of reinstalling win7 system and system configuration.
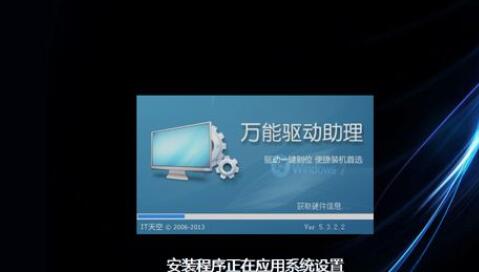
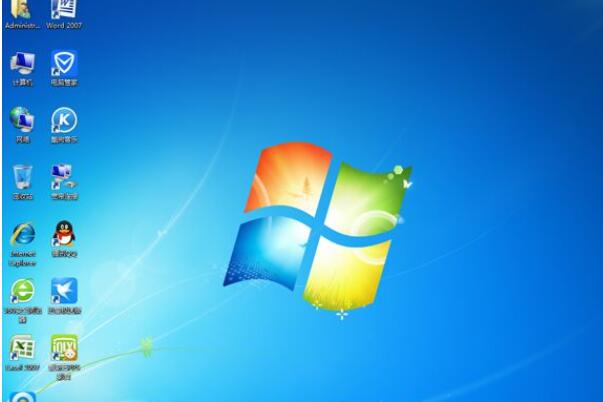
11. The installation process takes about 5-10 minutes, just restart it again.
The above is the detailed content of Detailed explanation of the complete tutorial on lossless reinstallation of win7 U disk system. For more information, please follow other related articles on the PHP Chinese website!

Hot AI Tools

Undresser.AI Undress
AI-powered app for creating realistic nude photos

AI Clothes Remover
Online AI tool for removing clothes from photos.

Undress AI Tool
Undress images for free

Clothoff.io
AI clothes remover

AI Hentai Generator
Generate AI Hentai for free.

Hot Article
Hot Tools

Notepad++7.3.1
Easy-to-use and free code editor

SublimeText3 Chinese version
Chinese version, very easy to use

Zend Studio 13.0.1
Powerful PHP integrated development environment

Dreamweaver CS6
Visual web development tools

SublimeText3 Mac version
God-level code editing software (SublimeText3)
Hot Topics
 1378
1378
 52
52

 Solution to the problem that Win11 system cannot install Chinese language pack
Mar 09, 2024 am 09:48 AM
Solution to the problem that Win11 system cannot install Chinese language pack
Mar 09, 2024 am 09:48 AM
Solution to the problem that Win11 system cannot install Chinese language pack With the launch of Windows 11 system, many users began to upgrade their operating system to experience new functions and interfaces. However, some users found that they were unable to install the Chinese language pack after upgrading, which troubled their experience. In this article, we will discuss the reasons why Win11 system cannot install the Chinese language pack and provide some solutions to help users solve this problem. Cause Analysis First, let us analyze the inability of Win11 system to
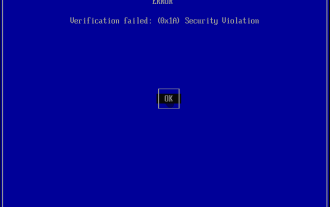 Ventoy secure boot settingsSecure Boot
Jun 18, 2024 pm 09:00 PM
Ventoy secure boot settingsSecure Boot
Jun 18, 2024 pm 09:00 PM
Ventoy is a USB boot tool that can directly boot ISO/WIM/IMG/VHD(x)/EFI and other types of files in the USB flash drive. It is very easy to use. Laptops have secure boot turned on by default. If they are not turned off or cannot be turned off, they cannot be booted from a USB device. Ventoy also supports secure boot. The principle is to inject a GRUB installation certificate into the current computer. As long as your computer After being injected once, any USB disk PE booted based on grub can pass. The official description of Ventoy is a GIF image. The playback speed is too fast and you may not be able to remember it. The editor has divided the GIF image to make it easier to understand. Ventoy secure boot has EnrollKey and Enro
 Solution for Win11 unable to install Chinese language pack
Mar 09, 2024 am 09:15 AM
Solution for Win11 unable to install Chinese language pack
Mar 09, 2024 am 09:15 AM
Win11 is the latest operating system launched by Microsoft. Compared with previous versions, Win11 has greatly improved the interface design and user experience. However, some users reported that they encountered the problem of being unable to install the Chinese language pack after installing Win11, which caused trouble for them to use Chinese in the system. This article will provide some solutions to the problem that Win11 cannot install the Chinese language pack to help users use Chinese smoothly. First, we need to understand why the Chinese language pack cannot be installed. Generally speaking, Win11
 How to use shortcut keys to take screenshots in Win8?
Mar 28, 2024 am 08:33 AM
How to use shortcut keys to take screenshots in Win8?
Mar 28, 2024 am 08:33 AM
How to use shortcut keys to take screenshots in Win8? In our daily use of computers, we often need to take screenshots of the content on the screen. For users of Windows 8 system, taking screenshots through shortcut keys is a convenient and efficient operation method. In this article, we will introduce several commonly used shortcut keys to take screenshots in Windows 8 system to help you take screenshots more quickly. The first method is to use the "Win key + PrintScreen key" key combination to perform full
 Win11 Tips Sharing: Skip Microsoft Account Login with One Trick
Mar 27, 2024 pm 02:57 PM
Win11 Tips Sharing: Skip Microsoft Account Login with One Trick
Mar 27, 2024 pm 02:57 PM
Win11 Tips Sharing: One trick to skip Microsoft account login Windows 11 is the latest operating system launched by Microsoft, with a new design style and many practical functions. However, for some users, having to log in to their Microsoft account every time they boot up the system can be a bit annoying. If you are one of them, you might as well try the following tips, which will allow you to skip logging in with a Microsoft account and enter the desktop interface directly. First, we need to create a local account in the system to log in instead of a Microsoft account. The advantage of doing this is
 Win11 file attribute setting tutorial: How to display suffix name?
Mar 08, 2024 pm 06:18 PM
Win11 file attribute setting tutorial: How to display suffix name?
Mar 08, 2024 pm 06:18 PM
Win11 file attribute setting tutorial: How to display suffix name? As one of the most popular operating systems, Windows operating system has always been loved and used by users. In the latest version of Windows 11, some file attribute settings are different from previous versions, including how to display file extensions. This article will introduce how to set the display of file suffix names in Windows 11. In the Windows operating system, files are hidden by default.
 Sharing tips for obtaining administrator privileges in Win11
Mar 08, 2024 pm 06:45 PM
Sharing tips for obtaining administrator privileges in Win11
Mar 08, 2024 pm 06:45 PM
Share tips on obtaining Win11 administrator rights. Microsoft's latest operating system, Windows 11, brings a new experience to users, but sometimes we need to obtain administrator rights to perform some specific operations during system operations. In the Win11 system, it is not difficult to obtain administrator rights. You only need to master some skills to complete it easily. This article will share some tips on obtaining administrator rights in Win11 to help you operate the system better. 1. Use shortcut keys to obtain administrator rights in Win11 system, use
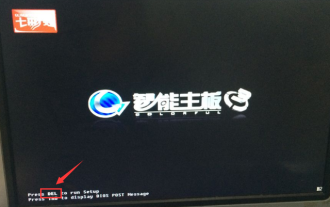 Colorful motherboard boot USB flash drive shortcut key
Mar 19, 2024 pm 12:55 PM
Colorful motherboard boot USB flash drive shortcut key
Mar 19, 2024 pm 12:55 PM
Hello everyone, today I will share a graphic tutorial from Xiaobai System official website (xiaobaixitong.com). Colorful motherboard is a computer motherboard brand with very good performance, and it has certain advantages in all aspects, and its price-performance ratio is also very high. So here comes the question, how to set the USB boot option for Colorful motherboard? Don’t worry, the editor will show you how to set up the USB disk boot option in Colorful. Teach you step by step how to set the U disk boot option for Colorful motherboard: First, insert the U disk into the computer, then turn on the computer and quickly and intermittently press the startup shortcut key to enter the BIOS setting interface (please note: usually it will be displayed below the computer brand logo Start hotkey hints). 2. Enter BIOS settings
