How to take and manage snapshots in Linux virtual machines
After installing a Linux virtual machine on vm, it is inevitable to operate the virtual machine, such as compiling the Linux kernel, etc. If you make a mistake in one step, everything will be lost. If you save each step as a snapshot, you can go back to the previous step without having to start over. How do you save the snapshot? Let’s take a look at the detailed tutorial below.
1. Open VMware software
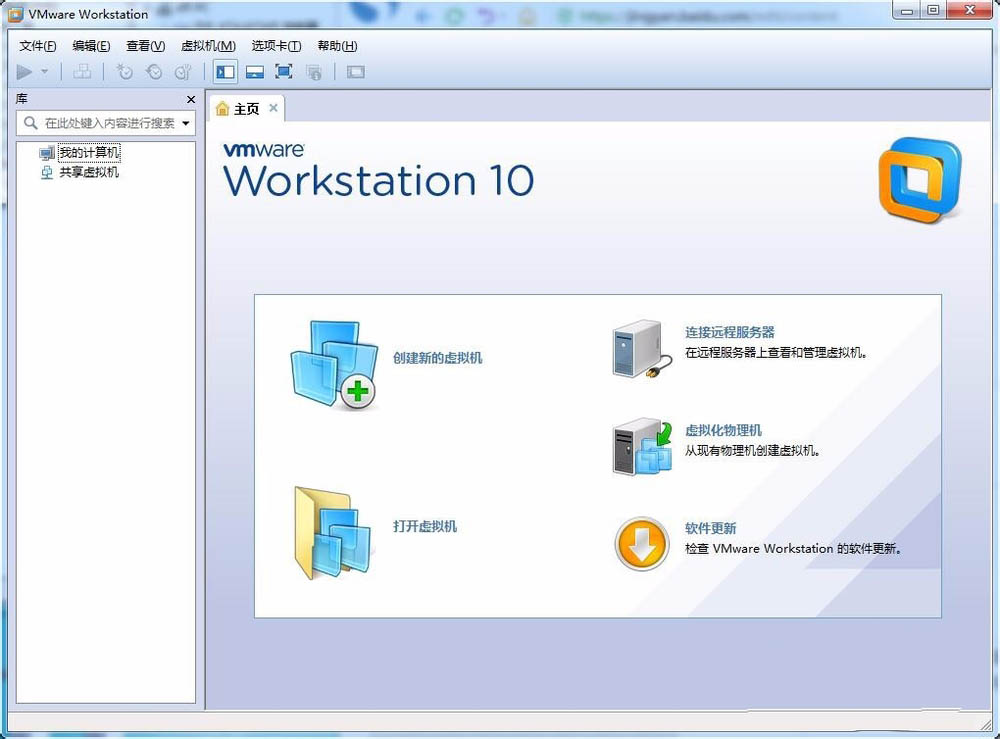
2. If you already have a Linux virtual machine, you can open it directly. If not, you need to install it. The editor already has a virtual machine, so just open it. Open the virtual machine--Go to all folders of the virtual machine and select the virtual machine
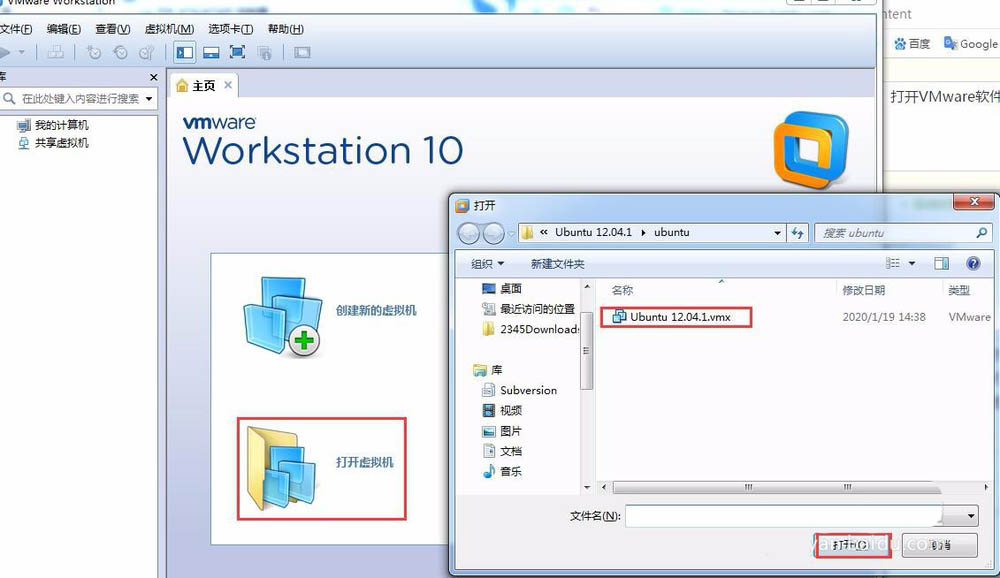
3. Turn on the virtual machine, that is, start the virtual machine
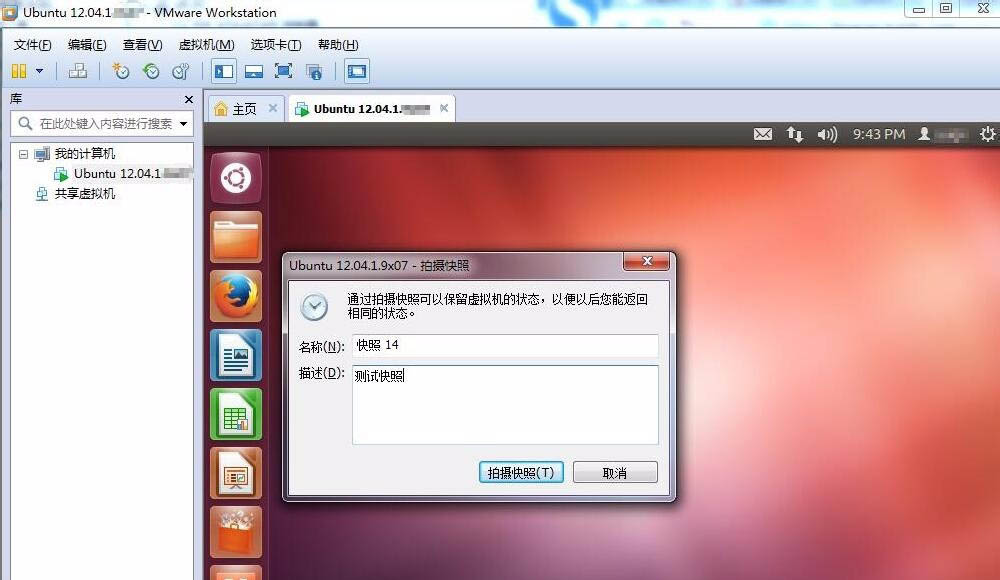
4, Take a snapshot.
Operation steps: Virtual machine--Snapshot--Take snapshot. In the pop-up dialog box, edit the snapshot information for easy viewing later. After editing, just click to take a snapshot
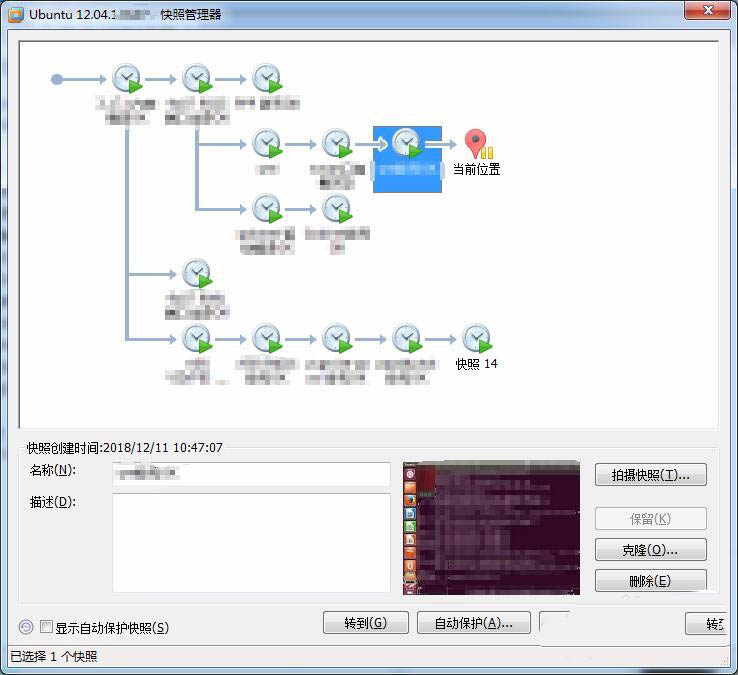
5. View the snapshot. Operation steps: Virtual machine--Snapshot--Snapshot manager,View all saved snapshots in the pop-up dialog box
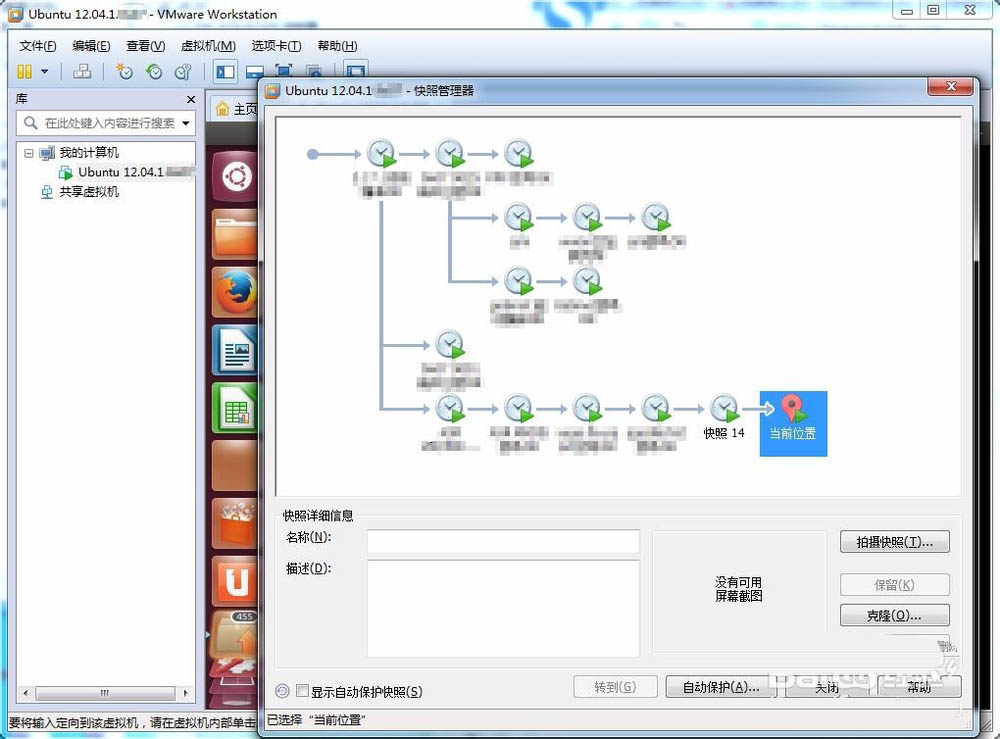
6. Jump to snapshot. In the previous step, you can see the current location of the virtual machine. If you need to jump to another branch, directly select the location you want to jump to, and then click Go to
The above is the detailed content of How to take and manage snapshots in Linux virtual machines. For more information, please follow other related articles on the PHP Chinese website!

Hot AI Tools

Undresser.AI Undress
AI-powered app for creating realistic nude photos

AI Clothes Remover
Online AI tool for removing clothes from photos.

Undress AI Tool
Undress images for free

Clothoff.io
AI clothes remover

AI Hentai Generator
Generate AI Hentai for free.

Hot Article

Hot Tools

Notepad++7.3.1
Easy-to-use and free code editor

SublimeText3 Chinese version
Chinese version, very easy to use

Zend Studio 13.0.1
Powerful PHP integrated development environment

Dreamweaver CS6
Visual web development tools

SublimeText3 Mac version
God-level code editing software (SublimeText3)

Hot Topics
 1378
1378
 52
52
 What is Linux actually good for?
Apr 12, 2025 am 12:20 AM
Linux is suitable for servers, development environments, and embedded systems. 1. As a server operating system, Linux is stable and efficient, and is often used to deploy high-concurrency applications. 2. As a development environment, Linux provides efficient command line tools and package management systems to improve development efficiency. 3. In embedded systems, Linux is lightweight and customizable, suitable for environments with limited resources.
 How to start apache
Apr 13, 2025 pm 01:06 PM
The steps to start Apache are as follows: Install Apache (command: sudo apt-get install apache2 or download it from the official website) Start Apache (Linux: sudo systemctl start apache2; Windows: Right-click the "Apache2.4" service and select "Start") Check whether it has been started (Linux: sudo systemctl status apache2; Windows: Check the status of the "Apache2.4" service in the service manager) Enable boot automatically (optional, Linux: sudo systemctl
 What to do if the apache80 port is occupied
Apr 13, 2025 pm 01:24 PM
When the Apache 80 port is occupied, the solution is as follows: find out the process that occupies the port and close it. Check the firewall settings to make sure Apache is not blocked. If the above method does not work, please reconfigure Apache to use a different port. Restart the Apache service.
 How to monitor Nginx SSL performance on Debian
Apr 12, 2025 pm 10:18 PM
This article describes how to effectively monitor the SSL performance of Nginx servers on Debian systems. We will use NginxExporter to export Nginx status data to Prometheus and then visually display it through Grafana. Step 1: Configuring Nginx First, we need to enable the stub_status module in the Nginx configuration file to obtain the status information of Nginx. Add the following snippet in your Nginx configuration file (usually located in /etc/nginx/nginx.conf or its include file): location/nginx_status{stub_status
 How to start monitoring of oracle
Apr 12, 2025 am 06:00 AM
The steps to start an Oracle listener are as follows: Check the listener status (using the lsnrctl status command) For Windows, start the "TNS Listener" service in Oracle Services Manager For Linux and Unix, use the lsnrctl start command to start the listener run the lsnrctl status command to verify that the listener is started
 How to set up a recycling bin in Debian system
Apr 12, 2025 pm 10:51 PM
This article introduces two methods of configuring a recycling bin in a Debian system: a graphical interface and a command line. Method 1: Use the Nautilus graphical interface to open the file manager: Find and start the Nautilus file manager (usually called "File") in the desktop or application menu. Find the Recycle Bin: Look for the Recycle Bin folder in the left navigation bar. If it is not found, try clicking "Other Location" or "Computer" to search. Configure Recycle Bin properties: Right-click "Recycle Bin" and select "Properties". In the Properties window, you can adjust the following settings: Maximum Size: Limit the disk space available in the Recycle Bin. Retention time: Set the preservation before the file is automatically deleted in the recycling bin
 How to restart the apache server
Apr 13, 2025 pm 01:12 PM
To restart the Apache server, follow these steps: Linux/macOS: Run sudo systemctl restart apache2. Windows: Run net stop Apache2.4 and then net start Apache2.4. Run netstat -a | findstr 80 to check the server status.
 How to optimize the performance of debian readdir
Apr 13, 2025 am 08:48 AM
In Debian systems, readdir system calls are used to read directory contents. If its performance is not good, try the following optimization strategy: Simplify the number of directory files: Split large directories into multiple small directories as much as possible, reducing the number of items processed per readdir call. Enable directory content caching: build a cache mechanism, update the cache regularly or when directory content changes, and reduce frequent calls to readdir. Memory caches (such as Memcached or Redis) or local caches (such as files or databases) can be considered. Adopt efficient data structure: If you implement directory traversal by yourself, select more efficient data structures (such as hash tables instead of linear search) to store and access directory information


