

Vim Text Editor Getting Started Guide


For a programmer, choosing a text editor is a very important thing. Because there are many differences between different editors: graphical interface or non-graphical interface, different shortcut keys, different programming language support, different plug-ins and custom settings, etc. My advice is not to search for the best editor, but to choose the one that best suits your habits and best suits your tasks. If you plan to work in a group, it's best to choose the same editor as your colleagues. This way, if you encounter problems during use, you can go to them for help.
This is exactly why I started using Vim a few years ago. Generally speaking, Vim is placed in opposition to the legendary Emacs. I admit I know very little about Emacs, but what you need to know about both is that they are both deeply customizable and can be very confusing at first. This tutorial won't cover everything there is to know about Vim, but it will cover the basics so you can get it right from the start, and then show you some tips that will (hopefully) give you the ability to explore on your own. study.
The word Vim comes from "Vi IMproved". Vi is a non-graphical text editor widely installed on Unix systems, and it is also installed by default on Linux systems. Vim is an enhanced version of this original editor, but unlike Vi, not every distribution has it installed by default.
InstallYou can use the following command to install Vim in Ubuntu:
sudo apt-get install vim
If you are already interested in certain plug-ins, use the following command:
sudo apt-cache search vim
This command will output you a long list of packages related to Vim. Among these, there are tools for different programming languages, plug-in managers, and so on.
In this series of tutorials, I will use the latest version of Vim (7.3.154, LCTT Annotation: the latest version is now 8.0) on Ubuntu. Of course you can use any other version.
warm upEnter the vim command in the terminal, and you will see a great welcome interface.
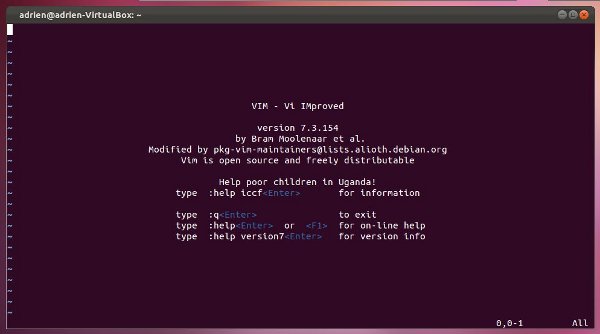
(LCTT translation annotation: Did you see the line "Help poor children in Uganda!" in the welcome interface?)
If you've never used Vi or Vim before, chances are you don't even know how to exit it... Yes, that's true. Any shortcut keys you commonly use in Vim will lose their original effects. (LCTT translation annotation: There is a joke circulating on the Internet - "How to create garbled code" and "Let novices exit vi")
First, use any imperative function like Save or Exit , you must first enter a colon (:). Saving is :w and exiting is :q. If you want to exit without saving the file, use the force exit command :q!. The great thing about Vim is that you don't need to enter each command separately. In other words, if you want to save and exit, you can just use :wq.
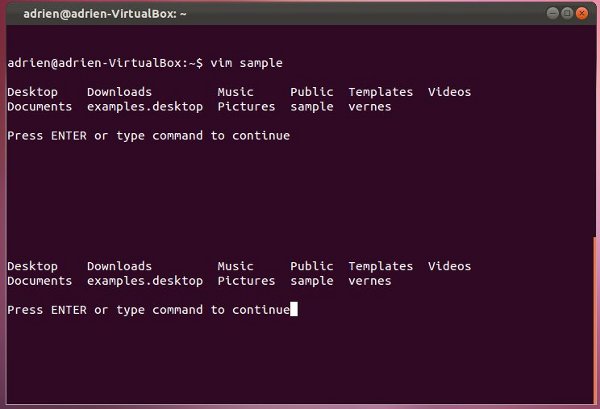
Now, we exit Vim and open a text file. To do this, just add the name of the file you want to edit after the command:
vim [文本文件名]

Generally speaking, when you open a text file, you will be in view mode. This makes Vim unique and initially confusing. Vim mainly consists of two modes: viewing mode and editing mode. View mode is used to view content and use some commands. To enter edit mode, just press the i key to insert or the a key to Add to. To return to view mode or perform command function operations, press the Escape key. The difference between inserting and adding is just that you want Enter edit mode and enter text before or after the cursor position. To fully understand, you should try it yourself. My suggestion: use to add only at the end of the line, and to insert ## at other times #).
(LCTT Translation: The original text of "view mode" in this paragraph is "visual mode", which is suspected to be "view mode". In this mode, text can be viewed but cannot be edited; while "visual mode" is editing mode. One, you can press thev key to enter, and then you can use the direction keys to select starting from the current cursor position, and it will be displayed with a reversed visual effect. Normally, you can press y after selection. Copy, press d to cut, etc. In addition, the author's terminology is not standard. According to Vim's own terminology, the so-called "view mode" here should be called "normal mode" ", "Edit mode" should be called "Insert mode", but the meaning is the same.)
To move the cursor within text, you can usually use the arrow keys on the keyboard, which work in both view mode and edit mode. However, a true purist will tell you to use the keysh for left, j for down, k for up, and i for Come right (in view mode) to move.
Now that you understand how to control Vim simply, let's go a little deeper.Some simple commands Now that you are familiar with switching between normal mode and insert mode, here are some commands you can use in normal mode:
- x: Delete a character
- u: Undo an operation (equivalent to Ctrl z)
- dd: Delete a line of content
- dw: Delete a word
- yy: Copy a line of content
- yw: Copy a word
- p: Paste a previously deleted or copied line or word
- e: Jump to the next word (LCTT translation annotation: end of word) (faster than simply using the arrow keys)
- r: Replace a letter (press r, release, then press new letter)
Of course there is more than this, but these are enough for now. If you master all of the above, you will be able to use Vim smoothly.
For those who want to know more, I will mention a few more. You can add a value before any of these commands and the command will be repeated the corresponding number of times. For example, 5x will delete 5 consecutive letters on the current line, while 3p will paste 3 times.
Advanced commandsFinally, as an encouragement and example for you to continue exploring, here are several advanced and commonly used commands:
- /Searched content: Search for specific content in the text
-
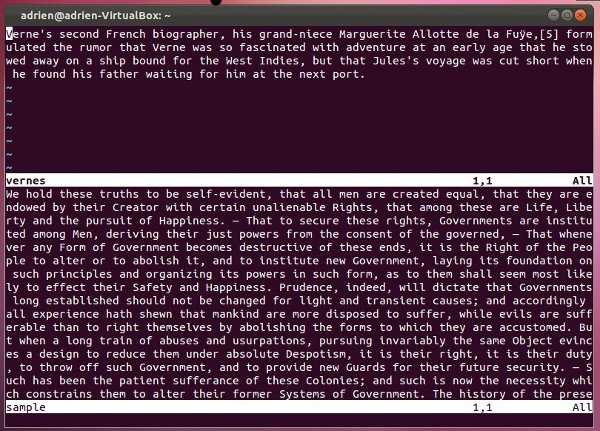
:sp text file name: Split the screen into upper and lower halves horizontally, and the new file is displayed in the other half. If you want to switch focus on both sides, you can use the Ctrl w shortcut key.

- :vsp text file name: Same as above, but split the screen vertically
- Ctrl Shift C and Ctrl Shift V: Copy and paste text in Terminal
-
:! Command name: Run terminal commands outside Vim in Vim and send them directly to the shell. For example, :! ls will display the files in your current directory without exiting the editor.
I think you should be ready enough to start using Vim now. You can also use interactive tutorials to learn more by installing various plugins, editing the ~.vimrc file, or entering the vimtutor command in the shell.
If you have any other Vim commands you’d like to share, please let us know in the comments.
The above is the detailed content of Vim Text Editor Getting Started Guide. For more information, please follow other related articles on the PHP Chinese website!

Hot AI Tools

Undresser.AI Undress
AI-powered app for creating realistic nude photos

AI Clothes Remover
Online AI tool for removing clothes from photos.

Undress AI Tool
Undress images for free

Clothoff.io
AI clothes remover

AI Hentai Generator
Generate AI Hentai for free.

Hot Article
Hot Tools

Notepad++7.3.1
Easy-to-use and free code editor

SublimeText3 Chinese version
Chinese version, very easy to use

Zend Studio 13.0.1
Powerful PHP integrated development environment

Dreamweaver CS6
Visual web development tools

SublimeText3 Mac version
God-level code editing software (SublimeText3)
Hot Topics
 1378
1378
 52
52

 Difference between centos and ubuntu
Apr 14, 2025 pm 09:09 PM
Difference between centos and ubuntu
Apr 14, 2025 pm 09:09 PM
The key differences between CentOS and Ubuntu are: origin (CentOS originates from Red Hat, for enterprises; Ubuntu originates from Debian, for individuals), package management (CentOS uses yum, focusing on stability; Ubuntu uses apt, for high update frequency), support cycle (CentOS provides 10 years of support, Ubuntu provides 5 years of LTS support), community support (CentOS focuses on stability, Ubuntu provides a wide range of tutorials and documents), uses (CentOS is biased towards servers, Ubuntu is suitable for servers and desktops), other differences include installation simplicity (CentOS is thin)
 How to use docker desktop
Apr 15, 2025 am 11:45 AM
How to use docker desktop
Apr 15, 2025 am 11:45 AM
How to use Docker Desktop? Docker Desktop is a tool for running Docker containers on local machines. The steps to use include: 1. Install Docker Desktop; 2. Start Docker Desktop; 3. Create Docker image (using Dockerfile); 4. Build Docker image (using docker build); 5. Run Docker container (using docker run).
 Centos stops maintenance 2024
Apr 14, 2025 pm 08:39 PM
Centos stops maintenance 2024
Apr 14, 2025 pm 08:39 PM
CentOS will be shut down in 2024 because its upstream distribution, RHEL 8, has been shut down. This shutdown will affect the CentOS 8 system, preventing it from continuing to receive updates. Users should plan for migration, and recommended options include CentOS Stream, AlmaLinux, and Rocky Linux to keep the system safe and stable.
 Detailed explanation of docker principle
Apr 14, 2025 pm 11:57 PM
Detailed explanation of docker principle
Apr 14, 2025 pm 11:57 PM
Docker uses Linux kernel features to provide an efficient and isolated application running environment. Its working principle is as follows: 1. The mirror is used as a read-only template, which contains everything you need to run the application; 2. The Union File System (UnionFS) stacks multiple file systems, only storing the differences, saving space and speeding up; 3. The daemon manages the mirrors and containers, and the client uses them for interaction; 4. Namespaces and cgroups implement container isolation and resource limitations; 5. Multiple network modes support container interconnection. Only by understanding these core concepts can you better utilize Docker.
 How to install centos
Apr 14, 2025 pm 09:03 PM
How to install centos
Apr 14, 2025 pm 09:03 PM
CentOS installation steps: Download the ISO image and burn bootable media; boot and select the installation source; select the language and keyboard layout; configure the network; partition the hard disk; set the system clock; create the root user; select the software package; start the installation; restart and boot from the hard disk after the installation is completed.
 What are the backup methods for GitLab on CentOS
Apr 14, 2025 pm 05:33 PM
What are the backup methods for GitLab on CentOS
Apr 14, 2025 pm 05:33 PM
Backup and Recovery Policy of GitLab under CentOS System In order to ensure data security and recoverability, GitLab on CentOS provides a variety of backup methods. This article will introduce several common backup methods, configuration parameters and recovery processes in detail to help you establish a complete GitLab backup and recovery strategy. 1. Manual backup Use the gitlab-rakegitlab:backup:create command to execute manual backup. This command backs up key information such as GitLab repository, database, users, user groups, keys, and permissions. The default backup file is stored in the /var/opt/gitlab/backups directory. You can modify /etc/gitlab
 How to mount hard disk in centos
Apr 14, 2025 pm 08:15 PM
How to mount hard disk in centos
Apr 14, 2025 pm 08:15 PM
CentOS hard disk mount is divided into the following steps: determine the hard disk device name (/dev/sdX); create a mount point (it is recommended to use /mnt/newdisk); execute the mount command (mount /dev/sdX1 /mnt/newdisk); edit the /etc/fstab file to add a permanent mount configuration; use the umount command to uninstall the device to ensure that no process uses the device.
 What to do after centos stops maintenance
Apr 14, 2025 pm 08:48 PM
What to do after centos stops maintenance
Apr 14, 2025 pm 08:48 PM
After CentOS is stopped, users can take the following measures to deal with it: Select a compatible distribution: such as AlmaLinux, Rocky Linux, and CentOS Stream. Migrate to commercial distributions: such as Red Hat Enterprise Linux, Oracle Linux. Upgrade to CentOS 9 Stream: Rolling distribution, providing the latest technology. Select other Linux distributions: such as Ubuntu, Debian. Evaluate other options such as containers, virtual machines, or cloud platforms.
