

| Introduction | If you are a Linux command line user, you will definitely use the df command to check the disk usage of the file system. Although df is a popular command, it still does not provide some advanced features, such as a user's actual disk free space, and various useful display formats. There is another command line utility available that provides not only these advanced functions but also all the features of df. In this article, we will discuss Disk Information Tool – di. |
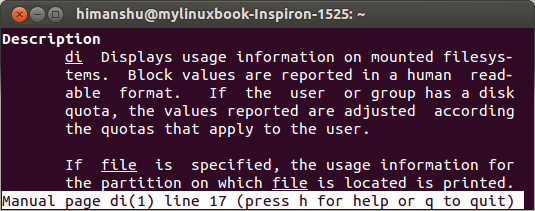
It is obvious from this di help man page that di provides some valuable features and is worth a try. Let's look at some examples of this tool in action.
test environmentHere are some examples of di tools:
1. Default outputBy default the di command generates an output format that is human-readable. Here is an example:
$ di
Filesystem         Mount               Size     Used    Avail %Used  fs Type
/dev/sda6          /                  28.1G    20.2G     6.5G   77%  ext4
udev               /dev                1.5G     0.0G     1.5G    0%  devtmpfs
tmpfs              /run              300.2M     0.9M   299.3M    0%  tmpfs
So you can find the data units of disk usage in gigabytes (G) and megabytes (M). This is definitely better than what df's default output produces. (Annotation: df can also output a display with similar units, but you need to add the additional parameter -h)
2. Use the -A option to print all fields such as mount points, special device names, etc.Option -A can be used to print mount points, special device names, etc. in great detail. Here is an example:
$ di -A
Mount fs Type  Filesystem
     Options
        Size     Used     Free %Used  %Free
        Size     Used    Avail %Used  %Free
        Size     Used    Avail %Used
       Inodes     Iused     Ifree %Iused
/     ext4     /dev/sda6
    rw,errors=remount-ro
       28.1G    20.2G     8.0G   72%    28%
       28.1G    21.6G     6.5G   77%    23%
       26.7G    20.2G     6.5G   75%
      1884160    389881   1494279   21%
/dev  devtmpfs udev
    rw,mode=0755
        1.5G     0.0G     1.5G    0%   100%
        1.5G     0.0G     1.5G    0%   100%
        1.5G     0.0G     1.5G    0%
       381805       571    381234    0%
/run  tmpfs    tmpfs
    rw,noexec,nosuid,size=10%,mode=0755
      300.2M     0.9M   299.3M    0%   100%
      300.2M     0.9M   299.3M    0%   100%
      300.2M     0.9M   299.3M    0%
384191 549 383642 0%So you can see all the fields and can print the output for debugging purposes.
3. Use the -a option to print all mounted devicesHere is an example:
$ di -a
Filesystem         Mount               Size     Used    Avail %Used  fs Type
/dev/sda6          /                  28.1G    20.2G     6.5G   77%  ext4
udev               /dev                1.5G     0.0G     1.5G    0%  devtmpfs
devpts             /dev/pts            0.0M     0.0M     0.0M    0%  devpts
proc               /proc               0.0M     0.0M     0.0M    0%  proc
binfmt_misc        /proc/sys/fs/bi     0.0M     0.0M     0.0M    0%  binfmt_misc
tmpfs              /run              300.2M     0.9M   299.3M    0%  tmpfs
none               /run/lock           0.0M     0.0M     0.0M    0%  tmpfs
none               /run/shm            0.0M     0.0M     0.0M    0%  tmpfs
none               /run/user           0.0M     0.0M     0.0M    0%  tmpfs
gvfsd-fuse         /run/user/himan     0.0M     0.0M     0.0M    0%  fuse.gvfsd-fuse
sysfs              /sys                0.0M     0.0M     0.0M    0%  sysfs
none               /sys/fs/cgroup      0.0M     0.0M     0.0M    0%  tmpfs
none               /sys/fs/fuse/co     0.0M     0.0M     0.0M    0%  fusectl
none               /sys/kernel/deb     0.0M     0.0M     0.0M    0%  debugfs
none               /sys/kernel/sec     0.0M     0.0M     0.0M    0%  securityfs
So you can see all information related to all devices, printed.
4. Use -c option to use comma as value separatorOption -c Command separated values will be enclosed in double quotes, here is an example:
$ di -c
s,m,b,u,v,p,T
/dev/sda6,/,28.1G,20.2G,6.5G,77%,ext4
udev,/dev,1.5G,0.0G,1.5G,0%,devtmpfs
tmpfs,/run,300.2M,0.9M,299.3M,0%,tmpfs
As above, you can see that the values output with comma delimiters are printed. (Annotation: This kind of output can be easily parsed as input to other programs)
5. Use the -g option to print the size in gigabytes (G)The following is an example:
$ di -g
Filesystem         Mount              Gibis     Used    Avail %Used  fs Type
/dev/sda6          /                   28.1     20.2      6.5   77%  ext4
udev               /dev                 1.5      0.0      1.5    0%  devtmpfs
tmpfs              /run                 0.3      0.0      0.3    0%  tmpfs
Of course, you can see that all size-related values are printed in gigabytes (G). Similarly, you can use the -k and -m options to display the size in kilobytes (K) and Megabyte (M) size.
6. Use the -I option to display information about a specific file system typeSuppose you want to display information only related to the tmpfs file system. The following will tell you how to use the -I option to complete the task.
$ di -I tmpfs
Filesystem         Mount               Size     Used    Avail %Used  fs Type
tmpfs              /run              300.2M     0.9M   299.3M    0%  tmpfs
none               /run/lock           5.0M     0.0M     5.0M    0%  tmpfs
none               /run/shm            1.5G     0.0G     1.5G    0%  tmpfs
none               /run/user         100.0M     0.0M   100.0M    0%  tmpfs
none               /sys/fs/cgroup      0.0M     0.0M     0.0M    0%  tmpfs
You can see that only file system information related to the tmpfs type is output and displayed.
7. Use the -n option to skip the output of the header lineIf you are trying to parse the output of this command through a script (or program) and want the di command to skip the displayed header line, then using the -n option is an excellent method. Here is an example:
$ di -n
/dev/sda6          /                  28.1G    20.2G     6.5G   77%  ext4
udev               /dev                1.5G     0.0G     1.5G    0%  devtmpfs
tmpfs              /run              300.2M     0.9M   299.3M    0%  tmpfs
As above, you can find that the header line is not displayed in the output.
8. Use the -t option to print another total line under the file system listIf you want to display the total number of all relevant columns, use the -t option, example:
$ di -t
Filesystem         Mount               Size     Used    Avail %Used  fs Type
/dev/sda6          /                  28.1G    20.2G     6.5G   77%  ext4
udev               /dev                1.5G     0.0G     1.5G    0%  devtmpfs
tmpfs              /run              300.2M     0.9M   299.3M    0%  tmpfs
Total 29.9G 20.2G 8.3G 72%Observe that the value of the last line is the statistics of all file systems.
9. Sort the output with the -s option The-s option can be used to sort the output of this command. The following tells you how to sort the output in reverse:
$ di -sr
Filesystem         Mount               Size     Used    Avail %Used  fs Type
tmpfs              /run              300.2M     0.9M   299.3M    0%  tmpfs
udev               /dev                1.5G     0.0G     1.5G    0%  devtmpfs
/dev/sda6          /                  28.1G    20.2G     6.5G   77%  ext4
You can also add the sub-option 'r' after -s to sort the output in reverse order. Similarly, you can use the -s option to do some other types of sorting. The following is an excerpt from the man manual for your reference:
-s sorting method
You can specify the sorting method. The default sorting method is to sort by the name of the mount point. The following sorting methods are supported:
m: Sort by mount point name (default)
n: Not sorted (that is, in the order in the mount table /etc/fstab)
s: According to the special device name
t :按照文件系统类型
r :逆序排序
排序方式可以组合使用,如: di –stsrm :按照类型、设备、挂载点逆序排序。di –strsrm :按照类型、设备逆序、挂载点逆序排序。
你可以通过结合-f选项和其子选项指定输出格式字符串,例如用 -fm,打印挂载点的名称:
$ di -fm
Mount
/
/dev
/run
如上你可以看到只有挂载点的名字被打印出来,同样的,打印文件系统的类型用 -ft ,示例:
$ di -ft
fsType
ext4
devtmpf
tmpfs
如果你想快速查找,这里有个其他可用的格式选项截图。
结论最后,di命令提供了一些非常有用的特性,比df命令更强大。如果你正在寻找一个类似df,但比df更强大的关于磁盘信息的命令行工具,那么di是最理想的选择。
The above is the detailed content of disk information tool di. For more information, please follow other related articles on the PHP Chinese website!


![[Web front-end] Node.js quick start](https://img.php.cn/upload/course/000/000/067/662b5d34ba7c0227.png)


