How to enable win10 hardware accelerated GPU plan
Jan 04, 2024 pm 10:00 PMWhen using the win10 system, we feel that games and software are not smooth, then we can use gpu to accelerate the software. For users who don’t know how to set it up, let’s take a look at how to enable the win10 hardware acceleration gpu plan.
How to enable win10 hardware acceleration gpu plan:
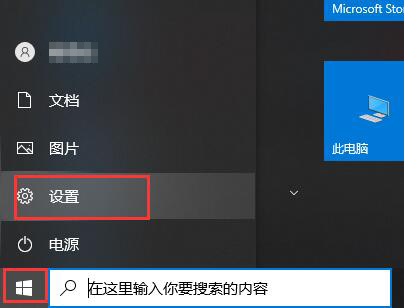
1. Click on the Start menu - click on Settings.
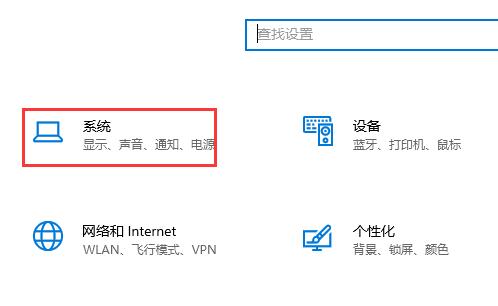
2. In Settings - click System.
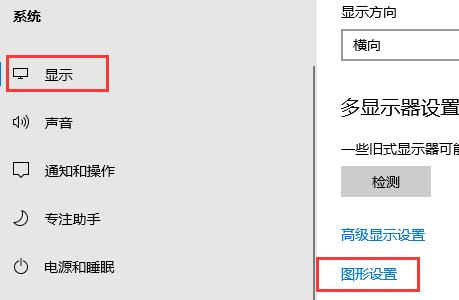
3. In the display column - click to enter the graphics settings.
4. In the graphical settings interface - click Browse.

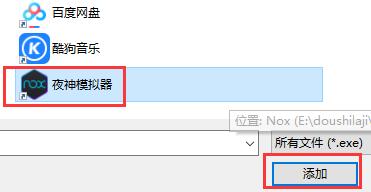
5. Select the software and game you want to accelerate. Here we take Night God Simulator as an example - click "Add".
6. After the addition is completed - click Options.
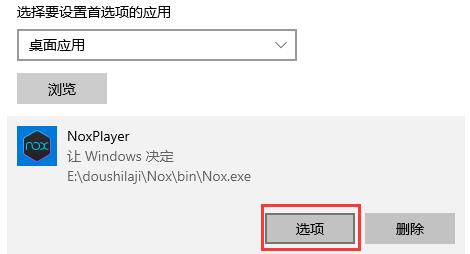
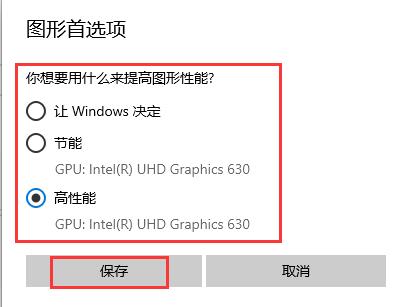
7. Select high performance, energy saving, etc. - click Save.
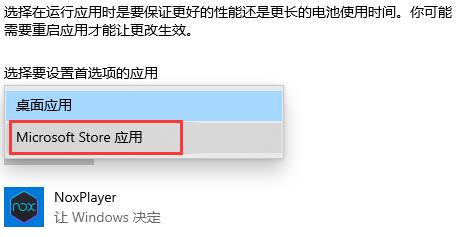
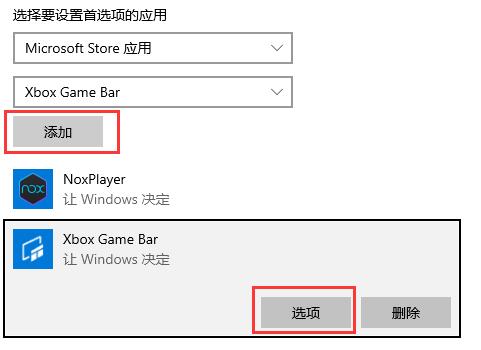
8. If we want to speed up the tools that come with the system, select Microsoft Store under the application for which you want to set preferences
9. Click to select the application - select the application we need
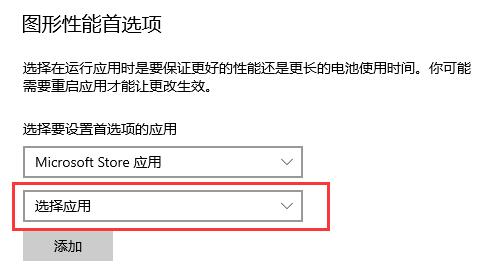
10. After the selection is completed - click below to add - click the option Perform GPU settings, etc.
The above is the detailed content of How to enable win10 hardware accelerated GPU plan. For more information, please follow other related articles on the PHP Chinese website!

Hot Article

Hot tools Tags

Hot Article

Hot Article Tags

Notepad++7.3.1
Easy-to-use and free code editor

SublimeText3 Chinese version
Chinese version, very easy to use

Zend Studio 13.0.1
Powerful PHP integrated development environment

Dreamweaver CS6
Visual web development tools

SublimeText3 Mac version
God-level code editing software (SublimeText3)

Hot Topics
 PowerToys Is the Ultimate Work From Home Companion App
Mar 03, 2025 am 10:07 AM
PowerToys Is the Ultimate Work From Home Companion App
 How to Find the Product Key for Windows 10
Mar 04, 2025 am 01:46 AM
How to Find the Product Key for Windows 10
 How to Install Windows 11 23H2 on Unsupported PC
Mar 03, 2025 pm 12:55 PM
How to Install Windows 11 23H2 on Unsupported PC
 How to Change the Font and Layout of PowerShell Window
Mar 03, 2025 pm 01:03 PM
How to Change the Font and Layout of PowerShell Window
 Top 3 Windows 11 Gaming Features That Outshine Windows 10
Mar 16, 2025 am 12:17 AM
Top 3 Windows 11 Gaming Features That Outshine Windows 10
 Acer PD163Q Dual Portable Monitor Review: I Really Wanted to Love This
Mar 18, 2025 am 03:04 AM
Acer PD163Q Dual Portable Monitor Review: I Really Wanted to Love This
 Fix 'There Are Currently No Power Options Available' in Windows 11
Mar 03, 2025 pm 12:58 PM
Fix 'There Are Currently No Power Options Available' in Windows 11


